1997 BUICK PARK AVENUE run flat
[x] Cancel search: run flatPage 3 of 420

The 1997 Buick Park Avenue Owner’s Manual
1-1
2-1
3-1
4-1
5-1
6-1
7-1
8- 1
9- 1
Seats and Restraint Systems
This section tells you how to use your seats and safety belts properly. It also explains the “SRS” system.
Features and Controls
This section explains how to start and operate your Buick.
Comfort Controls and Audio Systems
This section tells you how to adjust the ventilation and comfort controls and how to operate your audio system.
Your Driving and the Road
Here you’ll find helpful information and tips about the road and how to drive under different conditions.
Problems on the Road
This section tells what to do if you have a problem while driving, such as a flat tire or overheated engine, etc.
Service and Appearance Care
Here the manual tells you how to keep your Buick running properly and looking good,
Maintenance Schedule
This section tells you when to perform vehicle maintenance and what fluids and lubricants to use.
Customer Assistance Information
This section tells you how to contact Buick for assistance and how to get service and owner publications.
It also gives you information on “Reporting Safety Defects” on page
8-8.
Index
Here’s an alphabetical listing of almost every subject in this manual. You can use it to quickly find
sometlvng you want to read.
i
ProCarManuals.com
Page 121 of 420
Convenience Net
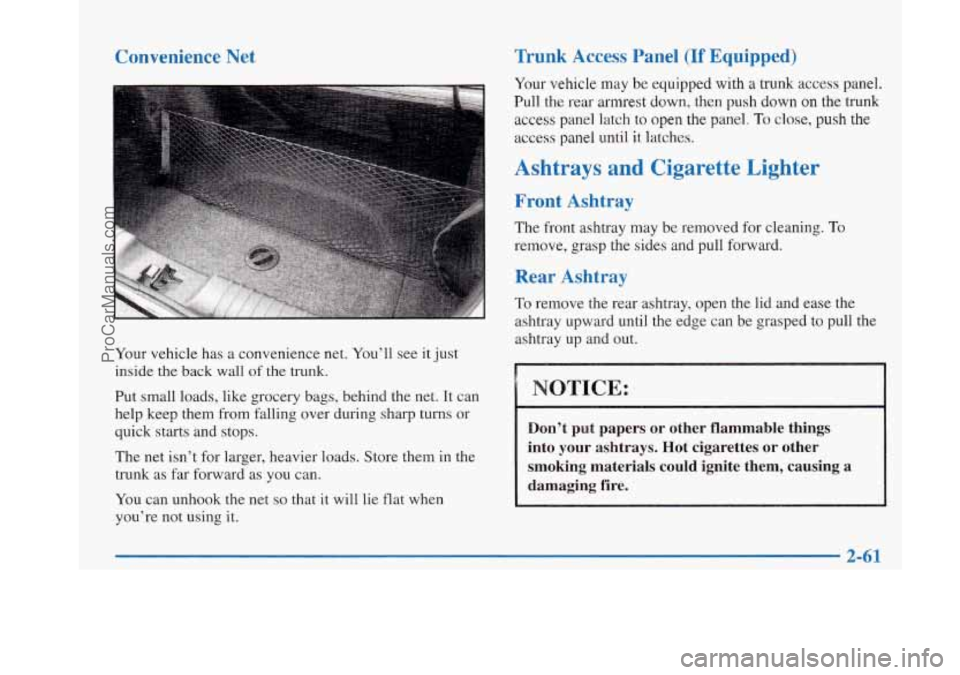
Your vehicle has a convenience net. You’ll see it just
inside the back wall
of the trunk.
Put small loads, like grocery bags, behind the net. It can
help keep them from falling over during sharp turns or
quick starts and stops.
The net isn’t for larger, heavier loads. Store them in the
trunk as far forward as you can.
You can unhook the net
so that it will lie flat when
you’re not using it.
Trunk Access Panel (If Equipped)
Your vehicle may be equipped with a trunk access panel.
Pull the rear armrest down, then push down on the
trunk
access panel latch to open the panel. To close, push the
access panel until it latches.
Ashtrays and Cigarette Lighter
Front Ashtray
The front ashtray may be removed for cleaning. To
remove, grasp the sides and pull forward.
Rear Ashtray
To remove the rear asnrray, open the lid and ease the
ashtray upward until the edge can be grasped to pull the
ashtray up and out.
NOTICE:
Don’t put papers or other flammable things
into your ashtrays. Hot cigarettes or other
smoking materials could ignite them, causing a
damaging fire.
2-61
ProCarManuals.com
Page 218 of 420
Run your engine only as long as you must. This saves
fuel. When you run the engine, make it go a little faster
than just idle. That
is, push the accelerator slightly. This
uses less fuel for the heat that you get and
it keeps the
battery charged. You will need a well-charged battery to
restart the vehicle, and possibly for signaling later on
with your headlamps. Let the heater run for awhile.
Then, shut the engine off and close the window almost
all the way to preserve the heat. Start the engine again
and repeat this only when you feel really uncomfortable
from the cold. But
do it as little as possible. Preserve the
fuel as long as you can. To help keep warm, you can get
out of the vehicle and do some fairly vigorous exercises
every half hour or
so until help comes.
Loading Your Vehicle
‘ OCCUPANTS
VEHICLE CAP. WT.
TIRE-LOADING
INFORMATION
FRT. CTR. RR.
TOTAL LBS. KG
MAX. LOADING & GVWR SAME AS VEHICLE
CAPACITY WEIGHT XXX COLD TIRE
TIRE SIZE SPEED PRESSURE RTG
PSI/KPa
FRT.
RR.
SPA.
IF TIRES ARE HOT, ADD 4PSli28KPa
SEE OWNER’S MANUAL FOR ADDITIONAL
INFORMATION
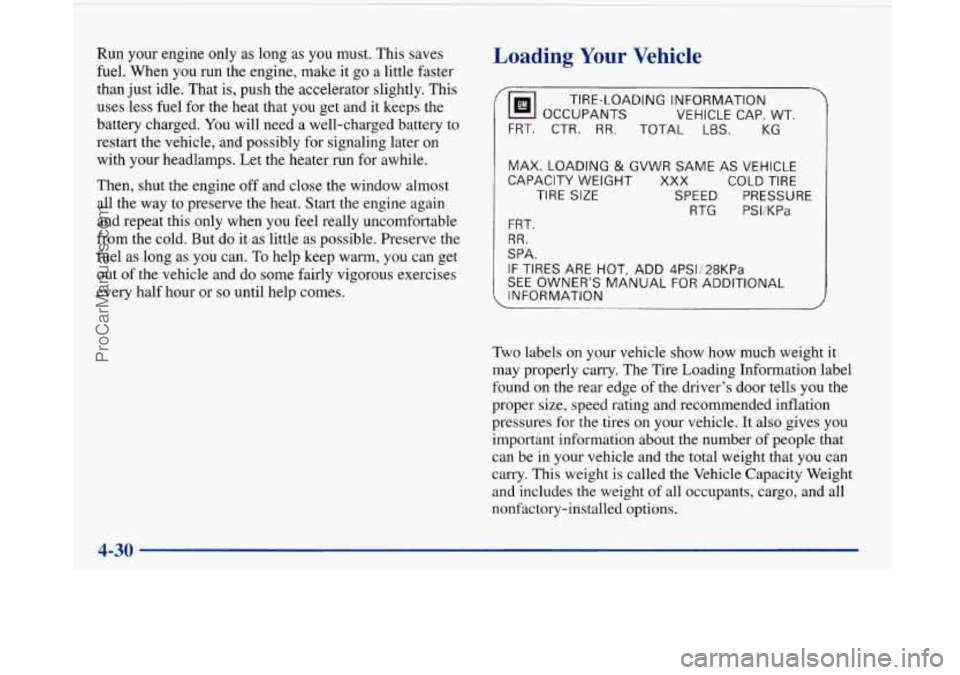
Two labels on your vehicle show how much weight it
may properly carry. The Tire Loading Information label
found on the rear edge of the driver’s door tells you the
proper size, speed rating and recommended inflation
pressures for the tires on your vehicle.
It also gives you
important information about the number of people that
can be in your vehicle and the total weight that you can
carry. This weight is called the Vehicle Capacity Weight
and includes the weight of all occupants, cargo, and all
nonfactory-installed options.
ProCarManuals.com
Page 252 of 420
I
A
Remove the spare tire from the trunk. See “Compact
Spare Tire” later in this section for more information
about the compact spare.
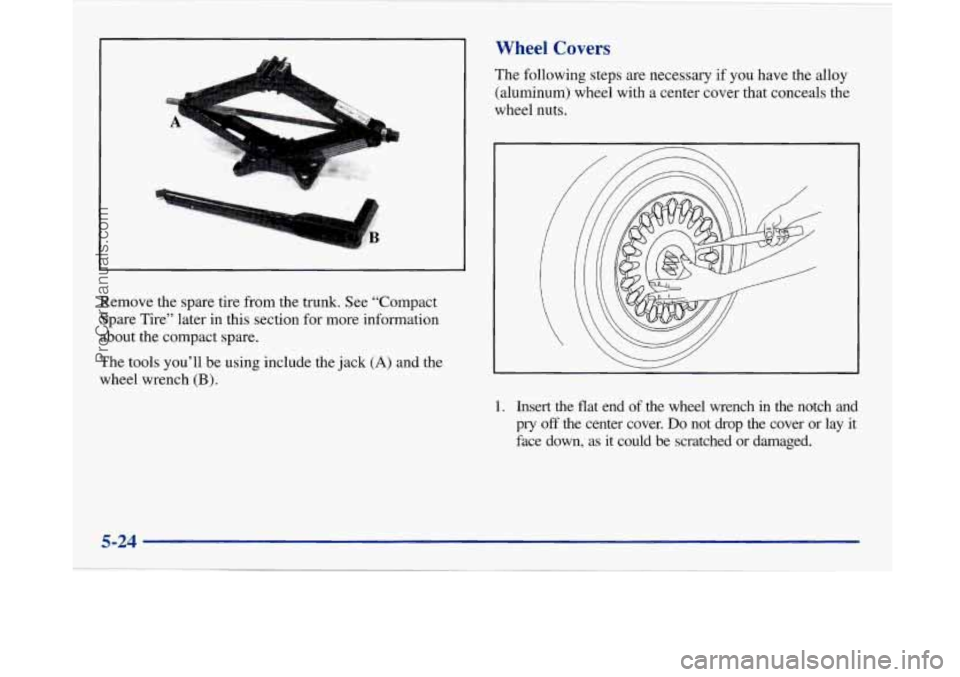
The tools you’ll be using include the jack
(A) and the
wheel wrench
(B).
Wheel Covers
The following steps are necessary if you have the alloy
(aluminum) wheel with a center cover that conceals the
wheel nuts.
1. Insert the flat end of the wheel wrench in the notch and
pry
off the center cover. Do not drop the cover or lay it
face down, as it could be scratched or damaged.
5-24
ProCarManuals.com
Page 258 of 420
NOTICE:
Improperly tightened wheel nuts can lead to
brake pulsation and rotor damage.
To avoid
expensive brake repairs, evenly tighten the wheel
nuts in the proper sequence and to the proper
torque specification.
Don’t try to put a wheel cover on your compact spare
tire. It won’t fit. Store the wheel cover
in the trunk
until you have the flat tire repaired or replaced.
NOTICE:
Wheel covers won’t fit on your compact spare. If
you try to put a wheel cover on your compact
spare, you could damage the cover or the spare.
Storing the Flat Tire and Tools
L!b, CAUTION: I
Storing a jack, a tire or other equipment in the
passenger compartment
of the vehicle could
cause injury. In
a sudden stop or collision, loose
equipment could strike someone. Store all these
in the proper place.
After you’ve put the compact spare tire on your vehicle,
you’ll need
to store the flat tire in your trunk. Use the
following procedure to secure the flat tire in the trunk.
5-30
~
ProCarManuals.com
Page 259 of 420
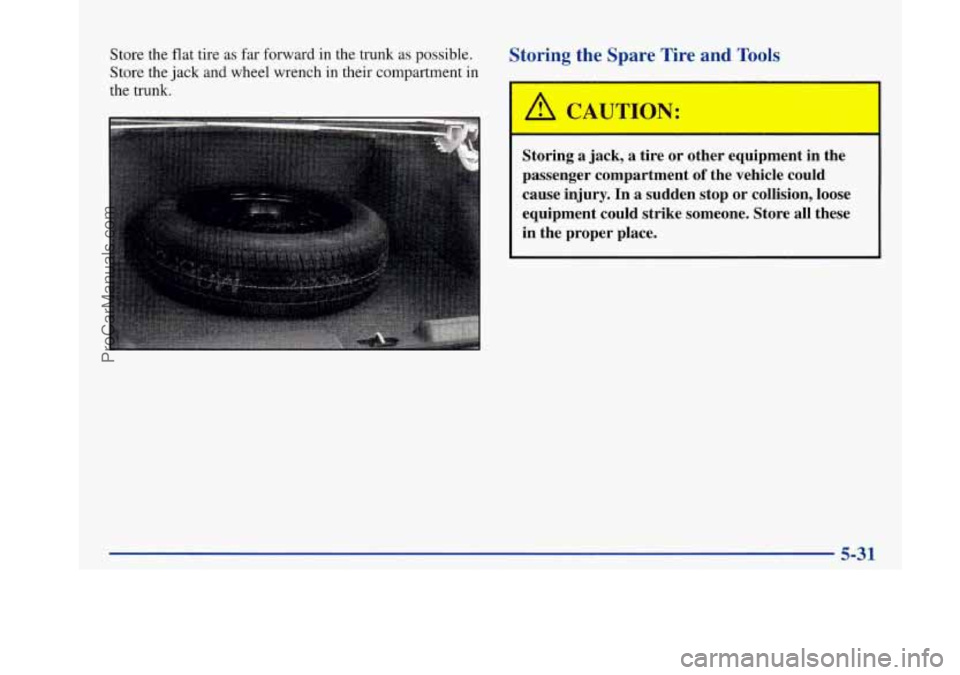
Store the flat tire as far forward in the trunk as possible.
Store the jack and wheel wrench in their compartment in
the trunk. Storing the Spare Tire and Tools
A CAUTION:
Storing a jack, a tire or other equipment in the
passenger compartment
of the vehicle could
cause injury. In a sudden stop or collision,
loose
equipment could strike someone. Store all these
in the proper place.
ProCarManuals.com
Page 333 of 420
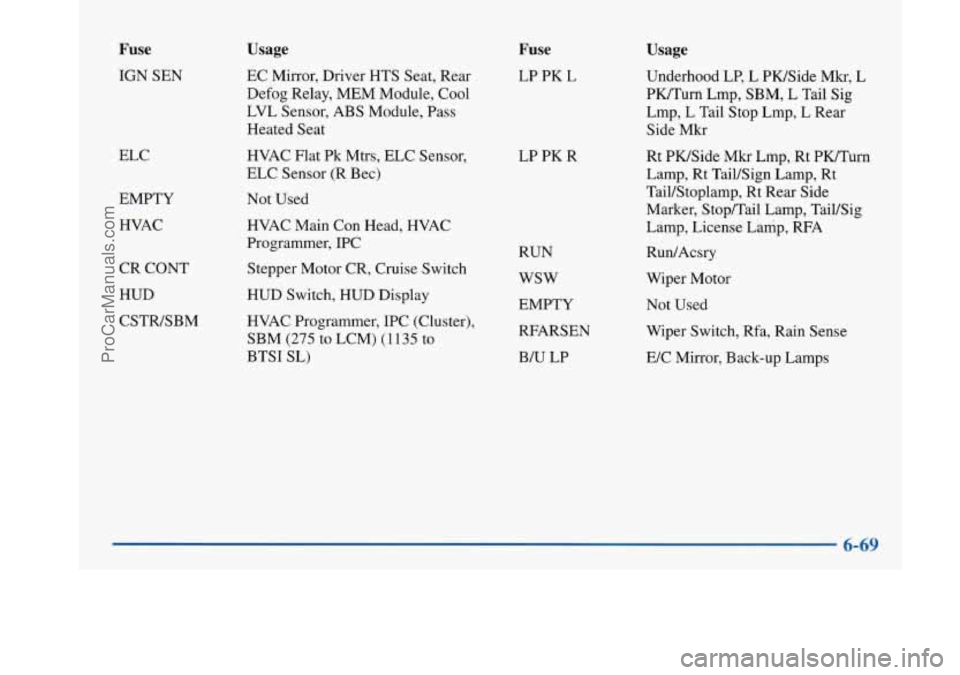
Fuse
IGN SEN
Usage
EC Mirror, Driver HTS Seat, Rear
Defog Relay, MEM Module, Cool
LVL Sensor, ABS Module, Pass
Heated Seat
Fuse
LP PK L
Usage
Underhood LP, L PWSide Mkr, L
PWTurn Lmp, SBM, L Tail Sig
Lmp, L Tail Stop Lmp, L Rear
Side Mkr
ELC
EMPTY
HVAC
CR CONT
HUD
CSTWSBM HVAC
Flat Pk Mtrs, ELC Sensor,
ELC Sensor (R Bec)
Not Used
HVAC Main Con Head, HVAC
Programmer, IPC
Stepper Motor CR, Cruise Switch
HUD Switch, HUD Display
HVAC Programmer, IPC (Cluster),
SBM
(275 to LCM) (1 135 to
BTSI SL) LP
PK R
RUN
wsw
EMPTY
RFARSEN B/U LP Rt
PWSide Mkr Lmp, Rt PWTurn
Lamp, Rt TaiUSign Lamp, Rt
TaiUStoplamp, Rt Rear Side
Marker, Stop/Tail Lamp, Tail/Sig
Lamp, License Lamp, RFA
Run/Acsry
Wiper Motor Not Used
Wiper Switch, Rfa, Rain
Sense
E/C Mirror, Back-up Lamps
ProCarManuals.com
Page 405 of 420
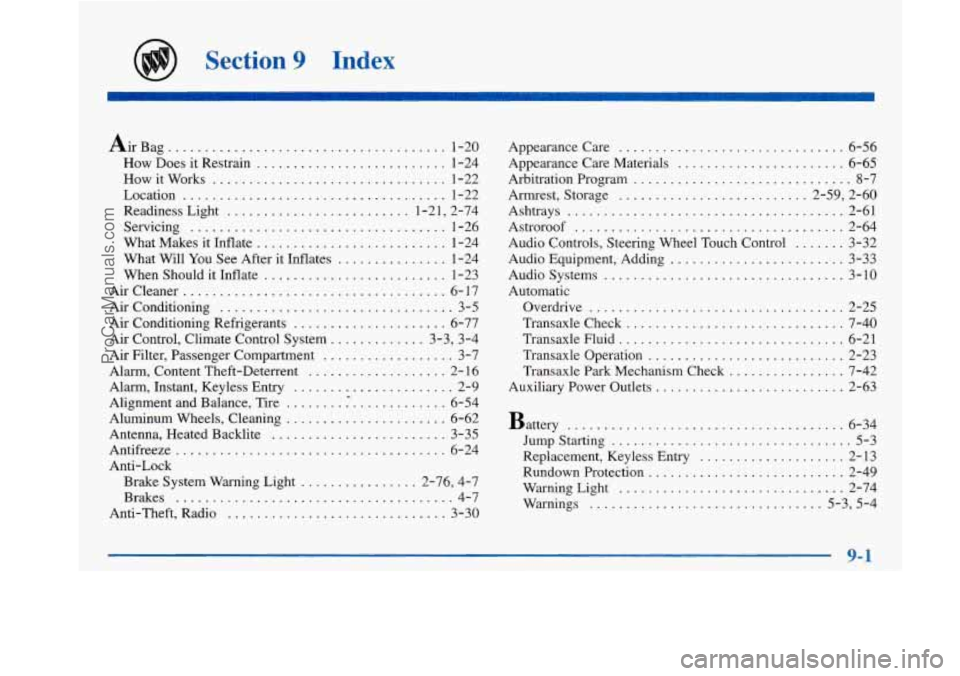
Section 9 Index
Air Bag ...................................... 1-20
How Does it Restrain
.......................... 1-24
How it Works
................................ 1-22
Location
.................................... 1-22
Readiness Light
......................... 1.21. 2.74
Servicing
................................... 1-26
What Makes it Inflate
.......................... 1-24
What Will
You See After it Inflates ............... 1-24
When Should it Inflate
......................... 1-23
Aircleaner
.................................... 6-17
Air Conditioning
................................ 3-5
Air Conditioning Refrigerants
..................... 6-77
Air Control. Climate Control System ............. 3.3. 3-4
Alarm. Content Theft-Deterrent
................... 2- 16
Alignment and Balance. Tire
....................... 6-54
Aluminum Wheels. Cleaning
...................... 6-62
Antenna. Heated Backlite
........................ 3-35
Antifreeze
..................................... 6-24
Anti-Lock
Brake System Warning Light
................ 2-76. 4-7
Brakes
...................................... 4-7
Anti.Theft. Radio
.............................. 3-30
Air Filter. Passenger Compartment .................. 3-7
Alarm. Instant. Keyless Entry
...................... 2-9 Appearancecare
............................... 6-56
Appearance Care Materials
....................... 6-65
Arbitration Program
.............................. 8-7
Armrest. Storage
.......................... 2.59. 2.60
Astroroof
..................................... 2-64
Audio Controls, Steering Wheel Touch Control
....... 3-32
Audio Equipment, Adding
........................ 3-33
Audio Systems
................................. 3-10
Automatic
Overdrive
................................... 2-25
Transaxle Check
.............................. 7-40
Transaxle Fluid
............................... 6-21
Ashtrays
...................................... 2-61
Transaxle Operation
........................... 2-23
Transaxle Park Mechanism Check
................ 7-42
Auxiliary Power Outlets
.......................... 2-63
Battery
................... ................ 6-34
Jump Starting
................................. 5-3
Replacement. Keyless Entry
.................... 2-13
Rundown Protection
........................... 2-49
WarningLight
............................... 2-74
Warnings
................................ 5.3. 5.4
9-1
ProCarManuals.com