1997 BUICK PARK AVENUE radio
[x] Cancel search: radioPage 15 of 420
0 Move the seat forward or back by pushing the
horizontal control to the front or back.
0 Tilt the seatback by pushing the vertical control
forward or rearward.
0 Raise or lower the shoulder belt and head rest by
pushing the vertical control to the top or bottom.
Memory Seat and Mirrors (Option)
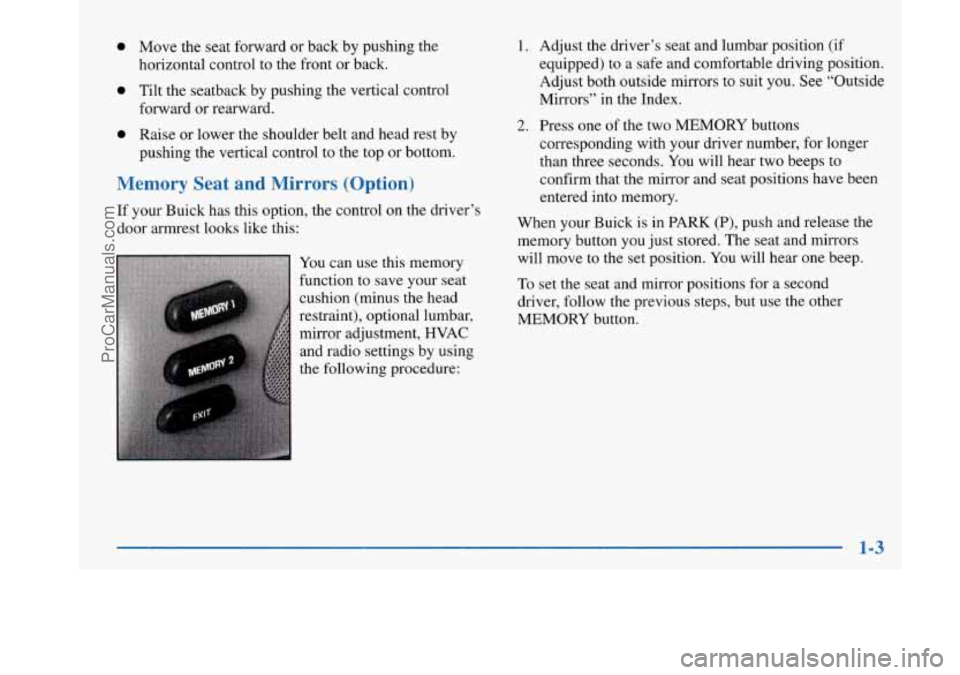
If your Buick has this option, the control on the driver’s
door armrest looks like this:
You can use this memory
function to save your seat
cushion (minus the head
restraint), optional lumbar,
mirror adjustment, HVAC
and radio settings by using
the following procedure:
1. Adjust the driver’s seat and lumbar position (if
equipped) to a safe and comfortable driving position.
Adjust both outside mirrors to suit you. See “Outside
Mirrors” in the Index.
2. Press one of the two MEMORY buttons
corresponding with your driver number, for longer
than three seconds. You will hear two beeps to
confirm that the mirror and seat positions have been
entered into memory.
When your Buick is in PARK (P), push and release the
memory button you just stored. The seat and mirrors
will move to the set position. You will hear one beep.
To set the seat and mirror positions for a second
driver, follow the previous steps, but use the other
MEMORY button.
ProCarManuals.com
Page 68 of 420

Lockout Protection
The power door locks will not work if the key is left in
the ignition, the ignition is turned to OFF and the
driver's door is open.
You can override this feature
by holding the power door lock switch for more than
three seconds.
Leaving Your Vehicle
If you are leaving the vehicle, take your keys, open your
door and set the locks from inside, then get out and close
the door.
Remote Keyless Entry System
With the remote keyless entry system, you can lock
and unlock your doors or unlock your trunk from about
3 feet (1 m) up to 30 feet (9 m) away using the remote
keyless entry transmitter supplied with your vehicle. Your
remote keyless
entry system operates
on a radio frequency
subject to Federal
Comunications
Commission (FCC)
Rules and with Industry and Science Canada.
This device complies with Part
15 of the FCC Rules.
Operation is subject to the following two conditions:
(1) this device may not cause harmful interference,
and
(2) this device must accept any interference
received, including interference that may cause
undesired operation.
This device complies with RSS-210 of Industry and
Science Canada. Operation is subject
to the following
two conditions:
(1) this device may not cause
interference, and (2) this device must accept any
interference received, including interference that may
'
cause undesired operation of the device.
2-8
ProCarManuals.com
Page 77 of 420

Here’s how to avoid setting off the alarm by accident:
0 If you don’t want to activate the theft-deterrent
system, the vehicle should
be locked with the door
key
after the doors are closed.
Always unlock a door with a key, or use the remote
keyless entry transmitter. Unlocking a door any other
way will set off the alarm.
If you set off the alarm by accident, unlock any door
with your key. You can also turn
off the alarm by
pressing UNLOCK on the remote keyless entry
transmitter. The alarm won’t stop if you try to unlock
a door any other way.
Testing the Alarm
1.
2.
3.
4.
From inside the vehicle, roll down the window.
Activate the system by locking the doors with the
power door lock switch while the door is open,
or
with the remote keyless entry transmitter.
Get out of the car, close the door and wait for the
SECURITY light to go out.
Then reach in through the window, unlock the door
with the manual door lock and open the door. This
should set
off the alarm. If
the alarm does not sound when it should, check to
see
if the horn works. The horn fuse may be blown.
To replace the fuse, see “Fuses and Circuit Breakers” in
the Index.
PASS-Key@ I11
Your vehicle is equipped
with the PASS-Key
111
(Personalized Automotive
Security System)
theft-deterrent system.
PASS-Key
I11 is a passive
theft-deterrent system. This
means you don’t have to do
anything different to arm or
disarm the system. It works
when you insert or remove
the key from the ignition.
PASS-Key
111 uses a radio frequency transponder in the
key that matches a decoder in your vehicle.
Your PASS-Key
I11 system operates on a radio
frequency subject to Federal Communications
Commission (FCC) Rules and with Industry and
Science Canada.
2-17
ProCarManuals.com
Page 81 of 420
START (E): This position starts your engine. When the
engine starts, release the key. The ignition switch will
return to
RUN for normal driving.
NOTICE:
If your key seems stuck in LOCK and you can’t
turn it, be sure you are using the correct key; if
so, is it all the way in? If it is, then turn the
steering wheel left and right while you turn the
key hard. But turn the key only with your hand.
Using
a tool to force it could break the key or the
ignition switch.
If none of this works, then your
vehicle needs service.
Key Reminder Warning
If you leave your key in the ignition, in the OFF
position, you will hear a warning chime when you open
the driver’s door.
Retained Accessory Power
After you turn your ignition off and even remove the
key, you will still have electrical power to such
accessories as the radio and power windows for up to
10 minutes. But if you open a door, power is shut off.
Starting Your Engine
Move your shift lever to PARK (P) or NEUTRAL (N).
Your engine won’t start in any other position -- that’s a
safety feature. To restart when you’re already moving,
use NEUTRAL (N) only.
NOTICE:
Don’t try to shift to PARK (P) if your Buick is
moving.
If you do, you could damage the
transaxle. Shift to
PARK (P) only when your
vehicle is stopped.
1. Without pushing the accelerator pedal, turn your
ignition key to START. When the engine starts, let
go of the key. The idle speed will go down as your
engine gets warm.
2-21
ProCarManuals.com
Page 123 of 420
To block out glare, swing down the visors. The larger
sun visor can be removed from the center mount and
moved to the side, while the auxiliary sun visor remains
to block glare from the front.
Auxiliary Power Outlets
Your vehicle may have one or two power outlets
depending on the type of front seat you have. If your
front seat has a fold-down armrest, the power outlet is
located in the center of the front seat below the cushion.
If your vehicle has front bucket seats with a center
console, you will find one outlet inside the storage
compartment and the other on the lower front edge
of the console.
These power outlets can be used to plug in electrical
equipment such as a cellular telephone or
CB radio.
Follow the proper installation instructions that are
included with the equipment you install.
Garment Hooks
For your convenience, you will find a two-hanger
capacity garment hook above each rear
door near the
reading lamps.
Cellular Phone Readiness Package
(If Equipped)
If you have this option, your vehicle has been prewired
for dealer installation of a portable phone. This system
will have steering wheel controls for volume only, and
infomation output through the
DIC. Voice activation
and hands-free operation are standard features. For more
information, contact your dealer.
A user’s guide will be
provided with the telephone completion lut.
2-63
ProCarManuals.com
Page 125 of 420
It will operate garage doors and gates, or other devices
controlled by radio frequency such as home/office
lighting systems.
The transmitter will learn and transmit the frequencies
of most current transmitters and is powered by your
vehicle’s battery and charging system.
This device complies with Part
15 of the FCC Rules.
Operation is subject to the following two conditions:
(1) This device may not cause harmful interference,
and
(2) This device must accept any interference
received, including interference that may cause
undesired operation.
Programming the Transmitter
Do not use the universal transmitter with any garage
door opener that does not have the “stop and reverse”
safety feature. This includes any garage door opener
model manufactured before April 1, 1982.
Be sure that people and objects are clear of the garage
door
you are programming!
Your vehicle’s engine should be turned off while
programming your transmitter. Follow these steps to
program up to three channels:
1.
2.
3.
4.
If you have previously programmed a universal
transmitter channel, proceed to Step
2. Otherwise,
hold down the two outside buttons on the universal
transmitter until the amber light begins to flash
rapidly (approximately
20 seconds). Then release the
buttons. This procedure initializes the memory and
erases any previous settings for all three channels.
Hold the end of your hand-held transmitter against
the bottom surface of the universal transmitter
so
that you can still see the amber light.
Decide which one of the three channels you want to
program. Using both hands, press the hand-held
transmitter button and the desired button on the
universal transmitter. Continue to hold both buttons
through Step
4.
Hold down both buttons until you see the amber light
on the universal transmitter first flash slowly, then
rapidly. The rapid flashing, which could take up to
90 seconds, indicates that the universal transmitter
has been programmed. Release both buttons once the
light starts
to flash rapidly.
2-65
ProCarManuals.com
Page 153 of 420
Section 3 Comfort Controls and Audio Systems
In this section, you’ll find out how to operate the comfort control and audio systems offered with your Buick. Be sure
to read about the particular systems supplied with your vehicle.
3-2
3-2
3-5
3-5
3-6
3-7 3-8
3-8
3-9
3-9
3-10
3-10
3- 14 Comfort Controls
Personal Choice Comfort Controls
Air Conditioning
Heating
Ventilation System
Passenger Compartment Air Filter
Defogging and Defrosting
Rear Window Defogger
Passenger Climate Control Steering Wheel Controls for Climate Control
Setting the Clock
AM-FM Stereo with Cassette Tape Player
AM-FM Stereo with Cassette Tape Player
and Tone Control 3-18
3-21
3 -27
3-30
3-32
3-33
3-33
3-34 3-35
3-35 AM-FM Stereo
with Compact Disc Player
and Tone Control
AM-FM Stereo with Cassette, CD Player
and Tone Control
Trunk Mounted CD Changer
Theft-Deterrent Feature
Steering Wheel Controls
Understanding Radio Reception
Tips About Your Audio System
Care of Your Cassette Tape Player
Care
of Your Compact Discs
Heated Backlite Antenna
ProCarManuals.com
Page 162 of 420
Audio Systems
Your Delco audio system has been designed to operate
easily and give years of listening pleasure. You will get the
most enjoyment out of it if you acquaint yourself with it
first. Find out what your Delco system can do and how to
operate all its controls, to be sure you’re getting the mos\
t
out
of the advanced engineering that went into it.
Setting the Clock
Press and hold HRS until the correct hour appears. Press
and hold
MIN until the correct minute appears.
You may set the clock with the ignition
off if you
press
RECALL first and follow the same procedure
described above.
Personal Choice Radio Controls
(If Equipped)
This feature allows two different drivers to store and recall
their
own radio settings for AM and FM presets, last tuned
station, volume, tone and audio source (radio, cassette or
CD). The Personal Choice settings recalled by the audio
system
are determined by the transmitter used to enter the
vehicle. After the
UNLOCK button of a remote keyless
entry transmitter is pressed and the ignition is in
RUN, the
radio will adjust to the last settings of the identified drive\
r. The settings can also
be changed by briefly pressing one of
the MEMORY seat switches located on the diver’s door
panel. When adjustments are made, the new settings are automatically saved for the driver.
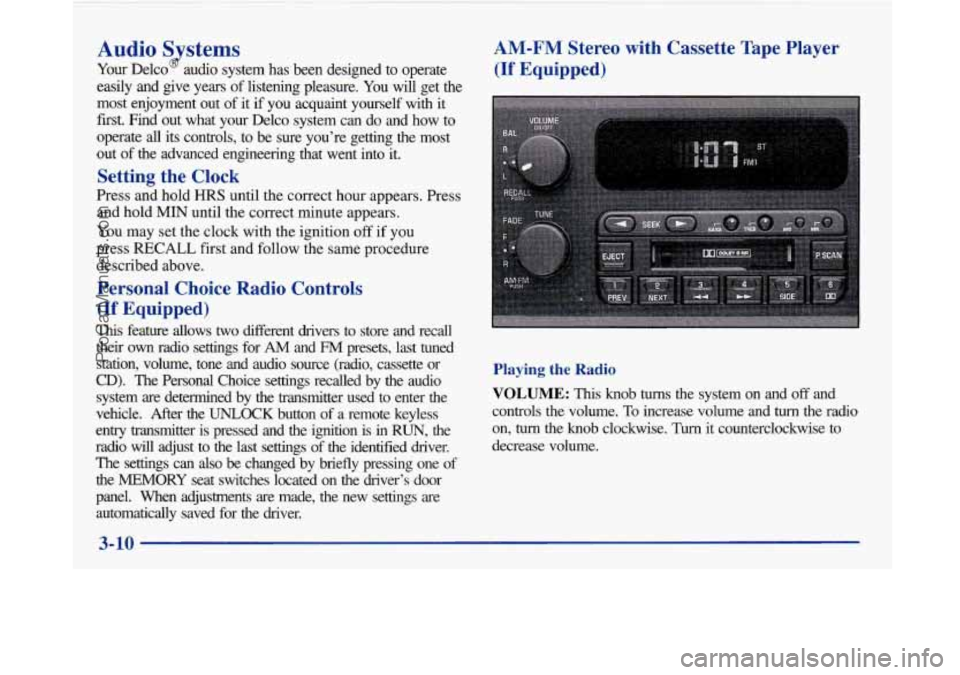
AM-FM Stereo with Cassette Tape Player
(If Equipped)
Playing the Radio
VOLUME: This knob turns the system on and off and
controls the volume.
To increase volume and turn the radio
on,
turn the knob clockwise. Turn it counterclockwise to
decrease volume.
3-10
-
ProCarManuals.com