Page 137 of 420

The traction control system warning light may come on
for the following reasons:
e
0
e
If you turn the system off by pressing the button
located on the end of the shift lever, the warning
light will come on and stay on. To turn the system
back on, press the button again. The warning light
should go
off. (See “Traction Control System” in
the Index for more information.)
If there’s a brake system problem that
is specifically
related
to traction control, the traction control system
will turn
off, the warning light will come on and the
chime will sound.
If the traction control system is affected by an
engine related problem, the system will turn off,
the warning light will come on and the chime
will sound.
If the traction control system warning light comes on
and stays on for an extended period
of time when the
system
is turned on, your vehicle needs service.
Engine Coolant Temperature Gage
TEMPERATURE
This gage measures the
temperature of your engine.
If the pointer moves into the
red area, your engine is too
hot.
A temperature indicator
light will turn on and a
chime will sound.
If you have been operating your vehicle under normal
driving conditions and the temperature indicator light
turns on, you should pull off the road, stop your vehicle
and turn off the engine as soon as possible.
The section “Problems on the Road,” in this manual
explains what to do. See “Engine Overheating” in
the Index.
ProCarManuals.com
Page 138 of 420

Malfunction Indicator Lamp
(Service Engine Soon Light)
SERVICE
ENGINE
SOON
Your Buick is equipped
with a computer which
monitors operation
of the
fuel, ignition and emission
control systems.
This system
is called OBD I1 (On-Board
Diagnostics-Second Generation) and is intended to
assure that emissions are at acceptable levels for the life
of the vehicle, helping to produce a cleaner
environment. (In Canada,
OBD I1 is replaced by
Enhanced Diagnostics.) The SERVICE ENGINE
SOON
light comes on and a chime will sound to indicate that
there is a problem and service
is required. Malfunctions
often will be indicated by the system before any
problem is apparent. This may prevent more serious
damage to your vehicle. This system is also designed to
assist your service technician in correctly diagnosing
any malfunction.
1 NOTICE:
If you keep driving your vehicle with this light
on, after a while, your emission controls may not
work as well, your fuel economy may not be as
good and your engine may not run as smoothly.
This could lead to costly repairs that may not be
covered by your warranty.
This light should come on, as a check to show you it is
working, when the ignition is
on and the engine is not
running. If the light doesn’t come on, have it repaired.
This light will also come on during
a malfunction in one
of
two ways:
0 Light Flashing -- A misfire condition has been
detected.
A misfire increases vehicle emissions and
may damage the emission control system on your
vehicle. Dealer or qualified service center diagnosis
and service is required.
0 Light On Steady -- An emission control system
malfunction has been detected on your vehicle.
Dealer or qualified service center diagnosis and
service may be required.
ProCarManuals.com
Page 139 of 420

If’ the Light Is Flashing
The following may prevent more serious damage to
your vehicle:
e Reducing vehicle speed.
e Avoiding hard accelerations.
0 Avoiding steep uphill grades.
0 If you are towing a trailer, reduce the amount of
cargo being hauled as soon as it is possible.
If the light stops flashing and remains on steady, see “If
the Light Is On Steady” following.
If the light continues to flash, when
it is safe to do so,
stop the vehicle. Find a safe place to park your vehicle.
Turn the key off, wait at least
10 seconds and restart the
engine.
If the light remains on steady, see “If the Light
Is On Steady” following. If the light is still flashing,
follow the previous steps, and drive the vehicle to your
dealer or qualified service center for service.
If the Light Is On Steady
You may be able to correct the emission system
malfunction by considering the following: Did
you just drive through a deep puddle of water?
If so, your electrical system may be wet. The condition
will usually be corrected when the electrical system
dries out.
A few driving trips should turn the light off.
Have you recently changed brands of fuel?
If so, be sure to fuel your vehicle with quality fuel (see
“Fuel” in the Index). Poor fuel quality will cause your
engine not to run as efficiently as designed. You may
notice this as stalling after start-up, stalling when you
put the vehicle into gear, misfiring, hesitation on
acceleration
or stumbling on acceleration. (These
conditions may go away once the engine is warmed up.)
This will be detected by the system and cause the light
to
turn on.
If you experience one or more of these conditions,
change the fuel brand you use. It will require at least one
full tank of the proper fuel to turn the light off.
If none of the above steps have made the light turn off,
have your dealer or qualified service center check the
vehicle. Your dealer has the proper test equipment and
diagnostic tools to fix any mechanical or electrical
problems that may have developed.
ProCarManuals.com
Page 140 of 420

Oil Pressure Light
OIL
This light tells you if there
could be a problem with
your engine oil pressure.
There are three ways the oil pressure light can come on
briefly, which are normal and don’t show a problem.
They are:
The light comes on when you turn your key to RUN.
It goes off once you turn the key to START. That’s
just a check to be sure the light works. If
it doesn’t,
be sure to have
it fixed so it will be there to warn you
if something goes wrong.
If you’re “idling” at a stop sign, the light may blink
on and then off.
If you make a hard stop, the light may come on
for a moment.
When this light comes on and stays on, and a chime
sounds, it means oil isn’t
going through your engine
properly. You could
be low on oil, or you might have
some other oil problem. See your dealer for service.
Don’t keep driving if the oil pressure is
low. If
you do, your engine can become so hot that it
catches fire. You or others could be burned.
Check your oil as soon as possible and have your
vehicle serviced.
I NOTICE:
Damage to your engine from neglected oil
problems can be costly and
is not covered by
your warranty.
2-80
ProCarManuals.com
Page 141 of 420

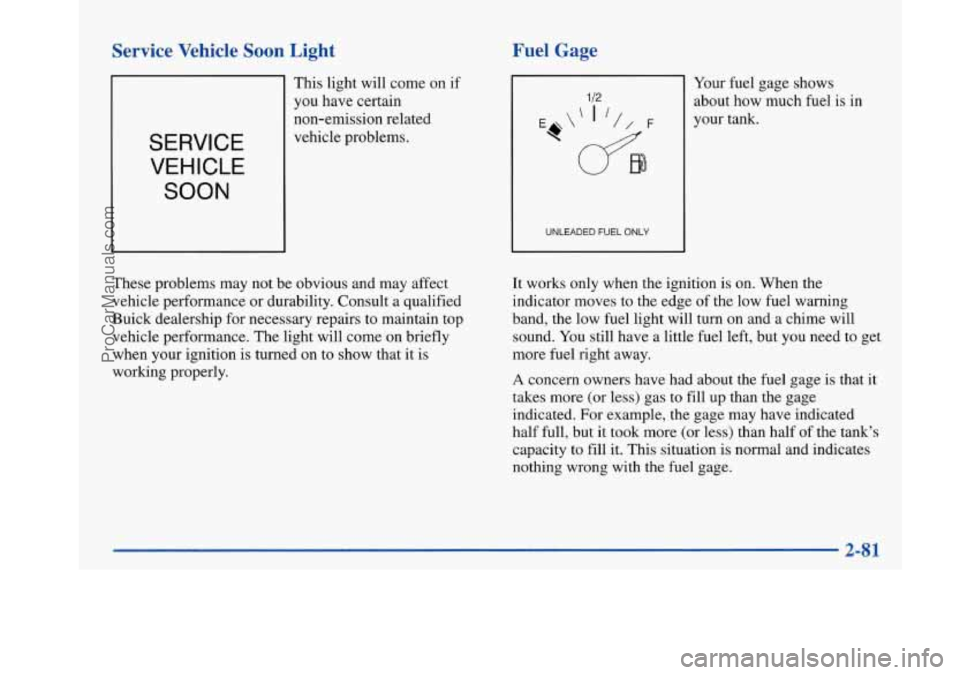
Service Vehicle Soon Light
SERVICE
VEHICLE SOON
This light will come on if
you have certain
non-emission related
vehicle problems.
I
These problems may not be obvious and may affect
vehicle performance or durability. Consult a qualified
Buick dealership for necessary repairs to maintain top
vehicle performance. The light will come on briefly
when your ignition is turned on to show that it is
working properly.
Fuel Gage
UNLEADED FUEL ONLY
Your fuel gage shows
about how much fuel is in
your tank.
It works only when the ignition is on. When the
indicator moves to the edge of the low fuel warning
band, the low fuel light will turn on and a chime will
sound. You still have a little fuel left, but you need to get
more fuel right away.
A concern owners have had about the fuel gage is that it
takes more (or less) gas to fill up than the gage indicated.
For example, the gage may have indicated
half full, but it took more
(or less) than half of the tank's
capacity to fill it. This situation is normal and indicates
nothing wrong with the fuel gage.
2-81
ProCarManuals.com
Page 142 of 420
Head-Up Display (HUD)
(If Equipped)
If the HUD image is too bright, or too high in
your field
of view, it may take you more time to
see things you need to see when it's dark outside,
Be sure to keep the
HUD image dim and placed
low in your field
of view.
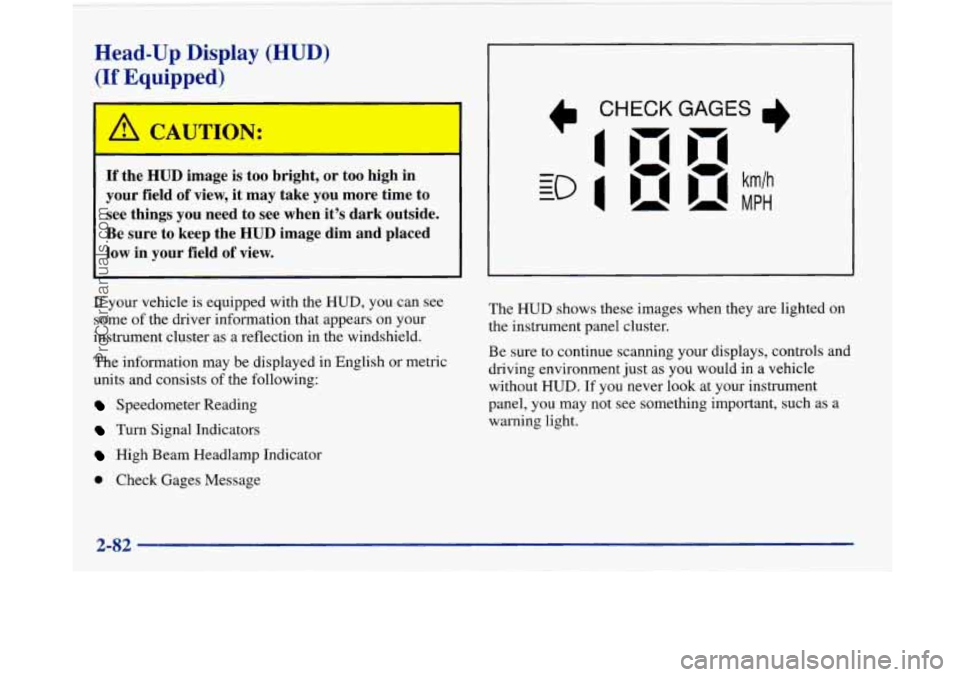
If your vehicle is equipped with the HUD, you can see
some of the driver information that appears on your
instrument cluster as a reflection in the windshield.
The information may be displayed
in English or metric
units and consists of the following:
Speedometer Reading
Turn Signal Indicators
High Beam Headlamp Indicator
Check Gages Message The
HUD shows these images
when they are lighted on
the instrument panel cluster.
Be sure to continue scanning your displays, controls and
driving environment just as you would in a vehicle
without
HUD. If you never look at your instrument
panel, you may not see something important, such as a
warning light.
2-82
ProCarManuals.com
Page 143 of 420

I NOTICE:
Although the HUD image appears to be near the
front
of the vehicle, do not use it as a parking aid.
The
HUD was not designed for that purpose. If
you try to use the display as a marker for the
front of your vehicle, such as in a parking
lot, you
may misjudge distance and hit an obstacle or
another vehicle.
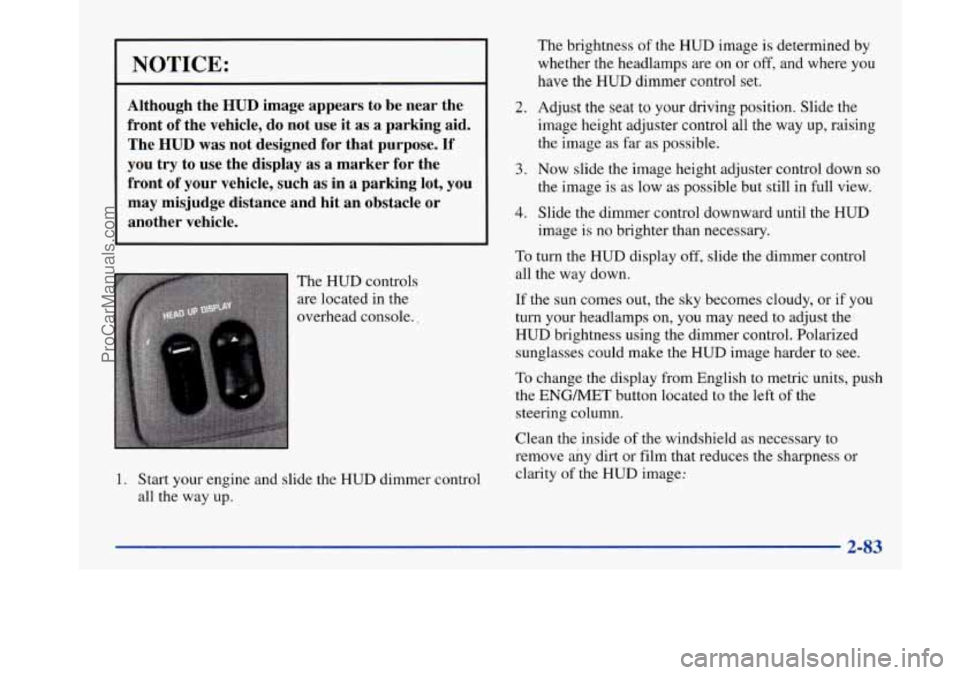
The HUD controls
are located in the
overhead console..
1. Start your engine and slide the HUD dimmer control
all the way up.
2.
3.
4.
The brightness of the HUD image is determined by
whether the headlamps are on or
off, and where you
have the
HUD dimmer control set.
Adjust the seat
to your driving position. Slide the
image height adjuster control all the way
up, raising
the image
as far as possible.
Now slide the image height adjuster control down so
the image is as low as possible but still in full view.
Slide the dimmer control downward until the HUD
image is no brighter than necessary.
To turn the HUD display off, slide the dimmer control
all the way down.
If the sun comes out, the sky becomes cloudy, or if you
turn your headlamps
on, you may need to adjust the
HUD brightness using the dimmer control. Polarized
sunglasses could make the HUD image harder to see.
To change the display from English to metric units, push
the ENGMET button located to the left of the
steering column.
Clean the inside of the windshield as necessary to
remove any dirt or film that reduces the sharpness or
clarity of the
HUD image:
2-83
ProCarManuals.com
Page 144 of 420

To clean the HUD lens, spray household glass cleaner
on a soft, clean cloth. Gently wipe
and dry the HUD
lens. Do not spray cleaner directly on the lens to avoid
cleaner leaking inside the unit.
If the ignition is on and you can’t see the HUD image,
check to see
if
The headlamps are on.
Something is covering the HUD unit.
The HUD dimmer control is adjusted properly.
The HUD image is adjusted to the proper height.
A fuse is blown. See “Fuses and Circuit Breakers” in
the Index.
Keep in mind that your windshield is part of the HUD
system. If you ever have to have your windshield
replaced, be sure to get one that is designed for HUD or
your HUD image may look blurred or out of focus.
Driver Information Center (DIC)
(If Equipped)
Your Park Avenue may be equipped with a Driver
Information Center (DIC). The DIC will display
information about how your vehicle is functioning,
as well as warning messages if a system problem
is detected. The
following buttons
are
on the DIC control panel
which
is located to the left
of the steering column:
ODOKRIP: Use this button to display your total and
trip miles.
FUEL INFO: Press this button to display fuel
information such as, fuel used, fuel range and fuel
economy.
GAGE INFO: Use this button to display oil pressure,
oil life, coolant temperature, tire pressure and battery
information.
RESET: This button, used along with other buttons,
will reset system functions.
ENGMET: Use this button to change the display
between English and metric units.
ProCarManuals.com