Page 1176 of 1503
Opener/Latch/Opener cable/Hoo k stop/Roo f sto p
bracke t removal :
1 . Ope n th e engin e cover . Remov e th e screws , the n
remov e th e suppor t ro d bracket . Remov e th e pus h
nuts , the n remov e th e engin e cove r insulator .
ENGINECOVERSUPPOR T RO DBRACKE T
ENGINE COVE RINSULATO R
2. Remov e th e roo f cove r latch , roo f cove r opene r an d
roo f cove r opene r cabl e fro m th e engin e cover .
NOTE : Tak e car e no t t o ben d th e roo f cove r opene r
cable.
Nut locations , 5Scre w locations , 2
ROO F COVE ROPENE R ENGINE COVE R
SHIMSThickness : 1. 0 m m
(0.03 9 in )
ROO F COVE RLATCH
ROOF COVE ROPENE R CABL E
ROOF COVE ROPENE R
PROOF COVE ROPENE R CABL E
KNOB
ROO F COVE RLATCH
ROOF COVE ROPENE R CABL E
Screw locations , 2
Push nu t locations , 1 9
ProCarManuals.com
Page 1177 of 1503
Engine Cover/Roo f Cove r
Replacemen t (cont'd )
3. Remov e th e roo f sto p bracket s an d hoo k stop s fro m
th e engin e cover .
LEFT ROO F STO P BRACKET /
ROO F HOLDE R SWITC H RIGH
T
ROO F STO PBRACKE T
ENGINECOVER
HOOK STOP S
CONNECTO R
LEF T ROO F
STO P BRACKE T
This scre w o n th e righ troof sto p bracke t i sscre w A . Nu
t locations , 4
HOOK STO P
4. Installatio n is th e revers e o f th e remova l procedure .
NOTE:
• Mak e sur e th e roo f cove r open s properl y an d
lock s securely .
• Mak e sur e th e roo f fit s o n th e engin e cove r
securely .
HOOK
STO P
ROO
F HOLDE R
SWITCH
ROOF SID E
HOO K
ENGIN ECOVER ROO
F
ProCarManuals.com
Page 1232 of 1503

Troubleshooting
Tips and Precautions (cont'd)
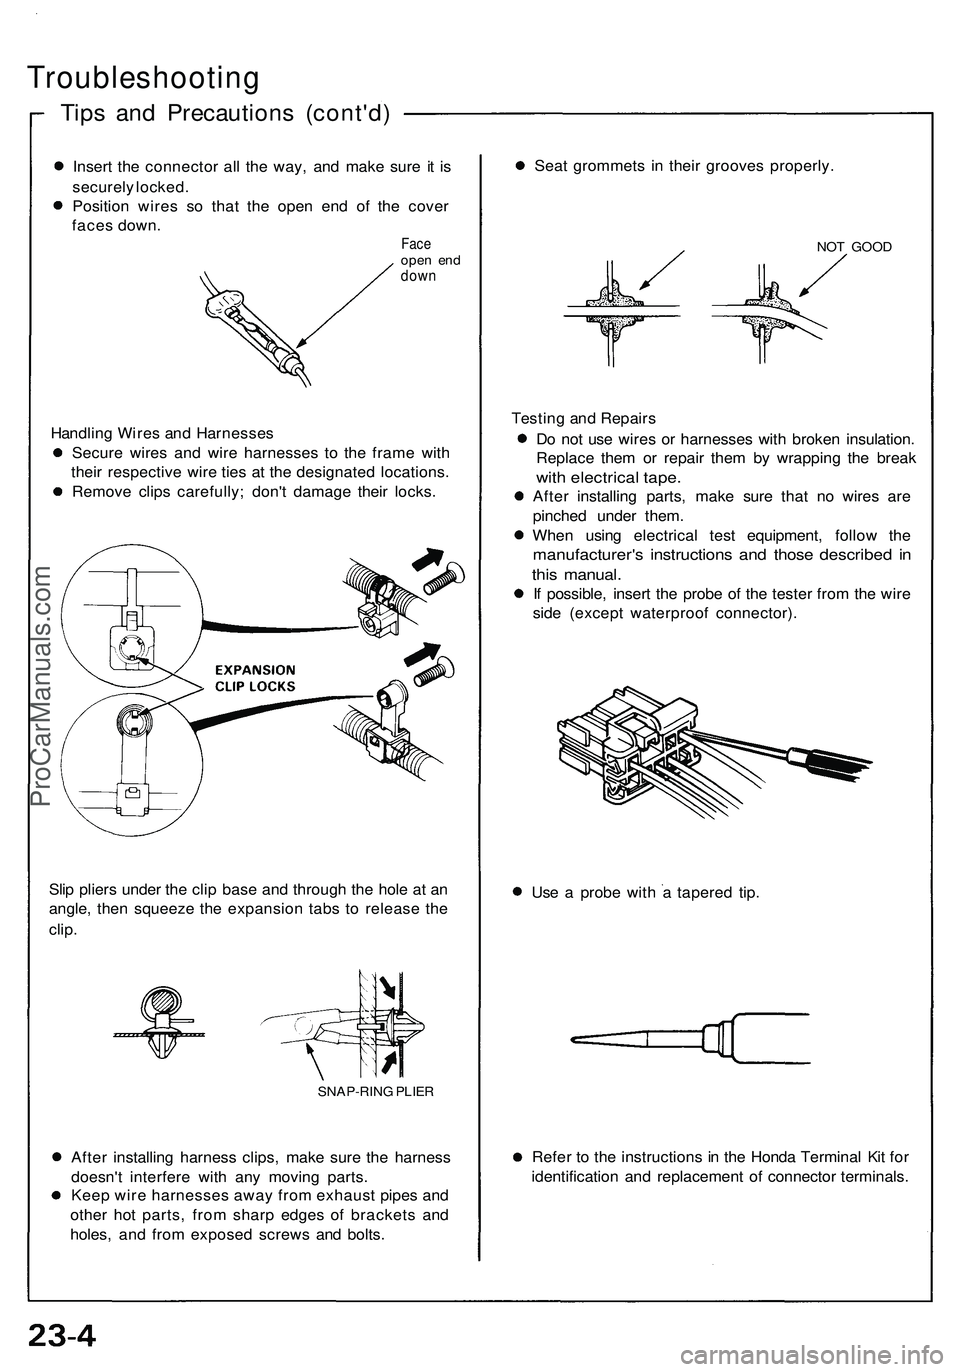
Insert the connector all the way, and make sure it is
securely locked.
Position wires so that the open end of the cover
faces down.
Face
open end
down
Handling Wires and Harnesses
Secure wires and wire harnesses to the frame with
their respective wire ties at the designated locations.
Remove clips carefully; don't damage their locks.
Slip pliers under the clip base and through the hole at an
angle, then squeeze the expansion tabs to release the
clip.
After installing harness clips, make sure the harness
doesn't interfere with any moving parts.
Keep wire harnesses away from exhaust pipes and
other hot parts, from sharp edges of brackets and
holes, and from exposed screws and bolts.
Seat grommets in their grooves properly.
NOT GOOD
Testing and Repairs
Do not use wires or harnesses with broken insulation.
Replace them or repair them by wrapping the break
with electrical tape.
After installing parts, make sure that no wires are
pinched under them.
When using electrical test equipment, follow the
manufacturer's instructions and those described in
this manual.
If possible, insert the probe of the tester from the wire
side (except waterproof connector).
Use a probe with a tapered tip.
Refer to the instructions in the Honda Terminal Kit for
identification and replacement of connector terminals.
SNAP-RING PLIERProCarManuals.com