Page 509 of 1202
P20551
P20530
Front
Z14291
1
2 3
45
6
7
89
10
EM3480
P20569
Front Mark
(Cavity)
FrontPush
- ENGINE MECHANICALCYLINDER BLOCK
EM-87
1996 TERCEL (RM440U)
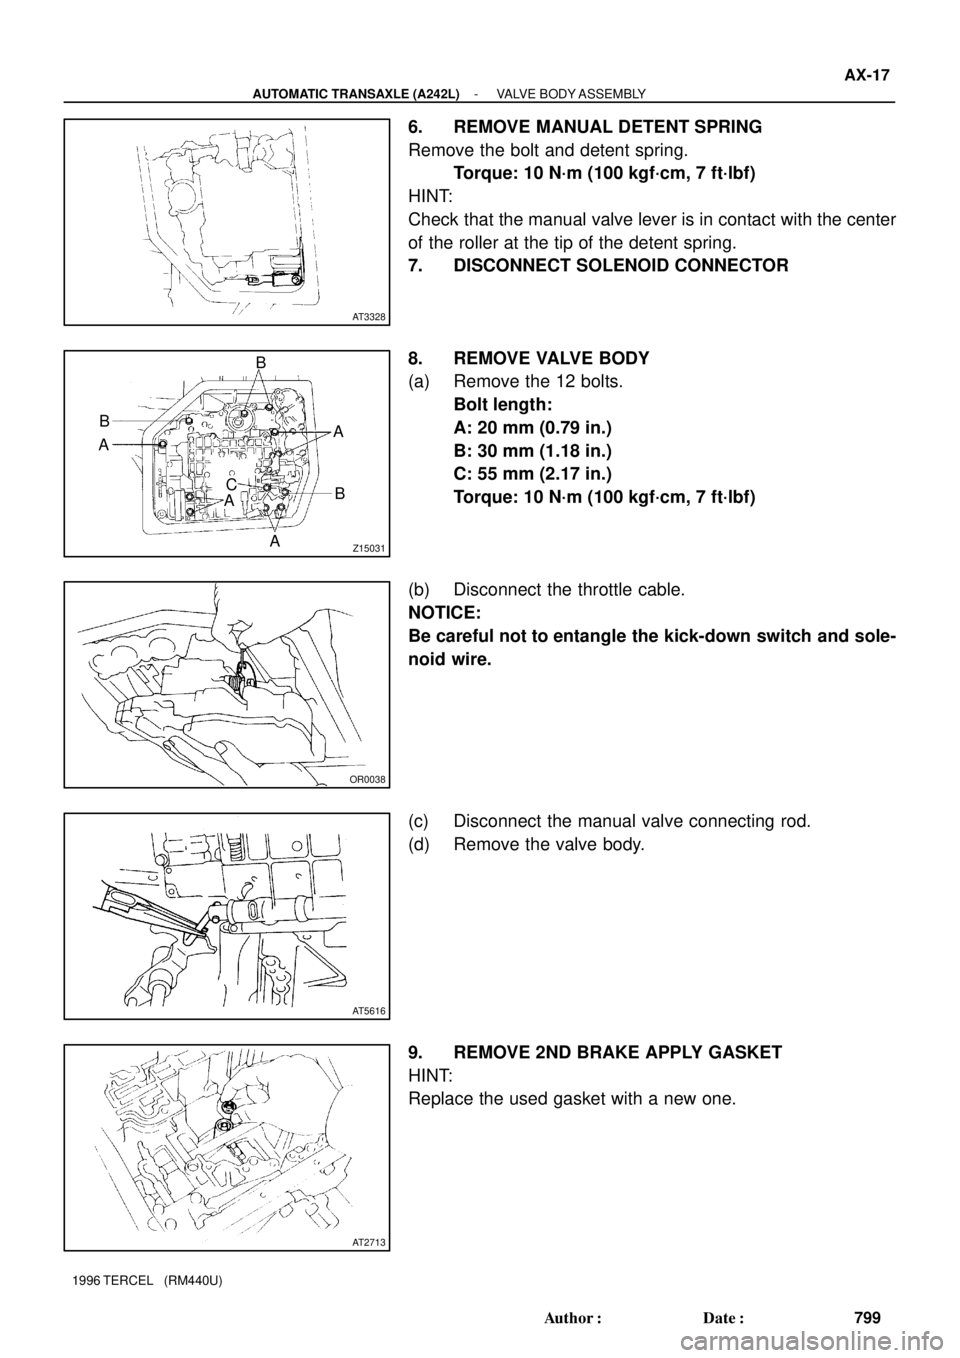
7. INSTALL MAIN BEARING CAPS AND LOWER
THRUST WASHERS
(a) Install the 2 thrust washers on the No.3 bearing cap with
the oil grooves facing outward.
(b) Install the 5 main bearing caps in their proper locations.
HINT:
Each bearing cap has a number and front mark.
(c) Apply a light coat of engine oil on the threads and under
the heads of the main bearing caps.
(d) Install and uniformly tighten the 10 bolts of the main bear-
ing caps, in several passes, in the sequence shown.
Torque: 58 N´m (580 kgf´cm, 42 ft´lbf)
(e) Check that the crankshaft turns smoothly.
(f) Check the crankshaft thrust clearance (See page
EM-70).
8. INSTALL PISTON AND CONNECTING ROD AS-
SEMBLIES
(a) Cover the connecting rod bolts with a short piece of hose
to protect the crankshaft from damage.
(b) Using a piston ring compressor, push the correctly num-
bered piston and connecting rod assemblies into each
cylinder with the front mark of the piston facing forward.
Page 510 of 1202
EM3481
Front Mark
(Protrusion)
Front
EM3448
P20475
Seal Packing
A'B'
A
B
A - A' B - B' EM-88
- ENGINE MECHANICALCYLINDER BLOCK
1996 TERCEL (RM440U)
9. INSTALL CONNECTING ROD CAPS
(a) Match the numbered connecting rod cap with the num-
bered connecting rod.
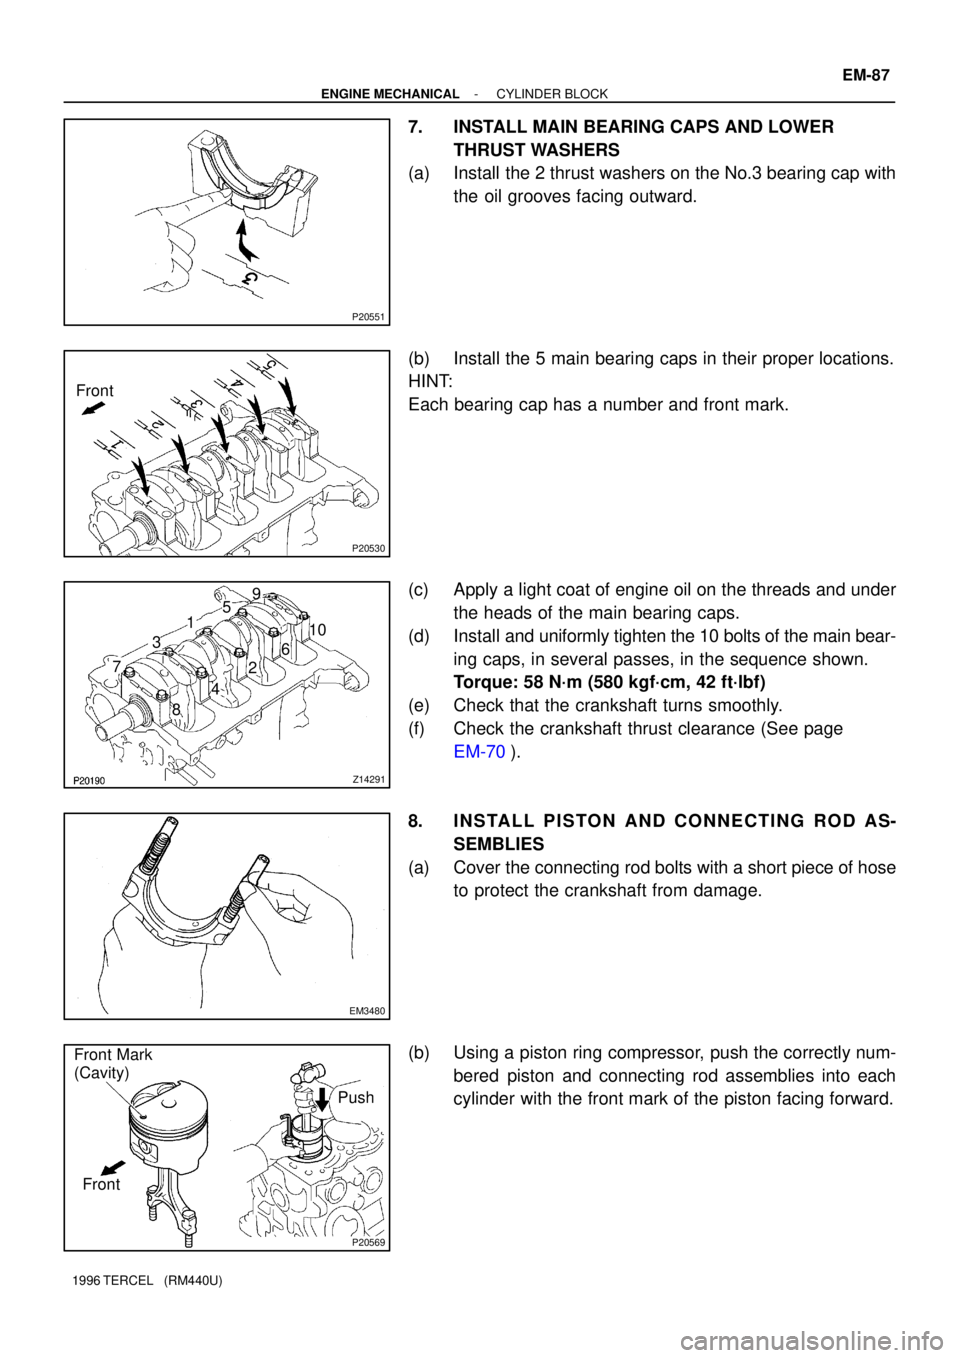
(b) Install the connecting rod cap with the front mark facing
forward.
(c) Apply a light coat of engine oil on the threads and under
the nuts of the connecting rod cap.
(d) Install and alternately tighten the nuts of the connecting
rod cap in several passes.
Torque: 40 N´m (400 kgf´cm, 29 ft´lbf)
(e) Check that the crankshaft turns smoothly.
(f) Check the connecting rod thrust clearance (See page
EM-70).
10. INSTALL REAR OIL SEAL RETAINER
(a) Remove any old packing (FIPG) material and be careful
not to drop any oil on the contact surfaces of the rear oil
seal retainer and cylinder block.
�Using a razor blade and gasket scraper, remove all
the old packing (FIPG) material from the gasket sur-
faces and sealing groove.
�Thoroughly clean all components to remove all the
loose material.
�Using a non-residue solvent, clean both sealing
surfaces.
(b) Apply seal packing to the rear oil seal retainer as shown
in the illustration.
Seal packing:
Part No. 08826-00080 or equivalent
�Install a nozzle that has been cut to a 2 - 3 mm (0.08
- 0.12 in.) opening.
�Parts must be assembled within 5 minutes of ap-
plication. Otherwise the material must be removed
and reapplied.
Page 800 of 1202
AT3328
Z15031
B
B
A
C
A AA
B
OR0038
AT5616
AT2713
- AUTOMATIC TRANSAXLE (A242L)VALVE BODY ASSEMBLY
AX-17
799 Author�: Date�:
1996 TERCEL (RM440U)
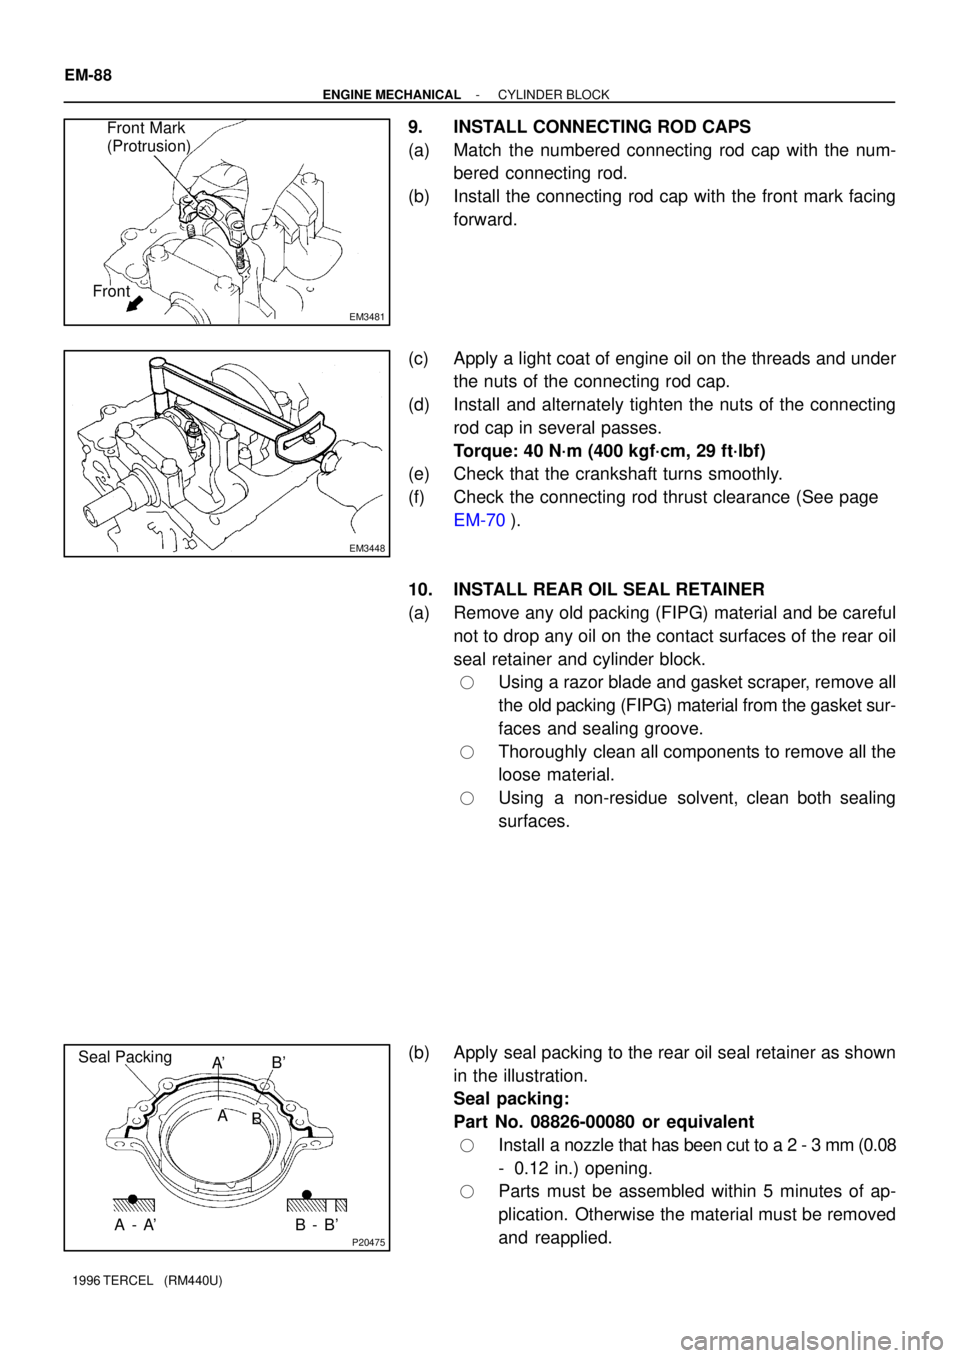
6. REMOVE MANUAL DETENT SPRING
Remove the bolt and detent spring.
Torque: 10 N´m (100 kgf´cm, 7 ft´lbf)
HINT:
Check that the manual valve lever is in contact with the center
of the roller at the tip of the detent spring.
7. DISCONNECT SOLENOID CONNECTOR
8. REMOVE VALVE BODY
(a) Remove the 12 bolts.
Bolt length:
A: 20 mm (0.79 in.)
B: 30 mm (1.18 in.)
C: 55 mm (2.17 in.)
Torque: 10 N´m (100 kgf´cm, 7 ft´lbf)
(b) Disconnect the throttle cable.
NOTICE:
Be careful not to entangle the kick-down switch and sole-
noid wire.
(c) Disconnect the manual valve connecting rod.
(d) Remove the valve body.
9. REMOVE 2ND BRAKE APPLY GASKET
HINT:
Replace the used gasket with a new one.
Page 835 of 1202
SA128-02
FA1535
SST
F03986
SA-18
- SUSPENSION AND AXLEFRONT DRIVE SHAFT
1996 TERCEL (RM440U)
REMOVAL
NOTICE:
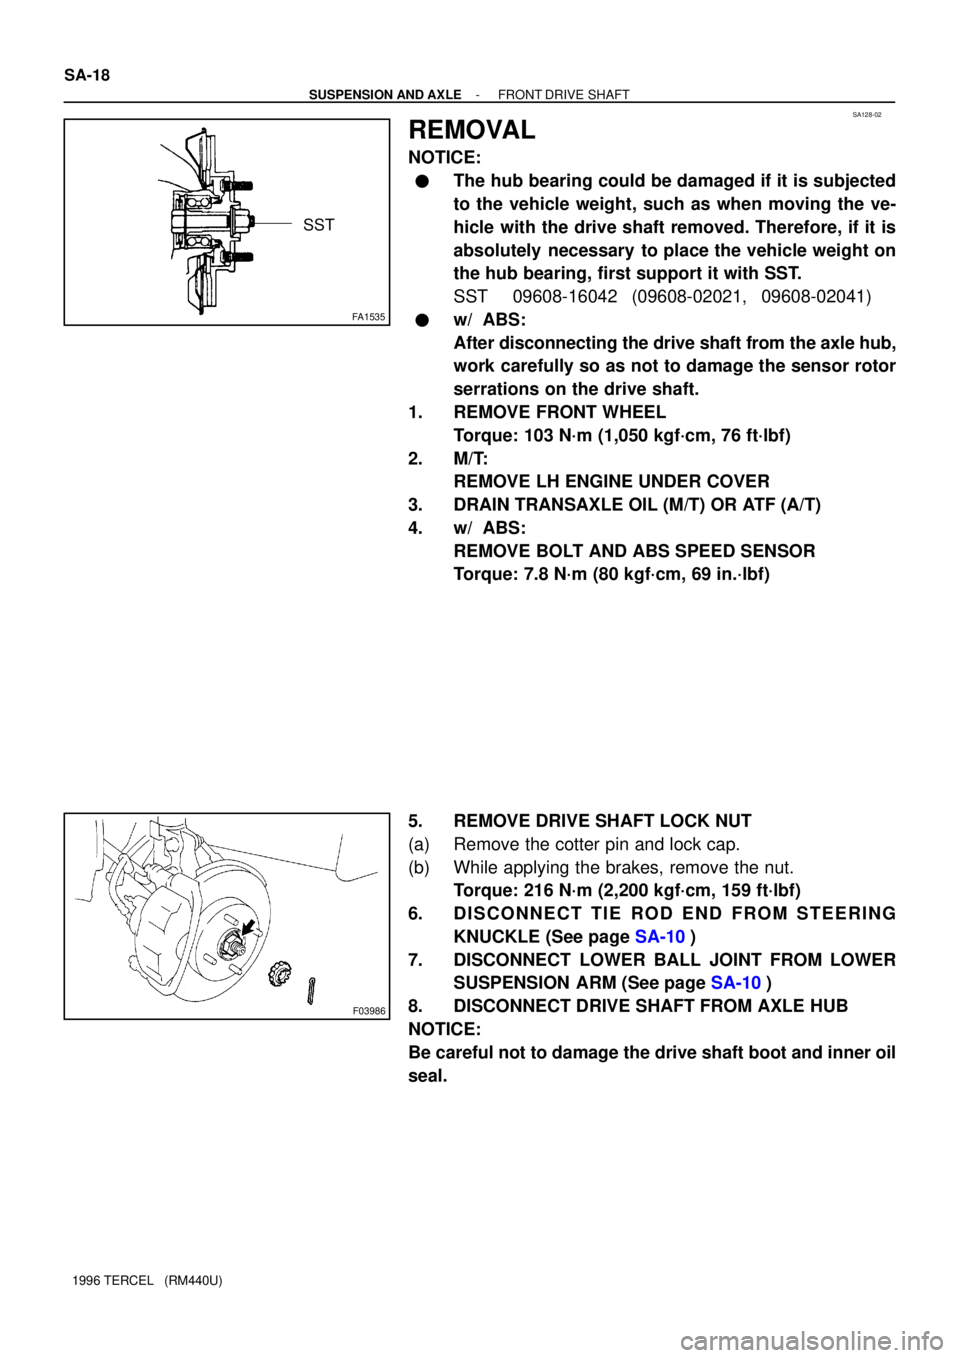
�The hub bearing could be damaged if it is subjected
to the vehicle weight, such as when moving the ve-
hicle with the drive shaft removed. Therefore, if it is
absolutely necessary to place the vehicle weight on
the hub bearing, first support it with SST.
SST 09608-16042 (09608-02021, 09608-02041)
�w/ ABS:
After disconnecting the drive shaft from the axle hub,
work carefully so as not to damage the sensor rotor
serrations on the drive shaft.
1. REMOVE FRONT WHEEL
Torque: 103 N´m (1,050 kgf´cm, 76 ft´lbf)
2. M/T:
REMOVE LH ENGINE UNDER COVER
3. DRAIN TRANSAXLE OIL (M/T) OR ATF (A/T)
4. w/ ABS:
REMOVE BOLT AND ABS SPEED SENSOR
Torque: 7.8 N´m (80 kgf´cm, 69 in.´lbf)
5. REMOVE DRIVE SHAFT LOCK NUT
(a) Remove the cotter pin and lock cap.
(b) While applying the brakes, remove the nut.
Torque: 216 N´m (2,200 kgf´cm, 159 ft´lbf)
6. DISCONNECT TIE ROD END FROM STEERING
KNUCKLE (See page SA-10)
7. DISCONNECT LOWER BALL JOINT FROM LOWER
SUSPENSION ARM (See page SA-10)
8. DISCONNECT DRIVE SHAFT FROM AXLE HUB
NOTICE:
Be careful not to damage the drive shaft boot and inner oil
seal.
Page 1124 of 1202
BO34D-01
N20165
Front Seat
Seatback Cover
� Hog Ring
Seat Cushion CoverSeatback Frame
� Hog Ring
Seat Cushion Frame
Seat Adjuster Inner
Reclining Connecting Rod
Reclining Adjuster Release
Handle
Seat Cushion Outer Shield Seat Adjuster Outer Seat Truck Handle Seat Cushion Inner ShieldFront Seat Inner Belt
� Non-reusable part
- BODYSEAT
BO-53
1147 Author�: Date�:
1996 TERCEL (RM440U)
SEAT
COMPONENTS
Page:
< prev 1-8 9-16 17-24