Page 228 of 1354
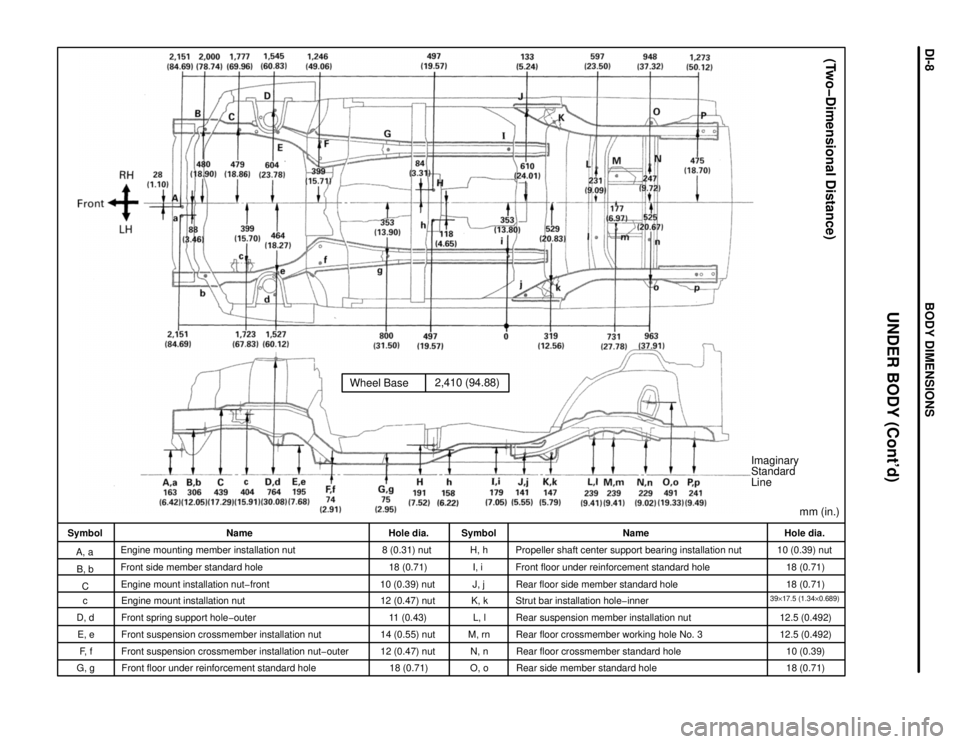
Wheel Base2,410 (94.88)
Imaginary
Standard
Line
mm (in.)
(Two-Dimensional Distance)
Hole dia.
10 (0.39) nut
18 (0.71)
18 (0.71)
39y17.5 (1.34y0.689)12.5 (0.492)
12.5 (0.492)
10 (0.39)
18 (0.71) Name
Propeller shaft center support bearing installation nut
Front floor under reinforcement standard hole
Rear floor side member standard hole
Strut bar installation hole-inner
Rear suspension member installation nut
Rear floor crossmember working hole No. 3
Rear floor crossmember standard hole
Rear side member standard hole Symbol
H, h
I, i
J, j
K, k
L, l
M, rn
N, n
O, o Hole dia.
8 (0.31) nut
18 (0.71)
10 (0.39) nut
12 (0.47) nut
11 (0.43)
14 (0.55) nut
12 (0.47) nut
18 (0.71) Name
Engine mounting member installation nut
Front side member standard hole
Engine mount installation nut-front
Engine mount installation nut
Front spring support hole-outer
Front suspension crossmember installation nut
Front suspension crossmember installation nut-outer
Front floor under reinforcement standard hole Symbol
A, a
B, b
C
c
D, d
E, e
F, f
UNDER BODY (Cont'd)
G, g
BODY DIMENSIONSDIœ8
Page 229 of 1354
GENERAL INFORMATION
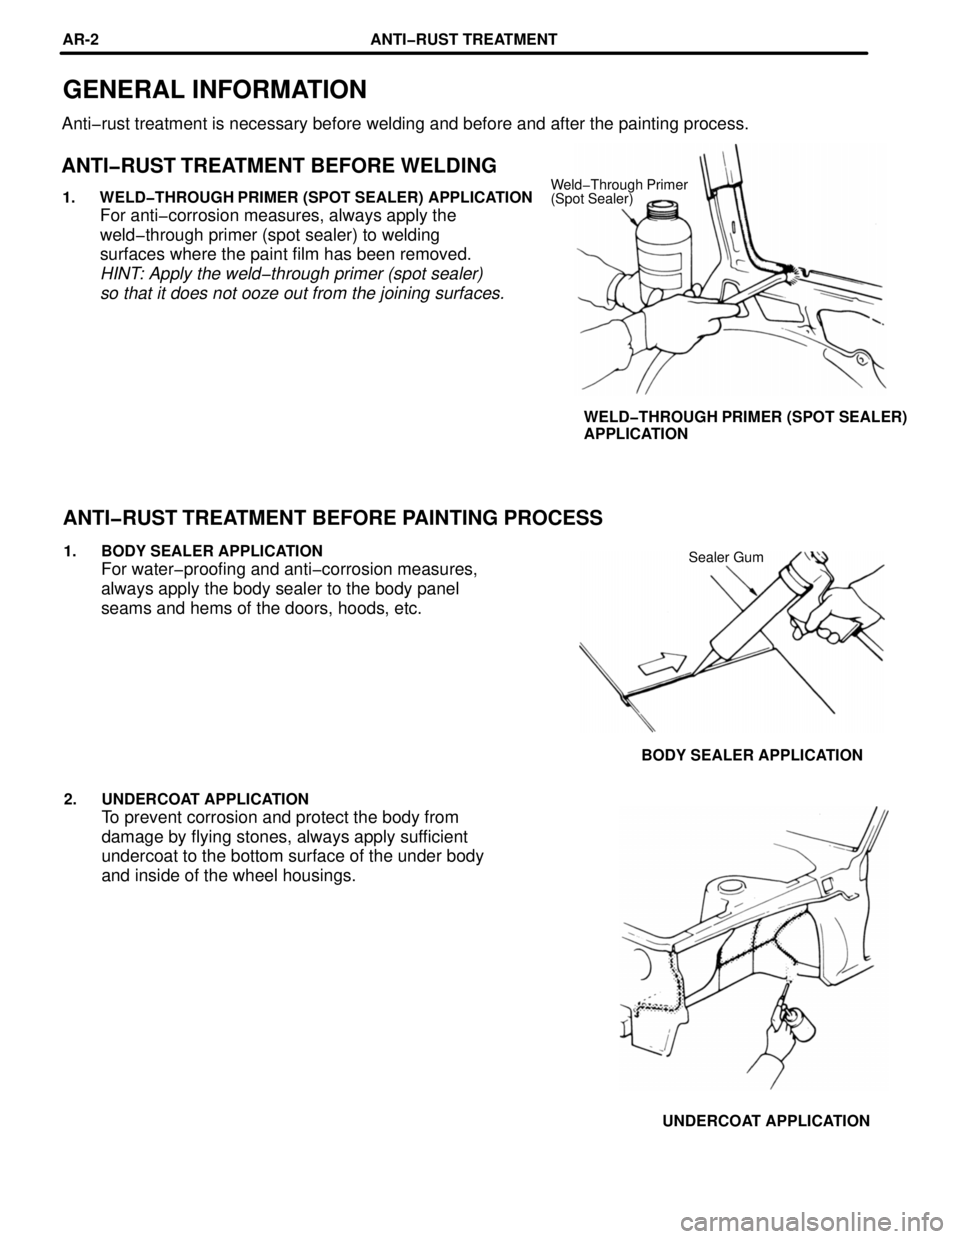
Anti-rust treatment is necessary before welding and before and after the painting process.
ANTI-RUST TREATMENT BEFORE WELDING
Weld-Through Primer
(Spot Sealer)1. WELD-THROUGH PRIMER (SPOT SEALER) APPLICATION
For anti-corrosion measures, always apply the
weld-through primer (spot sealer) to welding
surfaces where the paint film has been removed.
HINT: Apply the weld-through primer (spot sealer)
so that it does not ooze out from the joining surfaces.
WELD-THROUGH PRIMER (SPOT SEALER)
APPLICATION
ANTI-RUST TREATMENT BEFORE PAINTING PROCESS
Sealer Gum1. BODY SEALER APPLICATION
For water-proofing and anti-corrosion measures,
always apply the body sealer to the body panel
seams and hems of the doors, hoods, etc.
BODY SEALER APPLICATION
2. UNDERCOAT APPLICATION
To prevent corrosion and protect the body from
damage by flying stones, always apply sufficient
undercoat to the bottom surface of the under body
and inside of the wheel housings.
UNDERCOAT APPLICATION ANTI-RUST TREATMENT
ARœ2
Page 230 of 1354
Steel Metal Undercoat (ED Primer)Anti-Chipping Paint Second Coat
Steel Metal Undercoat (ED Primer) Second Coat Top Coat
ANTI-RUST TREATMENT AFTER PAINTING PROCESS
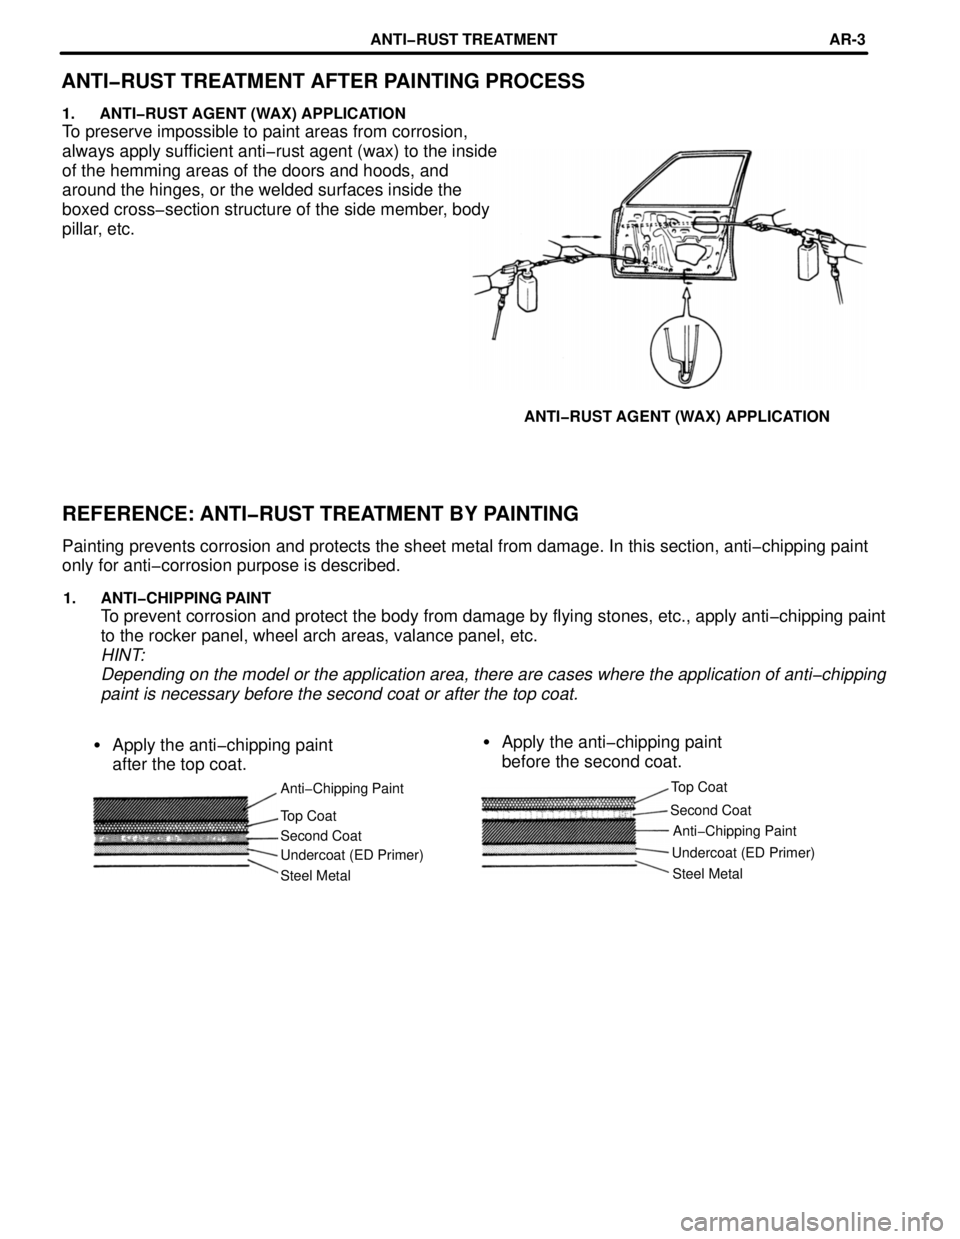
1. ANTI-RUST AGENT (WAX) APPLICATION
To preserve impossible to paint areas from corrosion,
always apply sufficient anti-rust agent (wax) to the inside
of the hemming areas of the doors and hoods, and
around the hinges, or the welded surfaces inside the
boxed cross-section structure of the side member, body
pillar, etc.
ANTI-RUST AGENT (WAX) APPLICATION
REFERENCE: ANTI-RUST TREATMENT BY PAINTING
Painting prevents corrosion and protects the sheet metal from damage. In this section, anti-chipping paint
only for anti-corrosion purpose is described.
1. ANTI-CHIPPING PAINT
To prevent corrosion and protect the body from damage by flying stones, etc., apply anti-chipping paint
to the rocker panel, wheel arch areas, valance panel, etc.
HINT:
Depending on the model or the application area, there are cases where the application of anti-chipping
paint is necessary before the second coat or after the top coat.
�Apply the anti-chipping paint
before the second coat. �Apply the anti-chipping paint
after the top coat.
Anti-Chipping PaintTop Coat
ANTI-RUST TREATMENTARœ3
Page 249 of 1354
mm in.
5
0.20
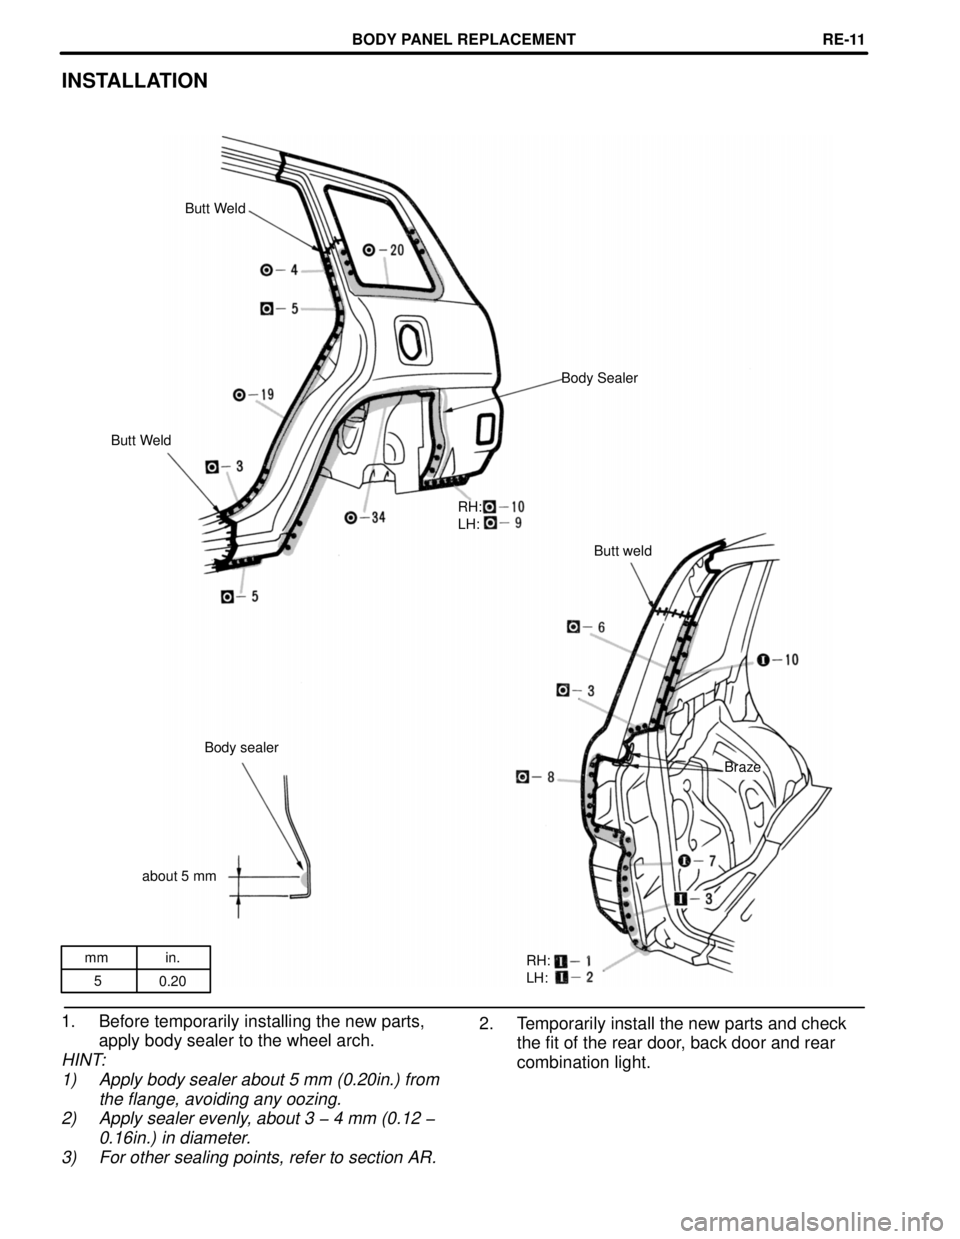
INSTALLATION
Butt Weld
Body Sealer
Butt Weld
RH:
LH:
Butt weld
Body sealer
Braze
about 5 mm
RH:
LH:
2. Temporarily install the new parts and check
the fit of the rear door, back door and rear
combination light. 1. Before temporarily installing the new parts,
apply body sealer to the wheel arch.
HINT:
1) Apply body sealer about 5 mm (0.20in.) from
the flange, avoiding any oozing.
2) Apply sealer evenly, about 3 - 4 mm (0.12 -
0.16in.) in diameter.
3) For other sealing points, refer to section AR.
BODY PANEL REPLACEMENTREœ11
Page 251 of 1354
mmin.
5
0.20Braze
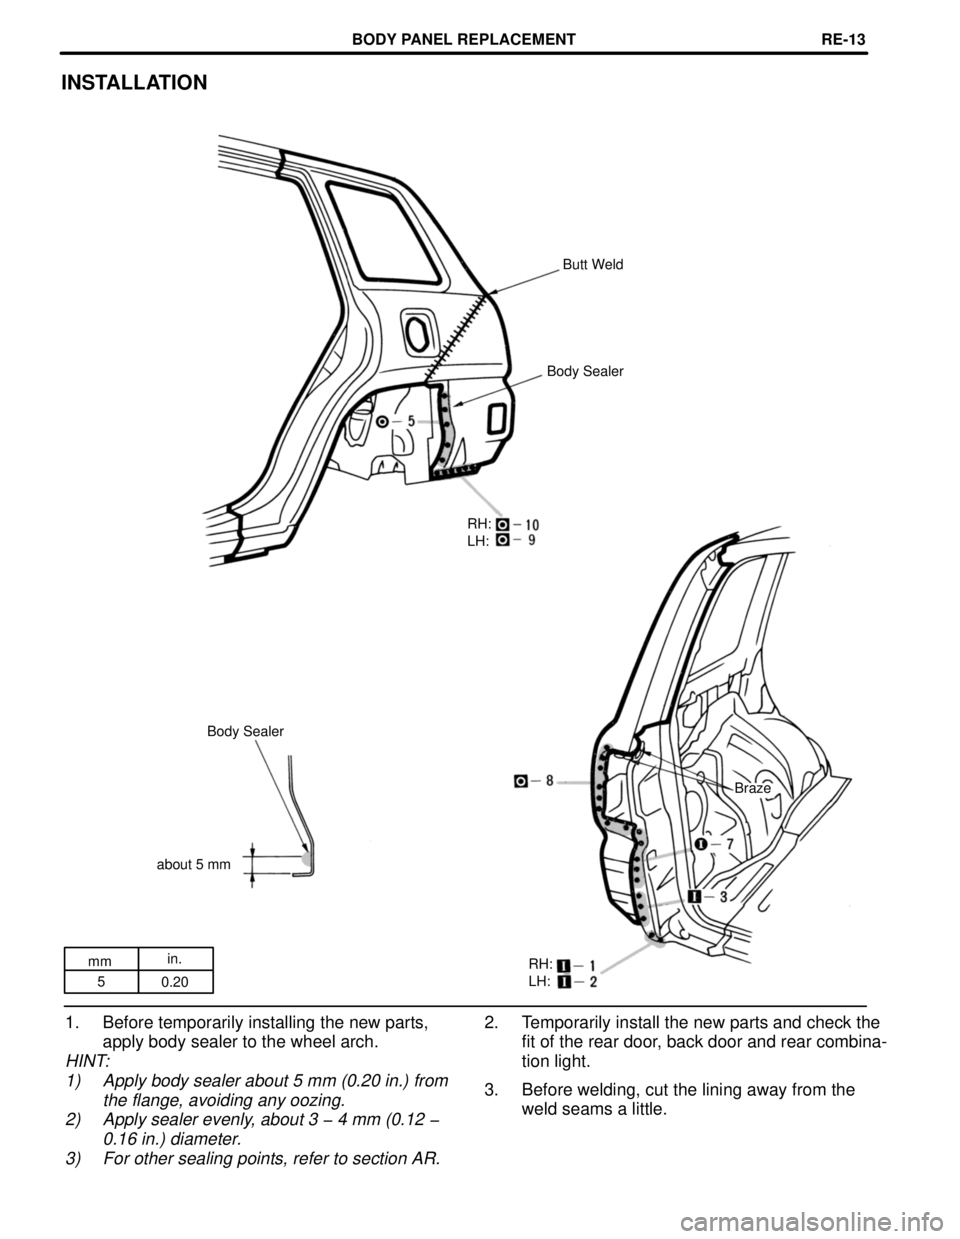
INSTALLATION
Butt Weld
Body Sealer
RH:
LH:
Body Sealer
about 5 mm
RH:
LH:
1. Before temporarily installing the new parts,
apply body sealer to the wheel arch.
HINT:
1) Apply body sealer about 5 mm (0.20 in.) from
the flange, avoiding any oozing.
2) Apply sealer evenly, about 3 - 4 mm (0.12 -
0.16 in.) diameter.
3) For other sealing points, refer to section AR.
2. Temporarily install the new parts and check the
fit of the rear door, back door and rear combinaœ
tion light.
3. Before welding, cut the lining away from the
weld seams a little.
BODY PANEL REPLACEMENTREœ13
Page 252 of 1354
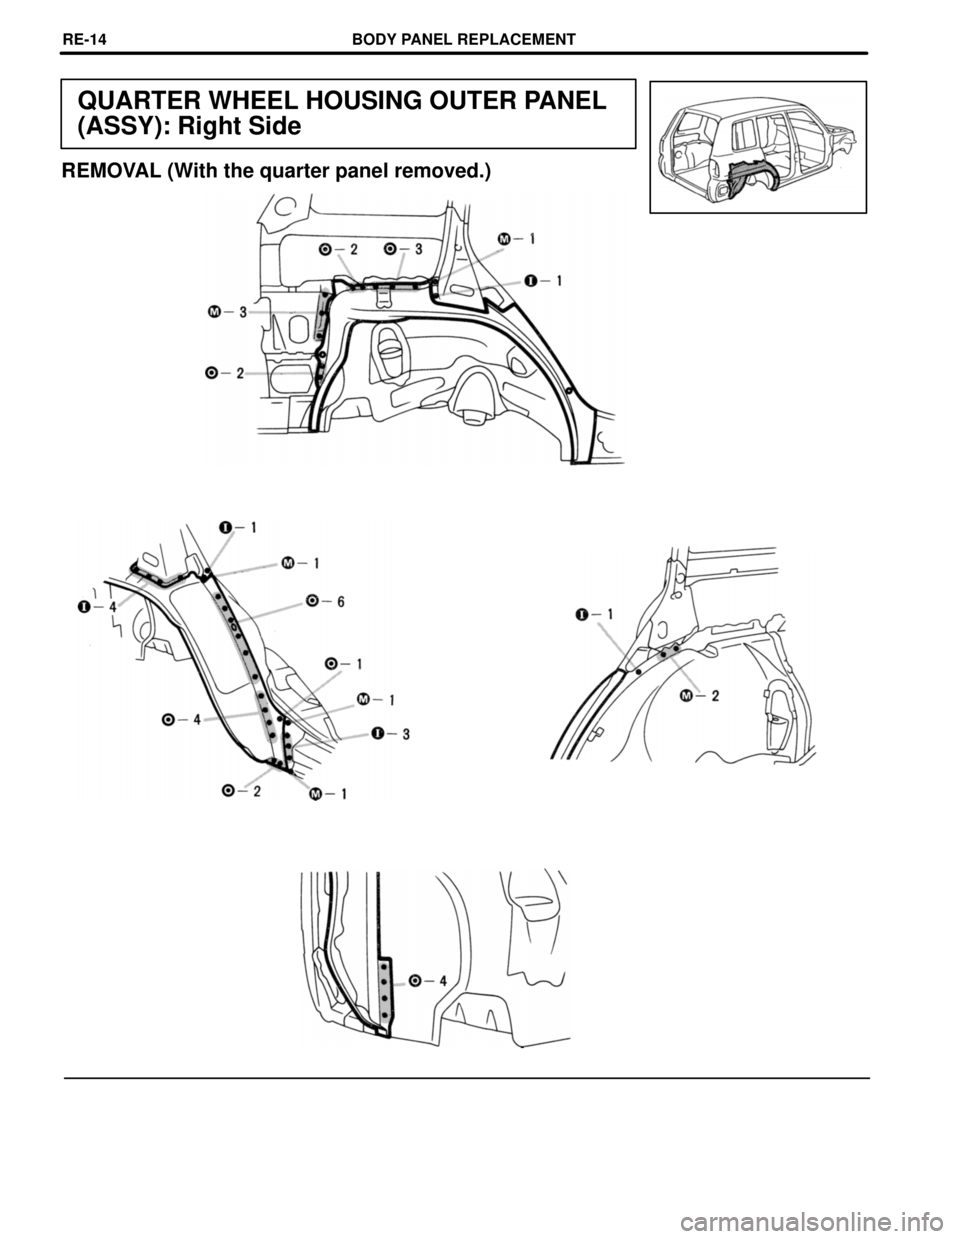
QUARTER WHEEL HOUSING OUTER PANEL
(ASSY): Right Side
REMOVAL (With the quarter panel removed.)
BODY PANEL REPLACEMENTREœ14
Page 253 of 1354
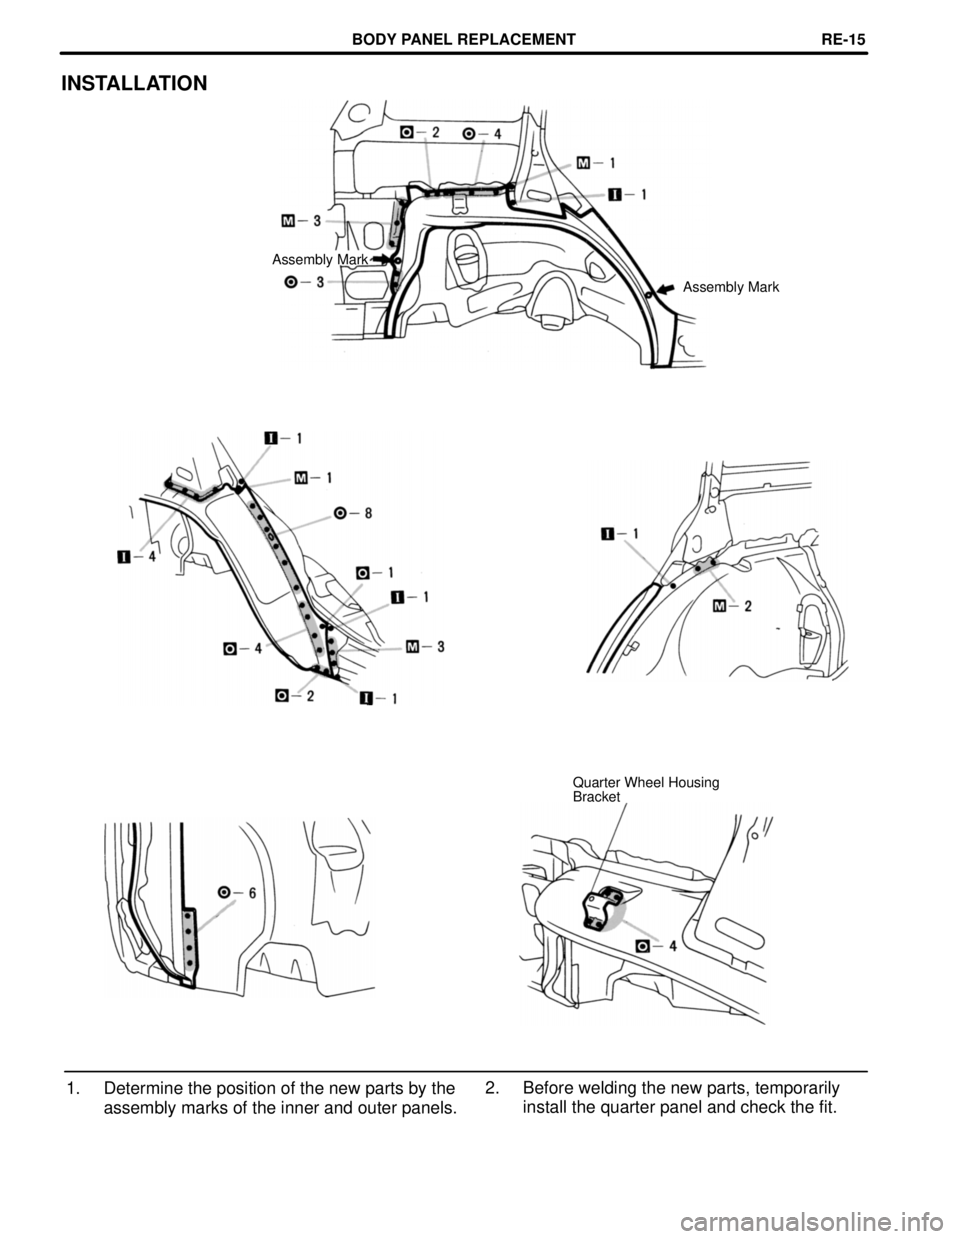
INSTALLATION
Assembly Mark
Assembly Mark
Quarter Wheel Housing
Bracket
2. Before welding the new parts, temporarily
install the quarter panel and check the fit. 1. Determine the position of the new parts by the
assembly marks of the inner and outer panels.
BODY PANEL REPLACEMENTREœ15
Page 254 of 1354
QUARTER WHEEL HOUSING OUTER PANEL
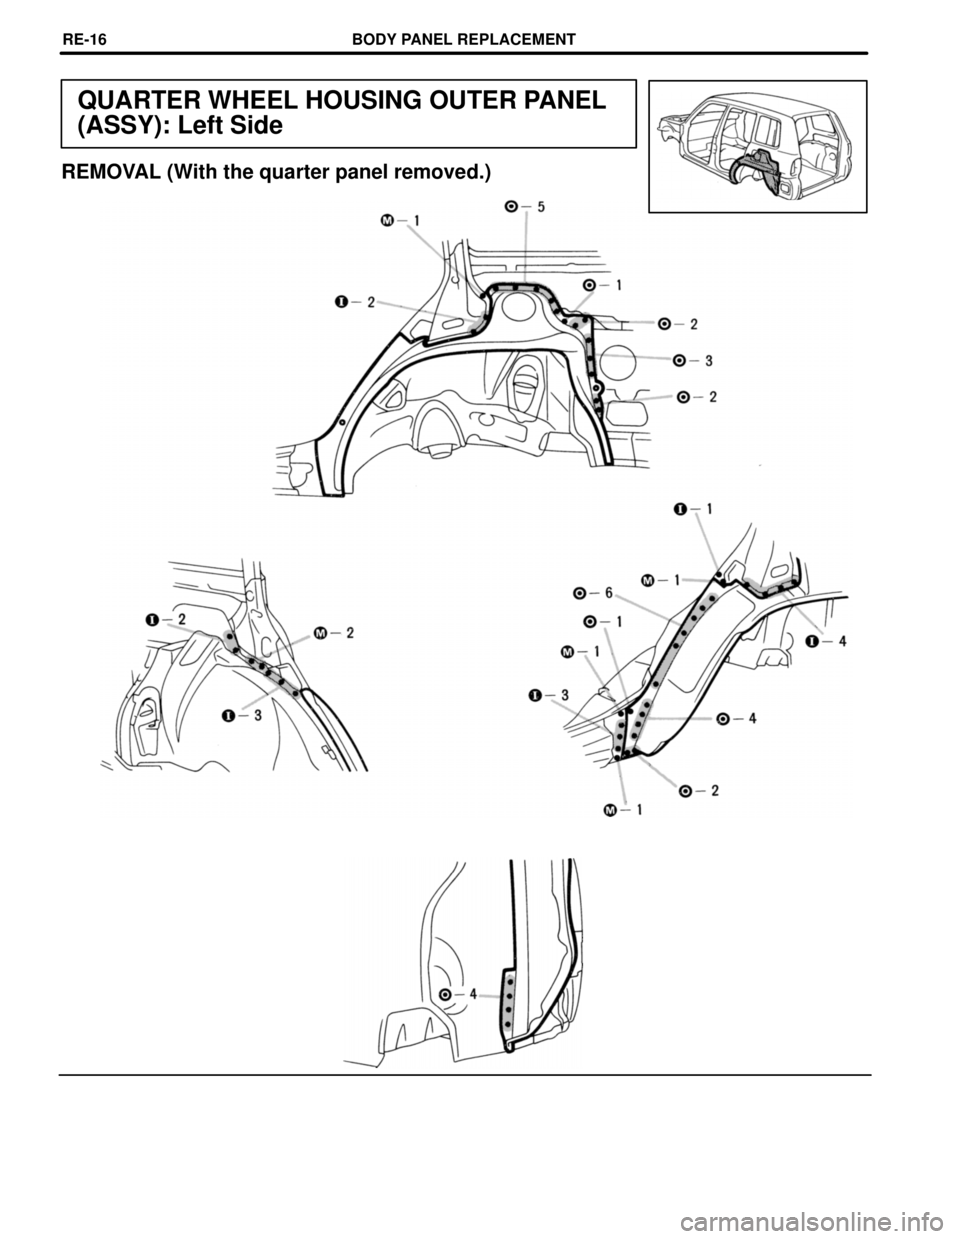
(ASSY): Left Side
REMOVAL (With the quarter panel removed.)
BODY PANEL REPLACEMENTREœ16