1996 NISSAN QUEST light
[x] Cancel search: lightPage 36 of 235
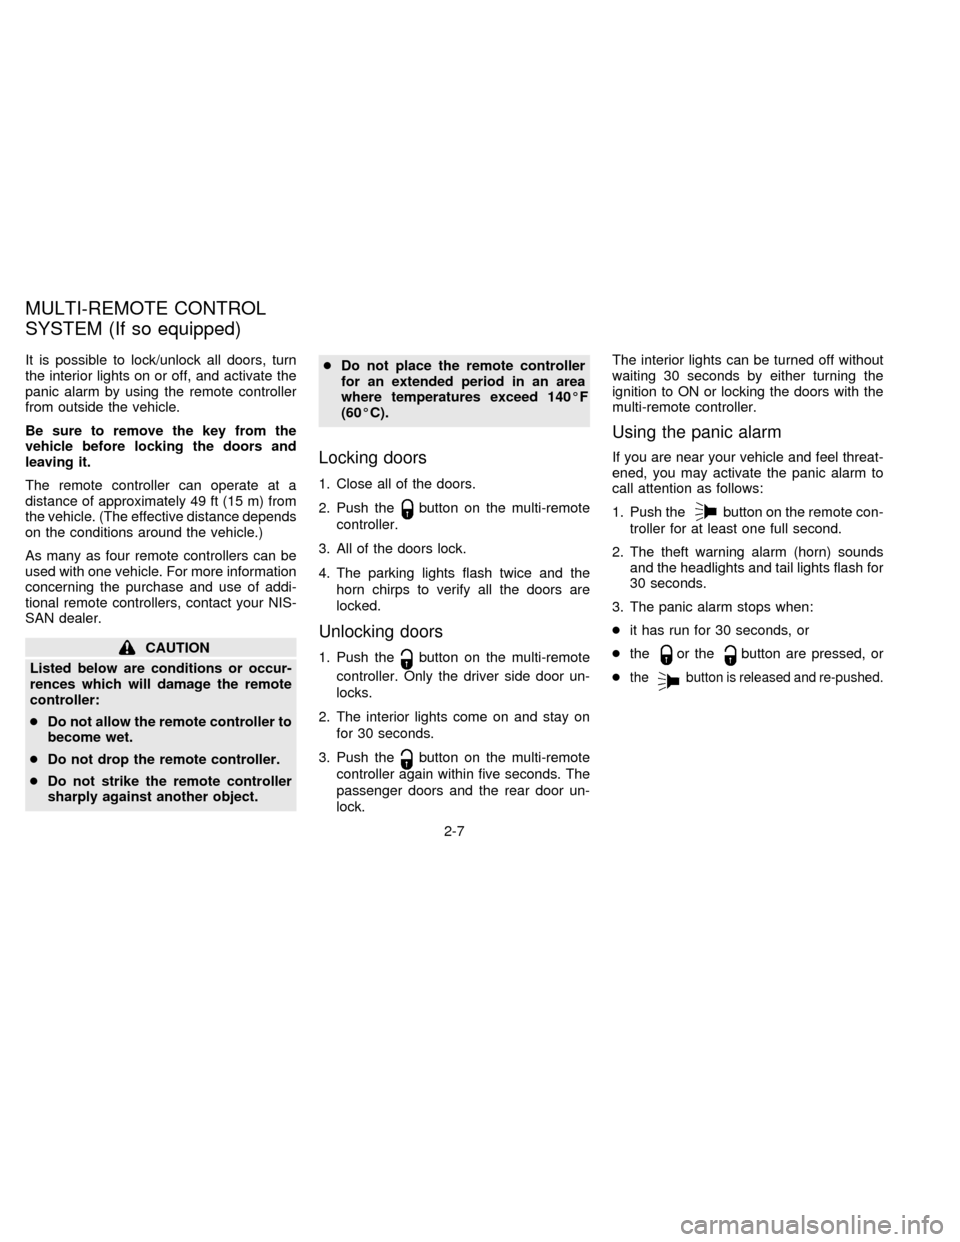
It is possible to lock/unlock all doors, turn
the interior lights on or off, and activate the
panic alarm by using the remote controller
from outside the vehicle.
Be sure to remove the key from the
vehicle before locking the doors and
leaving it.
The remote controller can operate at a
distance of approximately 49 ft (15 m) from
the vehicle. (The effective distance depends
on the conditions around the vehicle.)
As many as four remote controllers can be
used with one vehicle. For more information
concerning the purchase and use of addi-
tional remote controllers, contact your NIS-
SAN dealer.
CAUTION
Listed below are conditions or occur-
rences which will damage the remote
controller:
cDo not allow the remote controller to
become wet.
cDo not drop the remote controller.
cDo not strike the remote controller
sharply against another object.cDo not place the remote controller
for an extended period in an area
where temperatures exceed 140ÉF
(60ÉC).
Locking doors
1. Close all of the doors.
2. Push the
button on the multi-remote
controller.
3. All of the doors lock.
4. The parking lights flash twice and the
horn chirps to verify all the doors are
locked.
Unlocking doors
1. Push thebutton on the multi-remote
controller. Only the driver side door un-
locks.
2. The interior lights come on and stay on
for 30 seconds.
3. Push the
button on the multi-remote
controller again within five seconds. The
passenger doors and the rear door un-
lock.The interior lights can be turned off without
waiting 30 seconds by either turning the
ignition to ON or locking the doors with the
multi-remote controller.
Using the panic alarm
If you are near your vehicle and feel threat-
ened, you may activate the panic alarm to
call attention as follows:
1. Push the
button on the remote con-
troller for at least one full second.
2. The theft warning alarm (horn) sounds
and the headlights and tail lights flash for
30 seconds.
3. The panic alarm stops when:
cit has run for 30 seconds, or
cthe
or thebutton are pressed, or
c
thebutton is released and re-pushed.
MULTI-REMOTE CONTROL
SYSTEM (If so equipped)
2-7
ZX
Page 38 of 235

approved by the party responsible for
compliance could void the user's author-
ity to operate the device.
Illuminated entry system
All models
The interior lights, the cargo light, the step-
well lights near the sliding door and on the
front doors, and the footwell lights near the
driver's and front passenger's feet illumi-
nate when the front and sliding doors are
opened. These lights gradually dim to off
within 30 seconds or turn off immediately
when the key is turned to ON.
Battery saver
If the vehicle doors are not fully closed and
the interior lights remain illuminated, they
eventually turn off automatically to prevent
the battery from becoming discharged.
Lights that illuminate when the front doors
and/or the sliding door are open turn off
after approximately 30 minutes. Lights that
illuminate when the back door is open turn
off after approximately 60 minutes.
If the personal reading lamp is left on when
the key is removed from the ignition, it turns
off automatically in 30 minutes.
2-9
ZX
Page 39 of 235

1. Pull the hood lock release handles1
located below the instrument panel; the
hood then springs up slightly.
2. Pull up on the lever
s2at the front of the
hood and raise the hood.3. Insert the support rod
s3into the slot on
the underside of the hood.
4. When closing the hood, reset the support
rod to its original position, then slowly
close the hood and make sure it locks
into place.
PD1336MAPD0141
HOOD RELEASE
2-10
ZX
Page 74 of 235

Warning labels about the supplemental air
bag system are placed in the vehicle.The supplemental air bag light, displaying
AIR BAG in the instrument panel, monitors
the circuits of the supplemental air bag. The
circuits monitored by the supplemental air
bag light are the diagnosis sensor unit, air
bag modules and all related wiring.
When the ignition key is in the ON or START
position, the supplemental air bag light illu-
minates for about 7 seconds and then turns
off. This means the system is operational.
APD0823APD0554
WARNING LABELS SUPPLEMENTAL AIR BAG
WARNING LIGHT
2-45
ZX
Page 75 of 235
If any of the following conditions occur, the
supplemental air bag needs servicing and
should be taken to your nearest authorized
NISSAN dealer:
1. The supplemental air bag light does not
come on for 7 seconds and then go off as
described above.
2. The supplemental air bag light flashes
intermittently or remains on.
3. The supplemental air bag light does not
come on at all.
Under these conditions, the Supplemental
Restraint System Air Bag does not operate
properly. It must be checked and repaired.
Repair and replacement procedure
The supplemental air bag system is de-
signed to inflate on a one-time-only basis.
As a reminder, unless it is damaged, the
supplemental air bag light remains illumi-
nated after inflation has occurred. Repair
and replacement of the supplemental air
bag system should be done only by autho-
rized NISSAN dealers.To ensure long-
term functioning, the system must be
inspected 10 years after the date of
manufacture as noted on the certifica-tion label located on the driver side front
pillar.
When maintenance work is required on the
vehicle, the supplemental air bag system
and related parts should be pointed out to
the person conducting the maintenance.
The ignition key should always be in the
LOCK position when working under the
hood or inside the vehicle.
WARNING
cOnce the supplemental air bag in-
flates, the supplemental air bag
module will not function again and
must be replaced. The supplemental
air bag module cannot be repaired.
cAfter an air bag inflates, the front
instrument panel assembly should
be replaced if damaged, by your NIS-
SAN dealer.
cThe supplemental air bag system
should be inspected by an autho-
rized NISSAN dealer if there is any
damage to the front end portion of
the vehicle or replaced if the supple-
mental air bag has inflated.c
When selling your vehicle, we re-
quest that you inform the buyer about
the supplemental air bag system and
guide the buyer to the appropriate
sections in this Owner's Manual.
cIf you need to dispose of a supple-
mental air bag or scrap the vehicle,
contact an authorized NISSAN dealer.
Correct supplemental air bag dis-
posal procedures are set forth in the
appropriate NISSAN Service Manual.
Incorrect disposal procedures could
cause personal injury.
2-46
ZX
Page 76 of 235
PRECAUTIONS ON SEAT BELT
USAGE
Your chances of being injured or killed in an
accident and/or the severity of injury may be
greatly reduced if you are wearing your seat
belt and it is properly adjusted. NISSAN
strongly encourages you and all of your
passengers to buckle up every time you
drive, even if your seating position includes
an air bag.
Some states, provinces or territories re-
quire that seat belts be worn at all times
when a vehicle is being driven.
WARNING
cEvery person who drives or rides in
this vehicle should wear a seat belt
at all times. Children should be in
appropriate child restraints.
cThe belts should be adjusted to a
snug fit. Failure to do so will reduce
the effectiveness of the entire re-
straint system and increases the
chances or severity of injury in an
accident.cDo not wear the belts inside out or
twisted. Be sure the seat belt tongue
is securely fastened to the proper
buckle.
cDo not allow more than one person
to use the same seat belt.
cAll seat belt assemblies, including
retractors and attaching hardware,
should be inspected at your NISSAN
dealer after any collision. NISSAN
recommends that all seat belt as-
semblies in use during a collision be
replaced unless the collision was
minor and the belts show no damage
and continue to operate properly.
Seat belt assemblies not in use dur-
ing a collision should also be in-
spected and replaced if either dam-
age or improper operation is noted.
cNever carry more people in the ve-
hicle than there are seat belts.cIf the seat belt warning light glows
continuously while the ignition is
turned ON with all doors closed and
all seat belts fastened, it may indi-
cate a malfunction in the system.
Have the system checked by your
NISSAN dealer.
cBe sure to observe the following
cautions when using seat belts. Fail-
ure to do so could increase the
chance and/or severity of injury in an
accident.
cAlways route the shoulder belt over
your outer shoulder and across your
chest. Never run the belt under your
arm. Serious injury can occur if the
seat belt is not worn properly.
cPosition the lap belt as low as pos-
sible AROUND THE HIPS, NOT THE
WAIST.
cSerious injury or death can occur if
seat belts are not worn properly.
SEAT BELTS
2-47
ZX
Page 84 of 235
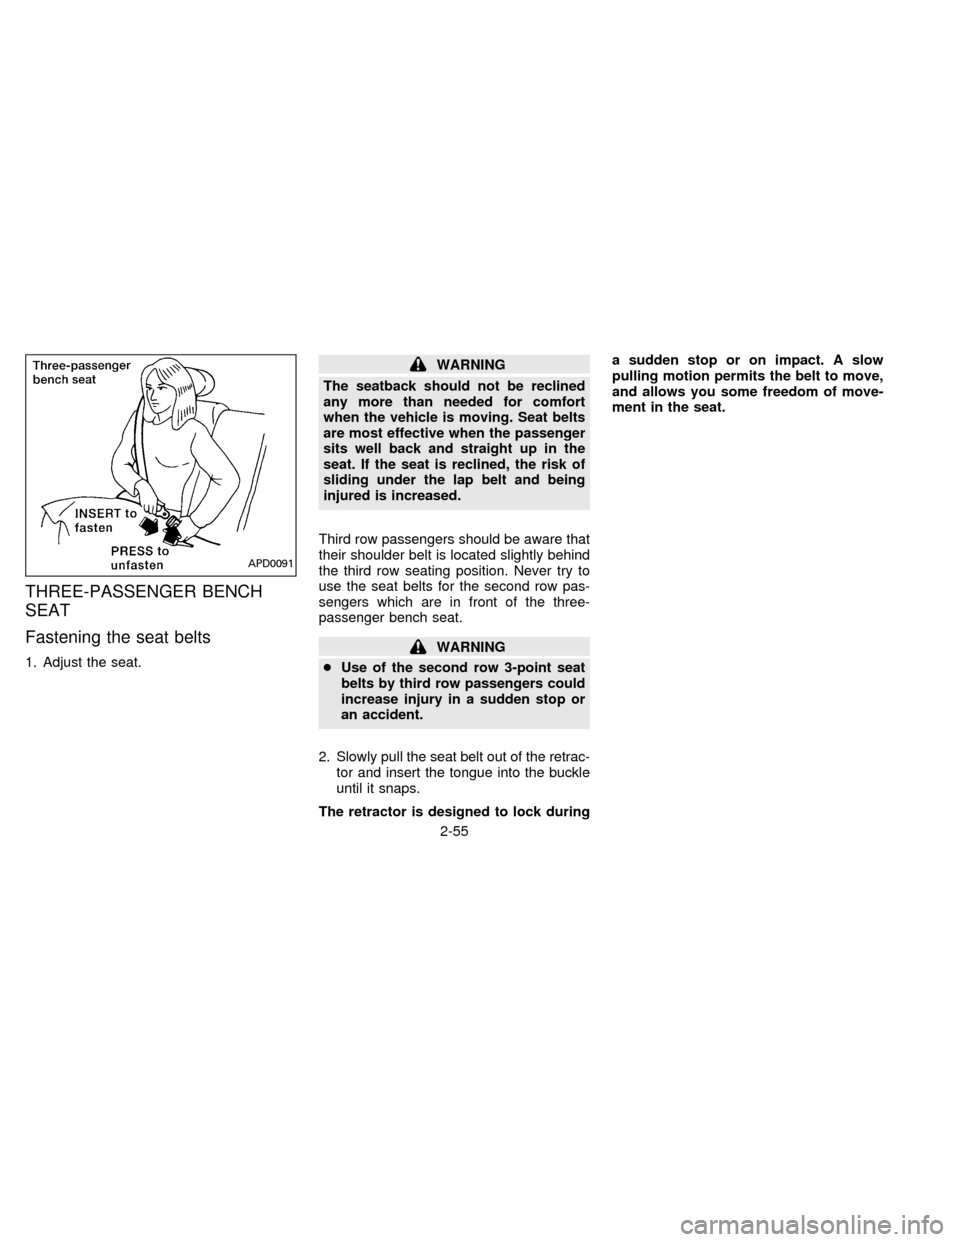
THREE-PASSENGER BENCH
SEAT
Fastening the seat belts
1. Adjust the seat.
WARNING
The seatback should not be reclined
any more than needed for comfort
when the vehicle is moving. Seat belts
are most effective when the passenger
sits well back and straight up in the
seat. If the seat is reclined, the risk of
sliding under the lap belt and being
injured is increased.
Third row passengers should be aware that
their shoulder belt is located slightly behind
the third row seating position. Never try to
use the seat belts for the second row pas-
sengers which are in front of the three-
passenger bench seat.
WARNING
cUse of the second row 3-point seat
belts by third row passengers could
increase injury in a sudden stop or
an accident.
2. Slowly pull the seat belt out of the retrac-
tor and insert the tongue into the buckle
until it snaps.
The retractor is designed to lock duringa sudden stop or on impact. A slow
pulling motion permits the belt to move,
and allows you some freedom of move-
ment in the seat.
APD0091
2-55
ZX
Page 98 of 235
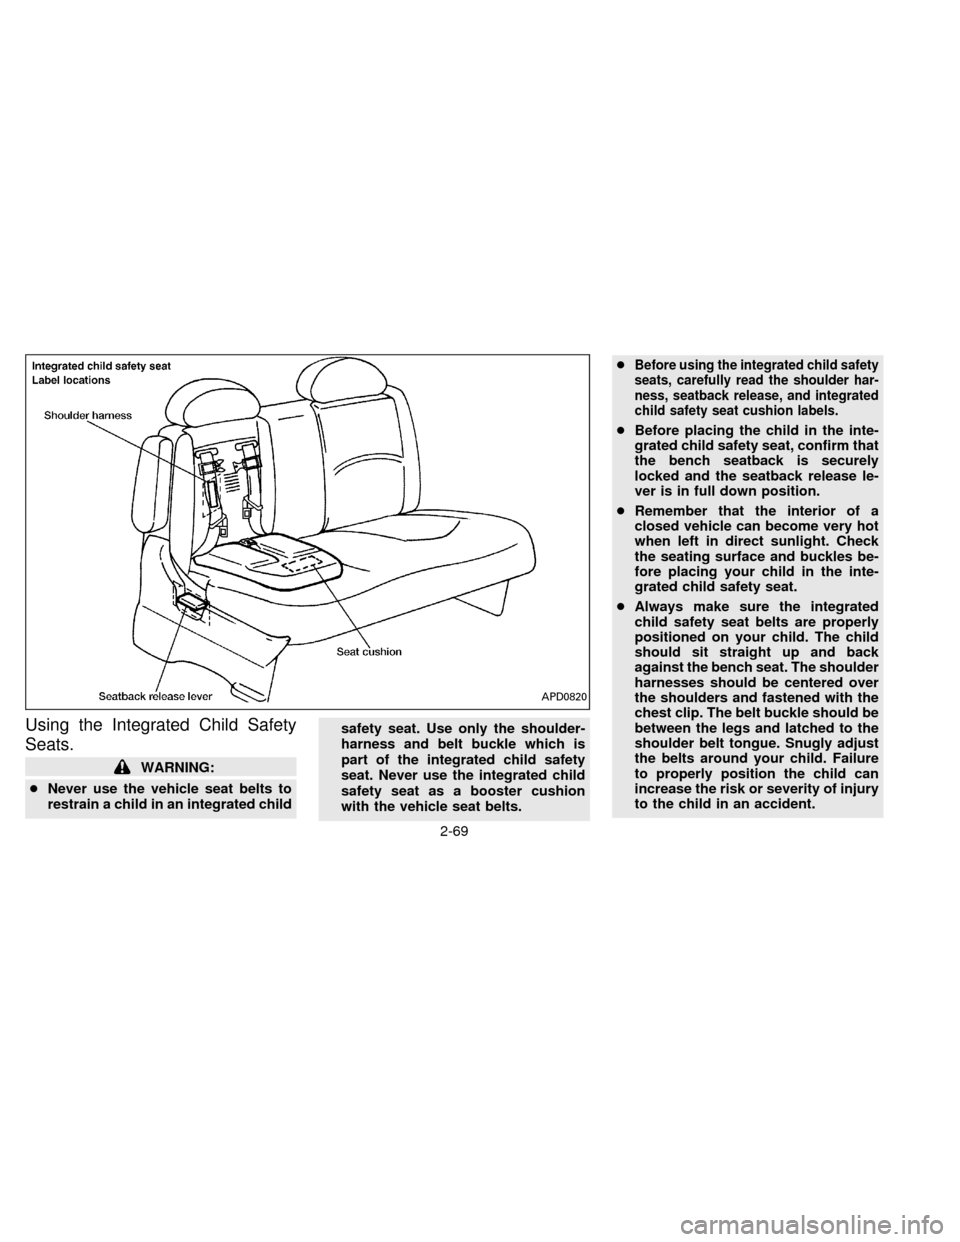
Using the Integrated Child Safety
Seats.
WARNING:
cNever use the vehicle seat belts to
restrain a child in an integrated childsafety seat. Use only the shoulder-
harness and belt buckle which is
part of the integrated child safety
seat. Never use the integrated child
safety seat as a booster cushion
with the vehicle seat belts.c
Before using the integrated child safety
seats, carefully read the shoulder har-
ness, seatback release, and integrated
child safety seat cushion labels.
cBefore placing the child in the inte-
grated child safety seat, confirm that
the bench seatback is securely
locked and the seatback release le-
ver is in full down position.
cRemember that the interior of a
closed vehicle can become very hot
when left in direct sunlight. Check
the seating surface and buckles be-
fore placing your child in the inte-
grated child safety seat.
cAlways make sure the integrated
child safety seat belts are properly
positioned on your child. The child
should sit straight up and back
against the bench seat. The shoulder
harnesses should be centered over
the shoulders and fastened with the
chest clip. The belt buckle should be
between the legs and latched to the
shoulder belt tongue. Snugly adjust
the belts around your child. Failure
to properly position the child can
increase the risk or severity of injury
to the child in an accident.
APD0820
2-69
ZX