1996 CHEVROLET ASTRO wheel
[x] Cancel search: wheelPage 164 of 372
Off-Road Recovery
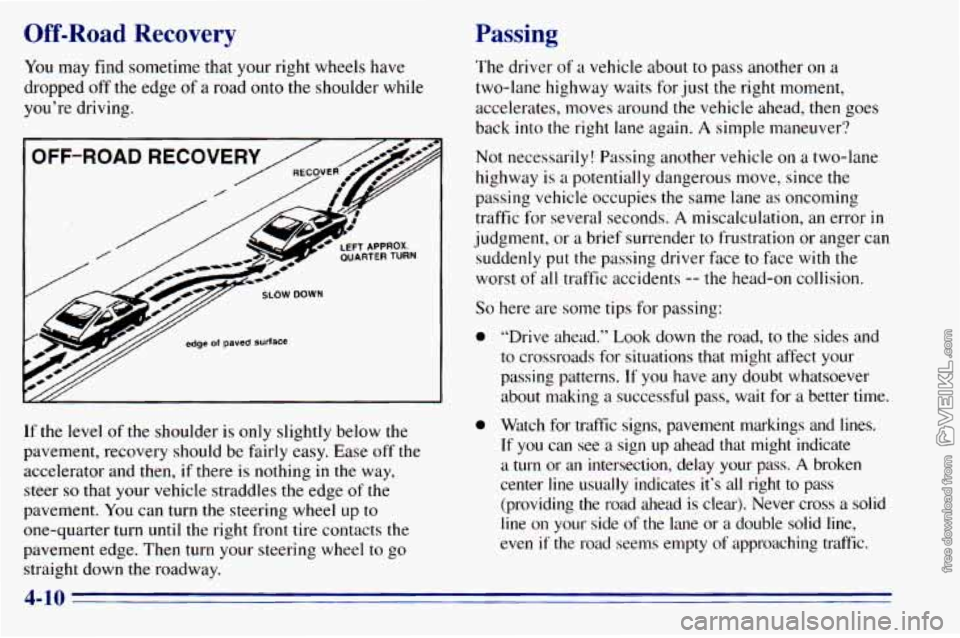
You may find sometime that your right wheels have
dropped off the edge
of a road onto the shoulder while
you’re driving.
If
the level of the shoulder is only slightly below the
pavement, recovery should be fairly easy. Ease off the
accelerator and then, if there
is nothing in the way,
steer
so that your vehicle straddles the edge of the
pavement. You can turn the steering wheel up to
one-quarter turn until the right front tire contacts the
pavement edge. Then turn your steering wheel
to go
straight down the roadway.
Passing
The driver of a vehicle about to pass another on a
two-lane highway waits for just the right moment,
accelerates, moves around the vehicle ahead, then goes
back
into the right lane again. A simple maneuver?
Not necessarily! Passing another vehicle on a two-lane
highway is a potentially dangerous move, since the
passing vehicle occupies the same lane as oncoming
traffic for several seconds.
A miscalculation, an error in
judgment, or a brief surrender to frustration or anger can
suddenly put the passing driver face
to face with the
worst
of all traffic accidents -- the head-on collision.
So here are some tips for passing:
0 “Drive ahead.” Look down the road, to the sides and
to crossroads for situations that might affect your
passing patterns.
If you have any doubt w’hatsoever
about making a successful pass, wait for a better time.
0 Watch for traffic signs, pavement markings and lines.
If you can see a sign up ahead that might indicate
a
turn or an intersection, delay your pass. A broken
center line usually indicates it’s all right to pass (providing the road ahead is clear). Never cross a solid
line
on your side of the lane or a double solid line,
even
if the road seems empty of approaching traffic.
4-10
Page 166 of 372
Loss of Control
Let’s review what driving experts say about what
happens when the three control systems (brakes, steering
and acceleration) don’t have enough friction where the
tires meet the road
to do what the driver has asked.
In
any emergency, don’t give up. Keep trying to
steer and constantly seek an escape route or area of
less danger.
Skidding
In a skid, a driver can lose control of the vehicle.
Defensive drivers avoid most skids by taking
reasonable care suited to existing conditions, and by
not “overdriving” those conditions. But skids are
always possible.
The three types
of skids correspond to your vehicle’s
three control systems. In the braking skid, your wheels
aren’t rolling. In
the steering or cornering skid, too
muchspeed or steering
in a curve causes tires to slip and
lose cornering force. And in the acceleration skid, too
much throttle causes the driving wheels
to spin.
A cornering skid and an acceleration skid are best
handled by easing your foot off the accelerator pedal.
If your vehicle starts to slide, ease your foot off the
accelerator pedal and quickly steer the way
you want the
vehicle
to go. If you start steering quickly enough, your
vehicle may straighten out. Always be ready for a
second skid
if it occurs.
Of course, traction is reduced when water, snow, ice,
gravel or other material is on the road. For safety,
you’ll
want to slow down and adjust your driving to these
conditions. It is important to slow down
on slippery
surfaces because stopping distance will be longer and
vehicle control more limited.
While driving on a surface with reduced traction, try
your best to avoid sudden steering, acceleration or
braking (including engine braking by shifting
to a lower
gear).
Any sudden changes could cause the tires to slide.
You may not realize the surface is slippery until your
vehicle is skidding. Learn to recognize warning clues
--
such as enough water, ice or packed snow on the road to
make a “mirrored surface”
-- and slow down when you
have any doubt.
Remember: Any anti-lock brake system (ABS) helps
avoid only
the braking skid.
4-12
Page 174 of 372
Highway Hypnosis
Is there actually such a condition as “highway hypnosis”?
Or
is it just plain falling asleep at the wheel? Call it
highway hypnosis, lack of awareness, or whatever.
There is something about an easy stretch of road with
the
same scenery, along with the hum of the tires on the road,
the drone
of the engine, and the rush of the wind against
the vehicle that can make
you sleepy. Don’t let it happen
to you! If it does, your vehicle can leave the road in Zess
than a secund, and you could crash and be injured.
What
can you do about highway hypnosis? First, be
aware
that it can happen.
Then here are
some tips:
0 Make sure your vehicle is well ventilated, with a
comfortably cool interior.
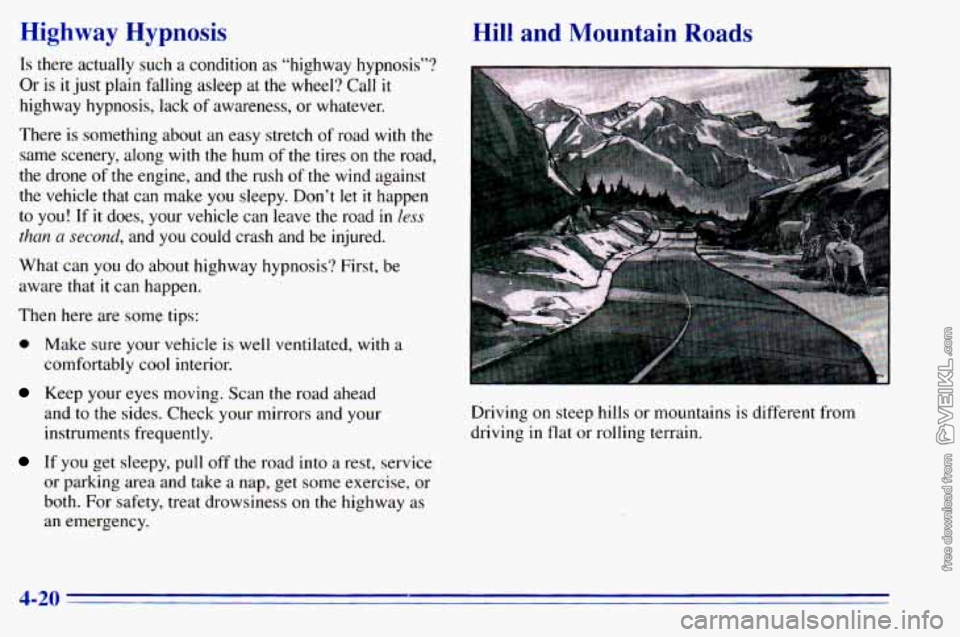
Hill and Mountain Roads
Keep your eyes moving. Scan the road ahead
and to the sides. Check your mirrors and your
instruments frequently. Driving on
steep hills or mountains is different from
driving
in flat or rolling terrain.
If you get sleepy, pull off the road into a rest, service
or parking area and take a nap, get some exercise, or
both. For safety, treat drowsiness
on the highway as
an emergency.
4-20
Page 177 of 372
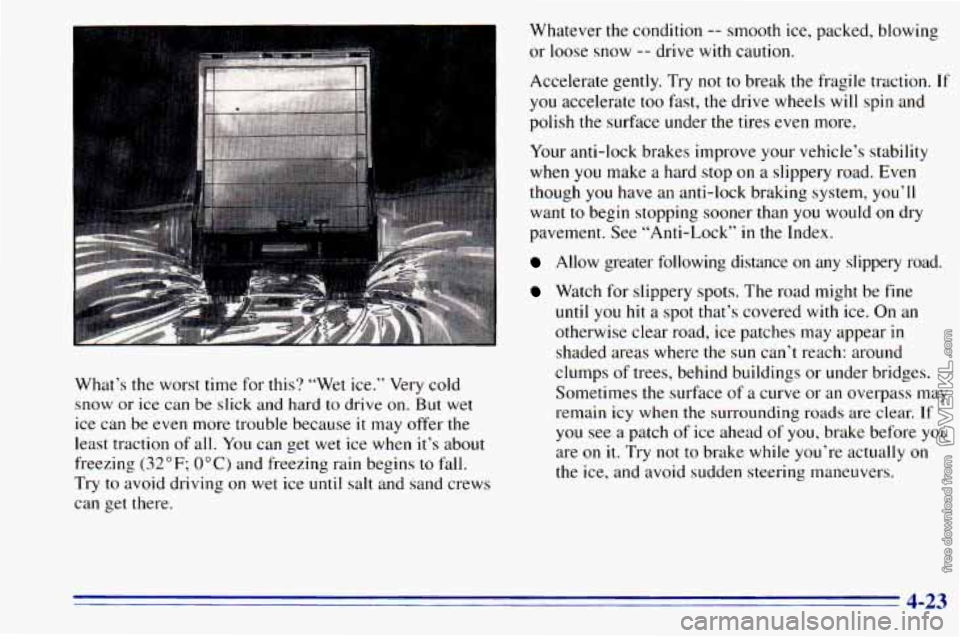
What’s the worst time for this? “Wet ice.” Very cold
snow or
ice can be slick and hard to drive on. But wet
ice can be even more trouble because
it may offer the
least traction
of all. You can get wet ice when it’s about
freezing
(32°F; OOC) and freezing rain begins to fall.
Try
to avoid driving on wet ice until salt and sand crews
can get there. Whatever
the condition -- smooth ice,
packed, blowing
or loose snow
-- drive with caution.
Accelerate gently. Try
not to break the fragile traction. If
you accelerate too fast, the drive wheels will spin and
polish the surface under the tires even more.
Your anti-lock brakes improve your vehicle’s stability
when
you make a hard stop on a slippery road. Even
though
you have an anti-lock braking system, you’ll
want to begin stopping sooner than
you would on dry
pavement. See “Anti-Lock”
in the Index.
Allow greater following distance on any slippery road.
Watch for slippery spots. The road might be fine
until you hit a spot that’s covered with ice. On an
otherwise clear road, ice patches may appear
in
shaded areas where the sun can’t reach: around
clumps of trees, behind buildings or under bridges.
Sometimes the surface of a curve or an overpass may
remain icy when the surrounding roads are clear.
If
you see a patch of ice ahead of you, brake before you
are on
it. Try not to brake while you’re actually on
the ice, and avoid sudden steering maneuvers.
Page 184 of 372
If You Do Decide To Pull A Trailer
If you do, here are some important points:
0
0
0
0
0
There are many different laws, including speed limit
restrictions, having
to do with trailering. Make sure
your rig will be legal,
not only where you live but
also where
you’ll be driving. A good source for this
information can be state or provincial police.
Consider using a sway control
if your trailer will
weigh 2,000 lbs.
(900 kg) or less. You should always
use a sway control if your trailer will weigh more
than 2,000 lbs.
(900 kg). You can ask a hitch dealer
about sway controls.
Don’t tow a trailer
at all during the first 500 miles
(800 km) your new vehicle is driven. Your engine,
axle or other parts could be damaged.
Then, during the first
500 miles (800 km) that you
tow a trailer, don’t drive over
50 mph (80 km/h) and
don’t make starts at
full throttle. This helps your
engine and other parts of your vehicle wear in at
the
heavier loads.
You should
use DRIVE (D) (or, as you need to,
a lower gear) when towing
a trailer. Operating your
vehicle in DRIVE
(D) when towing a trailer will
minimize heat buildup and extend the
life of
your transmission. Three
important considerations have to do with weight:
the weight
of the trailer,
the weight
of the trailer tongue
and the weight
on your vehicle’s tires.
Weight of the Trailer
How heavy can a trailer safely be?
It depends on how you plan to use your rig. For
example, speed, altitude, road grades, outside
temperature and how much your vehicle is used to pull a
trailer are all important. And, it can also depend
on any
special equipment
that you have on your vehicle.
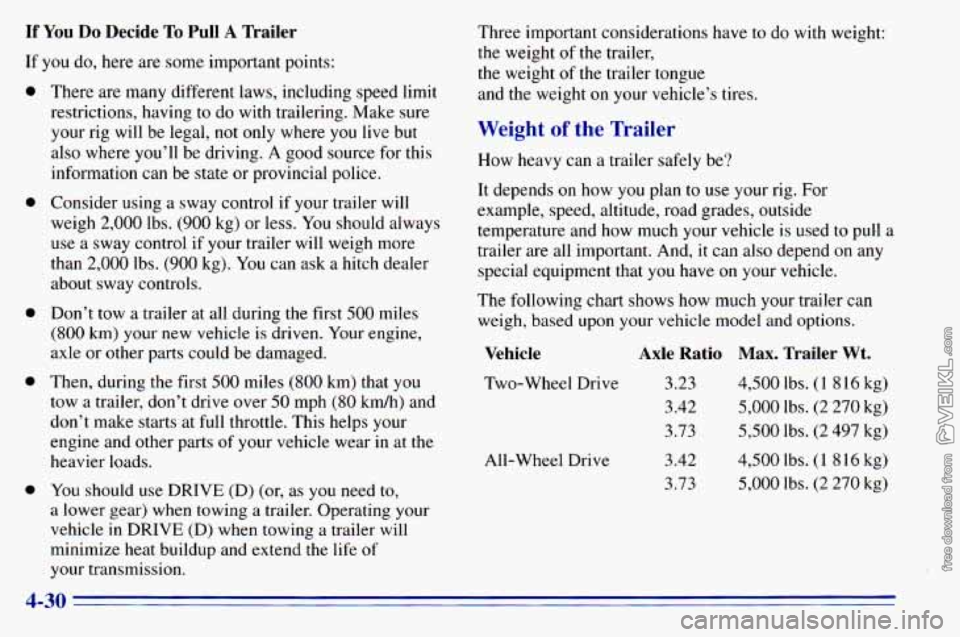
The following chart shows how much your trailer can
weigh, based upon your vehicle model and options.
Vehicle
Two-Wheel Drive
All-Wheel Drive
Axle Ratio Max. Trailer Wt.
3.23
3.42
3.73
3.42
3.73 4,500 lbs. (1 8 16 kg)
5,000 lbs. (2 270 kg)
5,500 lbs. (2 497 kg)
4,500 lbs.
(1 8 16 kg)
5,000 lbs. (2 270 kg)
4-30
Page 188 of 372
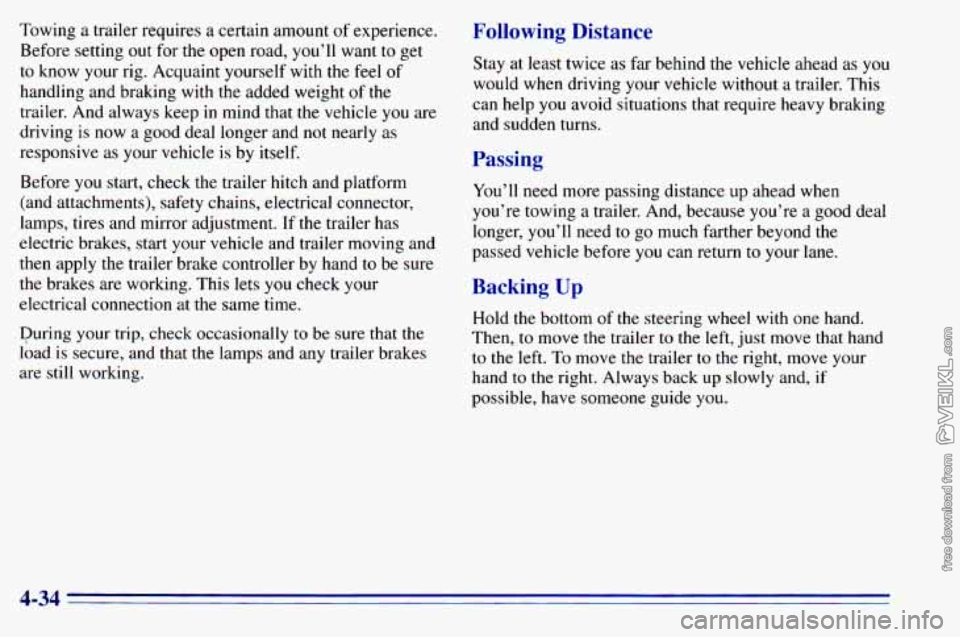
Towing a trailer requires a certain amount of experience.
Before setting out for the open road,
you’ll want to get
to know your rig. Acquaint yourself with the
feel of
handling and braking with the added weight of
the
trailer. And always keep in mind that the vehicle you are
driving is now a good deal longer and not nearly as
responsive as your vehicle is by itself.
Before
you start, check the trailer hitch and platform
(and attachments), safety chains, electrical connector,
lamps, tires and mirror adjustment. If the trailer has
electric brakes, start your vehicle and trailer moving and
then apply the trailer brake controller by hand to be sure
the brakes are working. This lets you check your
electrical connection at the same time.
During your trip, check occasionally to be sure that the
load is secure, and that the lamps and any trailer brakes
are still working.
lowing Distance
>ray at least twice as far behind the vehicle ahead as you
would when driving your vehicle without a trailer. This
can help you avoid situations that require heavy braking
and sudden turns.
Passing
You’ll need more passing distance up ahead when
you’re towing
a trailer. And, because you’re a good deal
longer,
you’ll need to go much farther beyond the
passed vehicle before you can return to your lane.
Backing Up
Hold the bottom of the steering wheel with one hand.
Then, to move the trailer
to the left, just move that hand
to the left. To move the trailer to the right, move your
hand to the right. Always back up slowly and,
if
possible, have someone guide you.
4-34
Page 190 of 372

Parking on Hills
Youereally should not park your vehicle, with a trailer
attached,
on a hill. If something goes wrong, your rig
could start to move. People can be injured, and both
your vehicle and the trailer can be damaged.
But
if you ever have to park your rig on a hill, here’s
how to do it:
1. Apply your regular brakes, but don’t shift into
PARK
(P) yet. Turn your wheels into the curb
when facing downhill and away from the curb when
facing uphill.
2. Have someone place chocks under the trailer wheels.
3, When the wheel chocks are in place, release the
regular brakes until the chocks absorb the load.
4. Reapply the regular brakes. Then apply your parking
brake, and shift to PARK
(P).
5. Release the regular brakes.
When You Are Ready to Leave After
Parking on a
Hill
1. Apply your regular brakes and hold the pedal down
while you:
Start your engine;
Shift into a gear; and
0 Release the parking brake.
2. Let up on the brake pedal.
3. Drive slowly until the trailer is clear of the chocks.
4. Stop and have someone pick up and store the chocks.
Maintenance When Trailer Towing
Your vehicle will need service more often when you’re
pulling a trailer. See the Maintenance Schedule for more
on this. Things that are especially important in trailer
operation are automatic transmission fluid (don’t
overfill), engine
oil, axle lubricant, belt, cooling system
and brake adjustment. Each
of these is covered in this
manual, and
the Index will help you find them quickly.
If you’re trailering, it’s a good idea
to review these
sections before you start your trip.
Check periodically
to see that all hitch nuts and bolts
are tight.
4-36
Page 191 of 372
Trailer Wiring Harness
If you have the optional trailering package, your vehicle
will have an eight-wire harness, including the center
high-mounted stoplamp battery feed wire. The harness
is stored on the passenger side
of the vehicle near the
rear wheel well. This harness
has a 30 amp battery feed
wire and no connector, and should be wired by a
qualified electrical technician. After choosing an
aftermarket trailer mating connector pair, have the
technician attach one connector to the eight-wire trailer
harness and the other connector to the wiring harness on
the trailer, Be sure the wiring harness on the trailer is
taped or strapped
to the trailer’s frame rail and leave it
loose enough
so the wiring doesn’t bend or break, but
not
so loose that it drags on the ground. The eight-wire
harness must be routed out
of your vehicle between the
rear door and the floor, with enough of the harness left
on both sides
so that the trailer or the body won’t pull it.
If you do not have the optional trailering package, your
vehicle will still have a trailering harness.
The harness is
located near the passenger’s side rear wheel well. It
consists of six wires that may be used
by after-market
trailer hitch installers. The technician can use the
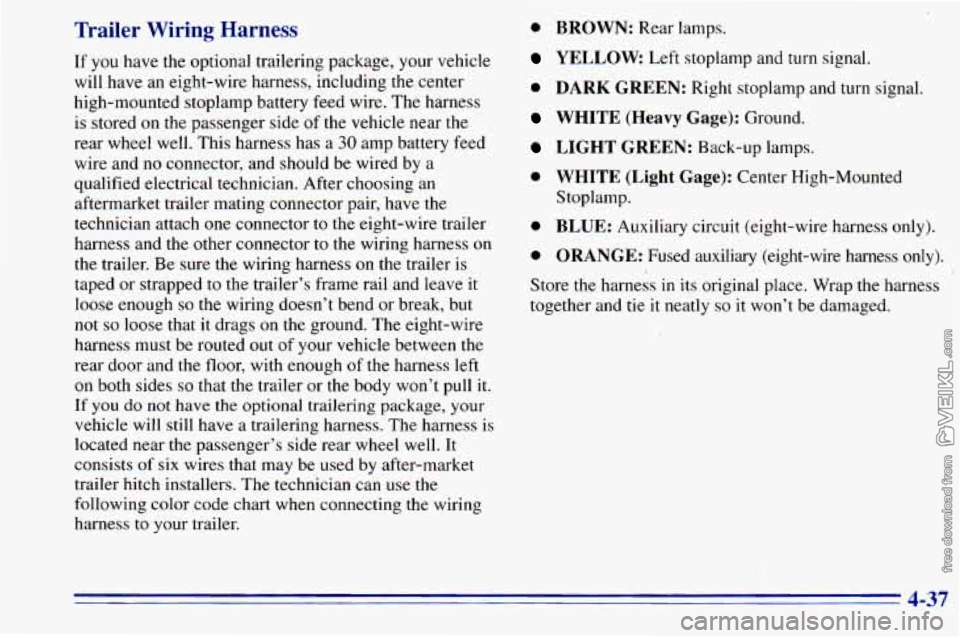
following color code chart when connecting the wiring
harness to your trailer.
0 BROWN: Rear lamps.
YELLOW Left stoplamp and turn signal.
0 DARK GREEN: Right stoplamp and turn signal.
WHITE (Heavy Gage): Ground.
LIGHT GREEN: Back-up lamps.
0 WHITE (Light Gage): Center High-Mounted
0 BLUE: Auxiliary circuit (eight-wire harness only).
0 ORANGE: Fused auxiliary (eight-wire harness only).
xore the harness in its original place. Wrap the harness
together and
tie it neatly so it won’t be damaged.
Stoplamp.
4-37