1995 HONDA ODYSSEY brake light
[x] Cancel search: brake lightPage 174 of 240
Lights
Check the operation of your car's
exterior lights at least once a month.
A burned out bulb can create an unsafe condition by reducing your
car's visibility and the ability to
signal your intentions to other
drivers.
Check the following:
Headlights (low and high beam)
Parking lights
Taillights Brake lights
High-mount brake light
Turn signals Back-up lights
Hazard light function
License plate light
Side marker lights
Daytime running lights (Canadian cars)
If you find any bulbs are burned out,
replace them as soon as possible. Refer to the chart on page 219 to
determine what type of replacement
bulb is needed. Headlight Aiming
The headlights were properly aimed when your car was new. You shouldcheck their aim if you regularly carry
heavy items in the cargo area or pull a trailer. Each headlight assembly
has horizontal and vertical adjust-
ment indicators. These are set to
their "0" positions after the
headlights are aimed at the factory.
To check these settings: 1. Make sure the fuel tank is full. Park the car on level ground.
2. The driver or someone who weighs the same should be sittingin the driver's seat for all checksand adjustments.
Load your car with the items you
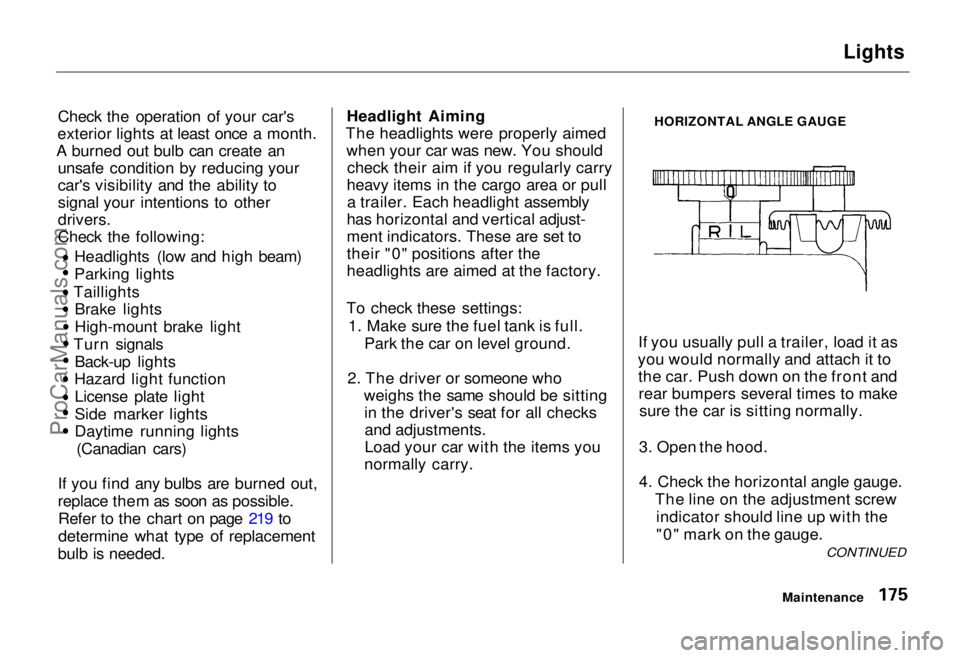
normally carry. HORIZONTAL ANGLE GAUGE
If you usually pull a trailer, load it as
you would normally and attach it to the car. Push down on the front andrear bumpers several times to make sure the car is sitting normally.
3. Open the hood.
4. Check the horizontal angle gauge. The line on the adjustment screwindicator should line up with the
"0" mark on the gauge.
Maintenance
CONTINUEDProCarManuals.comMain Menu Table of Contents s t
Page 181 of 240
Storing Your Car
If you need to park your car for an
extended period (more than 1
month), there are several things you should do to prepare it for storage.
Proper preparation helps prevent
deterioration and makes it easier to
get your car back on the road. It is best to store your car indoors if at all
possible.
Fill the fuel tank. Change the engine oil and filter
(see page 148 ). Wash and dry the exterior
completely.
Clean the interior. Make sure the
carpeting, floor mats, etc. are
completely dry. Leave the parking brake off. Put
the transmission in Park. Block the rear wheels.
If the car is to be stored for a
longer period, it should be supported on jackstands so the
tires are off the ground. Leave one window open slightly (if
the car is being stored indoors).
Disconnect the battery. Support the front and rear wiper
blade arms with a folded towel or
rag so they do not touch the
windshield. Apply a silicone spray lubricant to
all door and tailgate seals. Also,
apply wax to the painted surfaces
that mate with the door and
tailgate seals. Cover the car with a "breathable"
car cover, one made from a porous
material such as cotton.
Nonporous materials, such as plastic sheeting, trap moisture
which can damage the paint. If possible, run the engine for a
while periodically (preferably once a month).
If you store your car for 12 months
or longer, have your Honda dealer
perform the inspections called for in
the 24 months/48,000 km (30,000
miles) maintenance schedule (Normal Conditions) as soon as you
take it out of storage (see page 140 ).
The replacements called for in the maintenance schedule are notneeded unless the car has actually
reached that time or mileage.
MaintenanceProCarManuals.comMain Menu Table of Contents s t
Page 192 of 240
Changing a Flat Tire
If you have a flat tire while driving, stop in a safe place to change it.
Stopping in traffic or on the shoulder of a busy road is dangerous. Drive
slowly along the shoulder until you
get to an exit or an area to stop that
is far away from the traffic lanes.
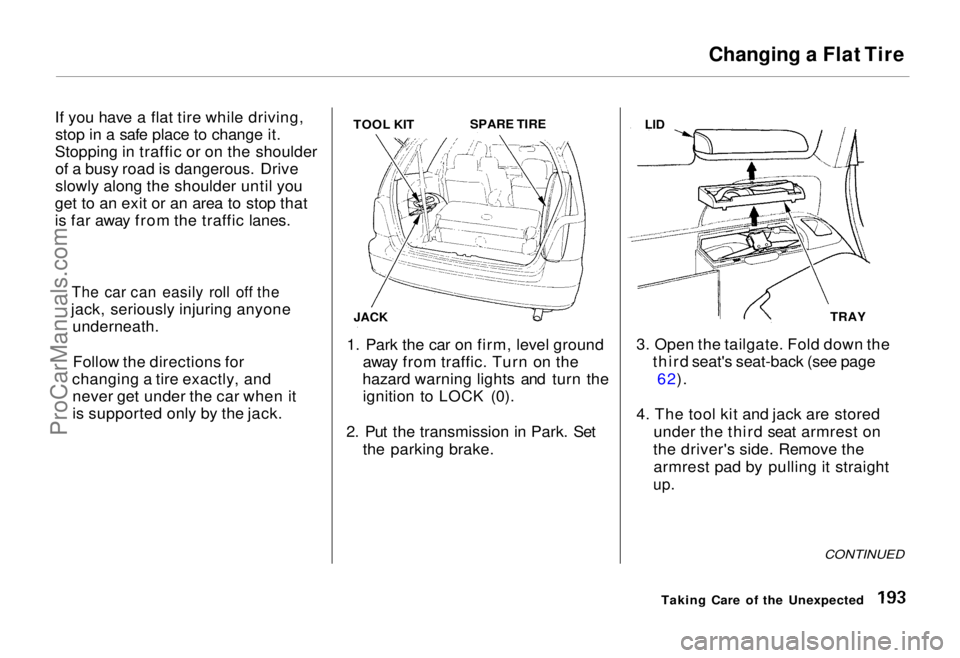
1. Park the car on firm, level groundaway from traffic. Turn on the
hazard warning lights and turn the ignition to LOCK (0).
2. Put the transmission in Park. Set the parking brake. 3. Open the tailgate. Fold down the
third seat's seat-back (see page
62).
4. The tool kit and jack are stored under the third seat armrest on
the driver's side. Remove the armrest pad by pulling it straight
up.
Taking Care of the Unexpected
CONTINUED
The car can easily roll off the
jack, seriously injuring anyone underneath.
Follow the directions for
changing a tire exactly, and never get under the car when it
is supported only by the jack. TOOL KIT
JACK
SPARE TIRE
TRAY
LIDProCarManuals.comMain Menu Table of Contents s t
Page 199 of 240
If Your Engine Won't Start, Jump Starting
The Starter Operates Normally In this case, the starter motorsounds normal when you turn the
ignition switch to START (III), but
the engine does not run.
Are you using the proper startingprocedure? Refer to Starting the
Engine on page 119 .
Do you have fuel? Turn the
ignition switch to ON (II) for a
minute and watch the fuel gauge.
The low fuel level warning light may not be working, so you were
not reminded to fill the tank.
There may be an electrical problem, such as no power to the
fuel pump. Check all the fuses (see page 208 ).
If you find nothing wrong, you will
need a qualified technician to find
the problem. See Towing on page 213. Jump Starting
If your car's battery has run clown,
you may be able to start the engine by using a booster battery. Although
this seems like a simple procedure,
there are several precautions youshould take. Follow the directions
closely.
You cannot start a Honda by pushing or pulling it. To jump start your car:
1. Open the hood and check the physical condition of the battery(see page 162 ). In very cold
weather, check the condition of
the electrolyte. If it seems slushy or like ice, do not try jump starting
until it thaws.
Taking Care of the Unexpected
If a battery sits in extreme cold, the
electrolyte inside can freeze.
Attempting to lump start with a frozen battery can cause it to rupture or
explode.
2. Turn off all the electrical acces- sories: heater, A/C, stereo system,
lights, etc.
Put the transmission in Neutral or
Park and set the parking brake.
A battery can explode if you do
not follow the correct procedure,
seriously injuring anyone nearby.
Keep all sparks, open flames,
and smoking materials away
from the battery.ProCarManuals.comMain Menu Table of Contents s t
Page 217 of 240
Specifications
Technical Information
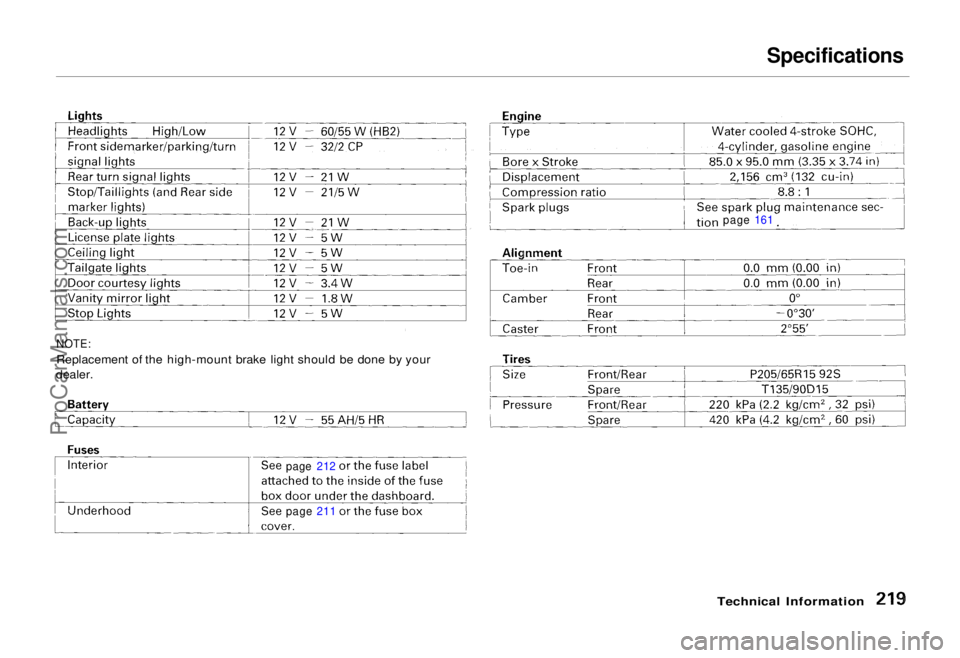
NOTE:
Replacement of the high-mount brake light should be done by your
dealer.
page 212
page 211 page 161ProCarManuals.comMain Menu Table of Contents s t
Page 218 of 240
Anti-lock Brake System
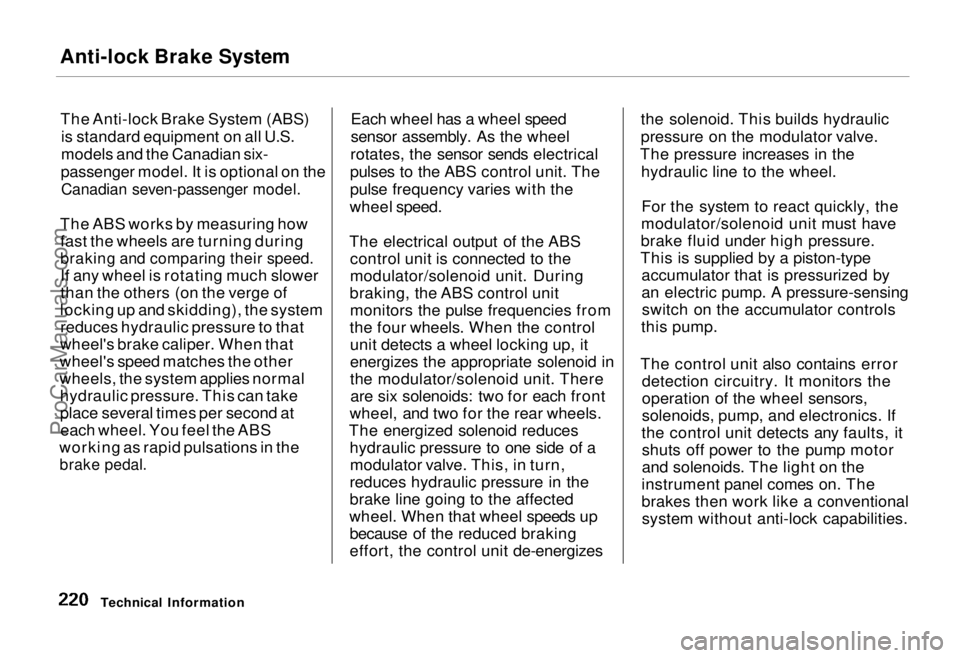
The Anti-lock Brake System (ABS) is standard equipment on all U.S.
models and the Canadian six-
passenger model. It is optional on the
Canadian seven-passenger model.
The ABS works by measuring how fast the wheels are turning during
braking and comparing their speed.
If any wheel is rotating much slower
than the others (on the verge of
locking up and skidding), the system reduces hydraulic pressure to that
wheel's brake caliper. When that
wheel's speed matches the other
wheels, the system applies normal hydraulic pressure. This can take
place several times per second ateach wheel. You feel the ABS
working as rapid pulsations in the
brake pedal.
Each wheel has a wheel speed
sensor assembly. As the wheel
rotates, the sensor sends electrical
pulses to the ABS control unit. The
pulse frequency varies with the
wheel speed.
The electrical output of the ABS control unit is connected to the
modulator/solenoid unit. During
braking, the ABS control unit monitors the pulse frequencies from
the four wheels. When the control unit detects a wheel locking up, it
energizes the appropriate solenoid in
the modulator/solenoid unit. Thereare six solenoids: two for each front
wheel, and two for the rear wheels.
The energized solenoid reduces hydraulic pressure to one side of amodulator valve. This, in turn,
reduces hydraulic pressure in the
brake line going to the affected
wheel. When that wheel speeds up because of the reduced braking
effort, the control unit de-energizes the solenoid. This builds hydraulic
pressure on the modulator valve.
The pressure increases in the hydraulic line to the wheel.
For the system to react quickly, the
modulator/solenoid unit must have
brake fluid under high pressure.
This is supplied by a piston-type accumulator that is pressurized by
an electric pump. A pressure-sensingswitch on the accumulator controls
this pump.
The control unit also contains error detection circuitry. It monitors the
operation of the wheel sensors,
solenoids, pump, and electronics. If
the control unit detects any faults, it shuts off power to the pump motor
and solenoids. The light on the
instrument panel comes on. The
brakes then work like a conventional system without anti-lock capabilities.
Technical InformationProCarManuals.comMain Menu Table of Contents s t
Page 232 of 240
Index
Accessories
Installation.................................. 115
ACCESSORY (Ignition Key
Position)....................................... 52
Adding Automatic Transmission
Fluid........................................ 155
Brake Fluid................................. 156
Engine Coolant........................... 150
Engine Oil................................... 146
Power Steering Fluid................. 157
Windshield Washer Fluid......... 154
Additional Safety Information........ 18 Door Locks................................... 19
Driving with Pets......................... 19
Head Restraint Position.............. 18
Seat-back Position........................ 18
Storing Cargo Safely................... 19
Additives, Engine Oil..................... 148
Adjustments
Mirrors.......................................... 67
Head Restraints........................... 58
Seats.............................................. 56
Steering Wheel............................ 46
Airbag (SRS) .................................... 12
Air Cleaner..................................... 157
Air Conditioning............................... 76
Maintenance............................... 168
Usage............................................. 78
Air Outlets (Vents).......................... 76
Air Pressure, Tires........................ 170
Alcohol and Drugs........................... 28
Alcohol in Gasoline........................ 109
Antifreeze....................................... 150
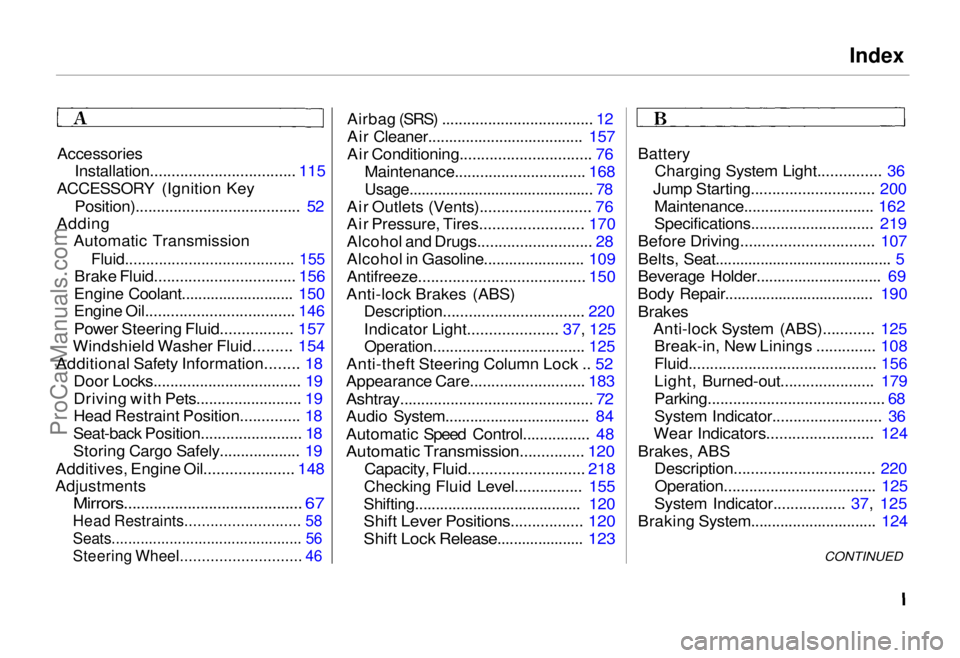
Anti-lock Brakes (ABS)
Description................................. 220
Indicator Light..................... 37, 125
Operation.................................... 125
Anti-theft Steering Column Lock .. 52
Appearance Care........................... 183
Ashtray.............................................. 72
Audio System................................... 84
Automatic Speed Control................ 48
Automatic Transmission............... 120
Capacity, Fluid........................... 218
Checking Fluid Level................ 155
Shifting........................................ 120
Shift Lever Positions................. 120
Shift Lock Release..................... 123
Battery
Charging System Light............... 36
Jump Starting............................. 200 Maintenance............................... 162
Specifications............................. 219
Before Driving............................... 107
Belts, Seat........................................... 5
Beverage Holder.............................. 69
Body Repair.................................... 190
Brakes
Anti-lock System (ABS)............ 125Break-in, New Linings .............. 108
Fluid............................................ 156
Light, Burned-out...................... 179
Parking.......................................... 68
System Indicator.......................... 36
Wear Indicators......................... 124
Brakes, ABS Description................................. 220
Operation.................................... 125
System Indicator................. 37, 125
Braking System.............................. 124
CONTINUEDProCarManuals.comMain Menu s t Main Menu s t
Page 233 of 240
Index
Break-in, New Car......................... 108
Brightness Control, Instruments... 43
Brights, Headlights......................... 42
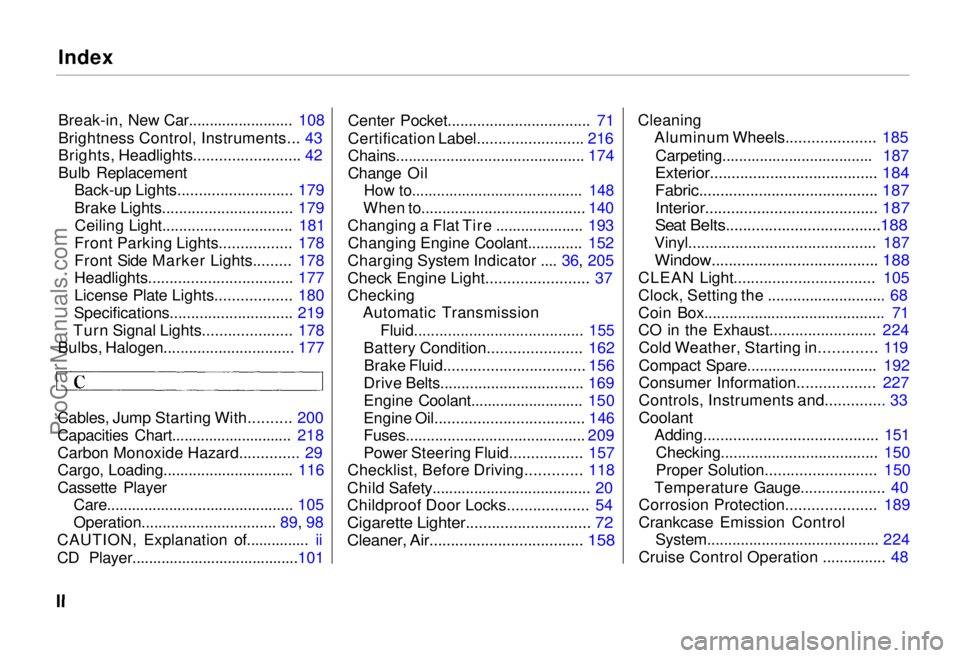
Bulb Replacement
Back-up Lights........................... 179
Brake Lights............................... 179
Ceiling Light............................... 181
Front Parking Lights................. 178
Front Side Marker Lights......... 178
Headlights.................................. 177
License Plate Lights.................. 180
Specifications............................. 219
Turn Signal Lights..................... 178
Bulbs, Halogen............................... 177
Cables, Jump Starting With.......... 200
Capacities Chart............................. 218
Carbon Monoxide Hazard.............. 29
Cargo, Loading............................... 116
Cassette Player Care............................................. 105
Operation................................ 89, 98
CAUTION, Explanation of............... ii
CD Player........................................101 Center Pocket.................................. 71
Certification Label......................... 216
Chains............................................. 174
Change Oil
How to......................................... 148
When to....................................... 140
Changing a Flat Tire ..................... 193 Changing Engine Coolant............. 152
Charging System Indicator .... 36, 205
Check Engine Light........................ 37
Checking Automatic Transmission
Fluid........................................ 155
Battery Condition...................... 162 Brake Fluid................................. 156
Drive Belts.................................. 169
Engine Coolant........................... 150
Engine Oil................................... 146
Fuses........................................... 209
Power Steering Fluid................. 157
Checklist, Before Driving............. 118
Child Safety...................................... 20
Childproof Door Locks................... 54
Cigarette Lighter............................. 72
Cleaner, Air.................................... 158
Cleaning
Aluminum Wheels..................... 185
Carpeting.................................... 187
Exterior....................................... 184
Fabric.......................................... 187
Interior........................................ 187
Seat Belts....................................188
Vinyl............................................ 187
Window....................................... 188
CLEAN Light................................. 105
Clock, Setting the ............................ 68
Coin Box........................................... 71
CO in the Exhaust......................... 224 Cold Weather, Starting in............. 119
Compact Spare............................... 192
Consumer Information.................. 227
Controls, Instruments and.............. 33
Coolant
Adding......................................... 151
Checking..................................... 150
Proper Solution.......................... 150
Temperature Gauge.................... 40
Corrosion Protection..................... 189
Crankcase Emission Control System......................................... 224
Cruise Control Operation ............... 48ProCarManuals.comMain Menu s t Main Menu s t