Page 234 of 354

NOTICE:
Too much or too little fluid can damage your
transmission.
Too much can mean that some of
the fluid could come out and
fall on hot engine
parts or exhaust system parts, starting
a fire. Be
sure to get an accurate reading if you check your
transmission fluid.
Check the fluid level only when your engine is off, the
vehicle is parked on a level place and the transmission
is
cool enough for you to rest your fingers on the
transmission case.
Then, follow these steps:
1.
2.
3.
Remove the filler plug.
Check that the lubricant level is up to
the bottom of
the filler plug hole.
If the fluid level
is good, install the plug and be sure
it is fully seated.
If the fluid level is low, add more
fluid as described
in the next steps.
How to Add Fluid
Here’s how to add fluid. Refer to the Maintenance
Schedule to determine what kind
of fluid to use. See
“Recommended Fluids and Lubricants” in the Index.
I. Remove the filler plug.
2. Add fluid at the filler plug hole. Add only enough
fluid to bring the fluid level up to the bottom
of the
filler plug hole.
3. Install the filler plug. Be sure the plug is fully seated.
Clutch Adjustment
The clutch linkage in your vehicle should be checked as
recommended in your Maintenance Schedule.
To check,
push the clutch pedal down with your hand until you
feel some resistance to movement
of the pedal. If the
pedal moves freely up
to an inch (25 mm) or so before
you feel resistance to the travel, adjustment isn’t needed.
If there is
no free travel or very little (less than 5/23 of an
inch
(16 mm)), see your dealer for adjustment.
ProCarManuals.com
Page 236 of 354

Front Axle Engine Coolant
When to Check and Change Lubricant
Refer to the Maintenance Schedule to determine how
often to check the lubricant and when to change it. See
“Periodic Maintenance Inspections” and “Scheduled
Maintenance Services” in the Index.
How to Check Lubricant
If the level is below the bottom of the filler plug hole,
you’ll need to add some lubricant.
If the differential is at operating temperature (warm),
add enough lubricant to raise the level to the bottom of
the filler plug hole.
If the differential is cold, add enough lubricant to raise
the level to 1/2 inch (12 mm) below the filler plug hole.
What to Use
Refer to the Maintenance Schedule to determine what
kind of lubricant to use. See “Recommended Fluids and
Lubricants” in the Index. The following explains
your cooling
system and how to
add coolant when it is low. If you have a problem with
engine overheating, see “Engine Overheating’’ in the
Index.
The proper coolant for your Geo will:
0 Give freezing protection down to -33°F (-36°C).
Give boiling protection up to 258°F (125°C).
Protect against rust and corrosion.
Help keep the proper engine temperature.
Let the warning lights work as they should.
What to Use
Use a mixture of one-half clean water (preferably
distilled) and one-half antifreeze that meets
“GM
Specification 1825M,” which won’t damage aluminum
parts. You can also use a recycled coolant conforming to
GM Specification 1825M with a complete coolant flush
and refill. If you use this mixture, you don’t need to add
anything else.
ProCarManuals.com
Page 237 of 354
I NOTICE:
If you use an improper coolant mix, your engine
could overheat and be badly damaged. The
repair cost wouldn’t be covered by your
warranty.
Too much water in the mix can freeze
and crack the engine, radiator, heater core and
other parts.
Adding Coolant
8-Valve Engine
To Check Coolant
When your engine is cold, the coolant level should be at
LOW, or
a little higher. When your engine is warm, the
level should be
up to FULL, or a little higher.
6-26
ProCarManuals.com
Page 238 of 354
16-Valve Engine
To Add Coolant
If you need more coolant, add the proper mix ut the
coolant recovery tank.
Add coolant mix at the recovery tank, but be careful not
to spill it.
ProCarManuals.com
Page 239 of 354
Radiator Pressure Cap Power Steering Fluid
I NOTICE:
Your radiator cap is a 13 psi (90 kPa)
pressure-type cap and must be tightly installed to
prevent coolant
loss and possible engine damage
from overheating. Be sure the arrows on the cap
line up with the overflow tube on the radiator
filler neck.
When you replace your radiator pressure cap, an AC@
cap is recommended.
Thermostat
Engine coolant temperature is controlled by a thermostat
in the engine coolant system. The thermostat stops the
flow of coolant through the radiator until the coolant
reaches
a preset temperature.
When
you replace your thermostat, an AC@ thermostat
is recommended.
How To Check Power Steering Fluid
When the engine compartment is cool, unscrew the cap
and wipe the dipstick with a clean rag. Replace the cap
and completely tighten it. Then remove the cap again
and look at the
fluid level on the dipstick.
ProCarManuals.com
Page 240 of 354
When the engine compartment is hot, the level
should
be at the MAX mark.
When the engine compartment is cool, the level
should be at the MIN mark.
A fluid loss in this system could indicate a problem.
Have the system inspected and repaired.
What to Add
Refer to the Maintenance Schedule to determine what
kind
of fluid to use. See “Recommended Fluids and
Lubricants” in the Index.
NOTICE:
When adding power steering fluid or making a
complete fluid change, always use the proper
fluid. Failure to use the proper fluid can cause
leaks and damage hoses and seals.
ProCarManuals.com
Page 243 of 354

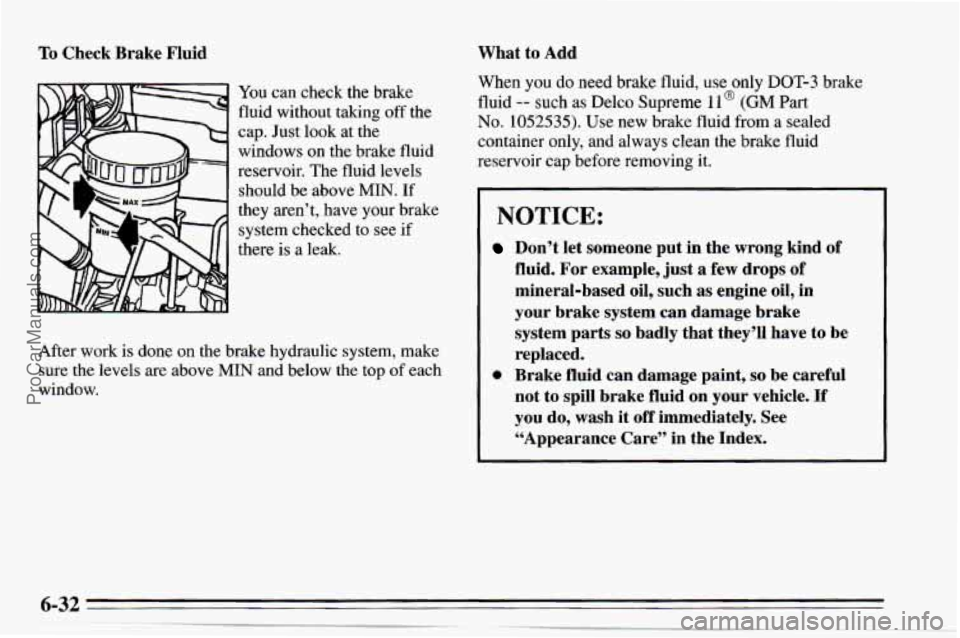
To Check Brake Fluid
You can check the brake
fluid without taking off the
cap. Just look at the
windows on the brake fluid
reservoir. The fluid levels should be above
MIN. If
they aren’t, have your brake
system checked to see
if
there is a leak.
After work is done on the brake hydraulic system, make
sure the levels are above
MIN and below the top of each
window.
What to Add
When you do need brake fluid, use only DOT-3 brake
fluid
-- such as Delco Supreme 1 l@ (GM Part
No. 1052535). Use new brake fluid from a sealed
container only, and always clean the brake fluid
reservoir cap before removing it.
I NOTICE:
Don’t let someone put in the wrong kind of
fluid, For example, just
a few drops of
mineral-based oil, such as engine oil, in
your brake system can damage brake
system parts
so badly that they’ll have to be
replaced.
0 Brake fluid can damage paint, so be careful
not to spill brake fluid on your vehicle.
If
you do, wash it off immediately. See
“Appearance Care” in the Index.
ProCarManuals.com
Page 270 of 354

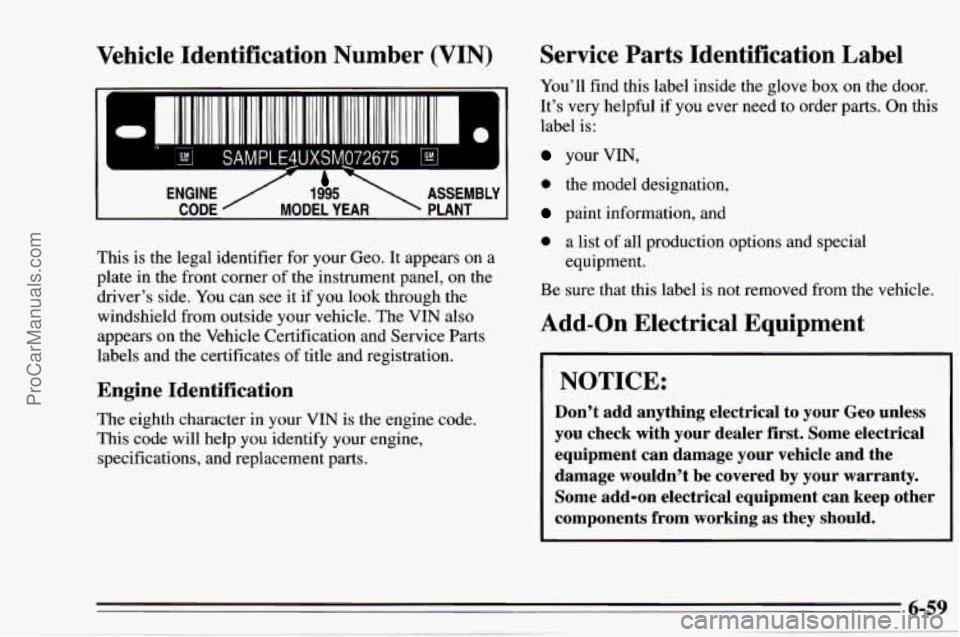
Vehicle Identification Number (VIN)
lli Iiilll Ill1 iilllllilll
1
I
SAMPLE4UXSMJ72675 45s- 1
(. CODE MODEL YEAR PLANT
ENGINE
/ 1995 ASSEMBLY I
Service Parts Identification Label
You’ll
find this label inside the glove box on the door.
It’s
very helpful if you ever need to order parts. On this
label is:
your VIN,
This is the legal identifier for your Geo. It appears on
a
plate in the front corner of the instrument panel, on the
driver’s side. You can see it if you look through the
windshield from outside your vehicle. The VIN also
appears
on the Vehicle Certification and Service Parts
labels and the certificates of title and registration.
Engine Identification
The eighth character in your VIN is the engine code.
This code will help you identify your engine,
specifications, and replacement parts.
0 the model designation,
paint information, and
0 a list of all production options and special
equipment.
Be sure that this label
is not removed from the vehicle.
Add-on Electrical Equipment
NOTICE:
Don’t add anything electrical to your Geo unless
you check with your dealer first. Some electrical equipment can damage your vehicle and the
damage wouldn’t be covered by your warranty. Some add-on electrical equipment can keep other
components from working as they should.
ProCarManuals.com