Page 133 of 386
Downloaded from www.Manualslib.com manuals search engine Convertible Top (Option)
The following procedures explain the proper operation
of your convertible top.
To Lower Your Convertible Top
NOTICE:
Don’t leave your convertible out with the top
down for any long periods of time. The sun and
the rain can damage your seat material and other
things inside your vehicle.
1. Park on a level surface, set the parking brake firmly
and shift an automatic transmission into
PARK (P).
Shift a manual transmission into
REVERSE (R).
Lower both windows and sunshades and turn the
ignition key
to LOCK.
NOTICE:
Before lowering the convertible top into the
storage area, be sure there are no objects in the
way of the folded, stored top. The weight
of a
stored top on items in the storage area may cause
the convertible top back glass to break.
2. Unlock the front of the convertible top by turning the
latch handles outward. Then lift the top
off the
windshield slightly.
2-90
Page 136 of 386
Downloaded from www.Manualslib.com manuals search engine 7. Lower the rear of the top. Then lift the front with a
slow, smooth motion. Fold the top into the storage
compartment, making sure the fabric is folded
between bows.
NOTICE:
Do not lift the rear of the convertible top when
lowering the top into the storage compartment or damage to the top may occur.
8. After the top is completely folded into the
compartment, turn the-latch handles toward the
center of the vehicle. Close the storage compartment
lid by pushing the front edge down on each side.
Try
to lift the lid to make sure it’s latched.
When closing the storage compartment lid, make
sure the latch handles are turned back toward
the center
of the vehicle. If they aren’t, you may
damage the paint on the lid inner panel.
To Raise Your Convertible Top
1. Park on a level surface, set the parking brake firmly
and shift an automatic transmission into
PARK (P).
Shift a manual transmission into REVERSE (R).
Lower both windows and sunshades and turn the
ignition key to
LOCK.
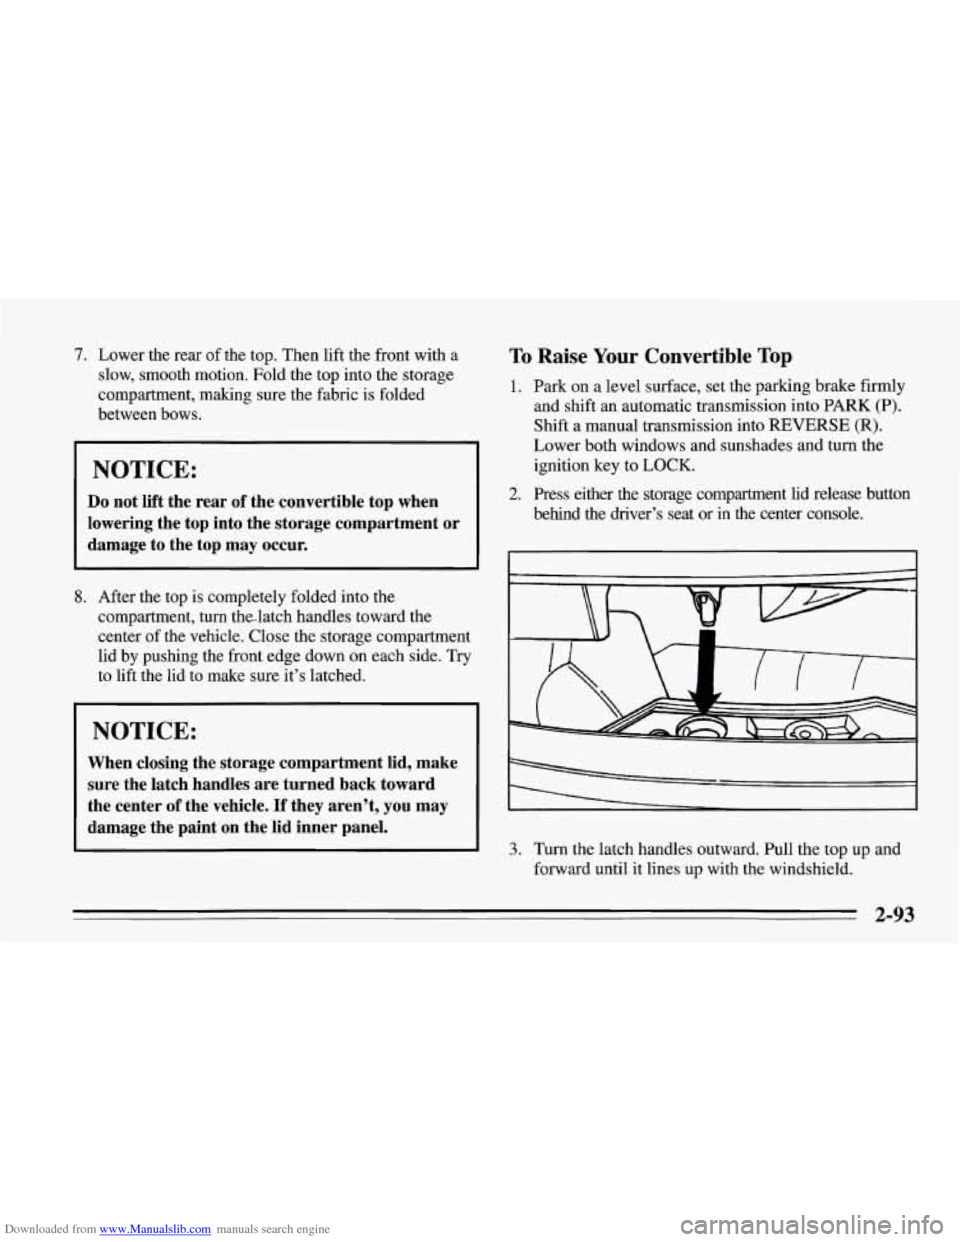
behind the driver’s seat or in the center console.
2. Press either the storage compartment lid release button
- II b-
3. Turn the latch handles outward. Pull the top up and
forward until it lines up with the windshield.
2-93
Page 139 of 386
Downloaded from www.Manualslib.com manuals search engine To Remove Your Convertible Hardtop
1. Park on a level surface, set the parking brake firmly
and shift the transmission into
NEUTRAL (N).
Lower both windows and sunshades and turn the
ignition key
off.
2. Loosen the front bolts with the wrench.
a k
3. Move both seatbacks forward and remove the rear
trim panel.
2-96
Page 142 of 386
Downloaded from www.Manualslib.com manuals search engine NOTICE:
To help avoid damaging the hardtop when not in
use:
Store the hardtop in its normal position,
0 Store hardware and trim panel with the
resting
on its mounting brackets.
hardtop.
12. Connect the rear window defogger electrical
connectors.
To Install Your Convertible Hardtop
1. Park on a level surface, set the parking brake firmly
and shift an automatic transmission into PARK
(P).
Shift a manual transmission into REVERSE (R).
Lower both windows and sunshades. Turn off the
radio to lower the power antenna and turn the
ignition key to LOCK.
2. Disconnect both rear window defogger electrical
connectors behind the lock pillar.
3. Lower the convertible top. Refer to “Convertible
Top” in the Index.
This procedure will require the use
of the storage
compartment lid release button behind the dnver’s
seat or the center console release switch. The fuse that
enables these releases is not installed at the assembly
plant and should be in your center console. See
“Instrument Panel Fuse Block” in the Index for
location
of the fuse. The fuse is labeled HATCH (45).
4. With one person on each side, carefully position the
hardtop over the vehicle. Lower the hardtop slowly,
aligning the rear bolt spacers onto the bezels, and
front conical nuts into the tapered receivers. Realign
the hardtop, if necessary.
NOTICE:
To help avoid damage, don’t force the rear of the
hardtop down. The hardtop may rest slightly
above the storage compartment lid until the
release lever is pulled. See Step
8 in this
procedure.
2-99
Page 151 of 386
Downloaded from www.Manualslib.com manuals search engine Defogging and Defrosting Windows
Your vehicle has several settings for clearing your
windows. The air conditioner compressor will run to
help remove moisture from the air.
To defrost the windshield quickly, press the arrows on
the
TEMP SET switch to set a comfortable temperature.
Press DEFROST and the fan will go to high speed. After
the windows are clear, you can lower the speed using the
downward arrow or
AUTO FAN.
With the automatic system, to warm passengers while
keeping the windshield clear? press the arrows on the
TEMP SET switch to set a comfortable temperature. Press
HEATER and DEFROST at the same time and, if you
don’t like the automatic setting, press the
arrows on the fan
speed switch.
To defrost the side windows quickly, press the arrows on
the
TEMP SET switch to set a comfortable temperature.
Then press DEFROST and,
if you don’t like the automatic
setting, press the arrows on the fan speed switch.
System Problems
If the light above an air control button flashes when you
turn on the ignition, your system may have an electrical
problem. The flashing will continue for one minute, then
stop.
The flashing light could also mean the refrigerant level
is too low in your system. The light will continue to
flash, even if refrigerant is added, until the system is
reset. Have your system checked and serviced if needed.
To reset your system:
1. Turn your ignition key to OFF or LOCK.
2. Remove the courtesy lamps and radio fuses from the
main fuse panel and wait one minute. See “Fuses and
Circuit Breakers” in the Index.
3. Put the fuses back in and start your vehicle.
The light shouldn’t come on and your system should be
working properly. If you still have a problem, see your
dealer.
Page 160 of 386
Downloaded from www.Manualslib.com manuals search engine To Stop the Disc Player
Turn the power off or turn the ignition key off. The
disc stays in the player and will resume playing at
the point where it stopped.
switch to radio. Press it again to restart the disc at the
point where it stopped.
the ignition or audio system is turned off, the player
will pull the disc back
in if you don’t remove it from
the opening within
30 seconds.
Tips about Your Audio System
Hearing damage from loud noise is almost undetectable
until it is too late. Your hearing can adapt to higher
volumes
of sound. Sound that seems normal can be loud
and harmful to your hearing. Take precautions by
adjusting the volume control on your radio to
a safe
sound level before your hearing adapts to it.
Press STOP-PLAY to stop playing the disc and
Press EJCT to eject the disc and switch to radio. If To
help avoid hearing loss or damage:
Adjust the volume control to the lowest setting.
Increase volume slowly until you hear comfortably
and clearly.
NOTICE:
Before you add any sound equipment to your
vehicle
-- like a tape player, CB radio, mobile
telephone or two-way radio
-- be sure you can
add what you want.
If you can, it’s very
important to do
it properly. Added sound
equipment may interfere with the operation of
your vehicle’s engine, Delco@ radio or other
systems, and even damage them. And, your
vehicle’s systems may interfere with the
operation of sound equipment that has been
added improperly.
So, before adding sound equipment, check with
your dealer and be sure to check Federal rules
covering mobile radio and telephone units.
3-17
Page 166 of 386
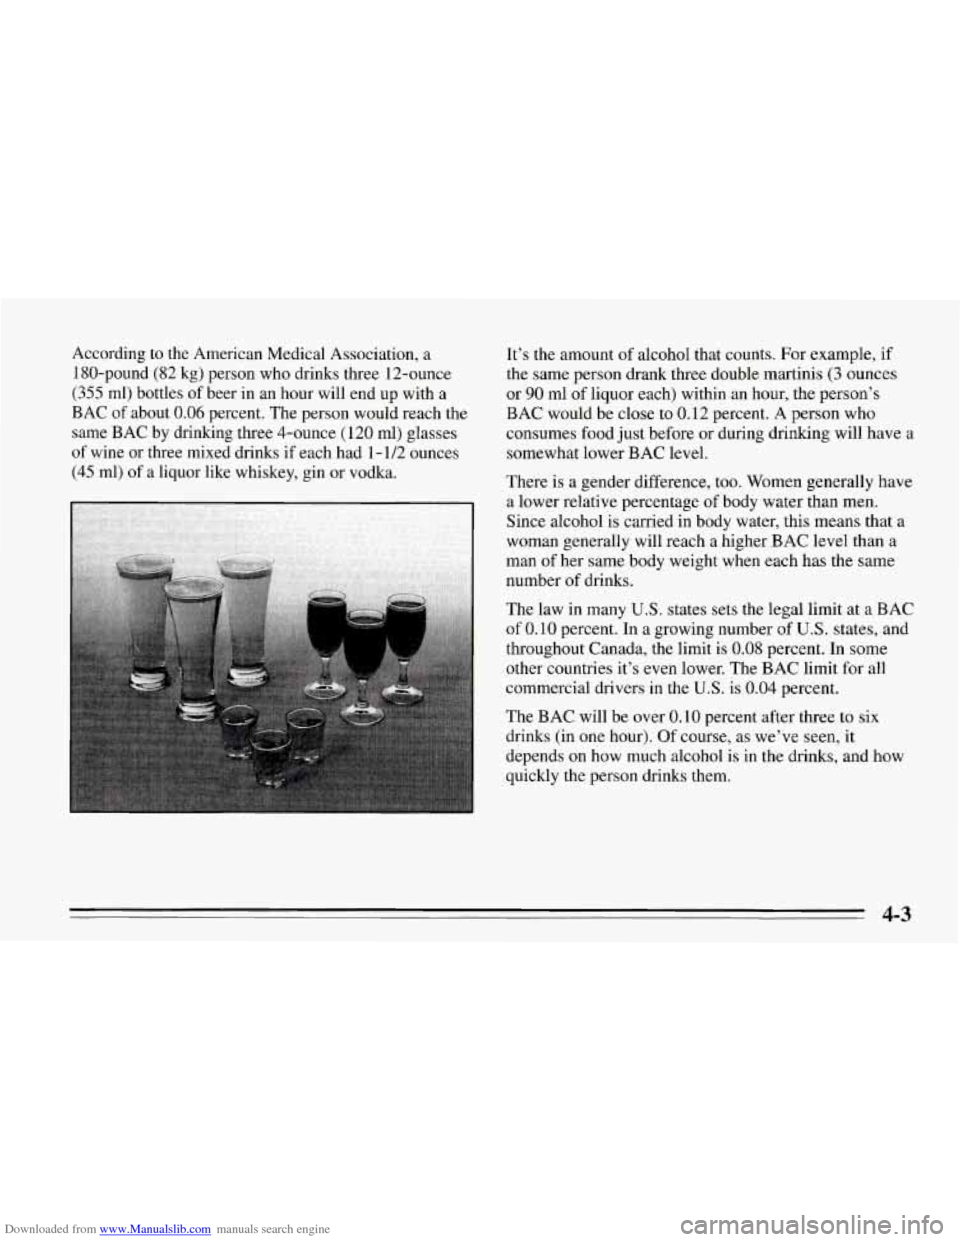
Downloaded from www.Manualslib.com manuals search engine According to the American Medical Association, a
1 80-pound (82 kg) person who drinks three 12-ounce
(355 ml) bottles of beer in an hour will end up with a
BAC of about
0.06 percent. The person would reach the
same BAC by drinking three 4-ounce (120
ml) glasses
of wine or three mixed drinks if each had 1-1/2 ounces
(45 ml) of a liquor like whiskey, gin or vodka. It’s the amount
of alcohol that counts. For example, if
the same person drank three double martinis
(3 ounces
or
90 ml of liquor each) within an hour, the person’s
BAC would be close to 0.12 percent. A person who
consumes food just before or during drinking will have a
somewhat lower BAC level.
There
is a gender difference, too. Women generally have
a lower relative percentage of body water than men.
Since alcohol is carried in body water, this means that a
woman generally will reach a higher BAC level than a
man of her same body weight when each has the same
number
of drinks.
The law in many
U.S. states sets the legal limit at a BAC
of 0.10 percent. In a growing number of U.S. states, and
throughout Canada, the limit is 0.08 percent. In some
other countries it’s even lower. The BAC limit for all
commercial drivers in the
U.S. is 0.04 percent.
The BAC will be over
0.10 percent after three to six
drinks (in one hour). Of course, as we’ve seen, it
depends on how much alcohol is
in the drinks, and how
quickly the person drinks them.
4-3
Page 195 of 386
Downloaded from www.Manualslib.com manuals search engine Your hazard warning flashers work no matter what
position your key
is in, and even if the key isn’t in.
To turn off the flashers, pull out on the collar.
When the hazard warning flashers are on, your turn
signals won’t work.
Other Warning Devices
If you carry reflective triangles, you can set one up at
the sid’e
of the road about 300 feet (100 m) behind your
vehicle.
Jump Starting
If your battery has run down, you may want to use
another vehicle and some jumper cables to start your
Corvette. But please follow the steps below to
do it
safely.
I
NOTICE:
Ignoring these steps could result in costly damage
to your vehicle that wouldn’t be covered by your
warranty.
Trying to start your Corvette by pushing or
pulling it could damage your vehicle, even if you
have
a manual transmission. And if you have an
automatic transmission, it won’t start that way.
5-2