Page 58 of 386
Downloaded from www.Manualslib.com manuals search engine However, if you accidentally use a key that has a
damaged or missing resistor pellet, you will see no
SECURITY light. You don’t have to wait three minutes
before trying the proper key.
If the resistor pellet is damaged or missing, the starter
won’t work. Use the other ignition key, and
see your
Chevrolet dealer or a locksmith who can service the
PASS-Key@ to have a new key made.
If the SECURITY light comes on while driving, have
your vehicle serviced as
soon as possible.
If you lose or damage a PASS-Key@ ignition key, see
your Chevrolet dealer or a locksmith who can service
PASS-Key? In an emergency, call the Chevrolet
Roadside Assistance Program at
1 -800-CHEV-USA
(1-800-243-8872).
New Vehicle “Break-In”
NOTICE:
Your modern Corvette doesn’t need an elaborate
“break-in.” But
it will perform better in the long
run if you follow these guidelines:
Keep your speed at 55 mph (88 km/h) or
less for the
first 500 miles (804 km).
Don’t drive at any one speed -- fast or
slow
-- for the first 500 miles (804 km).
Don’t make full-throttle starts.
200 miles (322 km) or so. During this time
your new brake linings aren’t yet broken
in. Hard stops with new linings can mean
premature wear and earlier replacement.
Follow this “breaking-in” guideline every
time you get new brake linings.
Avoid making hard stops for the first
2-15
Page 59 of 386
Downloaded from www.Manualslib.com manuals search engine Ignition Switch
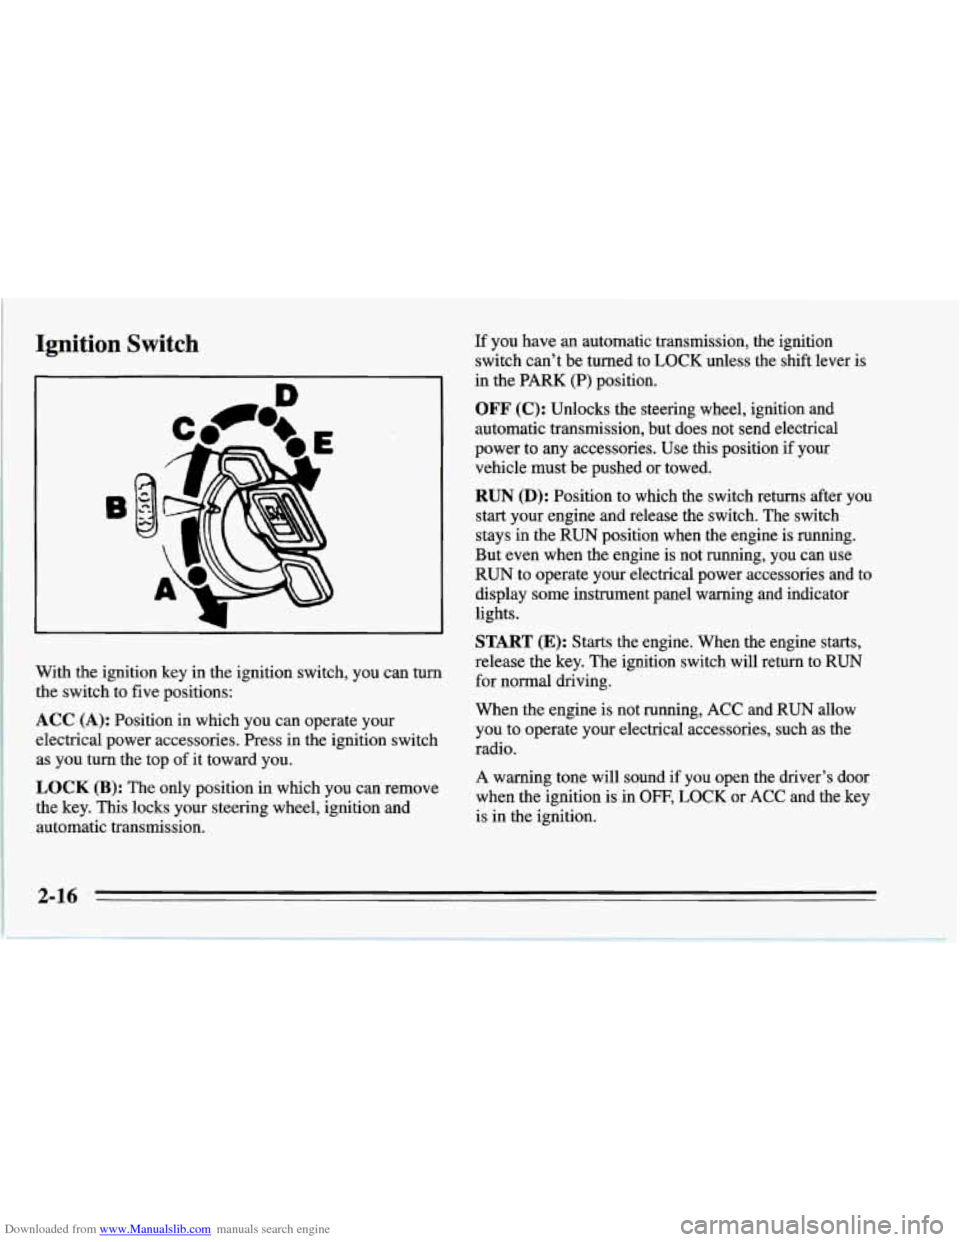
With the ignition key in the ignition switch, you can turn
the switch to five positions:
ACC (A): Position in which you can operate your
electrical power accessories. Press in the ignition switch as you turn the top of it toward you.
LOCK (B): The only position in which you can remove
the key.
This locks your steering wheel, ignition and
automatic transmission. If
you have an automatic transmission, the ignition
switch can’t be turned to LOCK unless the shift lever is
in the PARK (P) position.
OFF (C): Unlocks the steering wheel, ignition and
automatic transmission, but does not send electrical
power to any accessories. Use this position
if your
vehicle. must be pushed or towed.
RUN (D): Position to which the switch returns after you
start your engine and release the switch. The switch
stays in the
RUN position when the engine is running.
But even when the engine is not running, you can use
RUN to operate your electrical power accessories and to
display some instrument panel warning and indicator
lights.
START (E): Starts the engine. When the engine starts,
release
the key. The ignition switch will return to RUN
for normal driving.
When
the engine is not running, ACC and RUN allow
you to operate your electrical accessories, such as the
radio.
A warning tone will sound if you open the driver’s door
when the ignition
is in OFF, LOCK or ACC and the key
is in the ignition.
Page 64 of 386
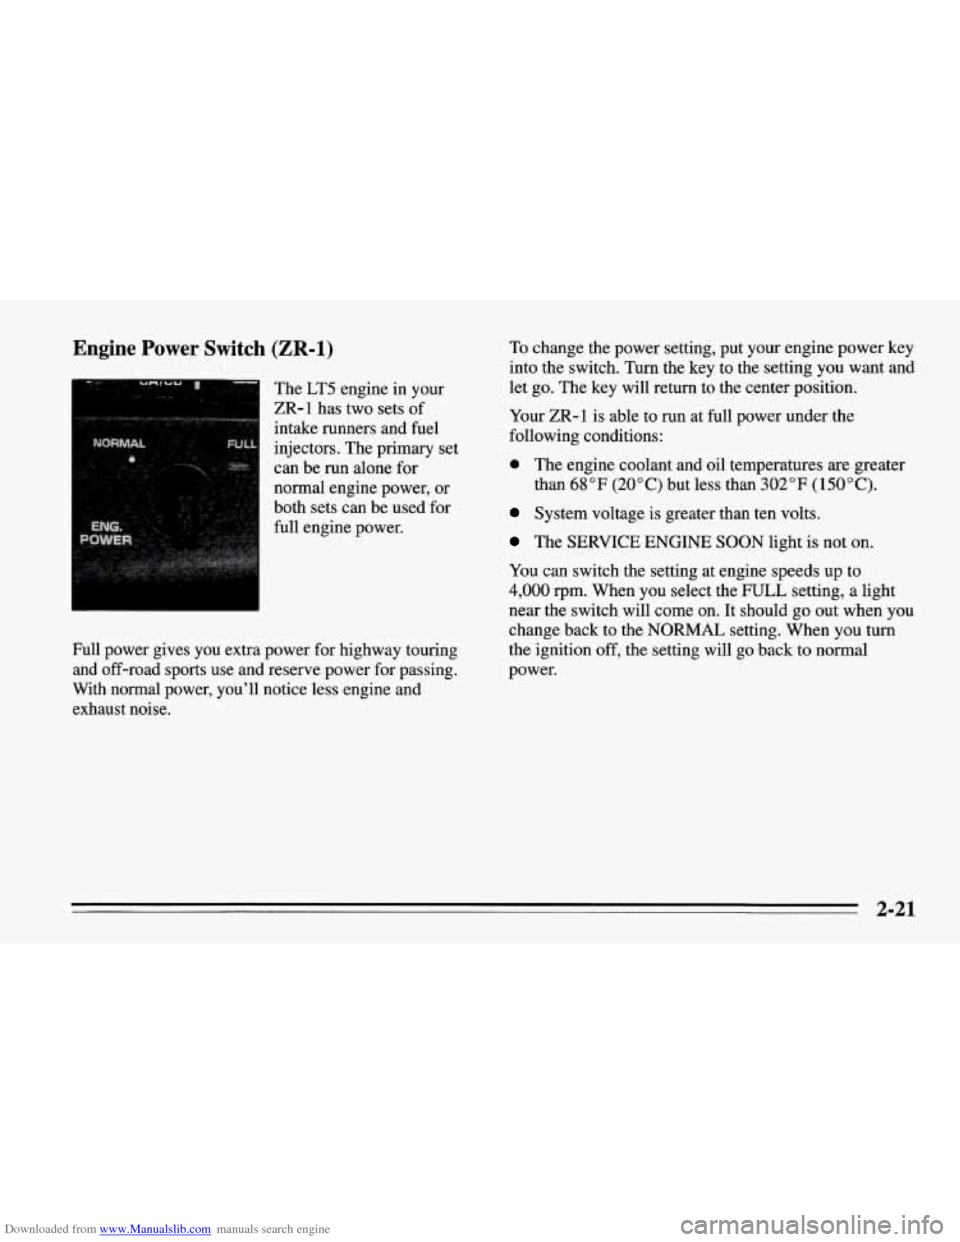
Downloaded from www.Manualslib.com manuals search engine Engine Power Switch (ZR-1)
The LT5 engine in your
ZR-1 has two sets of
intake runners and fuel
injectors. The primary set
can be run alone for
normal engine power, or
both sets can be used for
full engine power.
Full power gives you extra power for highway touring
and off-road sports use and reserve power for passing.
With normal power, you’ll notice less engine and
exhaust noise. To
change the power setting, put your engine power key
into the switch. Turn the key to the setting
you want and
let go. The key will return to the center position.
Your ZR-1 is able to run at full power under the
following conditions:
0 The engine coolant and oil temperatures are greater
than
68°F (20°C) but less than 302°F (150°C).
System voltage is greater than ten volts.
The SERVICE ENGINE SOON light is not on.
You can switch the setting at engine speeds up to
4,000 rpm. When you select the FULL setting, a light
near the switch will come on.
It should go out when you
change back to the NORMAL setting. When you turn
the ignition off, the setting will go back to normal
power.
2-21
Page 65 of 386
Downloaded from www.Manualslib.com manuals search engine Racing or Other Competitive Driving
See your Warranty Book before using your Corvette for
racing
or other competitive driving.
NOTICE:
If you use your Corvette for racing or other
competitive driving, your engine may use more oil than
it would with normal use. Low oil levels
can damage the engine. Be sure to check the oil
level often during racing or other competitive
driving and keep the level at or near the upper
mark on the engine oil dipstick. You may need to
add oil. See “Engine Oil” in the Index.
J
Driving Through Deep Standing
Water
NOTICE:
If you drive too quickly through deep puddles or
standing water, water can come in through your
engine’s air intake and badly damage your
engine. Never drive through water that is slightly
lower than the underbody of your vehicle.
If you
can’t avoid deep puddles or standing water, drive
through them very slowly.
2-22
Page 72 of 386
Downloaded from www.Manualslib.com manuals search engine Shift Speeds (Manual Transmission)
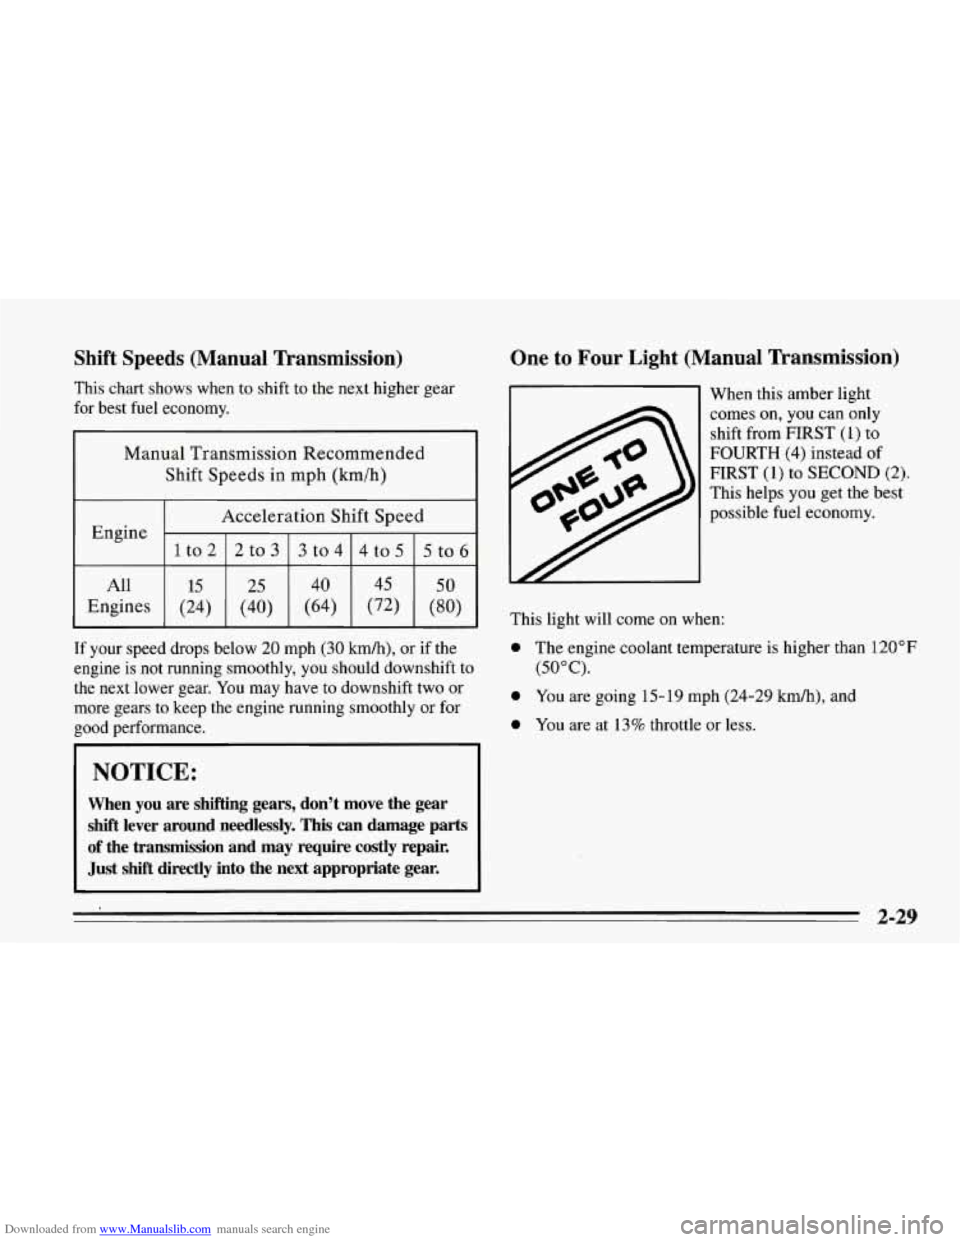
This chart shows when to shift to the next higher gear
for best fuel economy.
Manual Transmission Recommended
Shift Speeds in mph
(krn/h)
Acceleration Shift Speed
1to2
5to6 4to5
3to4
2to3
Engine
All
(80) (72)
(64)
(40)
(24) Engines
50 45 40
25 15
If your speed drops below 20 mph (30 kmk), or if the
engine is not running smoothly, you should downshift to
the next lower gear. You may have to downshift two or
more gears to keep the engine running smoothly or for
good performance.
NOTICE:
When you are shifting gears, don’t move the gear
shift lever around needlessly. This can damage parts
of the transmission and may require costly repair.
Just
shift directly into the next appropriate gear.
One to Four Light (Manual Transmission)
This light will come on when: When
this amber light
comes
on, you can only
shift from
FIRST (1) to
FOURTH
(4) instead of
FIRST (1) to SECOND (2).
This helps you get the best
possible fuel economy.
0 The engine coolant temperature is higher than 120°F
(50°C).
0 You are going 15-19 mph (24-29 km/h), and
0 You are at 13% throttle or less.
2-29
Page 74 of 386
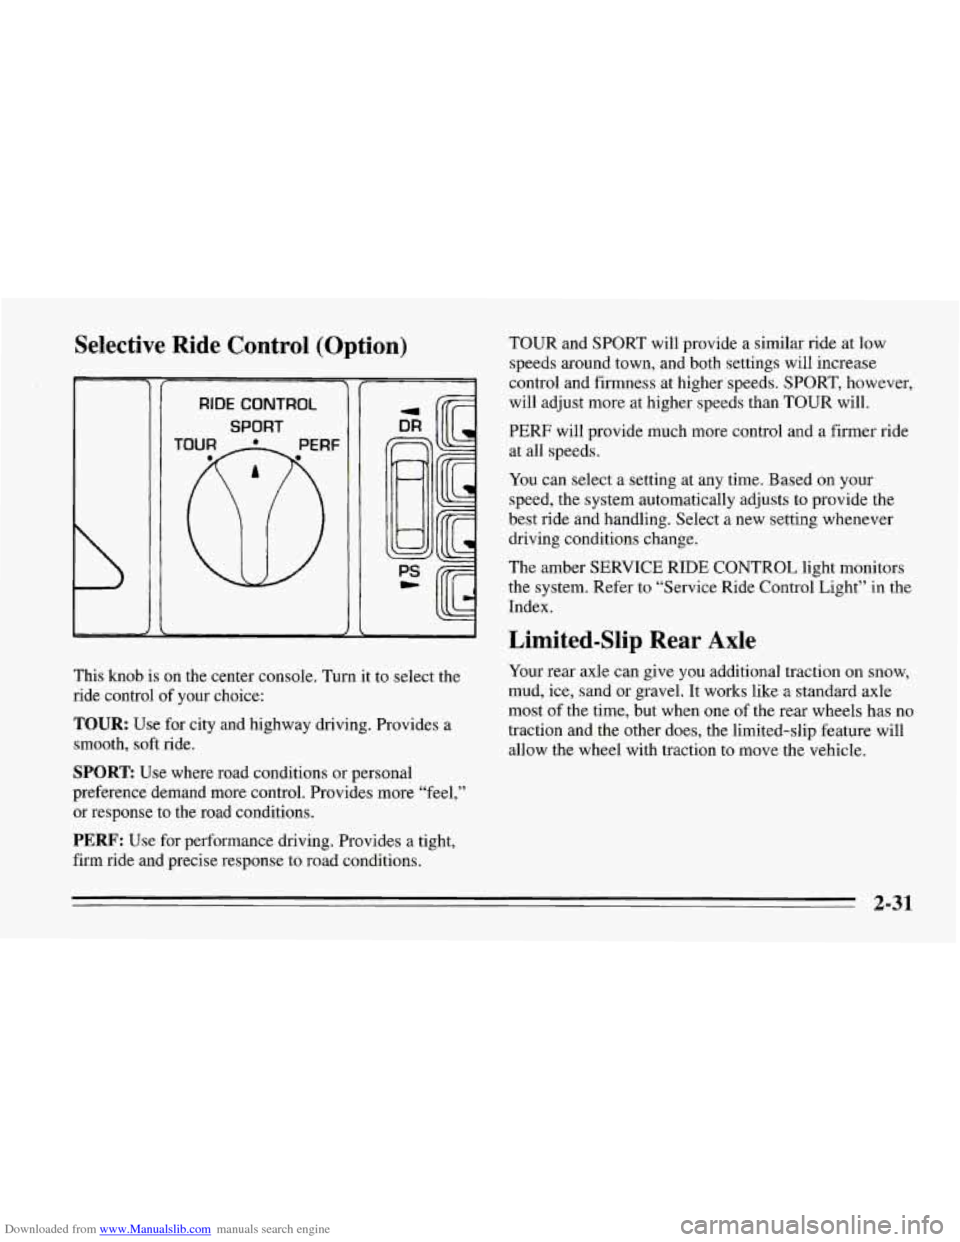
Downloaded from www.Manualslib.com manuals search engine Selective Ride Control (Option)
RIDE CONTROL
SPORT I/
This knob is on the center console. Turn it to select the
ride control of your choice:
TOUR: Use for city and highway driving. Provides a
smooth, soft ride.
SPORT: Use where road conditions or personal
preference demand more control. Provides more “feel,”
or response to the road conditions.
PERF: Use for performance driving. Provides a tight,
firm ride and precise response to road conditions. TOUR
and SPORT will provide a similar ride at low
speeds around town, and both settings will increase
control and firmness at higher speeds. SPORT, however,
will adjust more at higher speeds than TOUR will.
PERF will provide much more control and a firmer ride
at all speeds.
You can select a setting at any time. Based on your
speed, the system automatically adjusts to provide the
best ride and handling. Select a new setting whenever
driving conditions change.
The amber SERVICE RIDE CONTROL light monitors
the system. Refer to “Service Ride Control Light” in the
Index.
Limited-Slip Rear Axle
Your rear axle can give you additional traction on snow,
mud, ice, sand or gravel. It works like a standard axle
most of the time, but when one of the rear wheels has no
traction and the other does, the limited-slip feature will
allow the wheel with traction to move the vehicle.
2-31
Page 75 of 386
Downloaded from www.Manualslib.com manuals search engine Parking Brake
To set the parking brake, hold the brake pedal down.
Pull the parking brake lever up, then move it back down.
This sets your parking brake, even though the lever is
down.
If the ignition is on, the parking brake indicator
light will come on.
To release the parking brake, hold the brake pedal down.
Pull the parking brake lever up until you can push in the
release button. Hold the release button in
as you move
the brake lever all the way down.
NOTICE:
Driving with the parking brake on can 'cause
your rear brakes to overheat. You may have to
replace them, and you could also damage other
parts
of your vehicle.
2-32
Page 83 of 386
Downloaded from www.Manualslib.com manuals search engine A green arrow on the instrument panel will flash in the
direction
of the turn or lane change.
To signal a lane change, just raise or lower the lever
until the green arrow starts to flash. Hold it there until
you complete your lane change. The lever will return by
itself when you release it.
As you signal a turn or a lane change, if the arrows don’t
flash but just stay on, a signal bulb may be’burned out
and other drivers won’t see your turn signal.
If a bulb is burned out, replace it to help avoid an
accident. If the green arrows don’t go on at all when you
signal a turn, check the fuse (see “Fuses” in the Index)
and for burned-out bulbs.
Headlamp HighLow Beam
P
1 1
To change the headlamps from low beam to high or high
to low, pull the turn signal lever all the way toward you.
Then release it. When the high beams are
on, this blue
light
on the instrument panel also will be on.
2-40