Page 271 of 388

Downloaded from www.Manualslib.com manuals search engine To check the aim, the vehicle should be properly
prepared as follows:
The vehicle must have all four tires on a perfectly
level surface.
0 The vehicle should not have any snow, ice, or mud
There should not be any cargo or loading of vehicle,
except it should have a full tank of gas and one
person or
160 pounds (75 kg) on the driver’s seat.
attached to
it.
0 Tires
should be properly inflated.
0 The horizontal indicator should read “0.”
I NOTICE:
To make sure your headlamps are aimed
properly, read all the instructions before
beginning. Failure to
follow these instructions
could cause damage to headlamp parts.
State inspection stations will allow a vertical reading of
plus
0.76 degrees or minus 0.76 degrees for the center of
the bubble. It
is recommended that the upper limit not exceed plus
0.4 degrees for the center of the bubble. Other drivers
may flash their bright lights at you if your adjustment is
much above plus
0.4 degrees.
If you find that the headlamp aiming needs adjustment,
follow these steps:
To adjust the aim of your headlamps:
1. Move your vehicle to a level surface. Use a spirit
level to be sure. Be sure to remove any items that are
not part of your original equipment from the trunk
and passenger areas.
No one should be seated in the
vehicle and your fuel tank should be about half full.
Check to be sure your tires are at the correct
pressure.
6-39
Page 272 of 388
Downloaded from www.Manualslib.com manuals search engine There are four headlamps. Each one has its own
vertical and horizontal aim position indicator. Each
indicator has its own aiming screw.
A. Vertical Indicator
E!. Horizontal Indicator
C. Vertical Aiming Screw
D. Horizontal Aiming Screw
2. Start with the horizontal (left and right) headlamp
aim. Don’t try to adjust the vertical (up and down)
aim first.
3. Check the horizontal aim for each headlamp and
4. Turn the horizontal aiming screw until the pointer is
adjust
it
as necessary.
lined up with the
0 (zero).
6-40
Page 273 of 388
Downloaded from www.Manualslib.com manuals search engine 5. Now adjust the vertical aim. Check the vertical aim
for each headlamp and adjust it as necessary.
6. Turn the vertical aiming screw until the bubble in the
7. If the gage readings are not centered, repeat steps 2
Try not to touch threaded parts other than the vertical
and horizontal aiming screws.
level
is centered at 0 (zero).
and
3.
To Replace a Headlamp
Before replacing a headlamp that does not light, check
to make sure that the wiring connector is securely
fastened to it.
See “Replacement Bulbs”
in the Index to check the size
and type of headlamp you need to
use before you begin
to replace the headlamp.
You must replace a headlamp
with one that
is exactly the same.
Be careful
not to move the aiming screws when you
replace the headlamp. If the headlamp being replaced
was properly aimed, the
new one will be also if it is
properly installed.
6-41
Page 275 of 388
Downloaded from www.Manualslib.com manuals search engine 3. Pull the headlamp out of the assembly. Remove the
wiring connector from the headlamp socket by lifting
the plastic locking tabs
on the connector and pulling
it
from the socket.
4. Check the new headlamp again. The number on the
lamp must match the number of the headlamp being
replaced. The letter
U or L must also match.
5. Plug the wiring connector into the headlamp socket.
Snap the locking tabs onto the socket.
6. Place the new headlamp in the headlamp assembly.
The socket must be pointing in the same direction
the socket on the burned out bulb was.
7. Insert the tabs on the aiming ring into the tabs in the
headlamp assembly.
8. Hold the aiming ring closed, insert the screws at the
end
of the ring. Tighten the screws until the aiming
ring touches the plastic nuts
on both the top and
bottom.
Do not overtighten. Do not damage the
vertical aiming bubble.
6-43
Page 276 of 388
Downloaded from www.Manualslib.com manuals search engine 9. Check the headlamp aim indicators. The horizontal
indicator (A) should be on
0 (zero). If the vehicle
is level, the vertical indicator
(B) should also be on
0 (zero). If the vehicle isn’t level, check the vertical
aim
on a level surface as soon as you can. If either
indicator doesn’t read
0 (zero), adjust the headlamp
aim.
See “Adjusting Headlamp Aim” in the Index.
If your vehicle is damaged in an accident and the headlamp
aim seems
to be fleeted, see your Chevrolet dealer.
Headlamps
on damaged vehicles may require recalibration
of the horizontal aim by your Chevrolet dealer.
Center High-Mounted Stoplamp
To replace the bulb:
1. Remove the two screws in the stoplamp lens.
2. Gently pull assembly out and remove bulb from the
back
of the assembly.
3. Reverse the steps with a new bulb.
6-44
Page 283 of 388

Downloaded from www.Manualslib.com manuals search engine When to Check
Check your tires once a month or more.
Don’t forget your compact spare tire. It should be at
60 psi (420 kPa).
DW to Check
use a good quality pocket-type gage to check tire
pressure. Simply looking at the tires will not tell you the
pressure, especially if you have radial tires
-- which
may look properly inflated even if they’re underinflated.
If your tires have valve caps, be sure to put them back
on. They help prevent leaks by keeping out dirt and
moisture.
Tire Inspection and Rotation
Tires should be inspected every 6,000 to 8,000 miles
(1 0 000 to 13 000 km) for any signs of unusual wear.
If unusual wear is present, rotate your tires as soon as
possible and check wheel alignment. Also check for
damaged tires or wheels. See “When it’s Time
for New Tires”
and “Wheel Replacement” later
in this section for
more information.
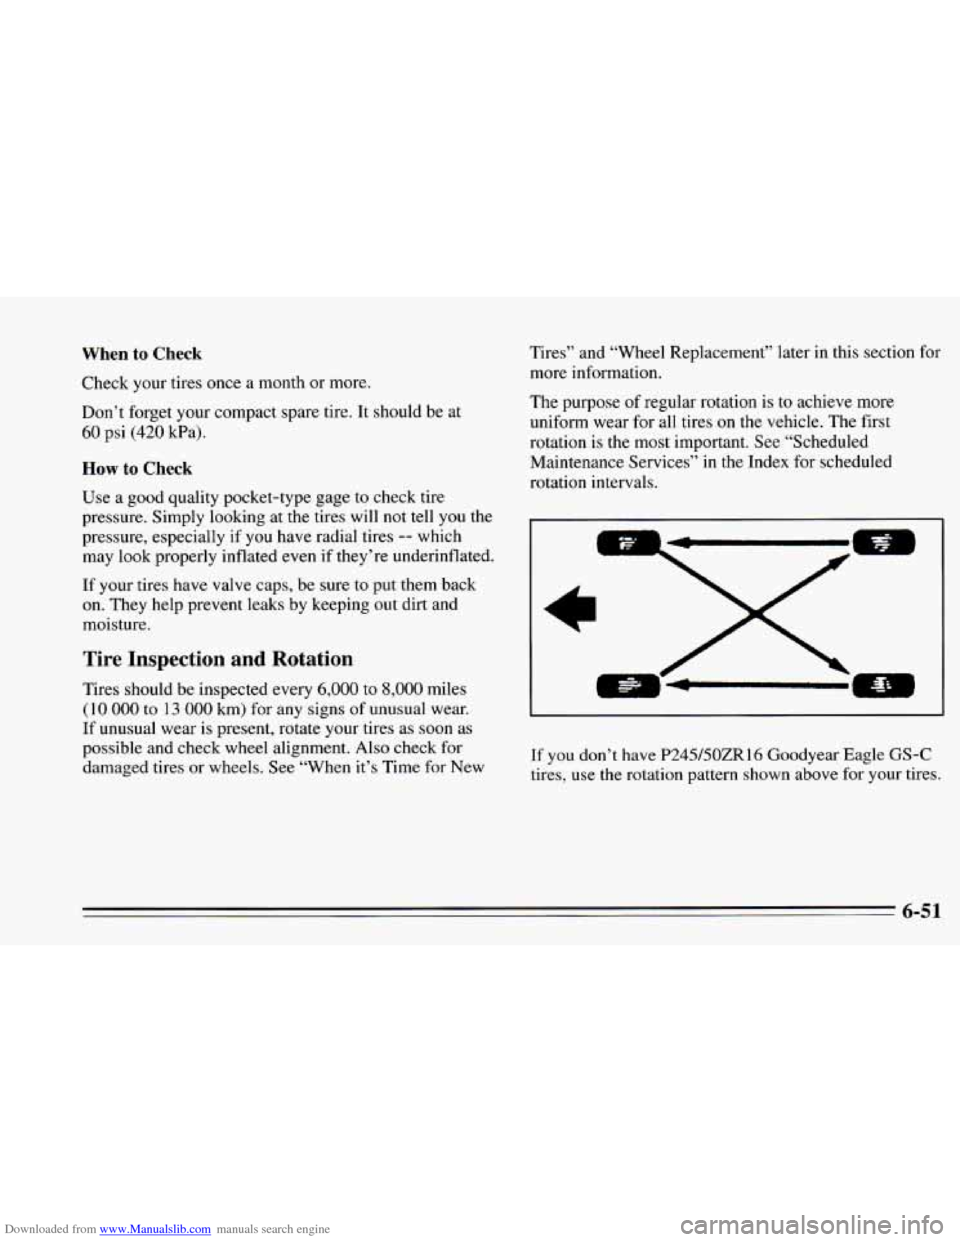
The purpose
of regular rotation is to achieve more
uniform wear for all tires on the vehicle. The first
rotation
is the most important. See “Scheduled
Maintenance Services”
in the Index for scheduled
rotation intervals.
-7 [*
If you don’t have P245/5OZR16 Goodyear Eagle GS-C
ires, use the rotation pattern shown above for your tires.
6-51
Page 285 of 388

Downloaded from www.Manualslib.com manuals search engine When it’s Time for New Tires
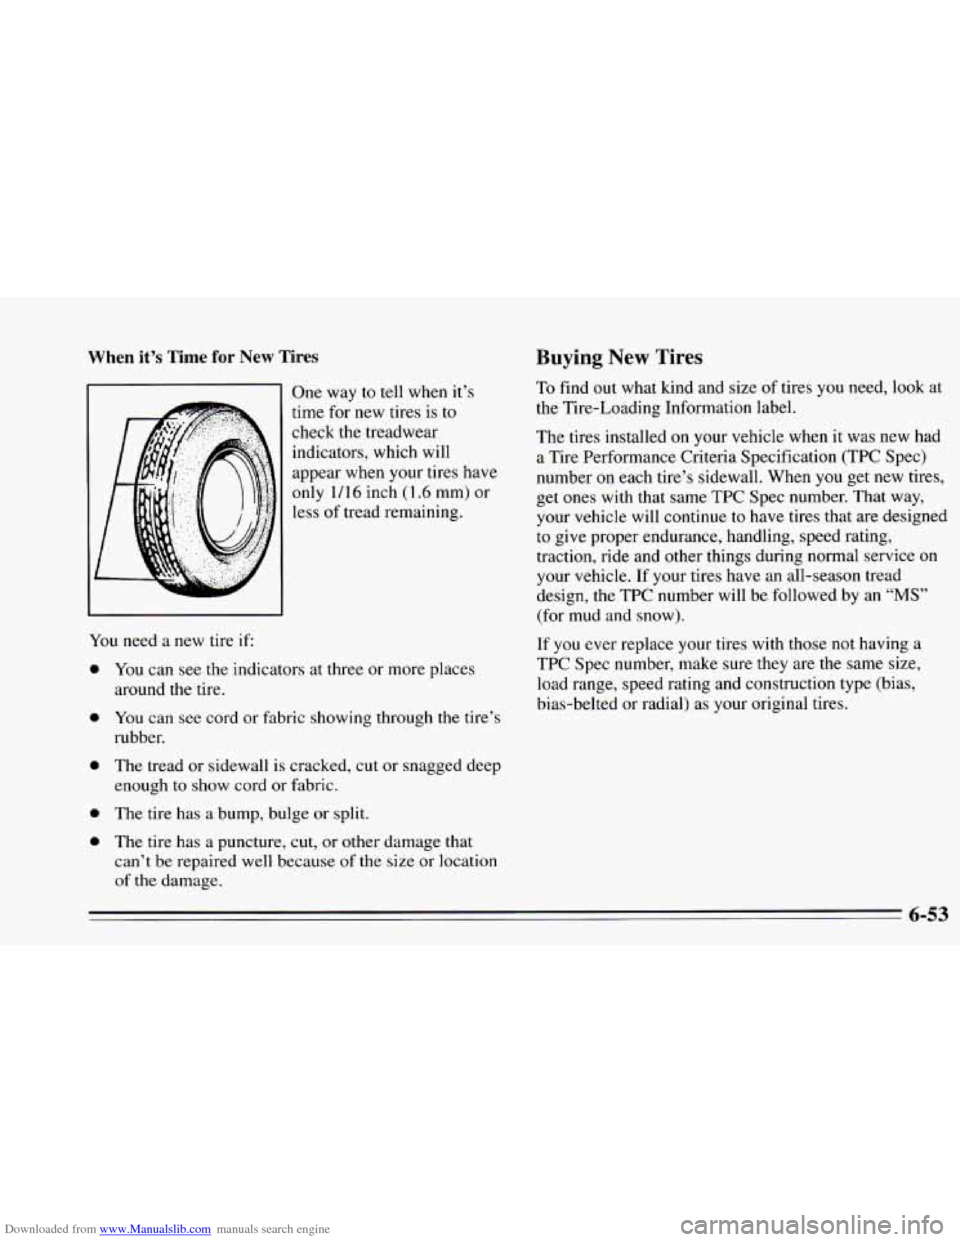
One way to tell when it’s
time for new tires is
to
check the treadwear
indicators, which will
appear when your tires have
only 1/16 inch (1.6 mm) or
less of tread remaining.
You need a new tire
if
a
a
a
e
a
You can see the indicators at three or more places
around the tire.
You can see cord or fabric showing through the tire’s
rubber.
The tread or sidewall is cracked, cut or snagged deep
enough to show cord or fabric.
The tire has a bump, bulge or split.
The tire has
a puncture, cut, or other damage that
can’t be repaired
well because of the size or location
of
the damage.
Buying New Tires
To find out what kind and size of tires you need, look at
the Tire-Loading Information label.
The tires installed
on your vehicle when it was new had
a Tire Performance Criteria Speci€ication (TPC Spec)
number on each tire’s sidewall. When
you get new tires,
get ones with that same TPC Spec number. That way,
your vehicle will continue to have tires that are designed
to give proper endurance, handling, speed rating,
traction, ride and other things during normal service on
your vehicle.
If your tires have an all-season tread
design, the TPC number will be followed by an
“MS”
(for mud and snow).
If you ever replace your tires with those not having a
TPC Spec number, make sure they are the same size,
load range, speed rating
and construction type (bias,
bias-belted or radial) as your original tires.
6-53
Page 294 of 388

Downloaded from www.Manualslib.com manuals search engine Cleaning the Outside of the
Windshield
and Wiper Blades
If the windshield is not clear after using the windshield
washer, or
if the wiper blade chatters when running, wax
or other material may be on the blade or windshield.
Clean the outside
of the windshield with GM
Windshield Cleaner, Bon-Ami Powder’ (GM Part No.
105001 1). The windshield is clean if beads do not form
when you rinse it with water.
Clean the blade by wiping vigorously with a cloth
soaked in full strength windshield washer solvent. Then
rinse the blade with water.
Wiper blades should be checked on a regular basis and
replaced when worn.
Weatherstrips
Silicone grease on weatherstrips will make them last
longer, seal better, and not stick or squeak. Apply
silicone grease with a clean cloth at least every six
months. During very cold, damp weather more frequent
application may be required. (See “Recommended
Fluids and Lubricants” in the Index.)
Cleaning a Removable Roof Panel
Special care is necessary when cleaning, removing
and/or storing the roof panel.
Flush with water to remove dust and dirt, then dry
the panel.
0 Clean the panel with GM Glass Cleaner. Leave the
cleaner on the panel for one minute, then wipe the
panel with a soft, lint-free cloth.
0 Don’t use abrasive cleaning materials.
Cleaning the Outside of Your
Chevrolet
The paint finish on your vehicle provides beauty, depth
of color, gloss retention and durability.
Washing Your Vehicle
The best way to preserve your vehicle’s finish is to keep
it clean by washing it often with lukewarm or cold water.
Don’t wash your vehicle in the direct rays
of the sun.
Don’t use strong soaps or chemical detergents. Use
liquid hand, dish or car washing (mild detergent) soaps.
Don’t use cleaning agents that are petroleum based, or
that contain acid or abrasives. All cleaning agents
6-62