Page 177 of 258

~ Service and Appearance Care
r
NOTICE:
Continuing to drive
with worn-out
brake pads could result in costly
brake repair.
Some driving conditions or climates may
cause a brake squeal when the brakes are
first applied or lightly applied. This does
not mean something is wrong with your
brakes.
Your rear drum brakes don’t have wear
indicators, but if you ever hear a rear
brake rubbing noise, have the rear brake linings inspected. Also, the rear brake
drums should be removed and inspected
each time the tires are removed for
rotation or changing. When you have the front brakes replaced, have
the rear
brakes inspected, too.
Brake linings should always be replaced
as complete axle sets.
Brake Pedal Travel
See your dealer if the brake pedal does
not return to normal height, or if there is a
rapid increase in pedal travel. This could
be a sign
of brake trouble.
Brake Adjustment
Every time you make a brake stop, your
disc brakes adjust for wear.
If your brake pedal goes down farther
than normal, your rear drum brakes may
need adjustment. Adjust them by backing
up and firmly applying the brakes a few
times.
Replacing Brake System Parts
The braking system on a modern vehicle
is complex. Its many parts have to be of
top quality and work well together
if the
vehicle is
to have really good braking.
Vehicles we design and test have
top-quality GM brake parts in them, as
your Geo does when it is new. When you replace parts
of your braking system -
for example,
when your brake linings
wear down and you have to have new
ones put in
- be sure you get new
genuine
GM replacement parts. If you
don’t, your brakes may no longer work
properly. For example, if someone puts in
brake linings that are wrong for your
vehicle, the balance between your front
and rear brakes can change, for the worse.
The braking performance you’ve come to
expect can change in many other ways if
someone puts in the wrong replacement
brake parts.
Battery
Every new Geo has a Delco Freedoms
battery.
You never have to add water to
one
of these. When it’s time for a new
battery, we recommend a Delco
Freedoma battery. Get one that has the
catalog number shown on the original
battery’s label.
Vehicle Storage
If you’re not going to drive your vehicle
for
25 days or more, take off the black,
negative
(-) cable from the battery. This
. . .I76
ProCarManuals.com
Page 178 of 258
will help keep your battery from running
down.
Contact your dealer to learn how to
prepare your vehicle for longer storage
periods. Bulb Replacement
See “Replacement Bulbs” in the Index to
check the size and type of bulb you need
to use.
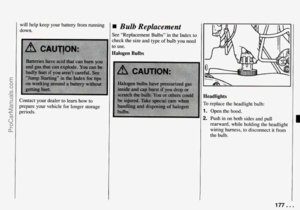
Halogen Bulbs
Headlights
To replace the headlight bulb:
1. Open the hood.
2. Push in on both sides and pull
rearward, while holding the headlight
wiring harness, to disconnect it from
the bulb.
177 ... ProCarManuals.com
Page 179 of 258
Service and Appearance Care
3. Turn the lock ring to the left to release
the bulb. 4. Pull the lock ring and the headlight
bulb straight out. Save the lock ring
and use with
the new bulb.
5. Reverse the steps with a new bulb.
Front Parking and Turn Signal Lights
ro replace the parking and turn signal
mlb:
I. Open the hood.
2. Turn the bulb socket to the left and
pull
it out of light housing.
. . .178
ProCarManuals.com
Page 180 of 258
3. Push the bulb in, turn it to the left and
4. Reverse the steps with a new bulb.
pull it out. Sidemarker Lights
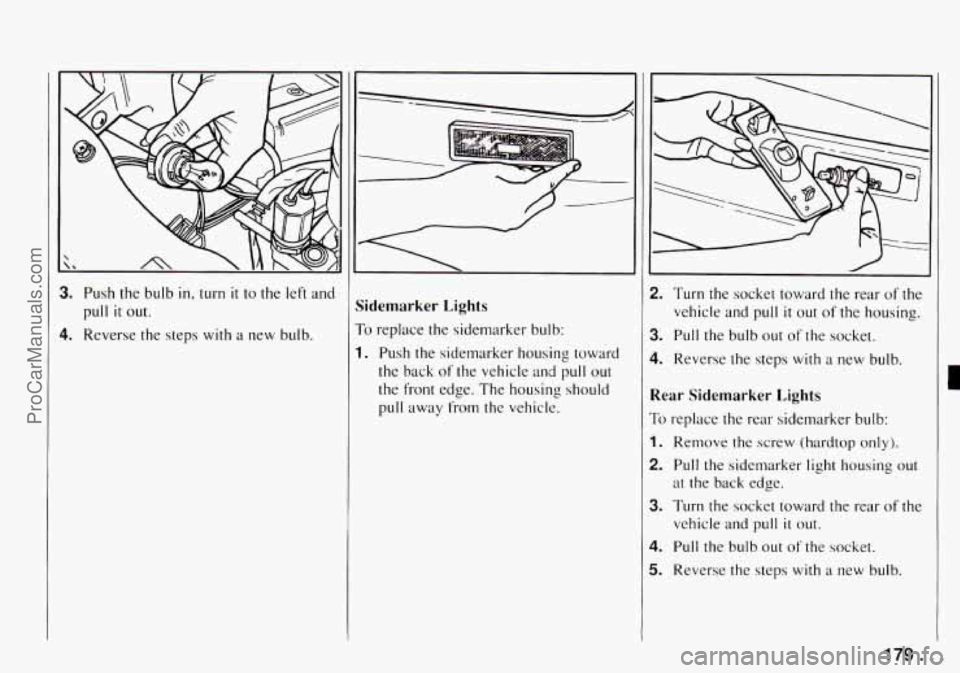
ro replace the sidemarker bulb:
I. Push the sidemarker housing toward
the back
of the vehicle and pull out
the front edge. The housing should
pull away from the vehicle.
2. Turn the socket toward the rear of the
vehicle and pull
it out of the housing.
3. Pull the bulb out of the socket.
4. Reverse the steps with a new bulb.
Rear Sidemarker Lights
To replace the rear sidemarker bulb:
1. Remove the screw (hardtop only).
2. Pull the sidemarker light housing out
3. Turn the socket toward the rear of the
at the back edge.
vehicle and pull
it out.
4. Pull the bulb out ofthe socket.
5. Reverse the steps with a new bulb.
179 ... ProCarManuals.com
Page 181 of 258
Service and Appearance Care
Rear Combination Lights
To remove the rear combination bulbs:
1. Remove the two screws from the
combination lights.
2. Pull the combination light out Fdr
enough to reach the bulb socket. 1. Turn the socket to the right and pull it
1. Pull the bulb out of the socket.
i. Reverse the steps with a new bulb.
out.
. . .I80
ProCarManuals.com
Page 182 of 258

:enter High-Mounted Stoplight
Hardtop)
i, remove the bulb:
. Remove the side pins.
!. Pull the housing forward.
1. Turn the socket counterclockwise and
pull
it out.
I. Pull the bulb out of the socket.
i. Reverse the steps with a new bulb.
ll
TIRE PLACARD
GVWR ~GAWR FRT GAWR RR
I TIRES I
I PRESSURE COLD PSl!kPa I
IJ
Center High-Mounted Stoplight
(Convertible)
To remove the bulb:
1, Remove the two screws and the lens
housing.
pull
it out.
2. Turn the socket counterclockwise and
3. Pull the bulb out of the socket.
4. Reverse the steps with a new bulb.
Loading Your Vehicle
Two labels on your vehicle show how
much weight
it may properly carry. The
Tire-Loading Information label found
on
the driver’s door lock pillar tells you the
proper size, speed rating and
recommended inflation pressures for the
tires on your vehicle.
It also gives you
important information about the number
of people that can be
in your vehicle and
the total weight that
you can carry. This
weight is called the Vehicle Capacity
Weight and includes the weight
of all
occupants, cargo, and all
nonfactory-installed options.
181 . . .
ProCarManuals.com
Page 183 of 258

Service and Appearance Care
1
1
a
I
> 7
i
tl
B
tl
F
tl
0
S
T
t
f
r
1
1)
:he other label is the Certification label,
dso found
on the driver’s door lock pillal
t tells you the gross weight capacity of
Tour vehicle, called the
GVWR (Gross
Jehicle Weight Rating). The
GVWR
dudes the weight of the vehicle, all
ccupants, fuel and cargo. Never exceed
ne GVWR for your vehicle, or the Gross
Ytle Weight Rating (GAWR) for either
he front or rear axle.
ind, if you
do have a heavy load, you
hould spread it out. Don’t carry more
han
400 pounds (1 8 1 kilograms) in your
ear area when four people are in your
wo-wheel drive vehicle.
If you have a
our-wheel drive vehicle, don’t carry
nore than
200 pounds (91 kilograms) in
{our rear area when four people are
in
Tour vehicle.
NOTICE:
I
Your warranty does not cover parts or
components that fail because
of over-
loading.
I ~
[f you put things inside your vehicle -
like suitcases, tools, packages, or
anything else
- they will go as fast as the
vehicle goes. If you have to stop or turn
quickly, or if there is a crash, they’ll keep
going.
. .I82
ProCarManuals.com
Page 184 of 258
! A CAUTION:
1
Tires
We don't make tires. Your new vehicle comes with high quality tires made by a
leading tire manufacturer. These tires are warranted by the tire manufacturers and
their warranties are delivered with every new
Geo. If your spare tire is a different
brand than your road tires, you will have a tire warranty folder from each of these
manufacturers.
183 ... ProCarManuals.com