Page 65 of 274

Downloaded from www.Manualslib.com manuals search engine Features and Controls
NOTICE:
0
0
0
0
When using concentrated washer fluid, follow the
manufacturer’s instructions
for adding water.
Don’t mix water with
ready-to-use washer fluid.
Water can cause the solution to
freeze and damage your washer
fluid tank and other parts of the
washer system. Also, water
doesn’t clean as well as washer
fluid.
Fill your washer fluid tank only
314 full when it’s very cold.
This allows for expansion,
which could damage
the tank
if it is completely full.
Don’t use radiator antifreeze in
your windshield washer. It can
damage your washer system
and paint.
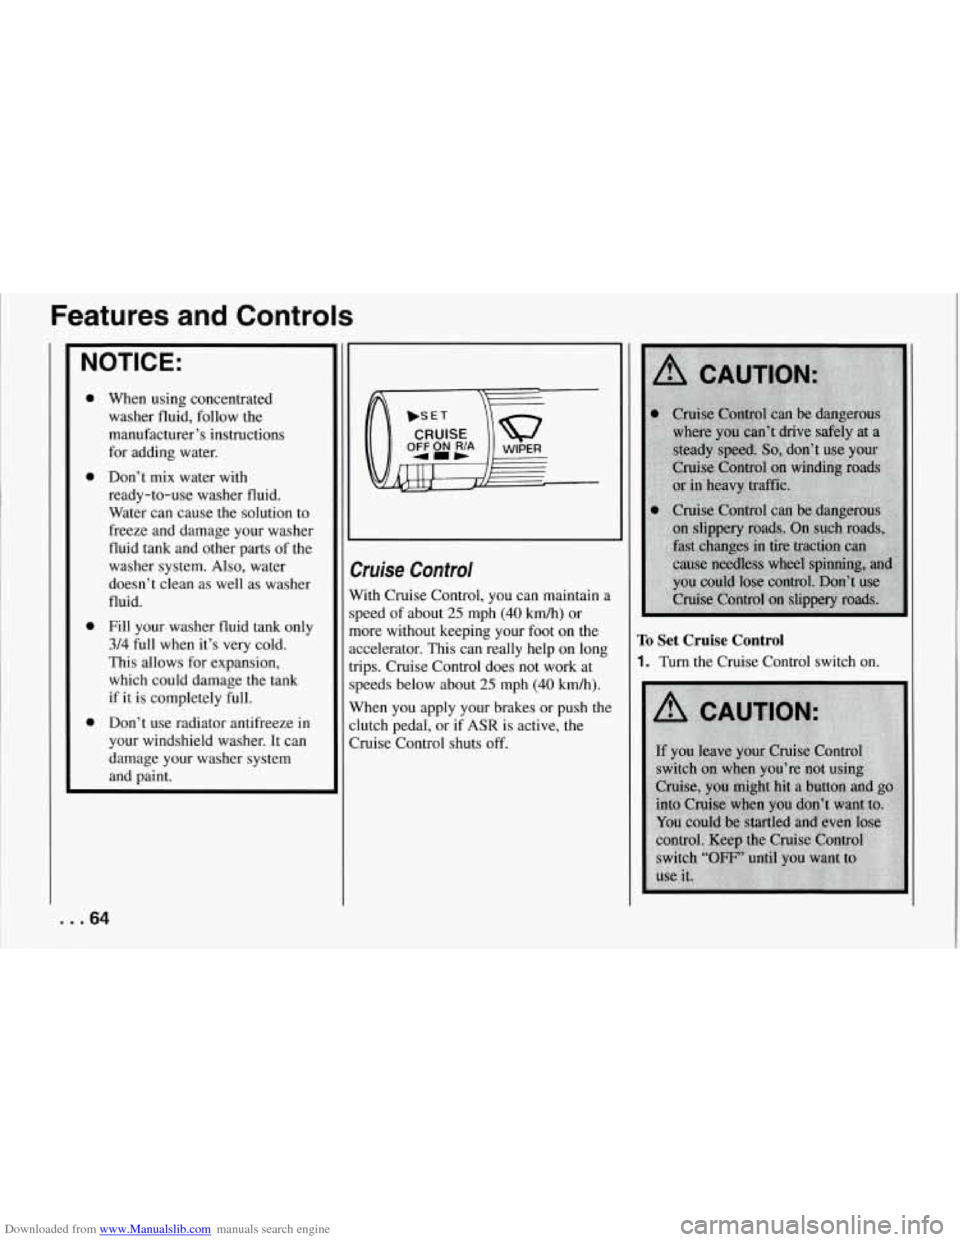
>wise Control
Vith Cruise Control, you can maintain a
peed of about 25 mph (40 km/h) or
nore without keeping your foot on the
ccelerator. This can really help on long
ips. Cruise Control does not work at
peeds below about
25 mph (40 kmh).
Vhen you apply your brakes or push the
lutch pedal, or if ASR is active, the
bise Control shuts off.
To Set Cruise Control
1. Turn the Cruise Control switch on.
... 64
Page 66 of 274

Downloaded from www.Manualslib.com manuals search engine . 1” ..
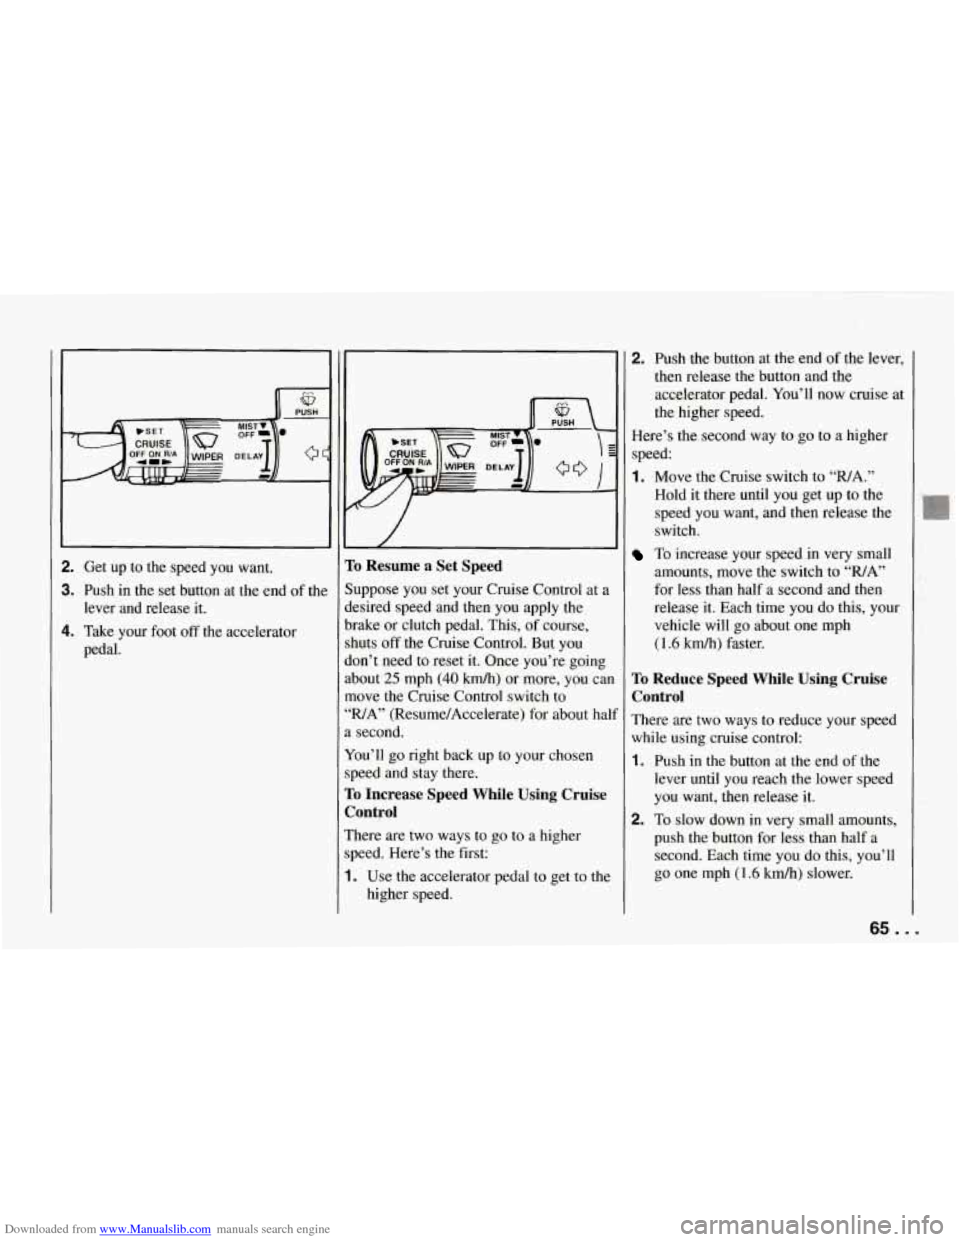
2. Get up to the speed you want.
3. Push in the set button at the end of the
4. Take your foot off the accelerator
lever and release it.
pedal.
I- W
To Resume a Set Speed
Suppose you set your Cruise Control at a
desired speed and then you apply the
brake or clutch pedal. This, of course,
shuts
off the Cruise Control. But you
don’t need to reset
it. Once you’re going
about
25 mph (40 km/h) or more, you ca~
move the Cruise Control switch to
“WA” (Resume/Accelerate) for about ha1
a second.
You’ll go right back up to your chosen
speed and stay there.
To Increase Speed While Using Cruise
Control
There are two ways to go to a higher
speed. Here’s the first:
1. Use the accelerator pedal to get to the
higher speed.
2. Push the button at the end of the lever,
then release the button and the
accelerator pedal. You’ll
now cruise at
the higher speed.
Here’s the second way to go to a higher
speed:
1. Move the Cruise switch to WA.”
Hold it there until you get up to the
speed you want, and then release the
switch.
To increase your speed in very small
amounts, move the switch to
“WA”
for less than half a second and then
release it. Each time you do this, your
vehicle will go about one mph
(1.6 km/h) faster.
To Reduce Speed While Using Cruise
Control
There are two ways to reduce your speed
while using cruise control:
1.
2.
Push in the button at the end of the
lever until you reach the lower speed
you want, then release it.
To slow down in very small amounts,
push the button for less than half a
second. Each time you do this, you’ll
go one mph
(1.6 km/h) slower.
65. .
Page 67 of 274

Downloaded from www.Manualslib.com manuals search engine Features and Controls
Passing Another Vehicle While Using
Cruise Control
Use the accelerator pedal to increase your
speed. When you take your foot off the
pedal, your vehicle will slow down to the
Cruise Control speed you set earlier.
Using Cruise Control on Hills
How well your Cruise Control will work
on hills depends upon your speed, load,
and the steepness of the hills. When going
up steep hills, you may have to step on
the accelerator pedal to maintain your
speed. When going downhill, you may
have to brake or shift to a lower gear to
keep your speed down. Of course,
applying the brake takes you out of
Cruise Control. Many drivers find this to
be too much trouble and don’t use Cruise
Control on steep hills.
... 66
:o Get Out of Cruise Control
’here are several ways to turn off the
bise Control:
. Step lightly on the brake pedal or push
the clutch pedal, if you have a manual
transmission;
OR
!. Move the Cruise switch to “OFF.”
ro Erase Speed Memory
Nhen you turn off the Cruise Control or
he ignition, your Cruise Control set speed
nemory is erased.
Operation of Lights
4lthough your vehicle’s lighting system
:headlights, parking lights, fog lamps,
sidemarker lights and taillights) meets all
applicable federal lighting requirements,
2ertain states and provinces may apply
their own lighting regulations that may
require special attention before you
operate these lights.
For example, some jurisdictions may
require that you operate your fog lamps
only when your lower beam headlights
are also on, or that headlights be turned
on whenever you must use your
windshield wipers. In addition, most
jurisdictions prohibit driving solely with
parking lights, especially at dawn or dusk.
It is recommended that you check with
your own state or provincial highway
authority for applicable lighting
regulations.
Page 68 of 274

Downloaded from www.Manualslib.com manuals search engine Ieadlights
?he headlight knob controls these lights:
b Headlights
1 Taillights
1 Parking lights
1 Sidemarker lights
hm the knob to $R to turn on your
leadlights and other operating lights.
rurn the knob to:OO:to turn on your
mking and other operating lights without
‘our headlights.
rurn the knob to “OFF’ to turn off the
ights.
(our digital display will dim at dusk to
emind you to turn on your headlights. To
read your odometer and fuel level with
the ignition
off, turn on your parking
lights.
Lights On Reminder
If you turn the ignition “Off” and leave
the lights on, you will hear a chime.
Brightness Control
The “DIMMER’ switch controls the
brightness of your instrument panel lights
when your headlights or parking lights are
on. Move the switch up or down to
brighten or dim the lights. If you turn the
switch all the way up, your courtesy,
reading, map and cargo area lights will
some on. Be sure to turn off the lights
when you leave your vehicle.
Headlight Doors
The headlight doors are designed to open
when you
turn the headlights on and close
when you turn the headlights and parking
lights
off. If you turn the headlights on,
then turn
the headlight switch back to the
parking lights setting, the headlight doors
will stay open.
You can open the doors manually using
the knob next to the headlight assembly.
Turn the knob counterclockwise until the
doors are open.
The headlight doors should be open when
driving in icy or snowy conditions to
prevent the doors from freezing closed
and when washing the vehicle to help
clean the headlights.
67. .
Page 69 of 274

Downloaded from www.Manualslib.com manuals search engine Features and Controls
Daytime Running Lights (Canada)
The Canadian Federal Government has
decided that “Daytime Running Lights”
(DE) are a useful feature, in that DIU
can make your vehicle more visible to
pedestrians and other drivers during
daylight hours. DIU are required on new
vehicles sold
in Canada.
Your
DRL, work with a light sensor on top
of the instrument panel. Don’t cover it up.
The front turn signal lights will come on
in daylight when:
0 The ignition is on
0 The headlight switch is off, and
0 The parking brake is released.
At dusk, the exterior lights will come on
automatically and the front turn signal
lights will go out. At dawn, the exterior
lights will go out and the front turn signal
lights will come on (if the headlight
switch is
off).
Of course, you may still turn on the
headlights any time
you need to.
To idle your vehicle with the DRL off, set
the parking brake while the ignition is
in
the “Off” or “LOCK” position. Then start
the vehicle. The DRL will stay
off until
you release the parking brake.
... 68
$.
Fog Lights
Use your fog lights for better vision in
Foggy or misty conditions. Your parking
lights or low beam headlights must be
on
or your fog lights won’t work.
To turn the fog lights on, push the button.
Push the button again to turn the fog
lights
off. A light above the button will
come on when the fog lights are on.
Interior Lights
Courtesy Lights
When any door is opened, the interior
lights will go on (unless it’s bright
outside). The lights will stay on for about
30 seconds or until you turn on the
ignition.
Front Map Lights
Your inside rearview mirror includes two
map lights. The lights will go on when a
door is opened. When the doors are
closed and the ignition is on, press the
switch to turn on the lights.
Page 70 of 274
Downloaded from www.Manualslib.com manuals search engine Mirrors
Inside Daymight Rearview Mirror
An inside rearview mirror is attached
, above your windshield. The mirror has
pivots
so that you can adjust it.
You can adjust the mirror for day
or nigh1
driving. Pull the tab for night driving to
reduce glare. Push the tab for daytime
driving.
Convex Outside Mirror
Your right side mirror is convex.
A convex mirror’s surface is curved so
you can see more from the driver’s seat.
Power Remote Control Mirrors
The electric mirror control is on the
Iriver’s door.
To adjust either mirror, turn
the switch to “L,” (left) or “R’ (right).
rhen use the joystick to adjust the- mirror
When you are done adjusting the mirrors
move the control back to the center.
69 ...
Page 71 of 274
Downloaded from www.Manualslib.com manuals search engine Features and Controls
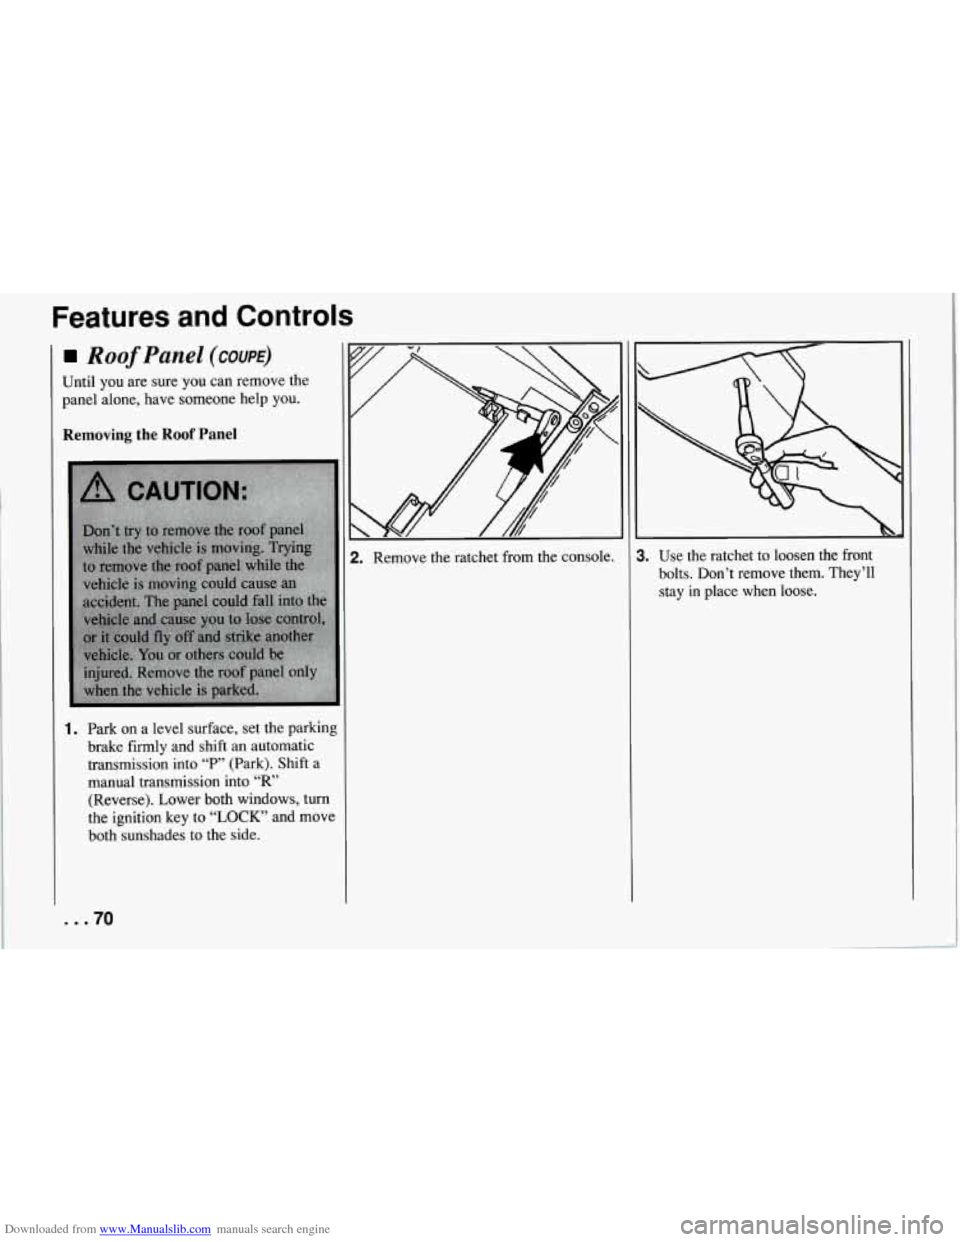
Roof Panel (COUPE)
Until you are sure you can remove the
panel alone, have someone help you.
Removing the Roof Panel
1. Park on a level surface, set the parking
brake firmly and shift an automatic
transmission into
“P” (Park). Shift a
manual transmission into
“R’
(Reverse). Lower both windows, turn
the ignition key to
“LOCK” and move
both sunshades to the side.
... 70
2. Remove the ratchet from the console. 1. Use the ratchet to loosen the front
bolts. Don’t remove them. They’ll
stay
in place when loose.
Page 72 of 274

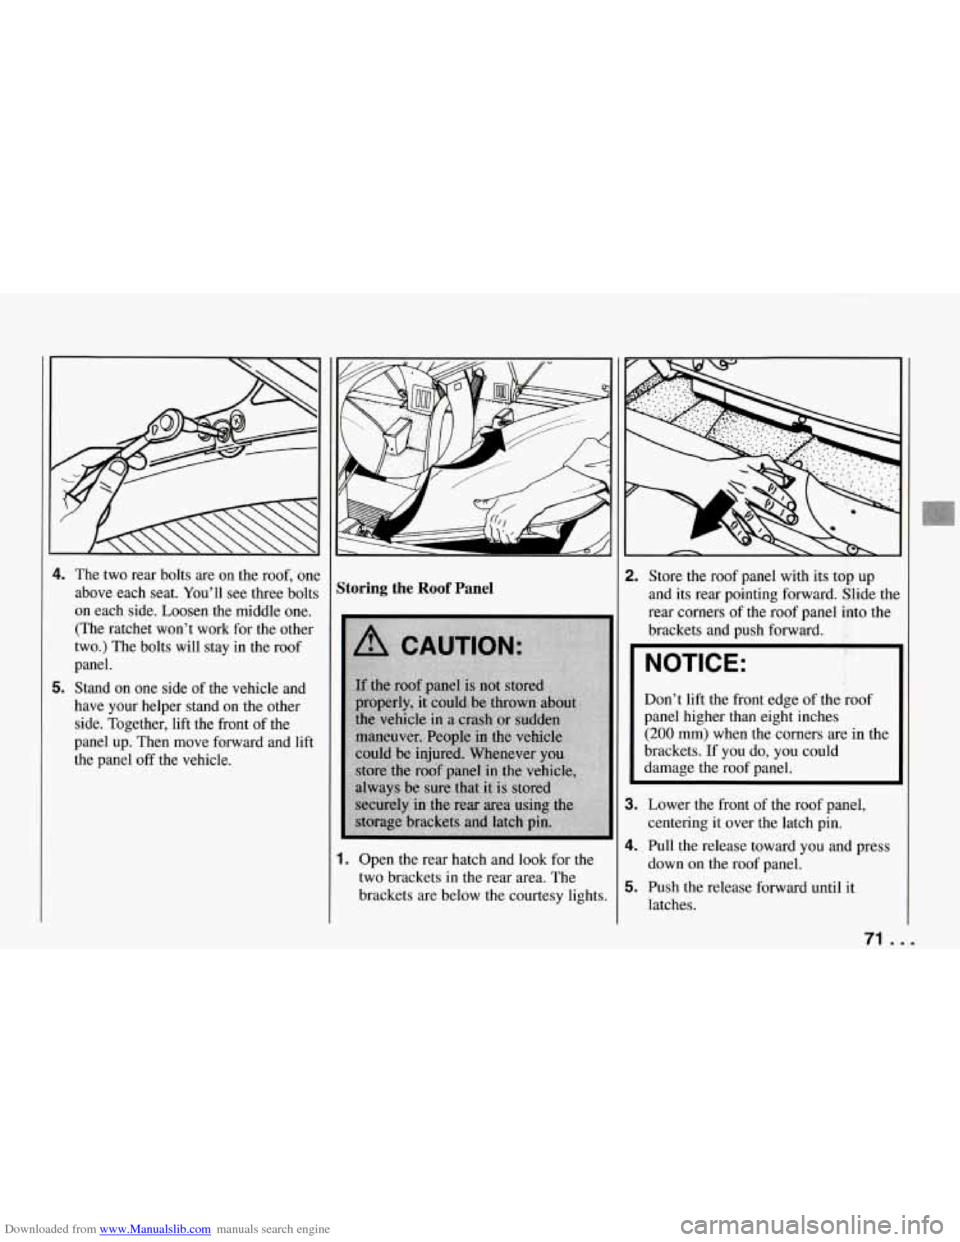
Downloaded from www.Manualslib.com manuals search engine 4. The two rear bolts are on the roof, one
above each seat. You’ll see three bolts
on each side. Loosen the middle one. (The ratchet won’t work for the other
two.) The bolts will stay in the roof
panel.
5. Stand on one side of the vehicle and
have your helper stand on the other
side. Together, lift the front of the
panel up. Then move forward and lift
the panel
off the vehicle.
Storing the Roof Panel
1. Open the rear hatch and look for the
two brackets in the rear area. The
brackets are below the courtesy lights.
2. Store the roof panel with its top up
and its rear pointing forward. Slide tht
rear corners of the roof panel into the
brackets and push forward.
NOTICE:
Don’t lift the front edge of the roof
panel higher than eight inches
(200 mm) when the corners are in the
brackets. If you do, you could
damage the roof panel.
3. Lower the front of the roof panel,
centering it over the latch pin.
4. Pull the release toward you and press
down on the roof panel.
5. Push the release forward until it
latches.
71 ...