Page 732 of 920

STEERING COLUMN
Article Text
1993 Volkswagen Corrado
For Volkswagen Technical Site: http://vw.belcom.ru
Copyright © 1998 Mitchell Repair Information Company, LLC
Wednesday, March 22, 2000 09:23PM
ARTICLE BEGINNING
1993 STEERING
Volkswagen - Steering Columns
Corrado SLC
DESCRIPTION
Swing-away steering column is held by a clamp and leaf
spring. On impact, the "U" joint shaft pushes steering column against
the leaf spring. The spring allows the column to disengage and swing
away.
REMOVAL & INSTALLATION
STEERING WHEEL & HORN PAD
Removal & Installation
1) Disconnect negative battery cable. On Corrado, lift cover
from bottom, then pull cover away from steering wheel. Spread horn
button locating lugs, then separate contact plates.
2) Disconnect horn wiring. Ensure steering wheel is in
straight-ahead position. Mark shaft and wheel for reassembly
reference. Remove retaining nut and washer. Pull steering wheel from
shaft. To install, reverse removal procedure.
TURN SIGNAL SWITCH
Removal & Installation
Remove steering wheel. See STEERING WHEEL & HORN PAD. Unplug
harness connector. Remove turn signal switch. To install, reverse
removal procedure.
WINDSHIELD WIPER SWITCH
Removal & Installation
Remove steering wheel. See STEERING WHEEL & HORN PAD. Remove
turn signal switch. See TURN SIGNAL SWITCH. Unplug harness connector.
Remove windshield wiper switch. To install, reverse removal procedure.
IGNITION SWITCH
Removal (Corrado)
1) Remove steering column and steering column switch. Insert
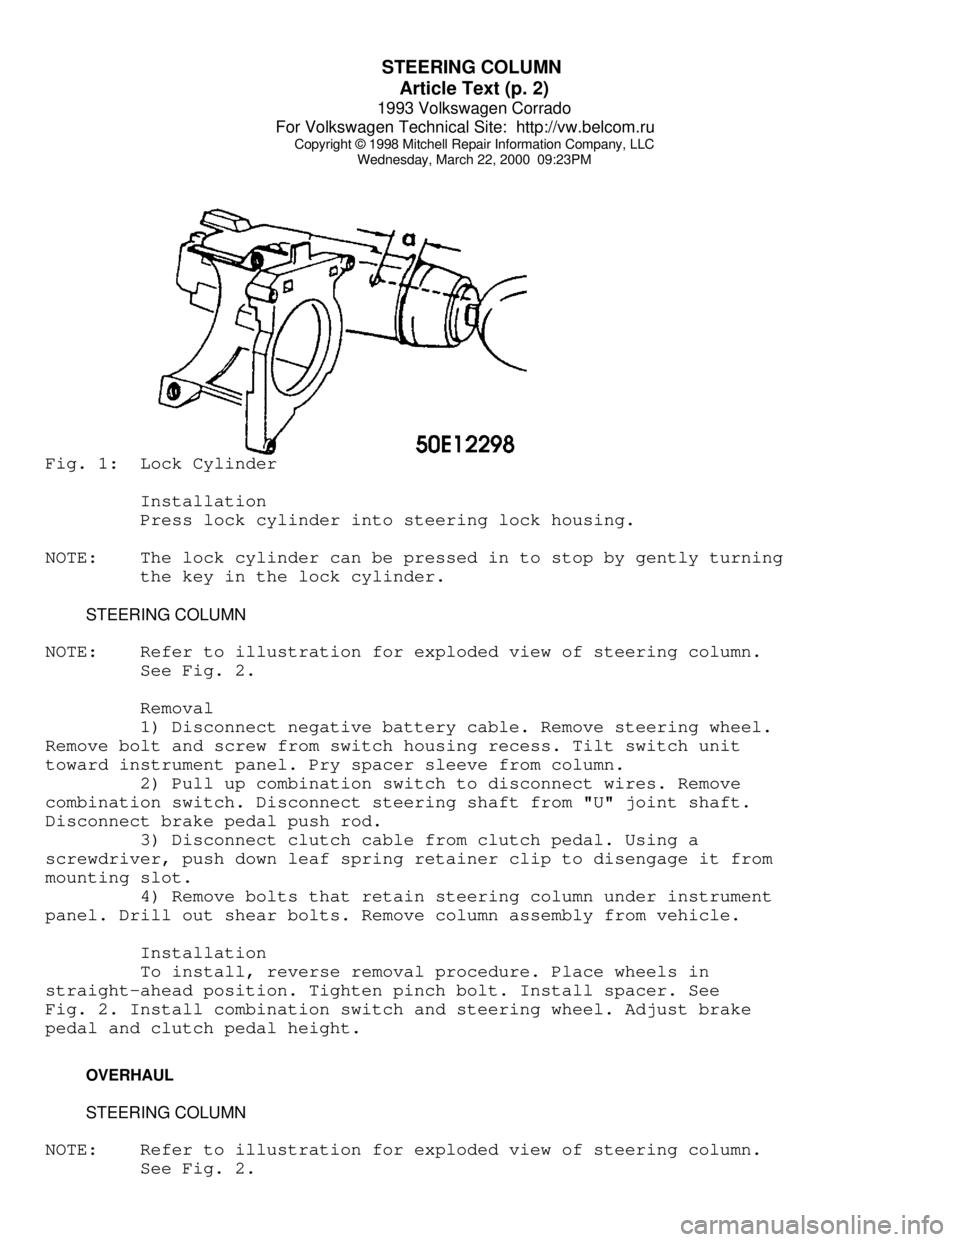
ignition key in ignition lock. Mark dimension "a" in Fig. 1. on line
with key (0.5" (12mm)).
2) Bore hole approximately 0.12" (3mm) in diameter through
steering lock housing until stop spring of lock cylinder is visible;
hole depth is approximately 0.12" (3mm). Compress stop spring with a
punch and pull out lock cylinder with key.
Page 733 of 920

STEERING COLUMN
Article Text (p. 2)
1993 Volkswagen Corrado
For Volkswagen Technical Site: http://vw.belcom.ru
Copyright © 1998 Mitchell Repair Information Company, LLC
Wednesday, March 22, 2000 09:23PMFig. 1: Lock Cylinder
Installation
Press lock cylinder into steering lock housing.
NOTE: The lock cylinder can be pressed in to stop by gently turning
the key in the lock cylinder.
STEERING COLUMN
NOTE: Refer to illustration for exploded view of steering column.
See Fig. 2.
Removal
1) Disconnect negative battery cable. Remove steering wheel.
Remove bolt and screw from switch housing recess. Tilt switch unit
toward instrument panel. Pry spacer sleeve from column.
2) Pull up combination switch to disconnect wires. Remove
combination switch. Disconnect steering shaft from "U" joint shaft.
Disconnect brake pedal push rod.
3) Disconnect clutch cable from clutch pedal. Using a
screwdriver, push down leaf spring retainer clip to disengage it from
mounting slot.
4) Remove bolts that retain steering column under instrument
panel. Drill out shear bolts. Remove column assembly from vehicle.
Installation
To install, reverse removal procedure. Place wheels in
straight-ahead position. Tighten pinch bolt. Install spacer. See
Fig. 2. Install combination switch and steering wheel. Adjust brake
pedal and clutch pedal height.
OVERHAUL
STEERING COLUMN
NOTE: Refer to illustration for exploded view of steering column.
See Fig. 2.
Page 748 of 920

SUN ROOF - POWER
Article Text
1993 Volkswagen Corrado
For Volkswagen Technical Site: http://vw.belcom.ru
Copyright © 1998 Mitchell Repair Information Company, LLC
Wednesday, March 22, 2000 09:23PM
ARTICLE BEGINNING
1993 ACCESSORIES & EQUIPMENT
Volkswagen Power Sun Roof
Volkswagen; Corrado SLC, EuroVan, Golf, GTI, Jetta, Passat
DESCRIPTION & OPERATION
The power sun roof operates at all times when the ignition is
in the on position. Power sun roof will operate after the ignition is
turned off until driver's door is opened. Power sun roof can also be
closed by inserting key in door lock and holding in the locked
position. If power system fails, sun roof can be operated manually by
removing control panel and rotating crank.
ADJUSTMENTS
NOTE: Adjustment information for EuroVan is not available.
PARALLEL ALIGNMENT
Corrado SLC, Golf, GTI, Jetta & Passat
1) Obtain radio code. Disconnect negative battery cable.
Using Headliner Trim Remover (3195), disengage headliner trim frame
from guide rails and push toward rear as far as possible. See Fig. 5
or 7.
2) Pry off interior light. Remove sun roof cable drive cover.
Remove cable drive mounting screws. Lower pinion drive until drive
pinion no longer meshes with cables.
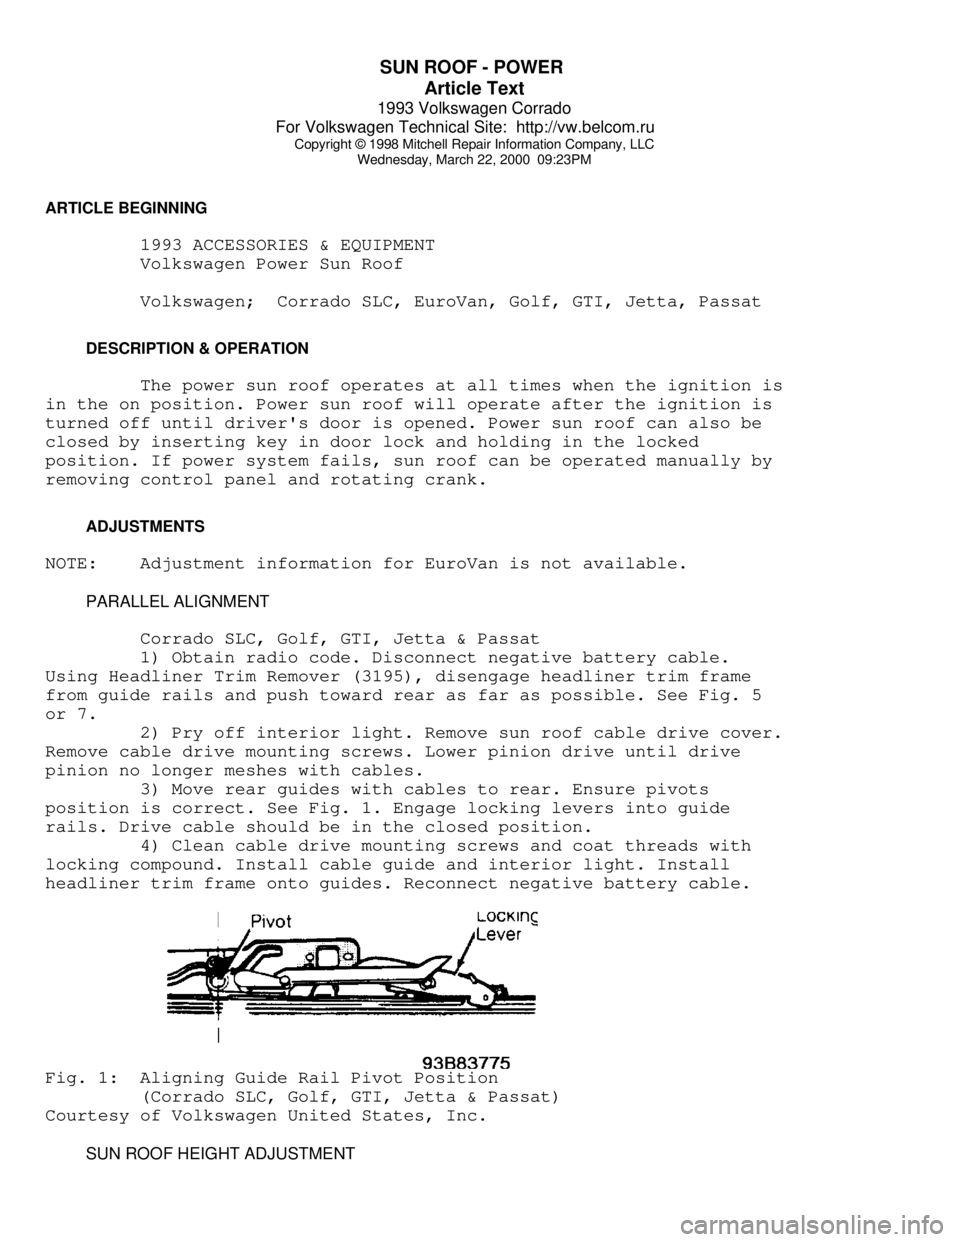
3) Move rear guides with cables to rear. Ensure pivots
position is correct. See Fig. 1. Engage locking levers into guide
rails. Drive cable should be in the closed position.
4) Clean cable drive mounting screws and coat threads with
locking compound. Install cable guide and interior light. Install
headliner trim frame onto guides. Reconnect negative battery cable.Fig. 1: Aligning Guide Rail Pivot Position
(Corrado SLC, Golf, GTI, Jetta & Passat)
Courtesy of Volkswagen United States, Inc.
SUN ROOF HEIGHT ADJUSTMENT