1993 CHEVROLET CAVALIER inflation pressure
[x] Cancel search: inflation pressurePage 193 of 308
Downloaded from www.Manualslib.com manuals search engine Don’t try to put a wheel cover on your
compact spare tire.
It won’t fit. Store the
wheel cover and plastic cap nuts in the
trunk or rear area until you have the flat
tire repaired or replaced.
16. Store the flat tire in the compact
spare tire compartment, and secure
with the wing bolt and extension.
Store the jack and wheel wrench in
their compartment, also.
MU I IVN 1
Storing a jack, a tire, or other
:quipment in the passenger
compartment
of the vehicle could
cause injury. In a sudden stop
or
collision, loose equipment could
strike someone. Store all these in
the proper place.
The compact spare is for temporary use
only. Replace the compact spare tire
with a full-size tire as soon as you can.
See
Compact Spare Tire next in this
section.
Compact Spare Tire
Although the compact spare was fully
inflated when your vehicle was new, it
can lose air after a time. Check the
inflation pressure regularly.
It should be
60 psi (420 Wa). The compact spare is
made to go up to
3,000 miles (5 000 km),
so you can finish your trip and have
your full-size tire repaired or replaced
where you want.
Of course, it’s best to
replace
your spare with a full-size tire as
soon as you can. Your spare will last
longer and be in good shape in case you
need it again.
Your anti-lock brake system warning
light may come on when you are driving
with a compact spare. See the
Index
under Anti-Lock Brake System Warning
Light.
191
Page 229 of 308
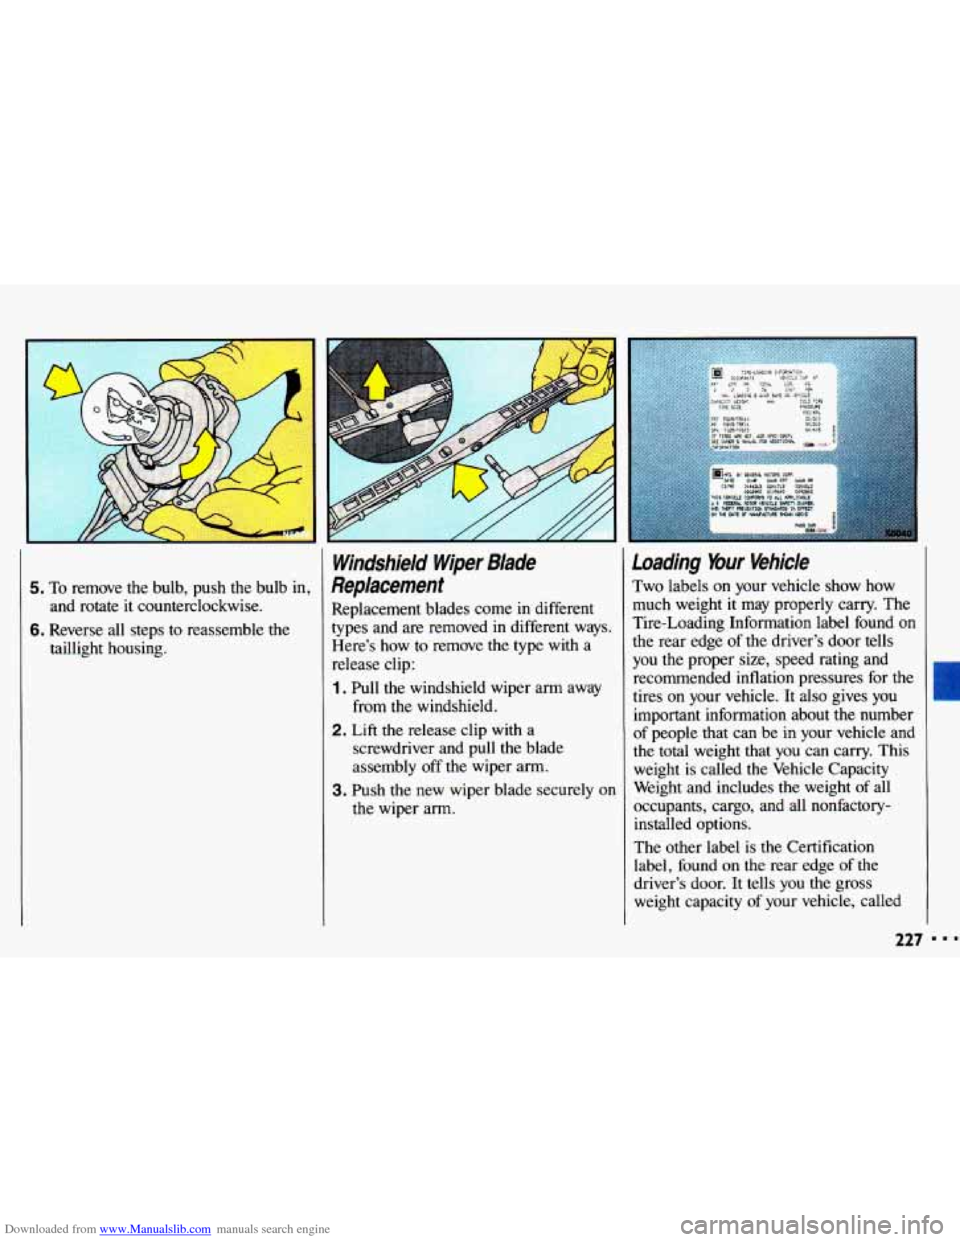
Downloaded from www.Manualslib.com manuals search engine 5. To remove the bulb, push the bulb in,
and rotate it counterclockwise.
6. Reverse all steps to reassemble the
taillight housing.
Windshield Wiper Blade
Replacement
Replacement blades come in different
types and are removed in different ways.
Here’s how
to remove the type with a
release clip:
1. Pull the windshield wiper arm away
2. Lift the release clip with a
from the windshield.
screwdriver and pull the blade
assembly
off the wiper arm.
the wiper arm.
3. Push the new wiper blade securely on
Loading %ur Vehicle
Two labels on your vehicle show how
much weight it may properly carry. The
Tire-Loading Information label found
on
the rear edge of the driver’s door tells
you the proper size, speed rating and
recommended inflation pressures for the
tires on your vehicle. It also gives
you
important information about the number
of people
that can be in your vehicle and
the total weight that you can carry. This
weight
is called the Vehicle Capacity
Weight and includes the weight
of all
occupants, cargo, and all nonfactory- installed options.
The other label
is the Certification
label, found on the rear edge of the
driver’s door. It tells you the gross
weight capacity
of your vehicle, called
I
227
Page 232 of 308
Downloaded from www.Manualslib.com manuals search engine Service & Appearance Care
lnflation-lire Pressure
The Tire-Loading Information label
which is
on the rear edge of the driver’s
door shows the correct inflation
pressures for your tires, when they’re
cold. “Cold” means your vehicle has
been sitting for at least three hours or
driven no more than a mile. Don’t
let anyone tell you that
underinflation
or overinflation is
all right. It’s
not. If your tires don’t
have enough
you can get:
Too much flexing
Too much heat
Tire overloading
Bad weLA
Bad handling
Bad fuel economy. ition)
If your tires have too much air
(overinflation), you can get:
Unusual wear
Bad handling
Rough ride
Needless damage from road
hazards.
When to Check:
Check your tires once a month or more.
Don’t forget your compact spare tire. It
should be at
60 psi (420 kpa).
How to Check:
Use a good quality pocket-type gage to
check tire pressure. Simply looking at
the tires will not tell you the pressure,
especially if
you have radial tires-
which may look properly inflated even if
they’re underinflated.
If your tires have valve caps, be sure to
put them back on. They help prevent
leaks by keeping out dirt and moisture.
230
Page 233 of 308
Downloaded from www.Manualslib.com manuals search engine Tire hspection and Rotation I
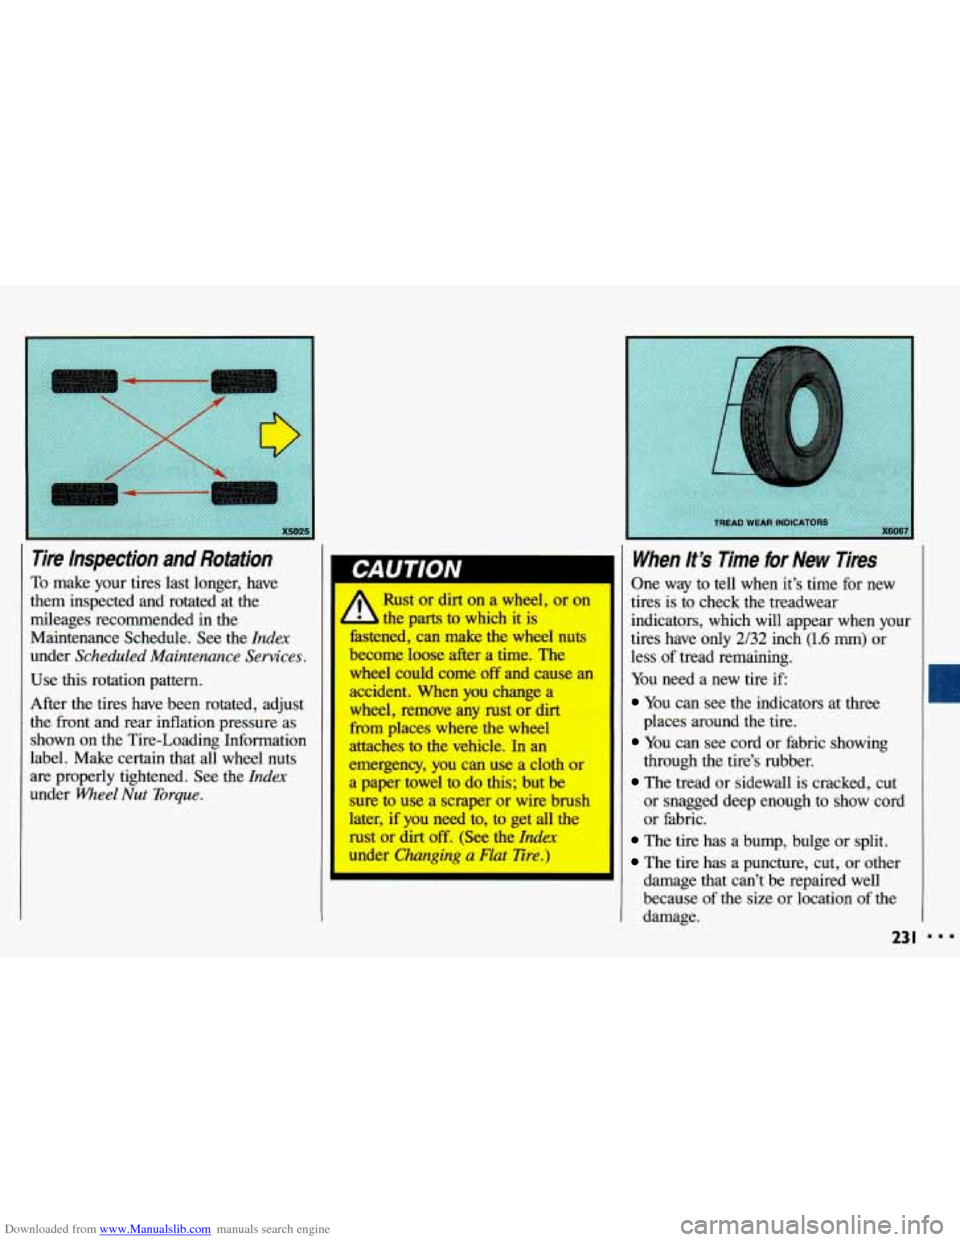
Use this rotation pattern.
After the tires have been rotated, adjust
the front and rear inflation pressure as
shown on the Tire-Loading Information
label. Make certain that all wheel nuts
are properly tightened. See the Index
under Wheel Nut Torque.
To make your tires last longer, have
them inspected and rotated at the
mileages recommended in the
Maintenance Schedule. See the
Index
under Scheduled Maintenance Services.
u I I’ -
Rust or dirt on a wheel, or on
; parts to which it is
fastened, can make the wheel nuts
become loose after a time. The
wheel could come off and cause an
accident. When you change a
wheel, remove any rust or dirt
from
places where the wheel
attaches to the vehicle. In an
emergency, you can use a cloth or
a paper towel to do this; but be
sure to use a scraper or wire brush
later, if you need to, to get all the
rust or dirt
off. (See the Index
under Changing a Flat Tire.)
When lt’s Time for New Tires
One way to tell when it’s time for new
tires
is to check the treadwear
indicators, which will appear when your
tires have
only 2/32 inch (1.6 mm) or
less of tread remaining.
You need a new tire if
You can see the indicators at three
You can see cord or fabric showing
The tread or sidewall is cracked, cut
places around the tire.
through the tire’s rubber.
or
snagged deep enough to show cord
or fabric.
The tire has a bump, bulge or split.
The tire has a puncture, cut, or other
damage that can’t be repaired well
because
of the size or location of the
damage.
23 I
Page 273 of 308
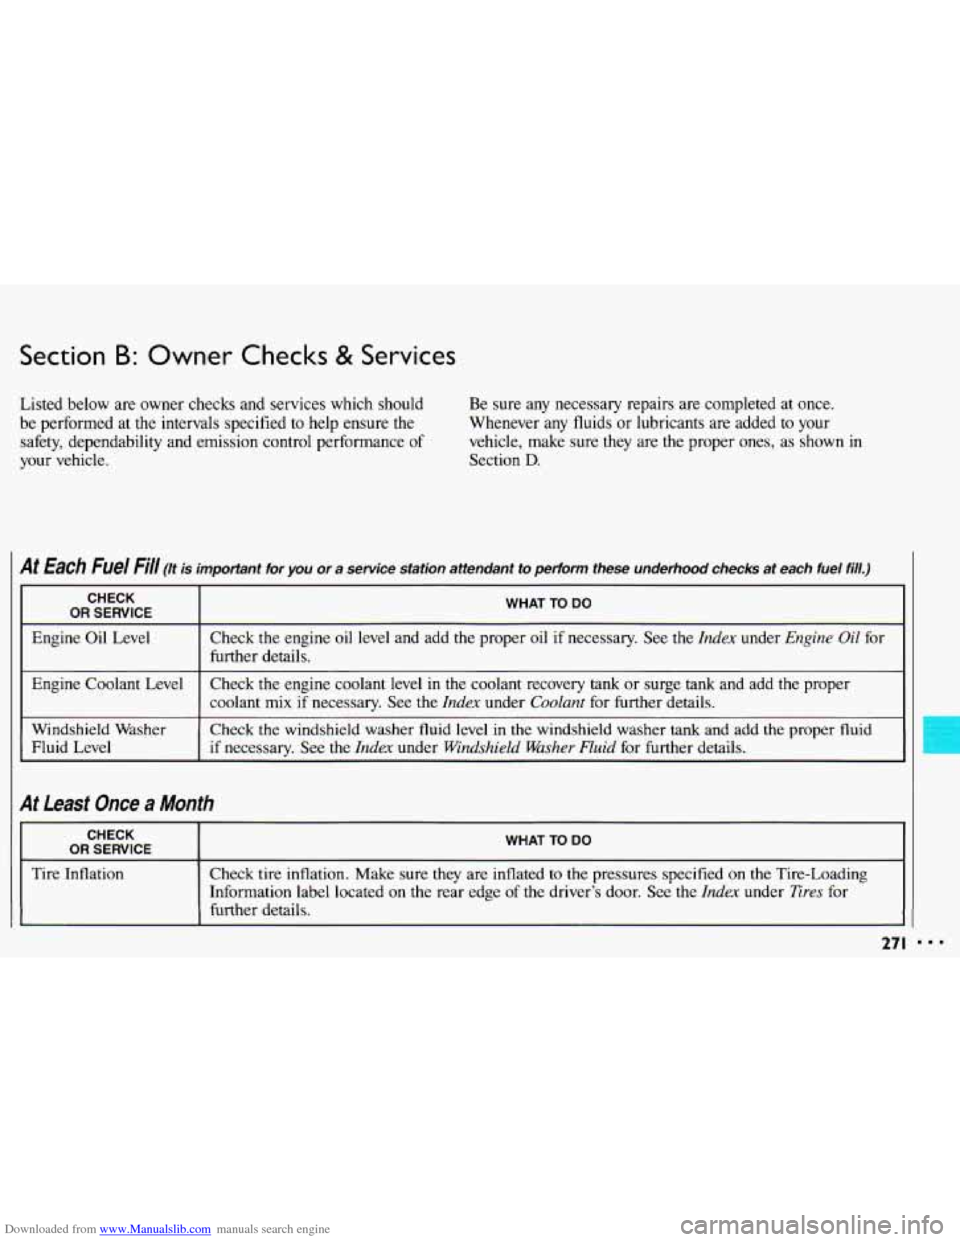
Downloaded from www.Manualslib.com manuals search engine Section B: Owner Checks & Services
Listed below are owner checks and services which should
be performed at the intervals specified to help
ensure the
safety, dependability and emission control performance of
your vehicle. Be
sure any necessary repairs are completed at once.
Whenever any fluids or lubricants are added to your
vehicle, make sure they are the proper ones, as shown in
Section D.
At Each Fuel Fill (It is important for you or a service station attendant to perform these underhood checks at \
each fuel fill.)
CHECK
OR SERVICE I WHAT TO DO
Engine Oil Level
1
Check the engine oil level and add the proper oil if necessary. See the Index under Engine Oil for
further details.
Engine Coolant Level Check the engine coolant level
in the coolant recovery tank or surge tank and add the proper
coolant
mix if necessary. See the Index under Coolant for further details.
Windshield Washer Check the windshield washer fluid level
in the windshield washer tank and add the proper fluid
Fluid Level if necessary. See the
Index under Windshield Washer Fluid for further details. I
At Least Once a Month
CHECK
I OR SERVICE I WHAT TO DO
Tire Inflation
Check tire inflation. Make sure they are inflated to the pressures specified on the Tire-Loading
Information label located on the rear edge of
the driver’s door. See the Index under fires for
further details.
27 I I..
Page 301 of 308
Downloaded from www.Manualslib.com manuals search engine Identification Number.
Vehicle
................. .56. 246
Idling Your Engine
........... .68. 71
Sand. Mud. Ice or Snow
........ 192
If You're Stuck: In
Ignition
Key
......................... 48
Key Release Button ............ 55
Positions
..................... 55
Illuminated Entry System
.......... 50
Indicator Lights (see
Warning Lights)
Infant Restraint (see Child Restraints)
Inflation. Tires ................. 230
Inside Rearview Mirror
........... 85
Instrument Panel ................ 93
Instrument Panel Wming'Lights
.... 96
Intermittent Windshield Wipers
..... 83
.................... J ack. Tire 185
Jump Starting
.................. 164
Key Release Button
............. 55
Keys .......................... 48 Lane
Change Indicator
........... 73
Lap-Shoulder Safety Belt
.......... 23
Front
..................... 23. 27
Rear
........................ 28
Use by Children ........... .33. 43
Latches. Seatback
................ 14
Liftgate Ajar Light
................... 102
Lock
........................ 52
Lock Release
................. 52
Safety Warning
................ 52
Lighter
........................ 87
Dome/Map
................... 82
Headlights
................... 78
Lights
Daytime Running Lights
......... 80
Flash-to-Pass .................. 81
Instrument Panel Intensity Control
... 81
Rear Compartment
............ 82
Removing
& Replacing
Bulbs
........... .224, 225, 253
Replacement Bulbs
........... 253
Taillights
.............. .225. 253
Turn Signal
.................. 73
Warning Lights
............... 96
Loading Your Vehicle
....... .91. 227 Locks
......................... 49
Long Distance Driving
.......... 152
Low Oil Pressure Warning
........ 98
Luggage Carrier
................. 91
Low Battery
................... 164
Maintenance Record
........... 279
Maintenance Schedule
.......... 259
Malfunction Indicator Lamp
(Check Engine Light)
.......... 102
Manual Front Seat
............... 12
Manual Sunroof
................. 88
Manual Transaxle
Adding Fluid
....... .215. 250, 252
Shifting
..................... 64
Master Cylinder. Brake
.......... 221
Methanol in Gasoline
........... 198
Mileage Indicator
Mirrors Checking
Fluid
............... 213
Starting the Engine
............ 56
(see
Odometer & Speedometer)
Convex Outside ............... 85
Inside Manual Day/Night ....... 85
299 m ..
Page 304 of 308
Downloaded from www.Manualslib.com manuals search engine Index
Steering In Emergencies
............... 139
Off-Road Recovery
............ 139
Tips
........................ 138
Steering Wheel. Tilt
.............. 73
Stereo Sound Systems (see
Audio Systems)
Storing Your Vehicle ............ 223
Stuck. If You Are
............... 192
Sunroof
....................... 88
Sun Visors ..................... 86
Tachometer ................... 95
Taillight Bulb Replacement.
.. .225. 253
Tape Player (see
Audio Systems)
Technical Facts & Specifications
Bulbs
...................... 253
Electrical Equipment. Add-on
... 247
Fluid Capacities
& Types .. .250, 252
Fuses
& Circuit Breakers ...... -247
Service
Parts Identification
Label
..................... 246
Vehicle Identification Number
(VIN)
................. 56. 246
Temperature Gage
............... 97
102
Theft ......................... 53
Thermostat
.................... 219
Tilt Steering Wheel .............. 73
Time. Setting the
................ 111
Tires
......................... 229
Buying New
................ -232
Chains
................ .192. 236
Flat. Changing
............... 184
Inflation
.................... 230
Inspection
& Rotation .......... 231
Loading
.................... 230
Pressure
.................... 230
Quality Grading
.............. 232
Spare. Compact
............... 191
Tread Wear Indicators
......... -231
Wheel Alignment and
Tire Balance
............... 234
Wheel Replacement
........... 234
When
to Replace Wheels ....... 234
Winter Driving and Tires
.. .157. 236
Top Strap
...................... 36
Torque Lock
................... 157
Towing a Trailer
................ 161
Towing Your Chevrolet
.......... 169
Traffic Lights
.................. 126
Trailer Towing
................. 161 Transaxle. Automatic
(see
Automatic Transaxle)
Transaxle. Manual (see
Manual Transaxle)
Transmission. Automatic
(see
Automatic Transaxle)
Transmission. Manual
(see
Manual Transaxle)
Trip Odometer .................. 95
Trunk
......................... 51
Trunk Cargo Anchors .......... 54
Trunk Convenience Net
......... 54
Trunk/Liftgate Release, Lockout
............. 51
Turn Signal Indicator
............ -73
Turn SignaYHeadlight Beam Lever
... 73
Cruise Control
................ 74
Headlight High/Low Beam
...... 81
Turn & Lane Change Indicator ... 73
Unleaded Gasoline
............. 197
Upholstery Care
................ 238
Upshift Indicator Light
....... .65. 101
Urban Driving
................. 149