1993 CHEVROLET CAVALIER tire type
[x] Cancel search: tire typePage 144 of 308
Downloaded from www.Manualslib.com manuals search engine Your Driving and the Road
Loss of Control
Let’s review what driving experts say
about what happens when the three
control systems (brakes,‘ steering and
acceleration) don’t have enough friction
where the tires meet
the road to do what
the driver has asked.
In any emergency, don’t give up. Keep
trying
to steer and constantly seek an
escape route or area of less danger.
I42
Skidding
In a skid, a driver can lose control of
the vehicle. Defensive drivers avoid
most skids
by taking reasonable care
suited
to existing conditions, and by not
“overdriving” those conditions.
But
skids are always possible.
The three types of skids correspond
to
your Chevrolet’s three control systems.
In the braking skid your wheels aren’t
rolling. In the steering
or cornering
skid, too much speed or steering
in a
curve causes tires to slip and lose
cornering force. And
in the acceleration
skid too much throttle causes the driving
wheels
to spin.
A cornering skid and an acceleration
skid are best handled by easing your
foot off the accelerator pedal. If your
vehicle starts
to slide (as when you turn
a corner on a wet, snow- or ice-covered
road), ease your foot off the accelerator
pedal as soon
as you feel the vehicle
start to slide. Quickly steer the way you
want the vehicle to
go. If you start
steering quickly enough, your vehicle
will straighten out. As
it does, straighten
the front wheels.
Of course, traction is reduced when
water, snow, ice, gravel, or other
material is
on the road. For safety, you’ll
want to
slow down and adjust your
driving to these conditions. It is
important to slow down on slippery
surfaces because stopping distance
will
be longer and vehicle control more
limited.
Page 171 of 308
Downloaded from www.Manualslib.com manuals search engine 12. Remove the cables in reverse order
to prevent electrical shorting. Take
care that they don't touch each other
or any other metal.
I
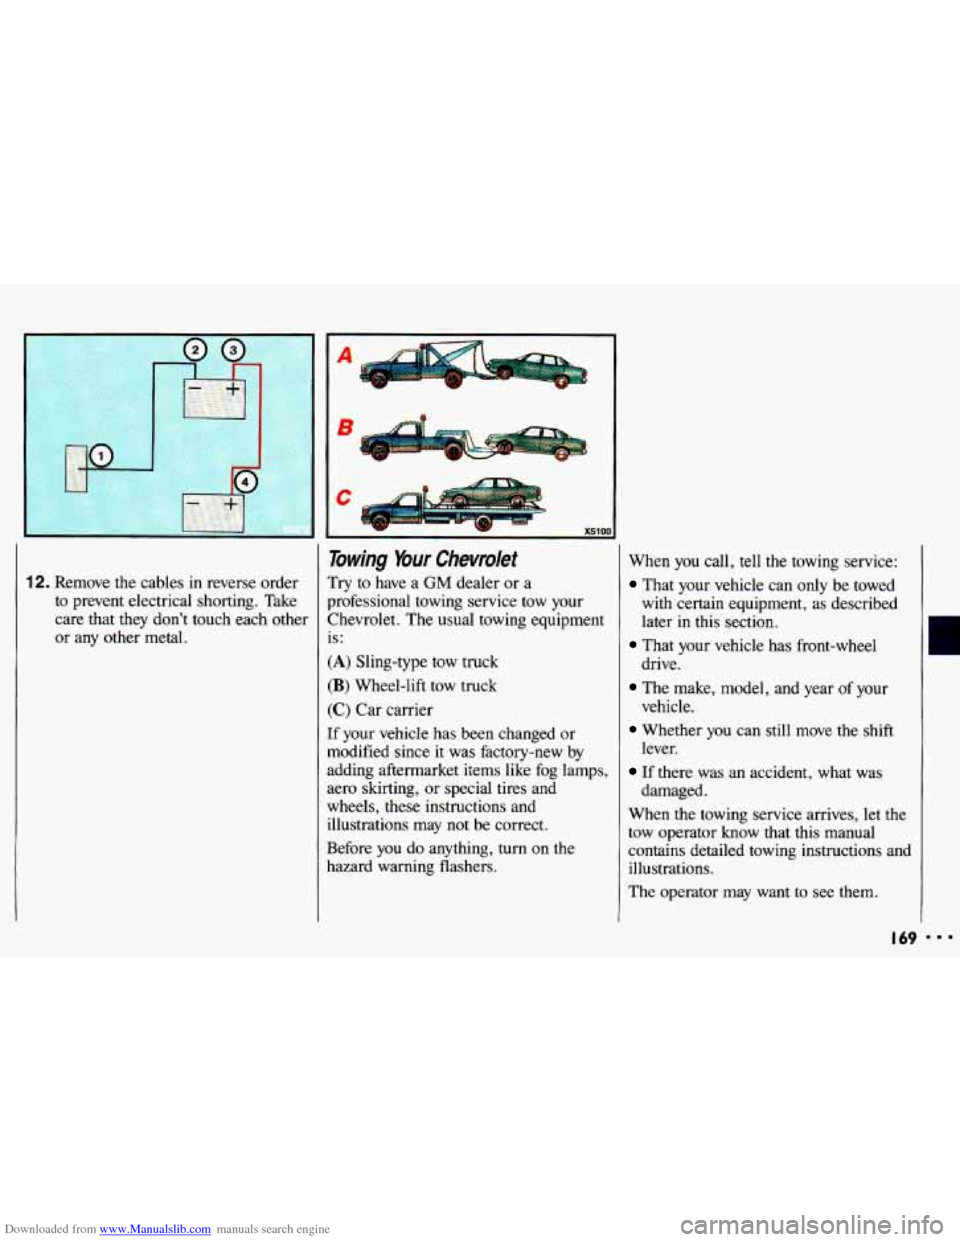
Towing Your Chevrolet
Try to have a GM dealer or a
professional towing service tow your
Chevrolet. The usual towing equipment
is:
(A) Sling-type tow truck
(B) Wheel-lift tow truck
(C) Car carrier
If your vehicle has been changed or
modified since it was factory-new by
adding aftermarket items like fog lamps,
aero skirting, or special tires and
wheels, these instructions and illustrations may not be correct.
Before you do anything, turn on the
hazard warning flashers. When
you call, tell the towing service:
That your vehicle can only be towed
with certain equipment,
as described
later
in this section.
drive.
vehicle. lever.
damaged.
That your vehicle has front-wheel
The make, model, and year of your
Whether you can still move the shift
If there was an accident, what was
When the towing service arrives, let the
tow operator know that this manual
contains detailed towing instructions and
illustrations.
The operator may want to see them.
I69
Page 229 of 308
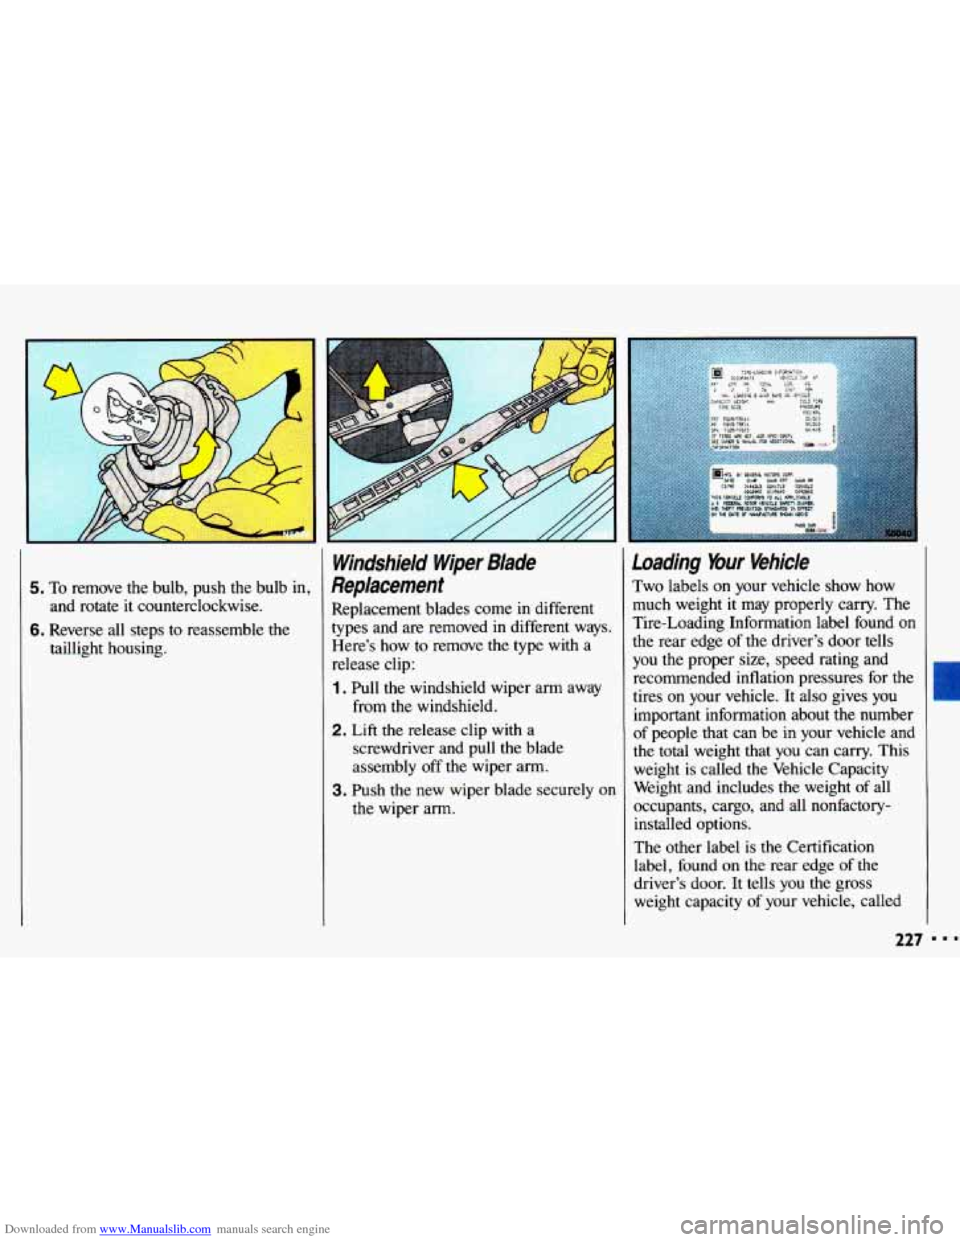
Downloaded from www.Manualslib.com manuals search engine 5. To remove the bulb, push the bulb in,
and rotate it counterclockwise.
6. Reverse all steps to reassemble the
taillight housing.
Windshield Wiper Blade
Replacement
Replacement blades come in different
types and are removed in different ways.
Here’s how
to remove the type with a
release clip:
1. Pull the windshield wiper arm away
2. Lift the release clip with a
from the windshield.
screwdriver and pull the blade
assembly
off the wiper arm.
the wiper arm.
3. Push the new wiper blade securely on
Loading %ur Vehicle
Two labels on your vehicle show how
much weight it may properly carry. The
Tire-Loading Information label found
on
the rear edge of the driver’s door tells
you the proper size, speed rating and
recommended inflation pressures for the
tires on your vehicle. It also gives
you
important information about the number
of people
that can be in your vehicle and
the total weight that you can carry. This
weight
is called the Vehicle Capacity
Weight and includes the weight
of all
occupants, cargo, and all nonfactory- installed options.
The other label
is the Certification
label, found on the rear edge of the
driver’s door. It tells you the gross
weight capacity
of your vehicle, called
I
227
Page 232 of 308
Downloaded from www.Manualslib.com manuals search engine Service & Appearance Care
lnflation-lire Pressure
The Tire-Loading Information label
which is
on the rear edge of the driver’s
door shows the correct inflation
pressures for your tires, when they’re
cold. “Cold” means your vehicle has
been sitting for at least three hours or
driven no more than a mile. Don’t
let anyone tell you that
underinflation
or overinflation is
all right. It’s
not. If your tires don’t
have enough
you can get:
Too much flexing
Too much heat
Tire overloading
Bad weLA
Bad handling
Bad fuel economy. ition)
If your tires have too much air
(overinflation), you can get:
Unusual wear
Bad handling
Rough ride
Needless damage from road
hazards.
When to Check:
Check your tires once a month or more.
Don’t forget your compact spare tire. It
should be at
60 psi (420 kpa).
How to Check:
Use a good quality pocket-type gage to
check tire pressure. Simply looking at
the tires will not tell you the pressure,
especially if
you have radial tires-
which may look properly inflated even if
they’re underinflated.
If your tires have valve caps, be sure to
put them back on. They help prevent
leaks by keeping out dirt and moisture.
230
Page 234 of 308
Downloaded from www.Manualslib.com manuals search engine Service & Appearance Care
Buying New Tires
To find out what kind and size of tires
you need, look at the Tire-Loading
Information label.
The tires installed on your vehicle when
it was new had a Tire Performance
Criteria Specification (TPC Spec)
number on each tire’s sidewall. When
you get new tires, get ones with that
same
TPC Spec number. That way, your
vehicle will continue to have tires that are designed to give proper endurance,
handling, speed rating, traction, ride
and other things during normal service
on your vehicle. If your tires have an all- season tread design, the TPC number
will be followed by a
“MS” (for mud
and snow).
If you ever replace your tires with those
not having a TPC Spec number, make
sure they are the same size, load range,
speed rating and construction type (bias,
bias-belted or radial) as your original
tires.
Mixing tires could cau’se you
d to lose control while driving.
If you mix tires of different sizes
or types (radial and bias-belted
tires), the vehicle
may not handle
properly,
and you could have a
crash. Be sure to use the same size
and type tires on all wheels. It’s all
right to drive with your compact
spare, though. It was developed for
limited use on your vehicle.
I I
Unijiorpn Tire Quality
Grading
The following information relates to the
system developed by the United States
National Highway Traffic Safety
Administration which grades tires by
treadwear, traction and temperature
performance. (This applies only to vehicles sold in the United States.)
232
Page 236 of 308
Downloaded from www.Manualslib.com manuals search engine Service & Appearance Care
Temperature-A, 8, C ~NTJ
Warning: The temperature grade for
this tire is established for a tire that is
properly inflated and not overloaded.
Excessive speed, underinflation,
or
excessive loading, either separately or in
combination, can cause heat buildup
and possible tire failure.
Those grades are molded on the
sidewalls of passenger car tires.
While
the tires available as standard or
optional equipment on General Motors
vehicles may vary
with respect to these
grades, all such tires meet General
Motors performance standards and have
been approved for use on General Motors vehicles.
All passenger type
(P Metric) tires must conform to Federal
safety requirements in addition to these
grades.
234
Wheel Alignment and
Tire Balance
The wheels on your vehicle were
aligned and balanced carefully at the
factory to give you the longest tire life
and best overall performance.
In most cases, you
will not need to have
your wheels aligned again. However,
if
you notice unusual tire wear or your
vehicle pulling one way or the other, the
alignment may need to be reset. If you
notice your vehicle vibrating when
driving on a smooth road, your wheels
may need to be rebalanced.
Wheel Replacement
Replace any wheel that is bent, cracked
or badly rusted. If wheel nuts keep
coming loose, the wheel, wheel bolts,
and wheel nuts should be replaced. If
the wheel leaks air out, replace
it
(except some aluminum wheels, which
can sometimes be repaired). See your
Chevrolet dealer if any of these
conditions exist.
Your dealer
will know the kind of wheel
you need. Each new wheel should have
the same load carrying capacity,
diameter, width, offset, and be mounted
the same way as the one
it replaces.
If you need to replace any of your
wheels, wheel bolts, or wheel nuts,
replace them only
with new GM
original equipment parts. This way, you
will be sure you have the right wheel,
wheel bolts, and wheel nuts for your
Chevrolet model.
Page 239 of 308
Downloaded from www.Manualslib.com manuals search engine Cleaning the Inside of Your
Chevrolel
Use a vacuum cleaner often to get rid of
dust and loose dirt. Wipe vinyl with a
clean, damp cloth.
Your Chevrolet dealer has two
GM
cleaners-a solvent-type spot lifter and a
foam-type powdered cleaner. They will
clean normal spots and stains very well.
Here are some cleaning tips:
Always read the instructions on the
cleaner label.
Clean up stains as soon as you can-
before they set.
Use a clean cloth or sponge, and
change to a clean area often. A
soft
brush may be used if stains are
stubborn.
Use solvent-type cleaners in a well-
ventilated area only. If you
use them,
don't saturate the stained area.
clean the entire area immediately or
it
will set.
If a ring forms after spot cleaning,
237
Page 244 of 308
Downloaded from www.Manualslib.com manuals search engine ...
Service & Appearance Care
Cleaning the Outside of Your
Chevrolet (CONT)
Washing Your Vehicle
The best way to preserve your vehicle’s
finish is to keep it clean by washing it
often with lukewarm or cold water.
Don’t wash your vehicle in the direct
rays of the sun. Don’t use strong soaps
or chemical detergents. Use liquid hand,
dish
or car washing (non-detergent)
soaps. Don’t use cleaning agents that
contain acid or abrasives. All cleaning
agents should be flushed promptly and not allowed to dry on the surface, or
they could stain.
Dry the finish with a
soft, clean chamois or a 100% cotton
towel to avoid surface scratches and water spotting.
High pressure vehicle washes may cause
water
to enter your vehicle.
242
Textured-Surface Bumper Covers
(VL and RS MODELS)
Cleaning with a brush, a soft terry cloth
or a commercial car wash is
recommended for normal dirt. Never
use a wire brush or abrasives.
Avoid applying wax
or polish to the
textured-surface bumper covers. To
remove wax, a commercially available
wax solvent should be used. Tar and Oil
Remover (GM Part
No. 1050172) is also
recommended. It’s also recommended
for cleaning difficult soils like road tar
and oil. Also recommended are solvent-
type fabric cleaners such as GM Part
No. 1050244.
To clean white bumper covers, first use
Tar and Oil Remover. If the dark areas
are still visible, whiten with White
Sidewall Tire Cleaner, such as GM Part
No. 1050174.
Finish Care of Textured-Surface
Bumper Covers
To touch up any small spots after
regular washing, use a solvent-type
fabric cleaner such as GM Part No.
1050244 and a clean, dry cloth.
To help maintain bumper covers, after
washing use a cleaner/protectant like
GM/Armor AllTM Part No. 1052919.