Page 2845 of 4087
4. REMOVE OIL COOLERRemove the three bolts and oil cooler.
INSPECTION OF OIL COOLER
INSPECT OIL COOLER
Check the oil cooler for damage or clogging.
If necessary, replace the oil cooler.
INSTALLATION OF OIL COOLER
(See Components on page CO±58)
1. INSTALL OIL COOLER Install the oil cooler with the three bolts.
Torque: 18 N Vm (180 kgf Vcm, 13 ft Vlbf)
2. CONNECT HOSES FROM OIL COOLER
Connect the following hoses:(1) Inlet hose (from reservoir tank)
(2) Outlet hose (from hydraulic motor)
3. INSTALL PS OIL COOLER Install the oil cooler with the two bolts.
4. REMOVE FENDER LINER
5. FILL COOLING FAN RESERVOIR TANK WITH FLUID
(See pages CO±23 and 24)
6. START ENGINE AND CHECK FOR LEAKS
±
COOLIING SYSTEM Electronically Controlled Hydraulic
Cooling Fan (Oil Cooler)CO±59
WhereEverybodyKnowsYourName
Page 2849 of 4087

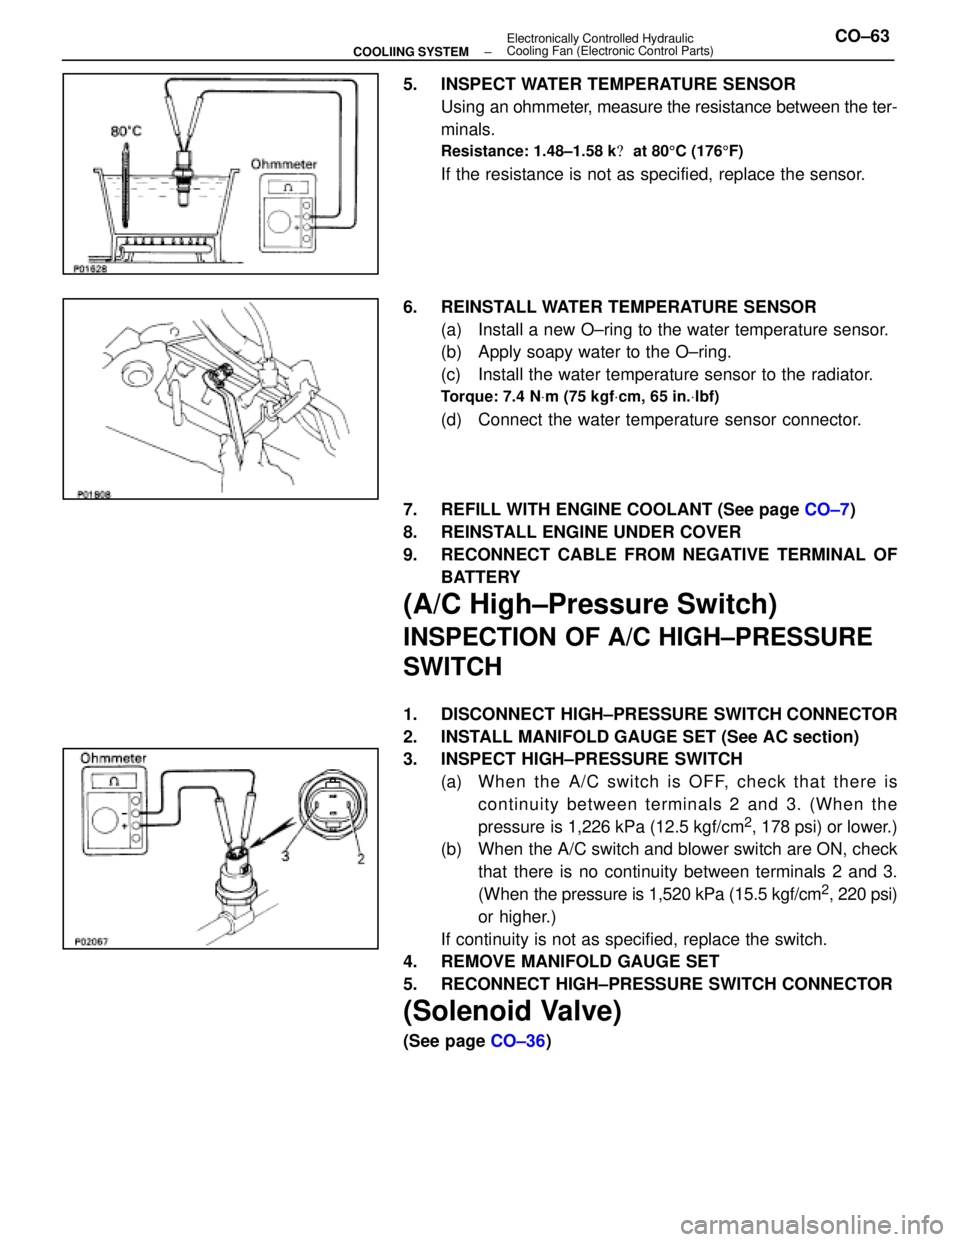
5. INSPECT WATER TEMPERATURE SENSORUsing an ohmmeter, measure the resistance between the ter-
minals.
Resistance: 1.48±1.58 k � at 80 5C (176 5F)
If the resistance is not as specified, replace the sensor.
6. REINSTALL WATER TEMPERATURE SENSOR (a) Install a new O±ring to the water temperature sensor.
(b) Apply soapy water to the O±ring.
(c) Install the water temperature sensor to the radiator.
Torque: 7.4 N Vm (75 kgf Vcm, 65 in. Vlbf)
(d) Connect the water temperature sensor connector.
7. REFILL WITH ENGINE COOLANT (See page CO±7)
8. REINSTALL ENGINE UNDER COVER
9. RECONNECT CABLE FROM NEGATIVE TERMINAL OF BATTERY
(A/C High±Pressure Switch)
INSPECTION OF A/C HIGH±PRESSURE
SWITCH
1. DISCONNECT HIGH±PRESSURE SWITCH CONNECTOR
2. INSTALL MANIFOLD GAUGE SET (See AC section)
3. INSPECT HIGH±PRESSURE SWITCH(a) Wh e n th e A/C switch is OFF, ch e ck th a t th e re iscontinuity between terminals 2 and 3. (When the
pressure is 1,226 kPa (12.5 kgf/cm
2, 178 psi) or lower.)
(b) When the A/C switch and blower switch are ON, check
that there is no continuity between terminals 2 and 3.
(When the pressure is 1,520 kPa (15.5 kgf/cm
2, 220 psi)
or higher.)
If continuity is not as specified, replace the switch.
4. REMOVE MANIFOLD GAUGE SET
5. RECONNECT HIGH±PRESSURE SWITCH CONNECTOR
(Solenoid Valve)
(See page CO±36)
±
COOLIING SYSTEM Electronically Controlled Hydraulic
Cooling Fan (Electronic Control Parts)CO±63
WhereEverybodyKnowsYourName
Page 2868 of 4087
INSPECTION OF EGR SYSTEM (USA
Spec.)
INSPECT SYSTEM OPERATION
(a) Using SST, connect terminals TE1 and E1 of the check(ºDIAGNOSISº) connector.
SST 09843±18020
(b) Keep the engine at 3,500 rpm.
(c) Set the transmission shift lever to the ºNº position.
(d) Remove the SST from the check connector.
SST 09843±18020
(e) Check whether the engine rpm increases 100±300 rpm under the following conditions.
Coolant temp.
Below 53 5C (127 5F) No increase
Above 55 5C (131 5F) Increases
±
EMISSION CONTROL SYSTEMS Exhaust Gas Recirculation (EGR) SystemEC±17
WhereEverybodyKnowsYourName
Page 2869 of 4087
INSPECTION OF EGR SYSTEM
(Exc. USA Spec.)
1. CHECK AND CLEAN FILTERS IN EGR VACUUMMODULATOR
(a) Remove the cap and filter.
(b) Check the filter for contamination or damage.
(c) Using compressed air, clean the filters.
(d) Reinstall the filter and cap.
HINT: Install the filter with the coarser surface facing the at-
mospheric side (outward).
2. INSPECT SYSTEM OPERATION (a) Using SST, connect terminals TE1 and E1 of the check
(ºDIAGNOSISº) connector.
SST 09843±18020
(b) Keep the engine at 3,500 rpm.
(c) Set the transmission shift lever to the ºNº position.
(d) Remove the SST from the check connector.
SST 09843±18020
(e) Check whether the engine rpm increases 100±300 rpm under the following conditions:
Coolant temp.
Below 53 5C (127 5F) No increase
Above 55 5C (131 5F) Increases
EC±18
±
EMISSION CONTROL SYSTEMS Exhaust Gas Recirculation (EGR) System
WhereEverybodyKnowsYourName
Page 2871 of 4087

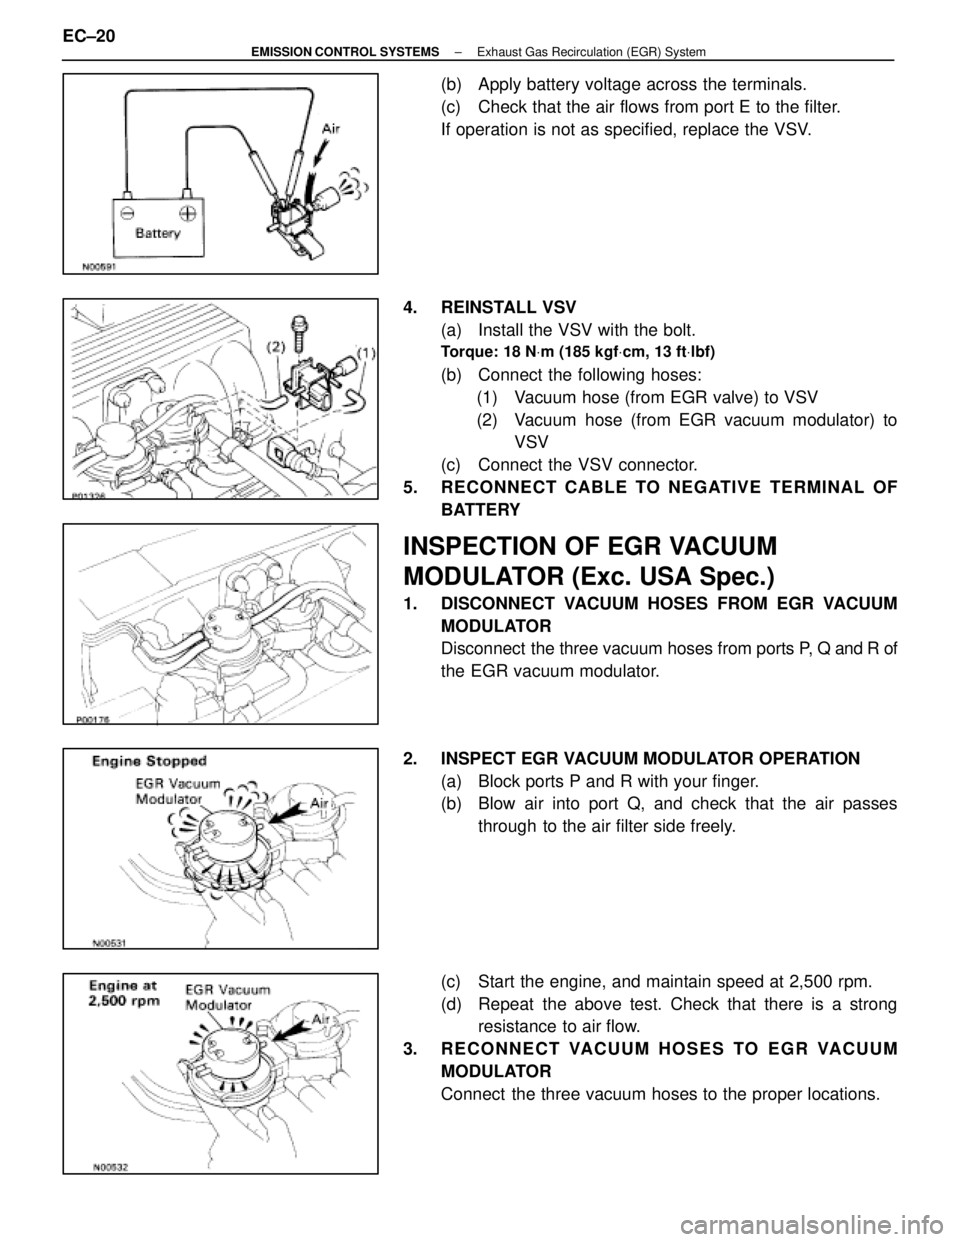
(b) Apply battery voltage across the terminals.
(c) Check that the air flows from port E to the filter.
If operation is not as specified, replace the VSV.
4. REINSTALL VSV (a) Install the VSV with the bolt.
Torque: 18 N Vm (185 kgf Vcm, 13 ft Vlbf)
(b) Connect the following hoses:
(1) Vacuum hose (from EGR valve) to VSV
(2) Vacuum hose (from EGR vacuum modulator) to VSV
(c) Connect the VSV connector.
5. RECONNECT CABLE TO NEGATIVE TERMINAL OF BATTERY
INSPECTION OF EGR VACUUM
MODULATOR (Exc. USA Spec.)
1. DISCONNECT VACUUM HOSES FROM EGR VACUUMMODULATOR
Disconnect the three vacuum hoses from ports P, Q and R of
the EGR vacuum modulator.
2. INSPECT EGR VACUUM MODULATOR OPERATION (a) Block ports P and R with your finger.
(b) Blow air into port Q, and check that the air passesthrough to the air filter side freely.
(c) Start the engine, and maintain speed at 2,500 rpm.
(d) Repeat the above test. Check that there is a strong resistance to air flow.
3. RECONNECT VACUUM HOSES TO EGR VACUUM MODULATOR
Connect the three vacuum hoses to the proper locations.
EC±20
±
EMISSION CONTROL SYSTEMS Exhaust Gas Recirculation (EGR) System
WhereEverybodyKnowsYourName
Page 2873 of 4087

INSPECTION OF EGR VALVE
(USA Spec.)
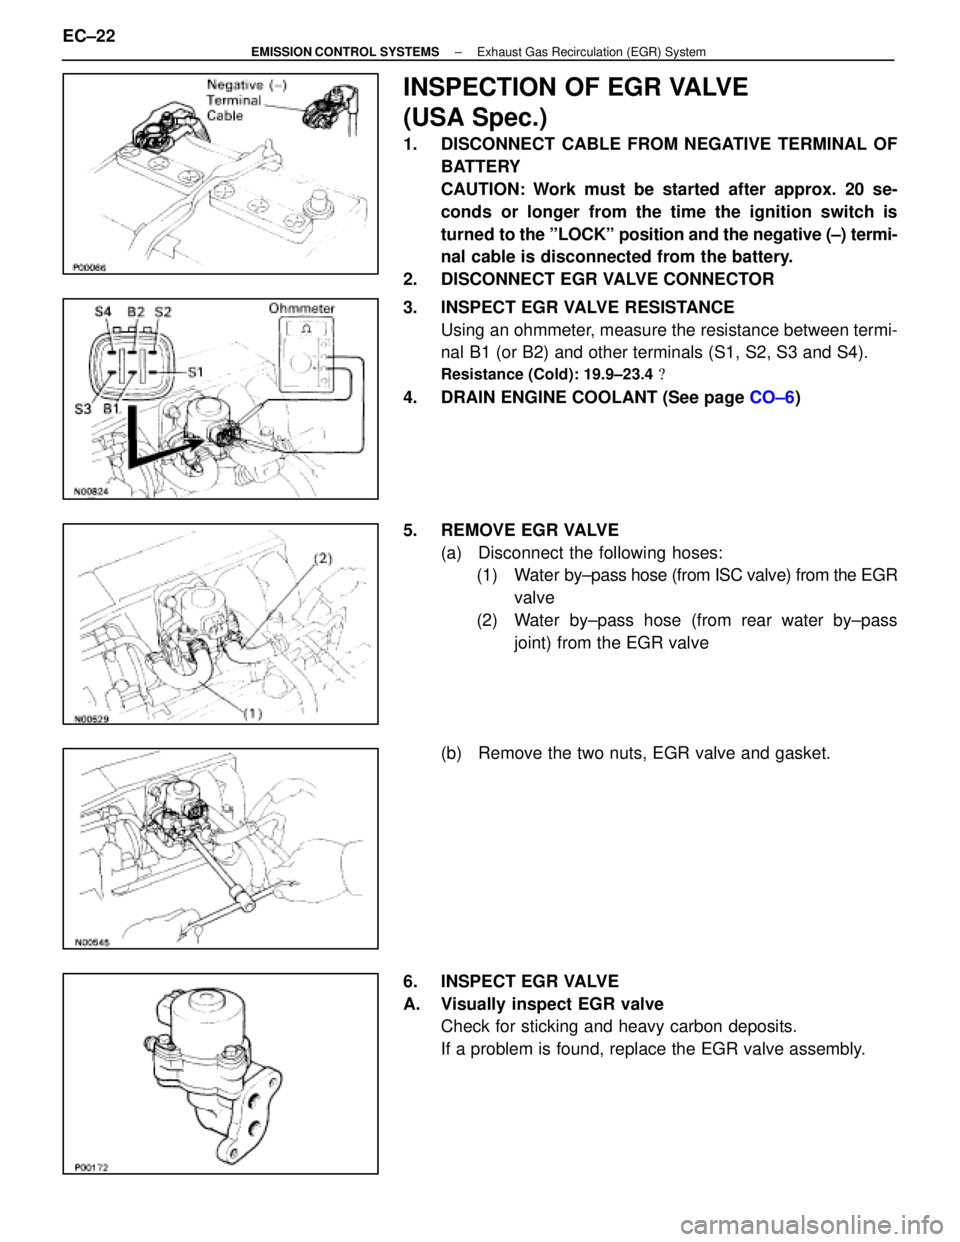
1. DISCONNECT CABLE FROM NEGATIVE TERMINAL OFBATTERY
CAUTION: Work must be started after approx. 20 se-
conds or longer from the time the ignition switch is
turned to the ºLOCKº position and the negative (±) termi-
nal cable is disconnected from the battery.
2. DISCONNECT EGR VALVE CONNECTOR
3. INSPECT EGR VALVE RESISTANCE Using an ohmmeter, measure the resistance between termi-
nal B1 (or B2) and other terminals (S1, S2, S3 and S4).
Resistance (Cold): 19.9±23.4 �
4. DRAIN ENGINE COOLANT (See page CO±6)
5. REMOVE EGR VALVE (a) Disconnect the following hoses:(1) Water by±pass hose (from ISC valve) from the EGR
valve
(2) Water by±pass hose (from rear water by±pass joint) from the EGR valve
(b) Remove the two nuts, EGR valve and gasket.
6. INSPECT EGR VALVE
A. Visually inspect EGR valve Check for sticking and heavy carbon deposits.
If a problem is found, replace the EGR valve assembly.
EC±22
±
EMISSION CONTROL SYSTEMS Exhaust Gas Recirculation (EGR) System
WhereEverybodyKnowsYourName
Page 2876 of 4087
3. INSPECT EGR VALVECheck for sticking and heavy carbon deposits.
If a problem is found, replace the EGR valve assembly.
4. REINSTALL EGR VALVE (a) Place a new gasket on the EGR valve adaptor.
NOTICE:
w Do not touch the adaptor and EGR valve surfaces of the
gasket with your hand.
w Align the port holes of the gasket and adaptor.
Be careful of the installation direction.
(b) Install the EGR valve with the two nuts.
Torque: 18 N Vm (185 kgf Vcm, 13 ft Vlbf)
(c) Install the vacuum modulator bracket to the EGR valve.
(d) Connect the following hoses:
(1) Vacuum hose (from VSV) to EGR valve
(2) Vacuum hose (from VSV) to EGR vacuum modula- tor
(3) Vacuum hose (from EGR vacuum modulator) to EGR valve
(4) Water by±pass hose (from ISC valve) to the EGR
valve
(5) Water by±pass hose (from rear water by±pass joint) to the EGR valve
5. REFILL WITH ENGINE COOLANT (See page CO±7)
±
EMISSION CONTROL SYSTEMS Exhaust Gas Recirculation (EGR) SystemEC±25
WhereEverybodyKnowsYourName
Page 2924 of 4087
24. CONNECT CONTROL CABLES TO THROTTLE BODYConnect the following hoses:(1) Accelerator cable
(2) A/T throttle control cable
(3) (w/ Cruise Control System) Cruise control actuator cable
25. INSTALL THROTTLE BODY COVER Install the throttle body cover and hose clamp with the two
bolts and cap nut.
26. C O N N E C T C A B L E TO N E G AT I V E T E R M I N A L O F BATTERY
27. FILL WITH ENGINE COOLANT (See page CO±7)
28. CHECK THAT ENGINE STARTS
ST±34
±
STARTING SYSTEM Starter
WhereEverybodyKnowsYourName