Page 1726 of 4087
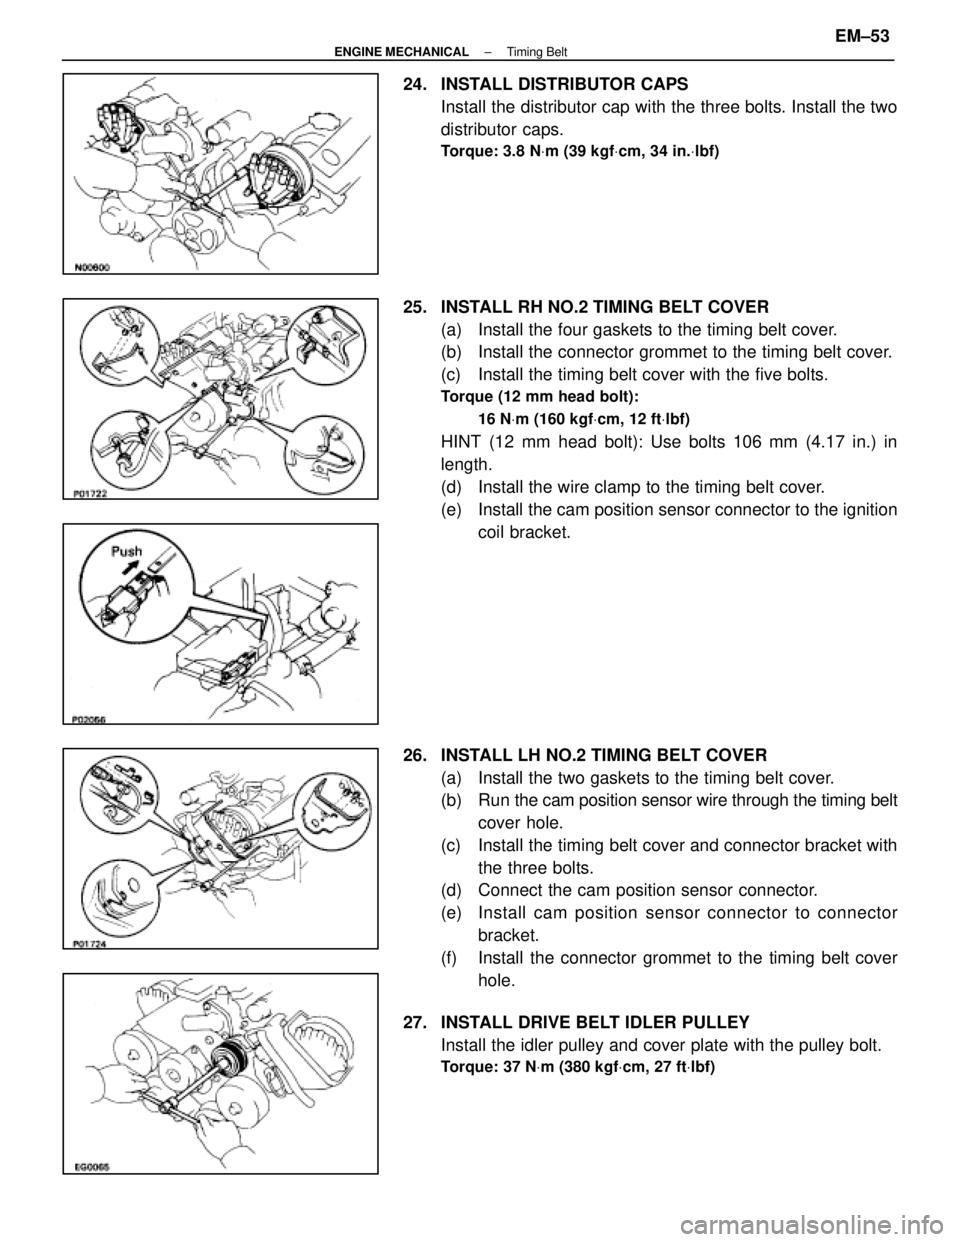
24. INSTALL DISTRIBUTOR CAPSInstall the distributor cap with the three bolts. Install the two
distributor caps.
Torque: 3.8 N Vm (39 kgf Vcm, 34 in. Vlbf)
25. INSTALL RH NO.2 TIMING BELT COVER
(a) Install the four gaskets to the timing belt cover.
(b) Install the connector grommet to the timing belt cover.
(c) Install the timing belt cover with the five bolts.
Torque (12 mm head bolt):
16 NVm (160 kgf Vcm, 12 ft Vlbf)
HINT (12 mm head bolt): Use bolts 106 mm (4.17 in.) in
length.
(d) Install the wire clamp to the timing belt cover.
(e) Install the cam position sensor connector to the ignition
coil bracket.
26. INSTALL LH NO.2 TIMING BELT COVER (a) Install the two gaskets to the timing belt cover.
(b) Run the cam po sition sensor wire through the timing belt
cover hole.
(c) Install the timing belt cover and connector bracket with the three bolts.
(d) Connect the cam position sensor connector.
(e) Install cam position sensor c onnector to connector
bracket.
(f) Install the connector grommet to the timing belt cover hole.
27. INSTALL DRIVE BELT IDLER PULLEY Install the idler pulley and cover plate with the pulley bolt.
Torque: 37 N Vm (380 kgf Vcm, 27 ft Vlbf)
±
ENGINE MECHANICAL Timing BeltEM±53
WhereEverybodyKnowsYourName
Page 1727 of 4087
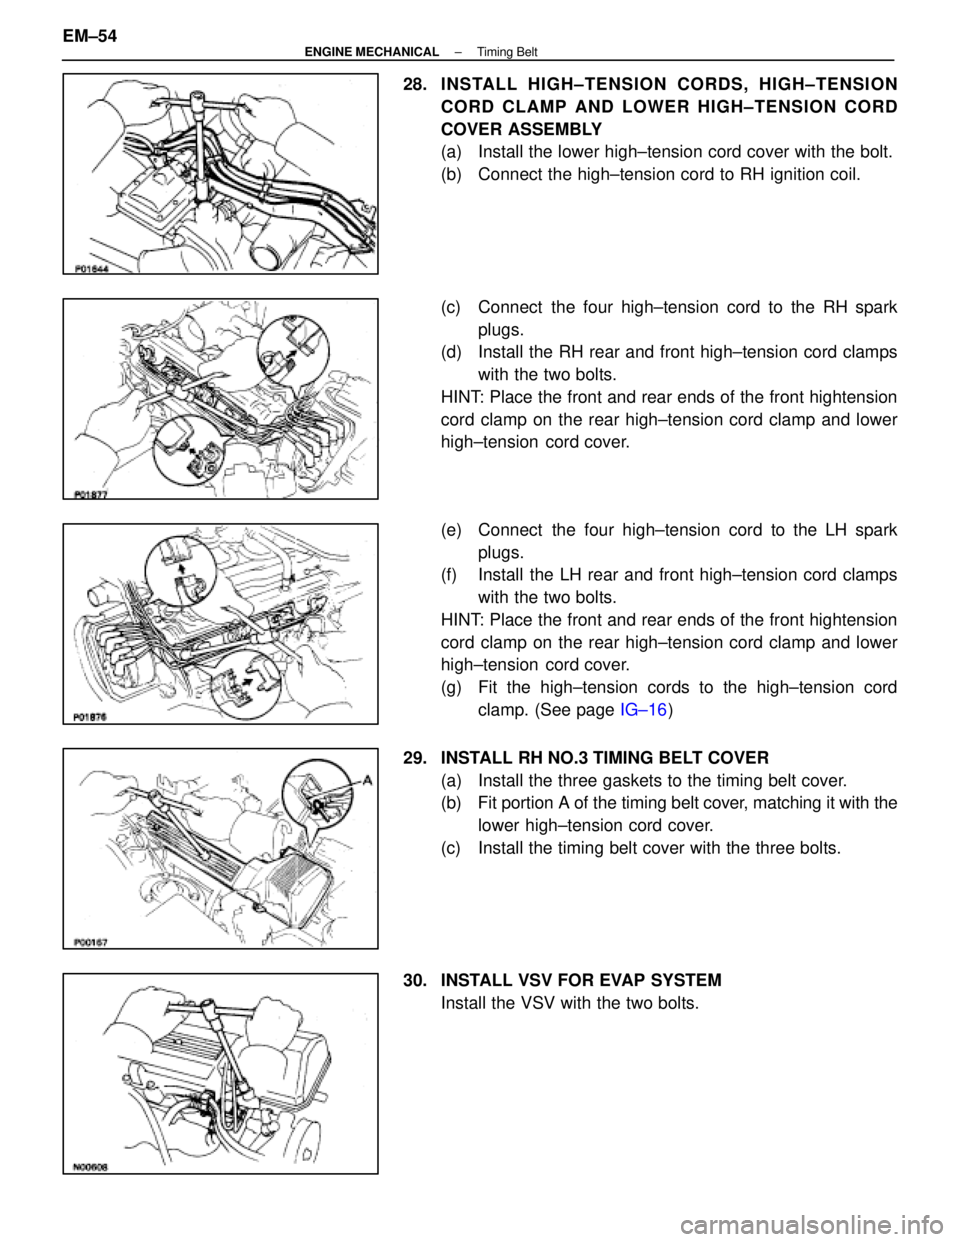
28. INSTALL HIGH±TENSION CORDS, HIGH±TENSIONCORD CLAMP AND LOWER HIGH±TENSION CORD
COVER ASSEMBLY
(a) Install the lower high±tension cord cover with the bolt.
(b) Connect the high±tension cord to RH ignition coil.
(c) Connect the four high±tension cord to the RH sparkplugs.
(d) Install the RH rear and front high±tension cord clamps
with the two bolts.
HINT: Place the front and rear ends of the front hightension
cord clamp on the rear high±tension cord clamp and lower
high±tension cord cover.
(e) Connect the four high±tension cord to the LH spark plugs.
(f) Install the LH rear and front high±tension cord clamps
with the two bolts.
HINT: Place the front and rear ends of the front hightension
cord clamp on the rear high±tension cord clamp and lower
high±tension cord cover.
(g) Fit the high±tension cords to the high±tension cord clamp. (See page IG±16)
29. INSTALL RH NO.3 TIMING BELT COVER (a) Install the three gaskets to the timing belt cover.
(b) Fit portion A of the timing belt cover, matching it with the
lower high±tension cord cover.
(c) Install the timing belt cover with the three bolts.
30. INSTALL VSV FOR EVAP SYSTEM Install the VSV with the two bolts.
EM±54
±
ENGINE MECHANICAL Timing Belt
WhereEverybodyKnowsYourName
Page 1729 of 4087
35. INSTALL LH IGNITION COIL(a) Install the ignition coil with the two bolts.
(b) Connect the following connectors and cord:(1) Ignition coil connector
(2) Noise filter connector
(3) High±tension cord
36. INSTALL INTAKE AIR CONNECTOR (a) Connect the end portions of the intake air connector tothe throttle body and air cleaner hose.
(b) Tighten the two hose clamps.
(c) Install the bolt holding the intake air connector to the cylinder head cover.
(d) Connect the following hoses: (1) Air hose to ISC valve
(2) Air hose (from PS air control valve) to intake air connector
EM±56
±
ENGINE MECHANICAL Timing Belt
WhereEverybodyKnowsYourName
Page 1733 of 4087
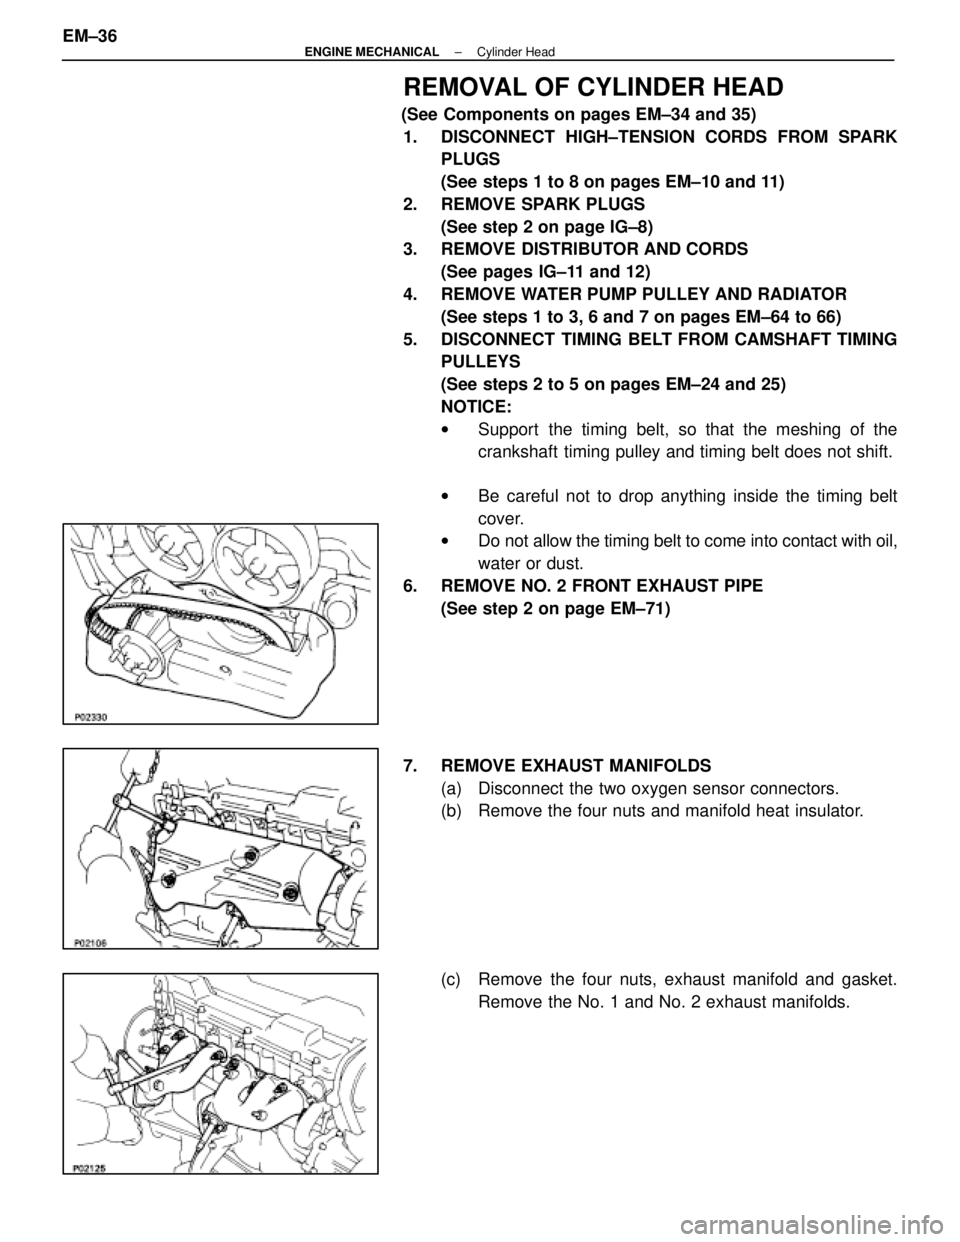
REMOVAL OF CYLINDER HEAD
(See Components on pages EM±34 and 35)1. DISCONNECT HIGH±TENSION CORDS FROM SPARK PLUGS
(See steps 1 to 8 on pages EM±10 and 11)
2. REMOVE SPARK PLUGS (See step 2 on page IG±8)
3. REMOVE DISTRIBUTOR AND CORDS
(See pages IG±11 and 12)
4. REMOVE WATER PUMP PULLEY AND RADIATOR (See steps 1 to 3, 6 and 7 on pages EM±64 to 66)
5. DISCONNECT TIMING BELT FROM CAMSHAFT TIMING PULLEYS
(See steps 2 to 5 on pages EM±24 and 25)
NOTICE:
wSupport the timing belt, so that the meshing of the
crankshaft timing pulley and timing belt does not shift.
w Be careful not to drop anything inside the timing belt
cover.
w Do not allow the timing belt to come into contact with oil,
water or dust.
6. REMOVE NO. 2 FRONT EXHAUST PIPE (See step 2 on page EM±71)
7. REMOVE EXHAUST MANIFOLDS (a) Disconnect the two oxygen sensor connectors.
(b) Remove the four nuts and manifold heat insulator.
(c) Remove the four nuts, exhaust manifold and gasket.Remove the No. 1 and No. 2 exhaust manifolds.
EM±36
±
ENGINE MECHANICAL Cylinder Head
WhereEverybodyKnowsYourName
Page 1734 of 4087
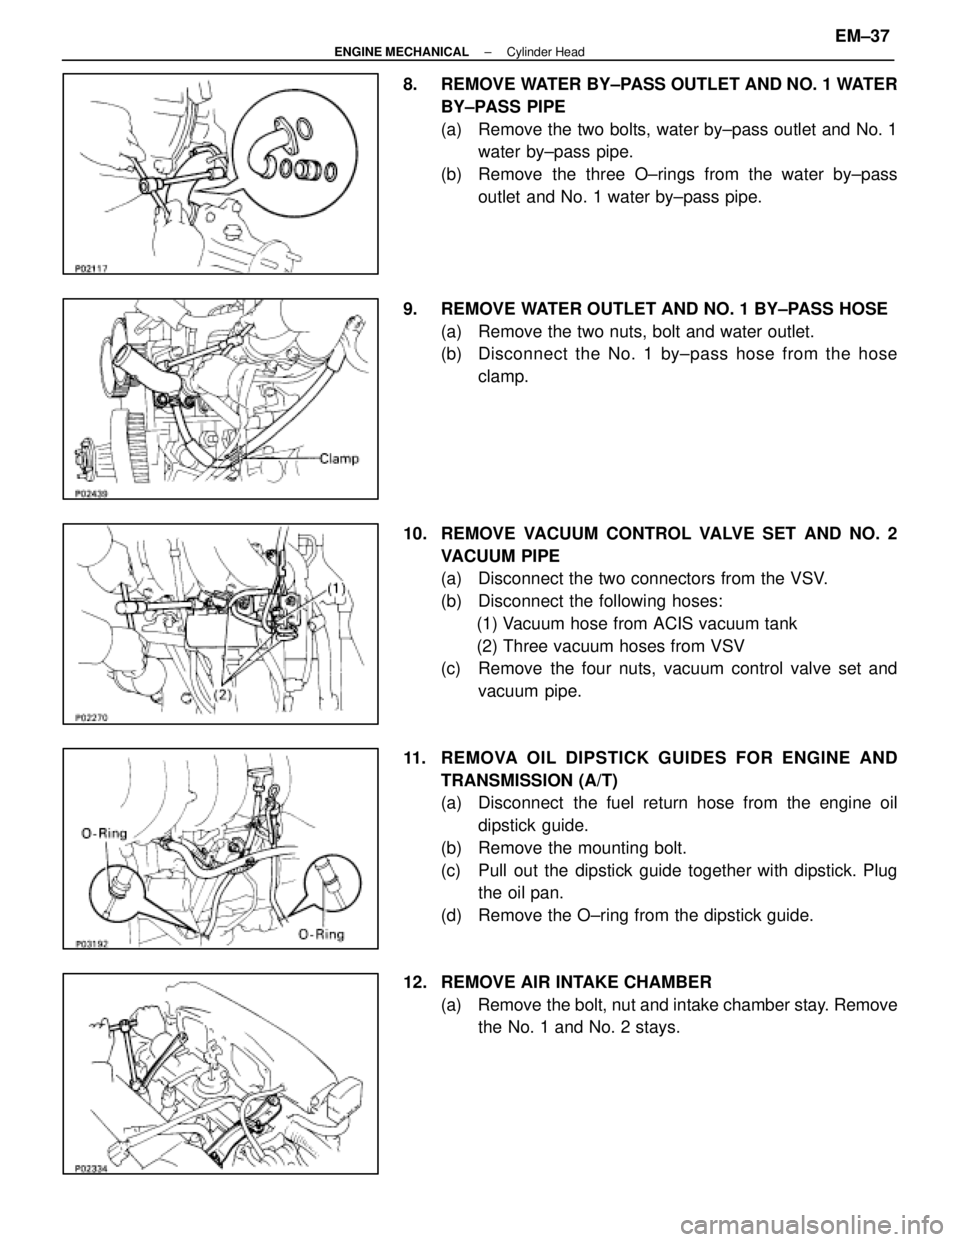
8. REMOVE WATER BY±PASS OUTLET AND NO. 1 WATERBY±PASS PIPE
(a) Remove the two bolts, water by±pass outlet and No. 1water by±pass pipe.
(b) Remove the three O±rings from the water by±pass outlet and No. 1 water by±pass pipe.
9. REMOVE WATER OUTLET AND NO. 1 BY±PASS HOSE (a) Remove the two nuts, bolt and water outlet.
(b) Disc onnect the No. 1 by±pass hose from the hose
clamp.
10. REMOVE VACUUM CONTROL VALVE SET AND NO. 2 VACUUM PIPE
(a) Disconnect the two connectors from the VSV.
(b) Disconnect the following hoses:(1) Vacuum hose from ACIS vacuum tank
(2) Three vacuum hoses from VSV
(c) Remove the four nuts, vacuum control valve set and
vacuum pipe.
11. REMOVA OIL DIPSTICK GUIDES FOR ENGINE AND TRANSMISSION (A/T)
(a) Disconnect the fuel return hose from the engine oildipstick guide.
(b) Remove the mounting bolt.
(c) Pull out the dipstick guide together with dipstick. Plug the oil pan.
(d) Remove the O±ring from the dipstick guide.
12. REMOVE AIR INTAKE CHAMBER (a) Remove the bolt, nut and intake chamber stay. Removethe No. 1 and No. 2 stays.
±
ENGINE MECHANICAL Cylinder HeadEM±37
WhereEverybodyKnowsYourName
Page 1735 of 4087
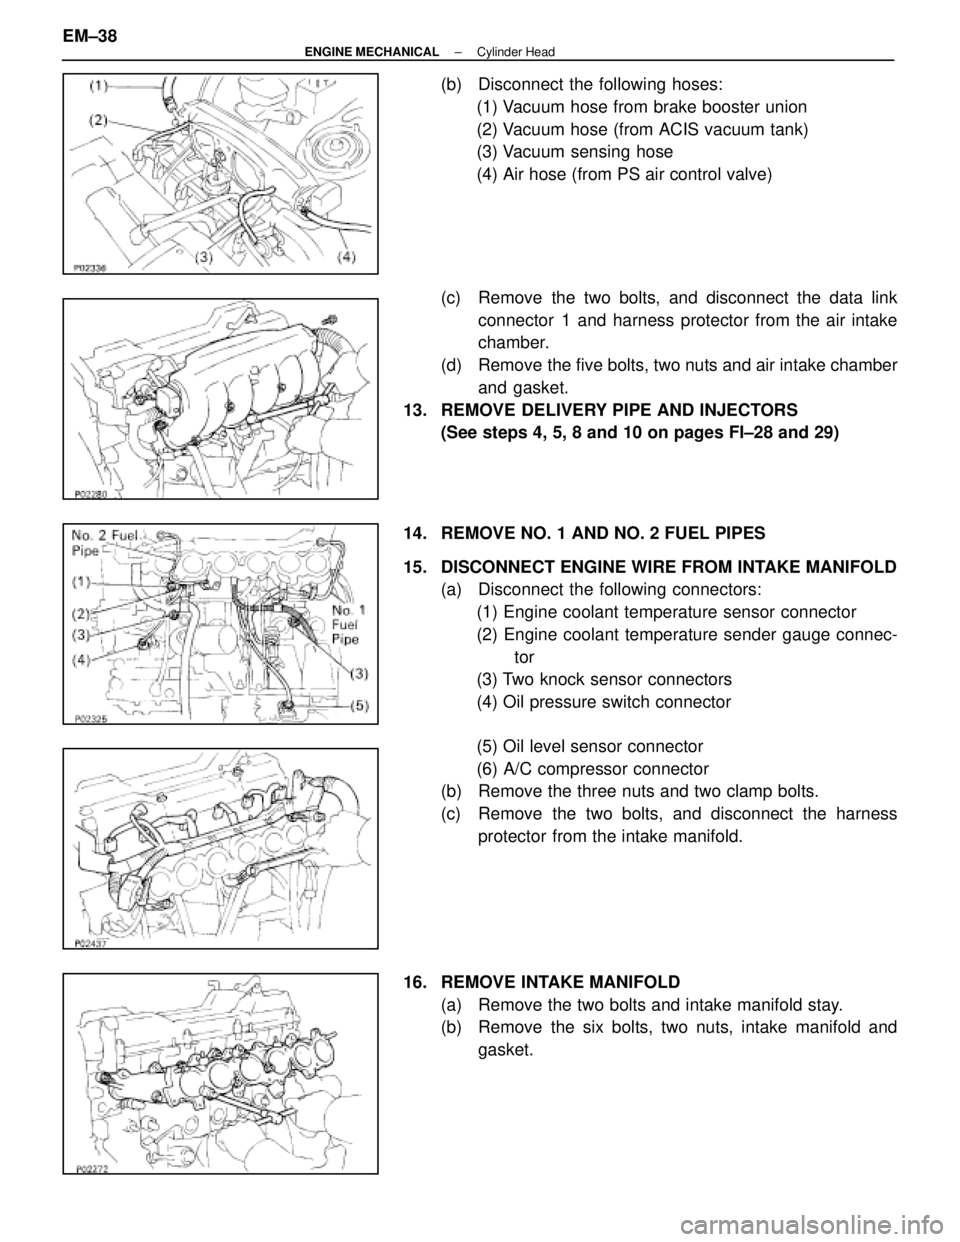
(b) Disconnect the following hoses:(1) Vacuum hose from brake booster union
(2) Vacuum hose (from ACIS vacuum tank)
(3) Vacuum sensing hose
(4) Air hose (from PS air control valve)
(c) Remove the two bolts, and disconnect the data link connector 1 and harness protector from the air intake
chamber.
(d) Remove the five bolts, two nuts and air intake chamber and gasket.
13. REMOVE DELIVERY PIPE AND INJECTORS (See steps 4, 5, 8 and 10 on pages FI±28 and 29)
14. REMOVE NO. 1 AND NO. 2 FUEL PIPES
15. DISCONNECT ENGINE WIRE FROM INTAKE MANIFOLD (a) Disconnect the following connectors:
(1) Engine coolant temperature sensor connector
(2) Engine coolant temperature sender gauge connec- tor
(3) Two knock sensor connectors
(4) Oil pressure switch connector
(5) Oil level sensor connector
(6) A/C compressor connector
(b) Remove the three nuts and two clamp bolts.
(c) Remove the two bolts, and disconnect the harness
protector from the intake manifold.
16. REMOVE INTAKE MANIFOLD (a) Remove the two bolts and intake manifold stay.
(b) Remove the six bolts, two nuts, intake manifold andgasket.
EM±38
±
ENGINE MECHANICAL Cylinder Head
WhereEverybodyKnowsYourName
Page 1736 of 4087
17. REMOVE NO. 3, No. 1 AND NO. 2 CYLINDER HEADCOVERS
(a) Remove the 12 bolts and four nuts.
(b) Remove the cylinder head covers and gaskets.
18. REMOVE CAMSHAFT TIMING PULLEYS Hold the hexagon portion of the camshaft with a wrench, and
remove the pulley mount bolt and camshaft pulley.
19. REMOVE NO. 4 TIMING BELT COVER Remove the four bolts and timing belt cover.
20. REMOVE CAMSHAFTS (a) Uniformly loosen and remove the four bearing cap bolts.
(b) Using a screwdriver, pry out the two No. 1 camshaft bearing caps and oil seals.
NOTICE: Be careful not to damage the cap. Tape the
screwdriver tip.
±
ENGINE MECHANICAL Cylinder HeadEM±39
WhereEverybodyKnowsYourName
Page 1738 of 4087
DISASSEMBLY OF CYLINDER HEAD
(See Components on page EM±35)1. REMOVE VALVE LIFTERS AND SHIMS
HINT: Store the valve lifters and shims in correct order.
2. REMOVE VALVES (a) Using SST, compress the valve spring and remove thetwo keepers.
SST 09202±70010
(b) Remove the spring retainer, valve spring, valve and spring seat.
HINT: Store the valves, valve springs, spring seats and spring
retainers in correct order.
(c) Using needle±nose pliers, remove the oil seal.
±
ENGINE MECHANICAL Cylinder HeadEM±41
WhereEverybodyKnowsYourName