Page 2236 of 4087
7. REMOVE INTAKE AIR CONNECTOR(a) Disconnect the following hoses:(1) Air hose from ISC valve
(2) Air hose (from PS air control valve) from intake air connector
(b) Remove the bolt holding the intake air connector to the cylinder head cover.
(c) Loosen the two hose clamps.
(d) Disconnect the intake air connector from the throttle
body and air cleaner hose, and remove the throttle body.
8. REMOVE LH IGNITION COIL (a) Disconnect the following connectors and cord:(1) Ignition coil connector
(2) Noise filter connector
(3) High±tension cord
(b) Remove the two bolts and ignition coil.
9. REMOVE UPPER HIGH±TENSION CORD COVER (a) Remove the two mounting bolts.
(b) Disconnect the front side claw groove of the cord coverfrom the claw of the lower cover, and remove the cord
cover.
EM±36
±
ENGINE MECHANICAL Timing Belt
WhereEverybodyKnowsYourName
Page 2237 of 4087
10. REMOVE RH ENGINE WIRE COVERRemove the bolt and engine wire cover.
11. REMOVE LH ENGINE WIRE COVER Remove the two bolts and engine wire cover.
12. REMOVE VSV FOR EVAP SYSTEM Remove the two bolts, and disconnect the VSV from cylinder
head and timing belt cover.
13. REMOVE NO.3 TIMING BELT COVER Remove the three bolts and timing belt cover.
14. REMOVE LH NO.3 TIMING BELT COVER (a) Remove the four mounting bolts.
(b) Disconnect the cord grommet from the timing belt cover,
and remove the timing belt cover.
(c) Remove the cord grommet from the high±tension cord.
±
ENGINE MECHANICAL Timing BeltEM±37
WhereEverybodyKnowsYourName
Page 2238 of 4087
15. REMOVE HIGH±TENSION CORDS, HIGH±TENSIONCORD CLAMPS AND LOWER HIGH±TENSION CORD
COVER ASSEMBLY
(a) Remove the two bolts holding the RH rear high±tensioncord clamp to the cylinder head.
(b) Disconnect the high±tension cords from the RH spark plugs and distributor cap.
(c) Remove the two bolts holding the LH rear high±tension cord clamp to the cylinder head.
(d) Disconnect the high±tension cords from the LH spark
plugs, distributor cap and LH ignition coil.
(e) Remove the bolt holding the lower high±tension cord cover to the water inlet housing.
(f) Disconnect the high±tension cord from the RH ignition
coil, and remove the high±tension cords, clamps and
cover assembly.
16. REMOVE DRIVE BELT IDLER PULLEY Remove the pulley bolt, cover plate and idler pulley.
17. REMOVE RH NO.2 TIMING BELT COVER (a) Disconnect the cam position sensor connector from theignition coil bracket.
EM±38
±
ENGINE MECHANICAL Timing Belt
WhereEverybodyKnowsYourName
Page 2239 of 4087

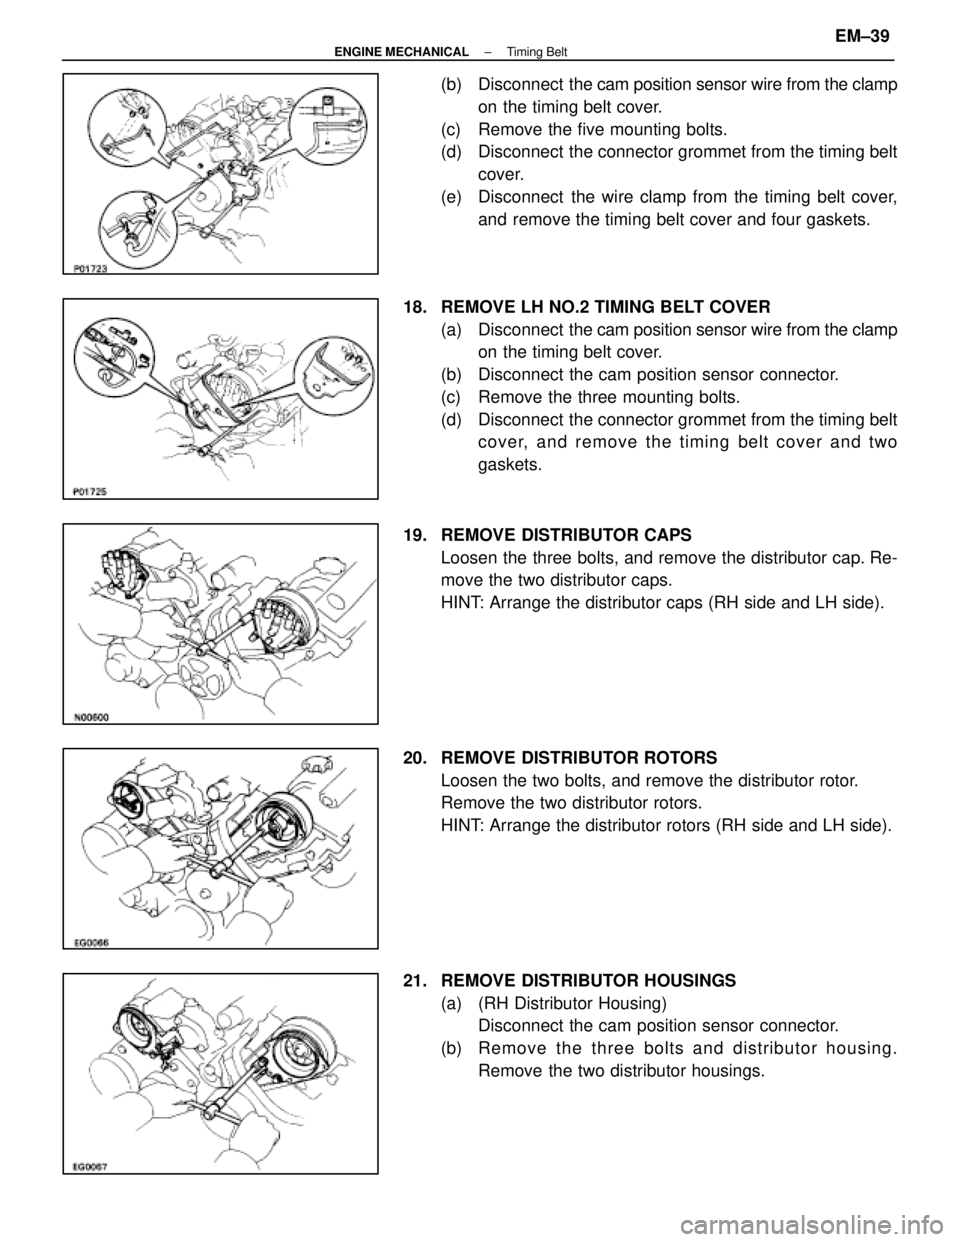
(b) Disconnect the cam position sensor wire from the clamp
on the timing belt cover.
(c) Remove the five mounting bolts.
(d) Disconnect the connector grommet from the timing belt cover.
(e) Disconnect the wire clamp from the timing belt cover, and remove the timing belt cover and four gaskets.
18. REMOVE LH NO.2 TIMING BELT COVER (a) Disconnect the cam position sensor wire from the clamp
on the timing belt cover.
(b) Disconnect the cam position sensor connector.
(c) Remove the three mounting bolts.
(d) Disconnect the connector grommet from the timing belt cover, and remove the timing belt cover and two
gaskets.
19. REMOVE DISTRIBUTOR CAPS Loosen the three bolts, and remove the distributor cap. Re-
move the two distributor caps.
HINT: Arrange the distributor caps (RH side and LH side).
20. REMOVE DISTRIBUTOR ROTORS Loosen the two bolts, and remove the distributor rotor.
Remove the two distributor rotors.
HINT: Arrange the distributor rotors (RH side and LH side).
21. REMOVE DISTRIBUTOR HOUSINGS (a) (RH Distributor Housing)Disconnect the cam position sensor connector.
(b) Re mo ve th e th re e bo lts an d distrib u to r ho u sin g . Remove the two distributor housings.
±
ENGINE MECHANICAL Timing BeltEM±39
WhereEverybodyKnowsYourName
Page 2240 of 4087
22. REMOVE ALTERNATOR(a) Disconnect the alternator connector.
(b) Remove the cap and nut, and disconnect the alternatorwire.
(c) Remove the bolt, and disconnect the A/T oil cooler pipe bracket.
(d) Remove the nut and alternator.
23. REMOVE DRIVE BELT TENSIONER Remove the bolt, two nuts and tensioner.
24. REMOVE SPARK PLUGS Using a 16 mm plug wrench, remove the eight spark plugs.
25. IF RE±USING TIMING BELT, CHECK INSTALLATION MARKS ON TIMING BELT
Check that there are four installation marks on the timing belt
by turning the crankshaft pulley as shown in the illustration.
If the installation marks have disappeared, place a new
installation mark on the timing belt before removing each
part.
26. SET NO.1 CYLINDER TO TDC/COMPRESSION (a) Turn the crankshaft pulley and align its groove with thetiming mark ºOº of the No.1 timing belt cover.
EM±40
±
ENGINE MECHANICAL Timing Belt
WhereEverybodyKnowsYourName
Page 2241 of 4087

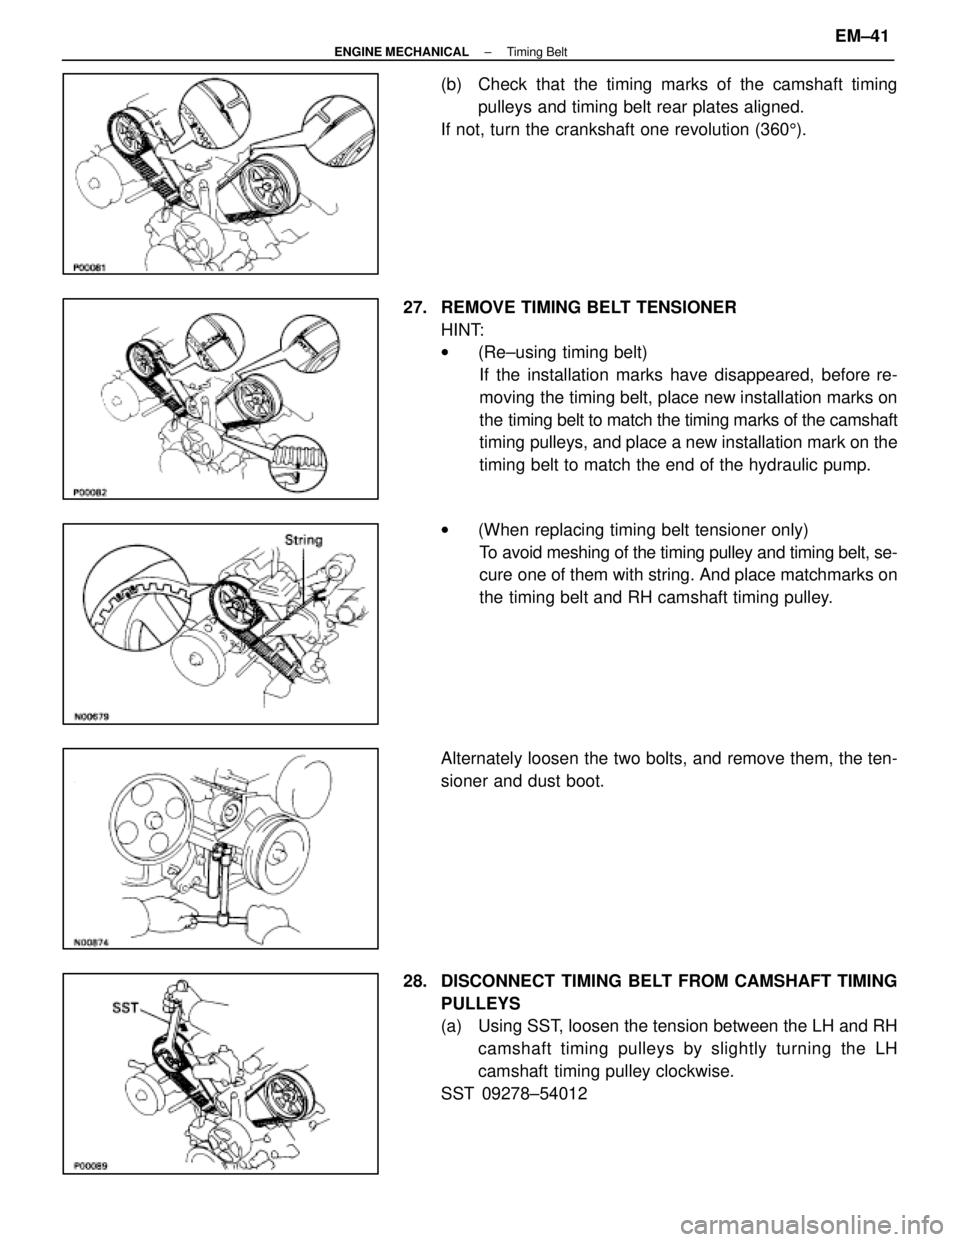
(b) Check that the timing marks of the camshaft timingpulleys and timing belt rear plates aligned.
If not, turn the crankshaft one revolution (360 5).
27. REMOVE TIMING BELT TENSIONER HINT:
w(Re±using timing belt)
If the installation marks have disappeared, before re-
moving the timing belt, place new installation marks on
the timing belt to match the timing marks of the camshaft
timing pulleys, and place a new installation mark on the
timing belt to match the end of the hydraulic pump.
w (When replacing timing belt tensioner only)
To avoid meshing of the timing pulley and timing belt, se-
cure one of them with string. And place matchmarks on
the timing belt and RH camshaft timing pulley.
Alternately loosen the two bolts, and remove them, the ten-
sioner and dust boot.
28. DISCONNECT TIMING BELT FROM CAMSHAFT TIMING PULLEYS
(a) Using SST, loosen the tension between the LH and RHcamshaft timing pulleys by slightly turning the LH
camshaft timing pulley clockwise.
SST 09278±54012
±
ENGINE MECHANICAL Timing BeltEM±41
WhereEverybodyKnowsYourName
Page 2242 of 4087
(b) Disconnect the timing belt from the camshaft timingpulleys.
29. REMOVE CAMSHAFT TIMING PULLEYS Using SST, remove the bolt, timing pulley. Remove the two
timing pulleys.
SST 09278±54012
30. REMOVE CRANKSHAFT PULLEY (a) Using SST, remove the pulley bolt.
SST 90213±70010 and 09330±00021
(b) Using SST, remove the pulley.
SST 09213±31021
31. REMOVE HYDRAULIC PUMP HINT (Re±using timing belt): Before removing the hydraulic
pump, using the crankshaft pulley bolt, turn the crankshaft
pulley and align the installation mark of the timing belt with the
end of the hydraulic pump.
EM±42
±
ENGINE MECHANICAL Timing Belt
WhereEverybodyKnowsYourName
Page 2243 of 4087
(a) Disconnect the solenoid valve connector.
(b) Remove the two mounting bolts and two mounting nuts.
(c) Disconnect the engine speed sensor wire clamp.
(d) Remove the hydraulic pump.
32. REMOVE NO.1 TIMING BELT COVER Remove the four bolts, timing belt cover and gasket.
33. REMOVE TIMING BELT COVER SPACER Remove the cover spacer and gasket.
34. REMOVE TIMING BELT GUIDE (NO.1 CRANK ANGLE SENSOR PLATE)
35. REMOVE TIMING BELT HINT (Re±using timing belt): If the installation marks have
disappeared, place a new installation mark on the timing belt
to match the dot mark of the crankshaft timing pulley.
±
ENGINE MECHANICAL Timing BeltEM±43
WhereEverybodyKnowsYourName