Page 428 of 878
33. REMOVE NO.3, NO.1 AND NO.2 CYLINDER HEAD
COVERS
(a) Remove the PCV valve.
(b) Remove the 4 bolts, 4 nuts and No.3 cylinder head cover.
(c) Remove the 4 bolts, No.1 cylinder head cover and gasket.
(d) Remove the 4 bolts, No.2 cylinder head cover and gasket.
34. REMOVE CAMSHAFT TIMING PULLEYS
Hold the hexagon portion of the camshaft with a wrench, and
remove the pulley mounting bolt and camshaft pulley.
35. REMOVE NO.4 TIMING BELT COVER
Remove the 4 bolts and timing belt cover.
36. REMOVE CAMSHAFTS
(a) Uniformly loosen and remove the 4 No.1 bearing cap bolts.
(b) Using a screwdriver, pry out the 2 No.1 camshaft bearing
caps and oil seals.
NOTICE: Be careful not to damage the cap. Tape the screwdriv-
er tip.
± ENGINEENGINE MECHANICALEG±45
Page 432 of 878
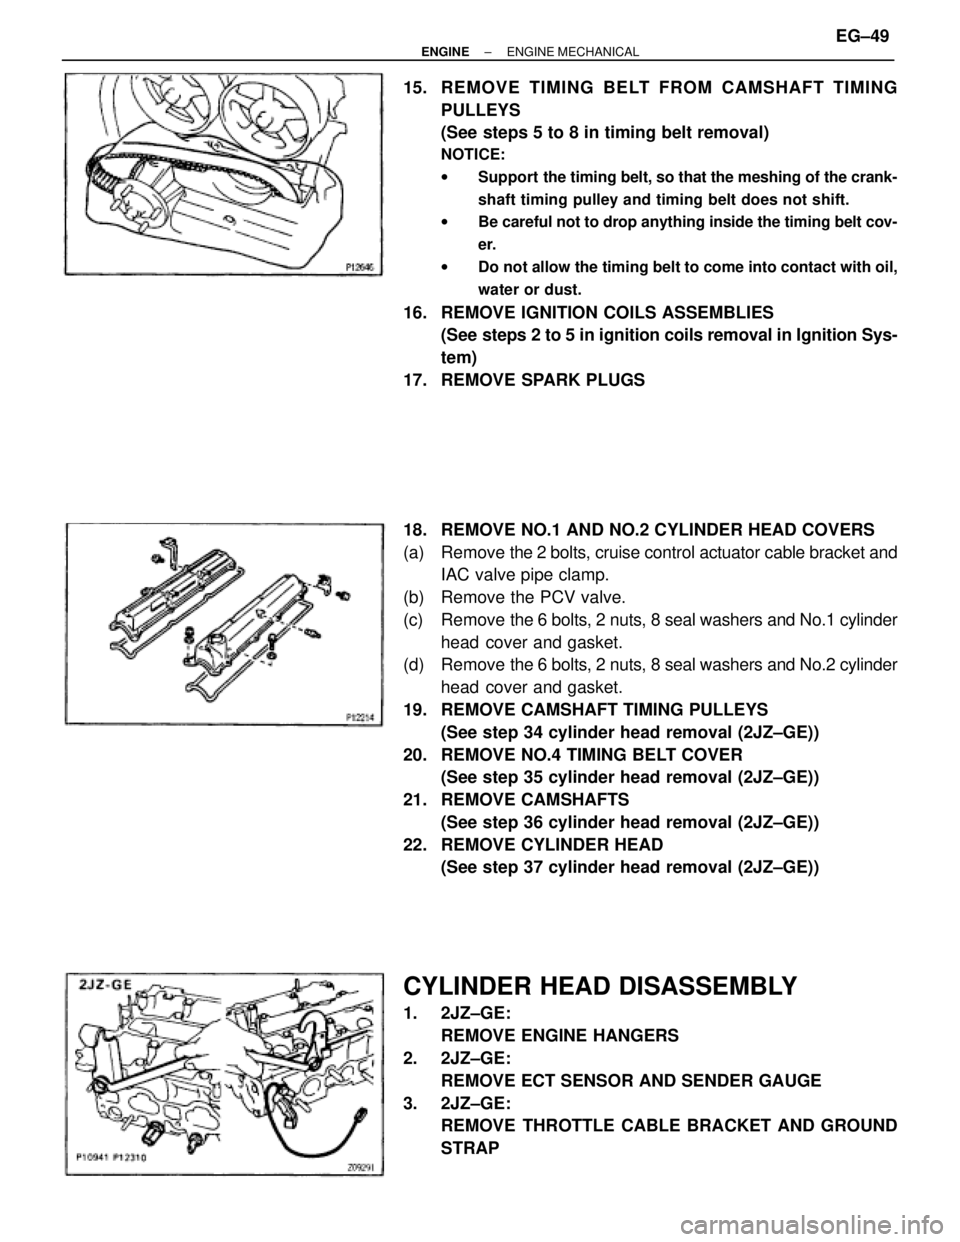
15. REMOVE TIMING BELT FROM CAMSHAFT TIMING
PULLEYS
(See steps 5 to 8 in timing belt removal)
NOTICE:
wSupport the timing belt, so that the meshing of the crank-
shaft timing pulley and timing belt does not shift.
wBe careful not to drop anything inside the timing belt cov-
er.
wDo not allow the timing belt to come into contact with oil,
water or dust.
16. REMOVE IGNITION COILS ASSEMBLIES
(See steps 2 to 5 in ignition coils removal in Ignition Sys-
tem)
17. REMOVE SPARK PLUGS
18. REMOVE NO.1 AND NO.2 CYLINDER HEAD COVERS
(a) Remove the 2 bolts, cruise control actuator cable bracket and
IAC valve pipe clamp.
(b) Remove the PCV valve.
(c) Remove the 6 bolts, 2 nuts, 8 seal washers and No.1 cylinder
head cover and gasket.
(d) Remove the 6 bolts, 2 nuts, 8 seal washers and No.2 cylinder
head cover and gasket.
19. REMOVE CAMSHAFT TIMING PULLEYS
(See step 34 cylinder head removal (2JZ±GE))
20. REMOVE NO.4 TIMING BELT COVER
(See step 35 cylinder head removal (2JZ±GE))
21. REMOVE CAMSHAFTS
(See step 36 cylinder head removal (2JZ±GE))
22. REMOVE CYLINDER HEAD
(See step 37 cylinder head removal (2JZ±GE))
CYLINDER HEAD DISASSEMBLY
1. 2JZ±GE:
REMOVE ENGINE HANGERS
2. 2JZ±GE:
REMOVE ECT SENSOR AND SENDER GAUGE
3. 2JZ±GE:
REMOVE THROTTLE CABLE BRACKET AND GROUND
STRAP
± ENGINEENGINE MECHANICALEG±49
Page 433 of 878
4. 2JZ±GTE:
REMOVE ENGINE HANGERS AND GROUND STRAP
5. 2JZ±GTE:
REMOVE CAMSHAFT POSITION SENSORS
6. REMOVE EGR COOLER
7. REMOVE VALVE LIFTERS AND SHIMS
HINT: Store the valve lifters and shims in correct order.
8. REMOVE VALVES
(a) Using SST, compress the valve spring and remove the 2
keepers.
SST 09202±70010
(b) Remove the spring retainer, valve spring, valve and spring
seat.
HINT: Store the valves, valve springs, spring seats and spring
retainers in correct order.
(c) Using needle±nose pliers, remove the oil seal.
CYLINDER HEAD COMPONENTS
INSPECTION AND REPAIR
1. CLEAN TOP SURFACES OF PISTONS AND CYLINDER
BLOCK
(a) Turn the crankshaft, and bring each piston to top dead center
(TDC). Using a gasket scraper, remove all the carbon from
the piston top surface. EG±50
± ENGINEENGINE MECHANICAL
Page 434 of 878
(b) Using a gasket scraper, remove all the gasket material from
the top surface of the cylinder block.
(c) Using compressed air, blow carbon and oil from the bolt
holes.
CAUTION: Protect your eyes when using high pressure com-
pressed air.
2. CLEAN CYLINDER HEAD
A. Remove gasket material
Using a gasket scraper, remove all the gasket material from
the cylinder block surface.
NOTICE: Be careful not to scratch the cylinder block contact
surface.
B. Clean combustion chambers
Using a wire brush, remove all the carbon from the combus-
tion chambers.
NOTICE: Be careful not to scratch the cylinder block contact
surface.
C. Clean valve guide bushings
Using a valve guide bushing brush and solvent, clean all the
guide bushings.
D. Clean cylinder head
Using a soft brush and solvent, thoroughly clean the cylinder
head.
± ENGINEENGINE MECHANICALEG±51
Page 436 of 878
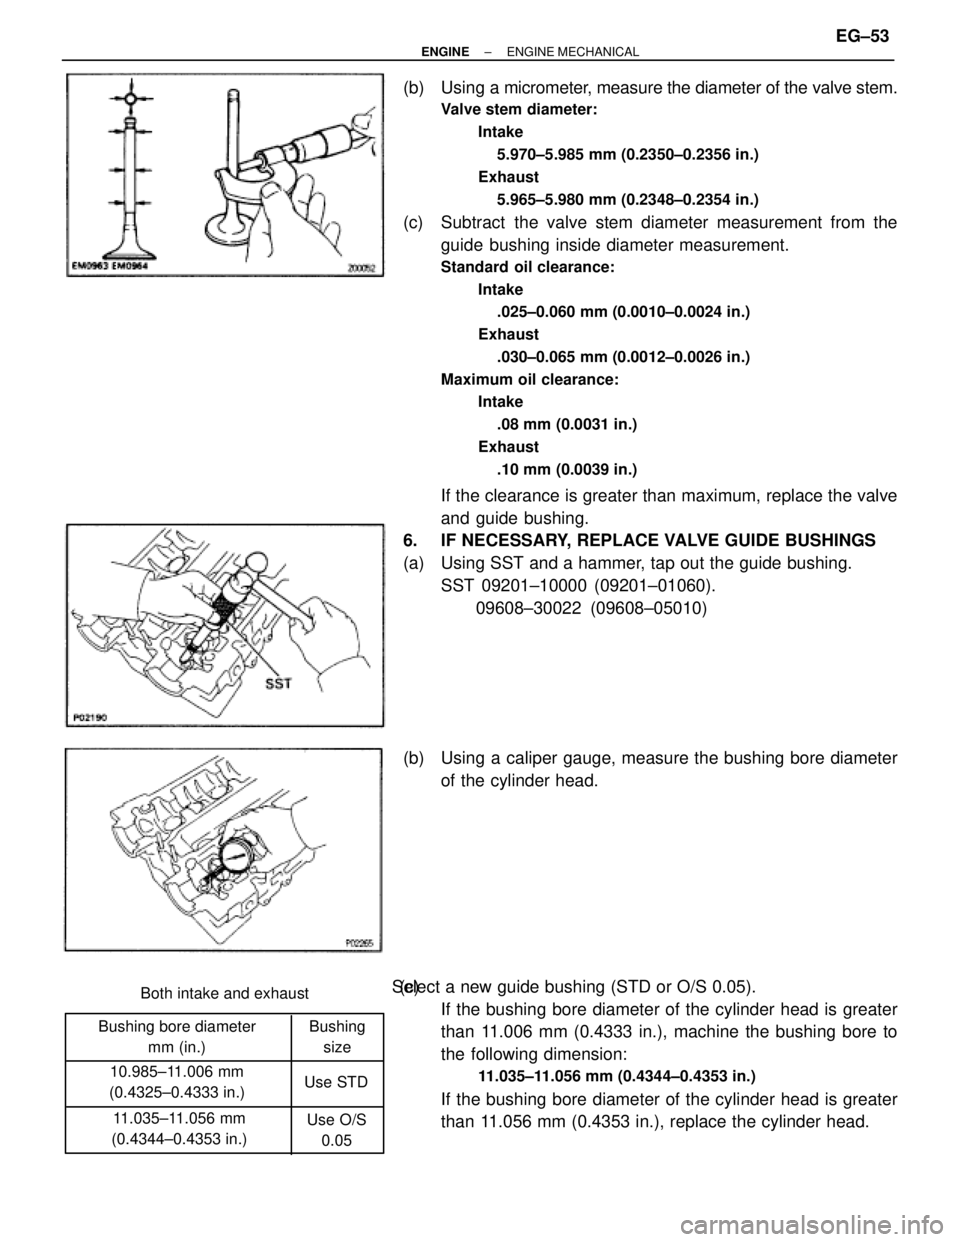
Bushing bore diameter
mm (in.)
10.985±11.006 mm
(0.4325±0.4333 in.)Both intake and exhaust
11.035±11.056 mm
(0.4344±0.4353 in.)Bushing
size
Use STD
Use O/S
0.05
(b) Using a micrometer, measure the diameter of the valve stem.
Valve stem diameter:
Intake
5.970±5.985 mm (0.2350±0.2356 in.)
Exhaust
5.965±5.980 mm (0.2348±0.2354 in.)
(c) Subtract the valve stem diameter measurement from the
guide bushing inside diameter measurement.
Standard oil clearance:
Intake
.025±0.060 mm (0.0010±0.0024 in.)
Exhaust
.030±0.065 mm (0.0012±0.0026 in.)
Maximum oil clearance:
Intake
.08 mm (0.0031 in.)
Exhaust
.10 mm (0.0039 in.)
If the clearance is greater than maximum, replace the valve
and guide bushing.
6. IF NECESSARY, REPLACE VALVE GUIDE BUSHINGS
(a) Using SST and a hammer, tap out the guide bushing.
SST 09201±10000 (09201±01060).
09608±30022 (09608±05010)
(b) Using a caliper gauge, measure the bushing bore diameter
of the cylinder head.
(c) Select a new guide bushing (STD or O/S 0.05).
If the bushing bore diameter of the cylinder head is greater
than 11.006 mm (0.4333 in.), machine the bushing bore to
the following dimension:
11.035±11.056 mm (0.4344±0.4353 in.)
If the bushing bore diameter of the cylinder head is greater
than 11.056 mm (0.4353 in.), replace the cylinder head.
± ENGINEENGINE MECHANICALEG±53
Page 440 of 878
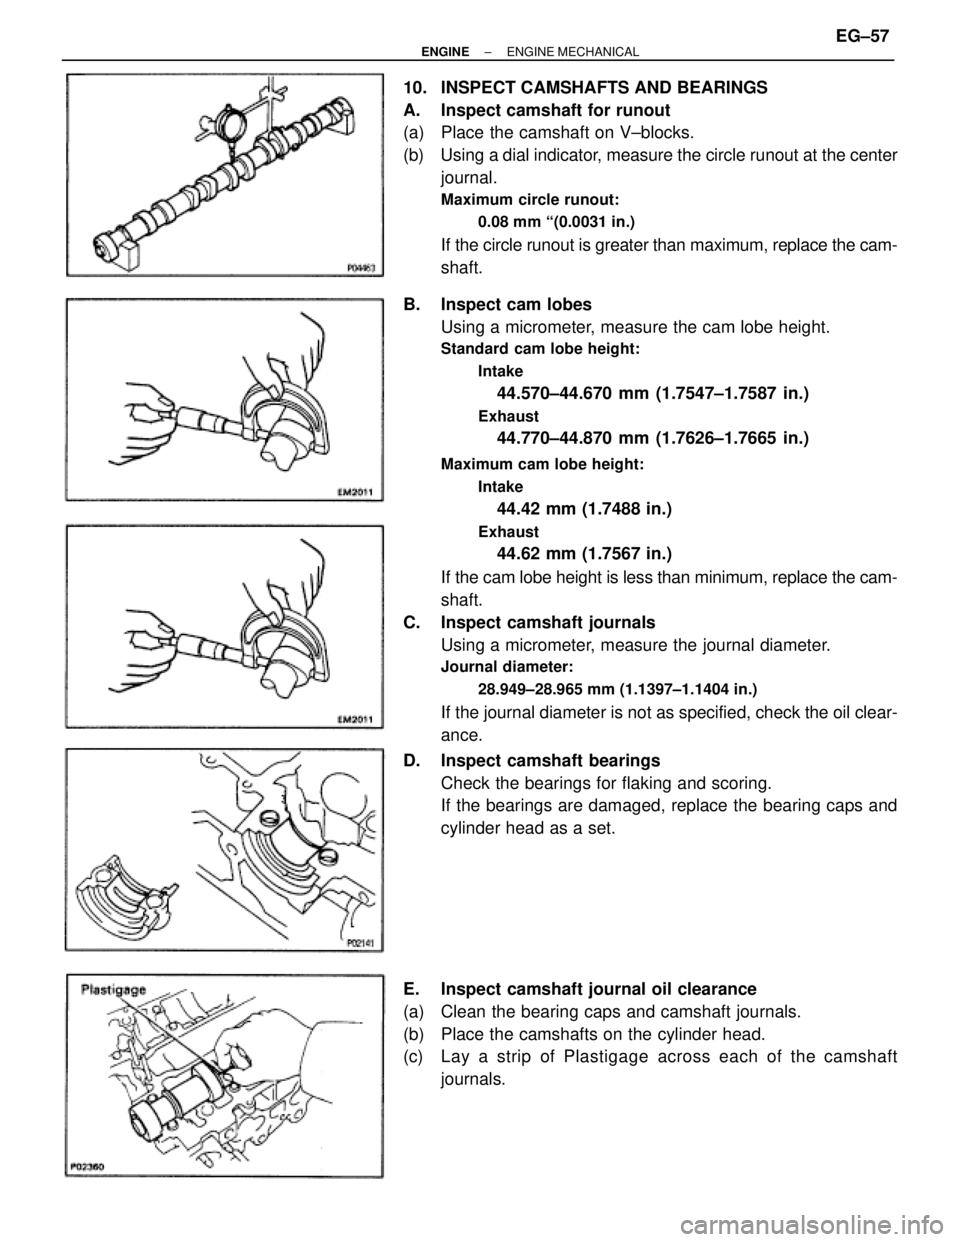
10. INSPECT CAMSHAFTS AND BEARINGS
A. Inspect camshaft for runout
(a) Place the camshaft on V±blocks.
(b) Using a dial indicator, measure the circle runout at the center
journal.
Maximum circle runout:
0.08 mm ª(0.0031 in.)
If the circle runout is greater than maximum, replace the cam-
shaft.
B. Inspect cam lobes
Using a micrometer, measure the cam lobe height.
Standard cam lobe height:
Intake
44.570±44.670 mm (1.7547±1.7587 in.)
Exhaust
44.770±44.870 mm (1.7626±1.7665 in.)
Maximum cam lobe height:
Intake
44.42 mm (1.7488 in.)
Exhaust
44.62 mm (1.7567 in.)
If the cam lobe height is less than minimum, replace the cam-
shaft.
C. Inspect camshaft journals
Using a micrometer, measure the journal diameter.
Journal diameter:
28.949±28.965 mm (1.1397±1.1404 in.)
If the journal diameter is not as specified, check the oil clear-
ance.
D. Inspect camshaft bearings
Check the bearings for flaking and scoring.
If the bearings are damaged, replace the bearing caps and
cylinder head as a set.
E. Inspect camshaft journal oil clearance
(a) Clean the bearing caps and camshaft journals.
(b) Place the camshafts on the cylinder head.
(c) Lay a strip of Plastigage across each of the camshaft
journals.
± ENGINEENGINE MECHANICALEG±57
Page 441 of 878
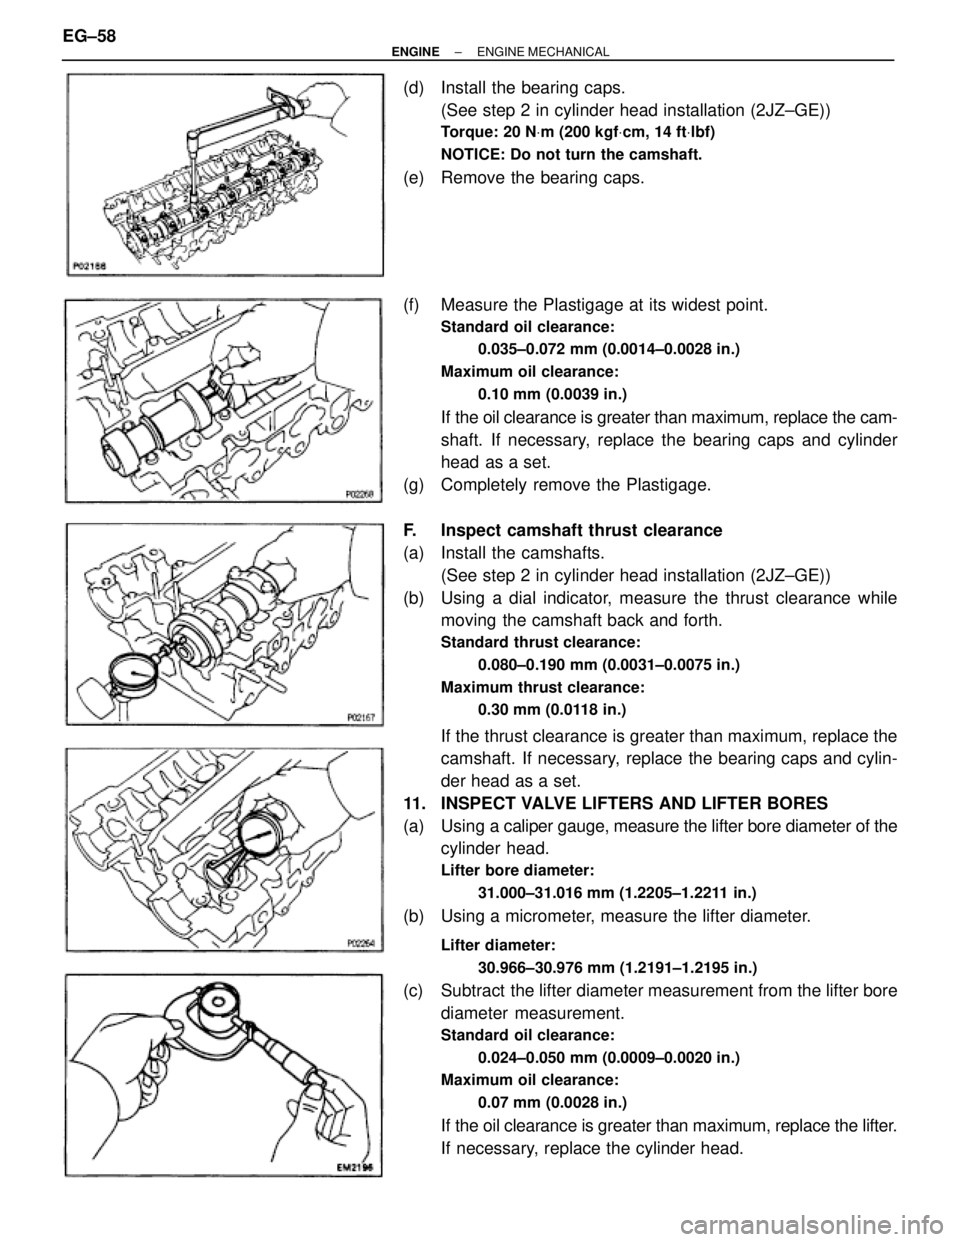
(d) Install the bearing caps.
(See step 2 in cylinder head installation (2JZ±GE))
Torque: 20 NVm (200 kgfVcm, 14 ftVlbf)
NOTICE: Do not turn the camshaft.
(e) Remove the bearing caps.
(f) Measure the Plastigage at its widest point.
Standard oil clearance:
0.035±0.072 mm (0.0014±0.0028 in.)
Maximum oil clearance:
0.10 mm (0.0039 in.)
If the oil clearance is greater than maximum, replace the cam-
shaft. If necessary, replace the bearing caps and cylinder
head as a set.
(g) Completely remove the Plastigage.
F. Inspect camshaft thrust clearance
(a) Install the camshafts.
(See step 2 in cylinder head installation (2JZ±GE))
(b) Using a dial indicator, measure the thrust clearance while
moving the camshaft back and forth.
Standard thrust clearance:
0.080±0.190 mm (0.0031±0.0075 in.)
Maximum thrust clearance:
0.30 mm (0.0118 in.)
If the thrust clearance is greater than maximum, replace the
camshaft. If necessary, replace the bearing caps and cylin-
der head as a set.
11. INSPECT VALVE LIFTERS AND LIFTER BORES
(a) Using a caliper gauge, measure the lifter bore diameter of the
cylinder head.
Lifter bore diameter:
31.000±31.016 mm (1.2205±1.2211 in.)
(b) Using a micrometer, measure the lifter diameter.
Lifter diameter:
30.966±30.976 mm (1.2191±1.2195 in.)
(c) Subtract the lifter diameter measurement from the lifter bore
diameter measurement.
Standard oil clearance:
0.024±0.050 mm (0.0009±0.0020 in.)
Maximum oil clearance:
0.07 mm (0.0028 in.)
If the oil clearance is greater than maximum, replace the lifter.
If necessary, replace the cylinder head. EG±58
± ENGINEENGINE MECHANICAL
Page 443 of 878
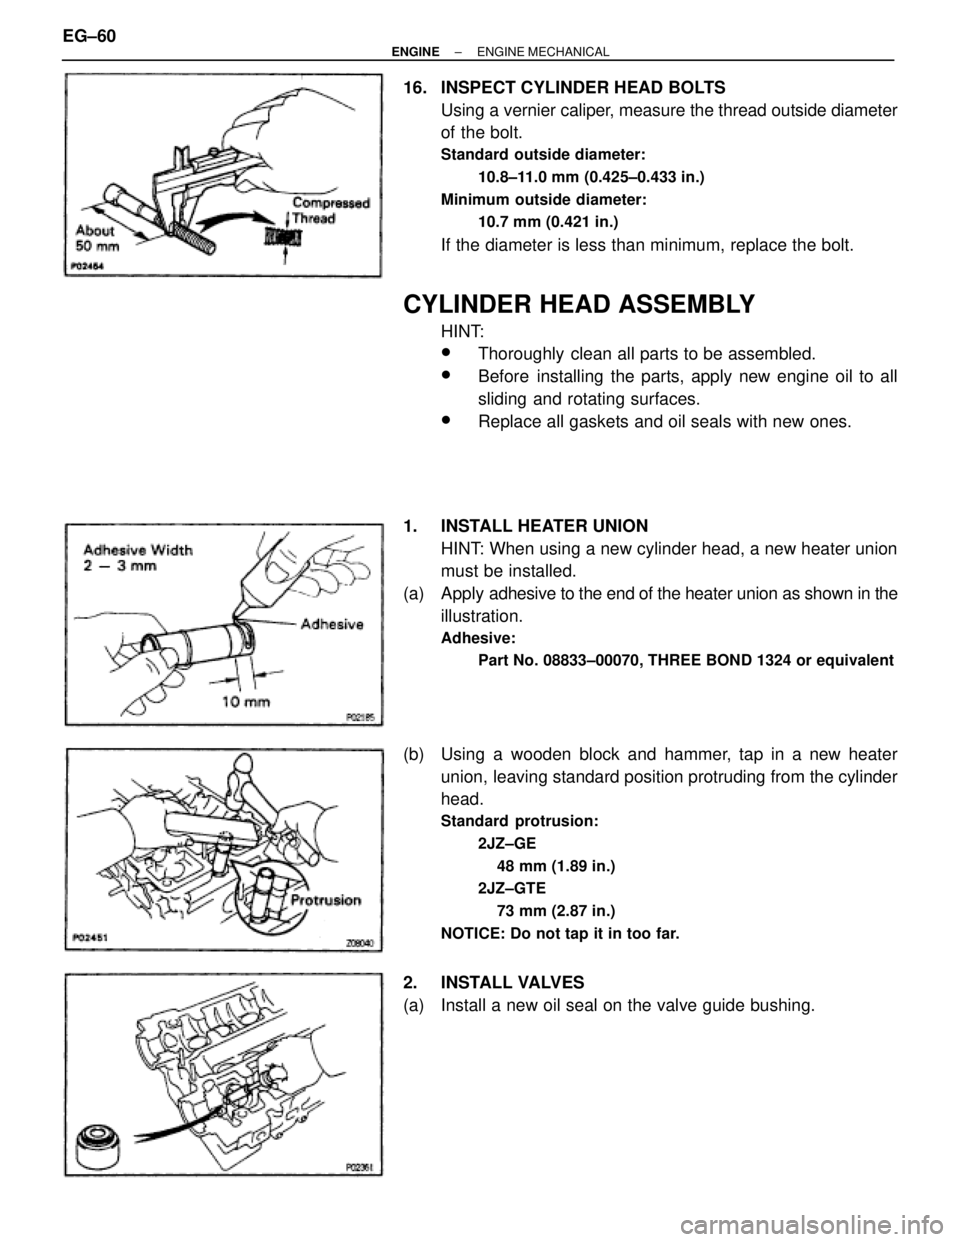
16. INSPECT CYLINDER HEAD BOLTS
Using a vernier caliper, measure the thread outside diameter
of the bolt.
Standard outside diameter:
10.8±11.0 mm (0.425±0.433 in.)
Minimum outside diameter:
10.7 mm (0.421 in.)
If the diameter is less than minimum, replace the bolt.
CYLINDER HEAD ASSEMBLY
HINT:
wThoroughly clean all parts to be assembled.
wBefore installing the parts, apply new engine oil to all
sliding and rotating surfaces.
wReplace all gaskets and oil seals with new ones.
1. INSTALL HEATER UNION
HINT: When using a new cylinder head, a new heater union
must be installed.
(a) Apply adhesive to the end of the heater union as shown in the
illustration.
Adhesive:
Part No. 08833±00070, THREE BOND 1324 or equivalent
(b) Using a wooden block and hammer, tap in a new heater
union, leaving standard position protruding from the cylinder
head.
Standard protrusion:
2JZ±GE
48 mm (1.89 in.)
2JZ±GTE
73 mm (2.87 in.)
NOTICE: Do not tap it in too far.
2. INSTALL VALVES
(a) Install a new oil seal on the valve guide bushing. EG±60
± ENGINEENGINE MECHANICAL