1980 CHEVROLET CITATION trunk release
[x] Cancel search: trunk releasePage 43 of 95

Downloaded from www.Manualslib.com manuals search engine Remote Control Rear Quarter Swing-Out Windows
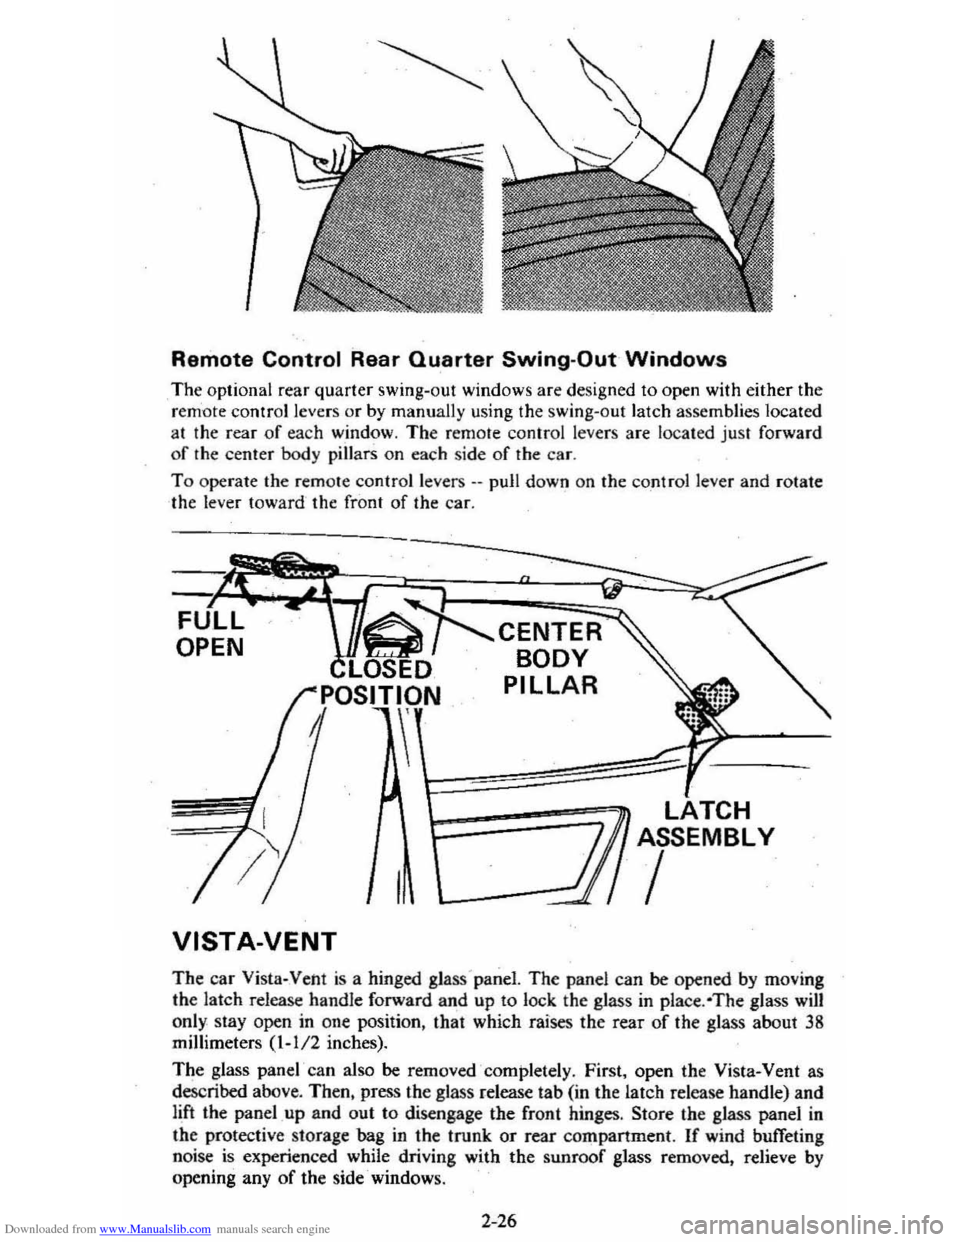
The optional rear quarter swing~oul windows are designed to open with either the
r e m 'ote control levers Of by manually using the swing-out latch assemblies located
at the rear of each window. The remote control levers are located just forward
o f the center
bod y pillars on each side of the car.
T o operate the remote control levers .-pull down on the cont ro l lever and rotate
the lever toward the front of the car.
OPEN
VISTA-VENT
CENTER
BODY
PILLAR
1========7.~ TCH r: ASSEMBLY
/
The car Vista-Vent is a hinged glass'panel. The panel can be opened by moving
the latch release handle forward and up
to lock the glass in place . ·The glass will
only. stay open in one position, that which raises the fear of the glass about 38 millimeters (1-112 inches).
The glass
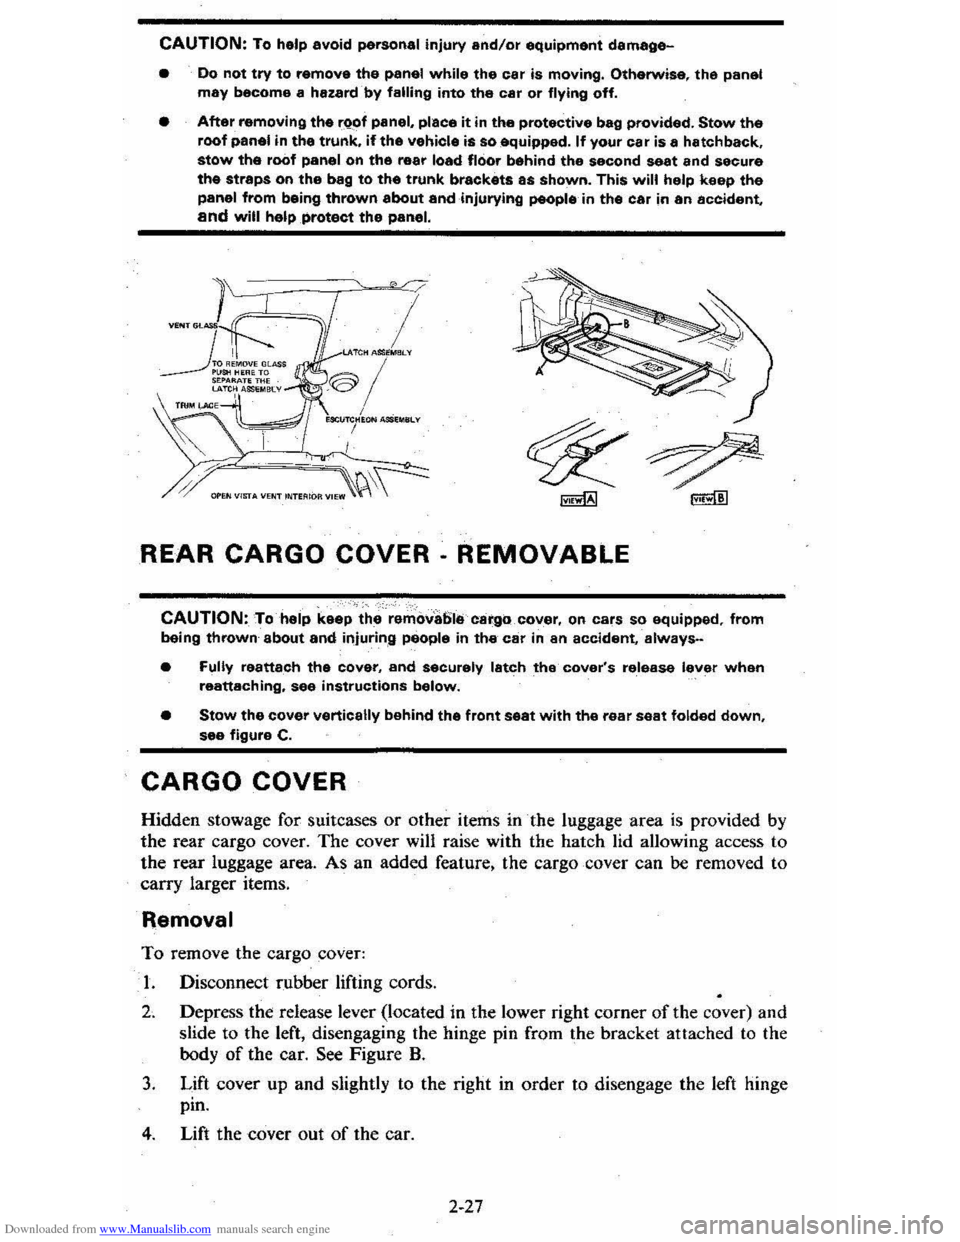
panel' can also be removed completely . First, open the Vista-Vent as
described above.
Then, press the glass release tab (in the latch release handle) and
lift the panel up and out to disengage the front hinges . Store the glass panel in
the protective storage bag in the trunk or rear companment. If wind buffeting
noise is experienced while driving with the sunroof glass removed. relieve by opening any of the side· windows .
2-26
Page 44 of 95

Downloaded from www.Manualslib.com manuals search engine CAUTION: To help avoid personal injury and/or equipment damage-
• Do not try to remove the panel while the car is moving. Otherwise. the panel may become a hazard by falling into the car or flying off.
• After removing the rQof panel, place it in the protective bag provided. Stow the roof panel in the trunk. if the vehicle is so equipped. If your car is a hatchback. stow the roof panel on the rear load floor behind the second seat and secure the straps on the bag to the trunk brackets as shown. This will help keep the panel from being thrown about andinjurying people in the car in an accident, and will help protect the panel.
I LAlCH ASIl~MElLV
®/ , MClI~HION MSl .. SLv
I
REAR CARGO COVER· REMOVABLE
CAUTION: To help keep the remova61e cargo cover, on cars so equipped, from being thrown about and injuring people in the car in an accident, always-
• Fully reattach the cover, and securely latch the cover's release lever when reattaching, see instructions below.
• Stow the cover vertically behind the front seat with the rear seat folded down. see figure C.
CARGO COVER
Hidden stowage for suitcases or other items in the luggage area is provided by
the rear cargo cover. The cover will raise with the hatch lid allowing access to
the rear luggage area. As an added feature. the cargo cover can be removed to
carry larger items.
Removal
To remove the cargo cover:
1. Disconnect rubber lifting cords.
2. Depress the release lever (located in the lower right corner of the cover) and
slide to the left, disengaging the hinge pin from the bracket attached to the
body
of the car. See Figure B.
3. Lift cover up and slightly to the right in order to disengage the left hinge
pin.
4. Lift the cover out of the car.
2-27
Page 46 of 95

Downloaded from www.Manualslib.com manuals search engine Insta"ation
To install the cargo cover:
1. Insert the left hinge pin in the bracket attached to the body of the car.
2. Slide the release lever to the right to engage hinge pin in the 'bracket. See figure
B.
3. Move the lever up to lock the cover in place.
4. Reconnect the rubber 'lifting cords.
STOWING THINGS IN (OR ON) THE CAR
CAUTION: luggage or other cergo should not be piled higher than the seatbacks, When at all possible, luggage or cargo should be C8rrifHj in the trunk area. The filler panel or cargo cover, between the rear 88atback and the rear window should not be used to carry objects-even those that are small and light. All nems should be secured in place. This will help keep such things from being thrown about and Injurying people in the car during an accident. Cargo weight whether inside or on the roof, should be positioned as evenly as possible from front to rear.
ROOF LUGGAGE CARRIER
The optional roof luggage carrier is designed to allow loading of items onto the
roof
of your car. The roof luggage carrier does not increase the total load carrying
capacity of th e car , as shown opposite "Max Load" on the Tire Placard located
on the left front door. Be sure the total weight of the cargo on the roof, plus the
weight
of the cargo and passe ngers inside the car, plus the tongue load of any
trailer you are towing does
,1;10t exc_eed this "Max Load" vehicle capacity weight. See Section 5, page "5-11 for more information on Vehicle Loading . Also see the
infonnation on Trailer Towing
in Section 1 of this manual . if needed .
NOTICE:To helpayoid pOSSible damage, do not exceed 70 kilograms (1 50 pounds), cargo weight on the roof. Position the cargo in the luggage carrier as evenly as: pOssible. If carrying long items, never exceed car length and fasten such loads securely at the front and rear of the car, as well as to the luggage rack.
The roof luggage carrier consists of: five roof slats bolted to the top of the car,
two crossrails with knobs at each end th~t allow the crossrails to be adjusted or removed, and six' adjustable tie-downs.
The operation
of each item is as follows: the crossrails are easily adjusted forward
or rearward in order to help position your load. To move the crossrails , rotate
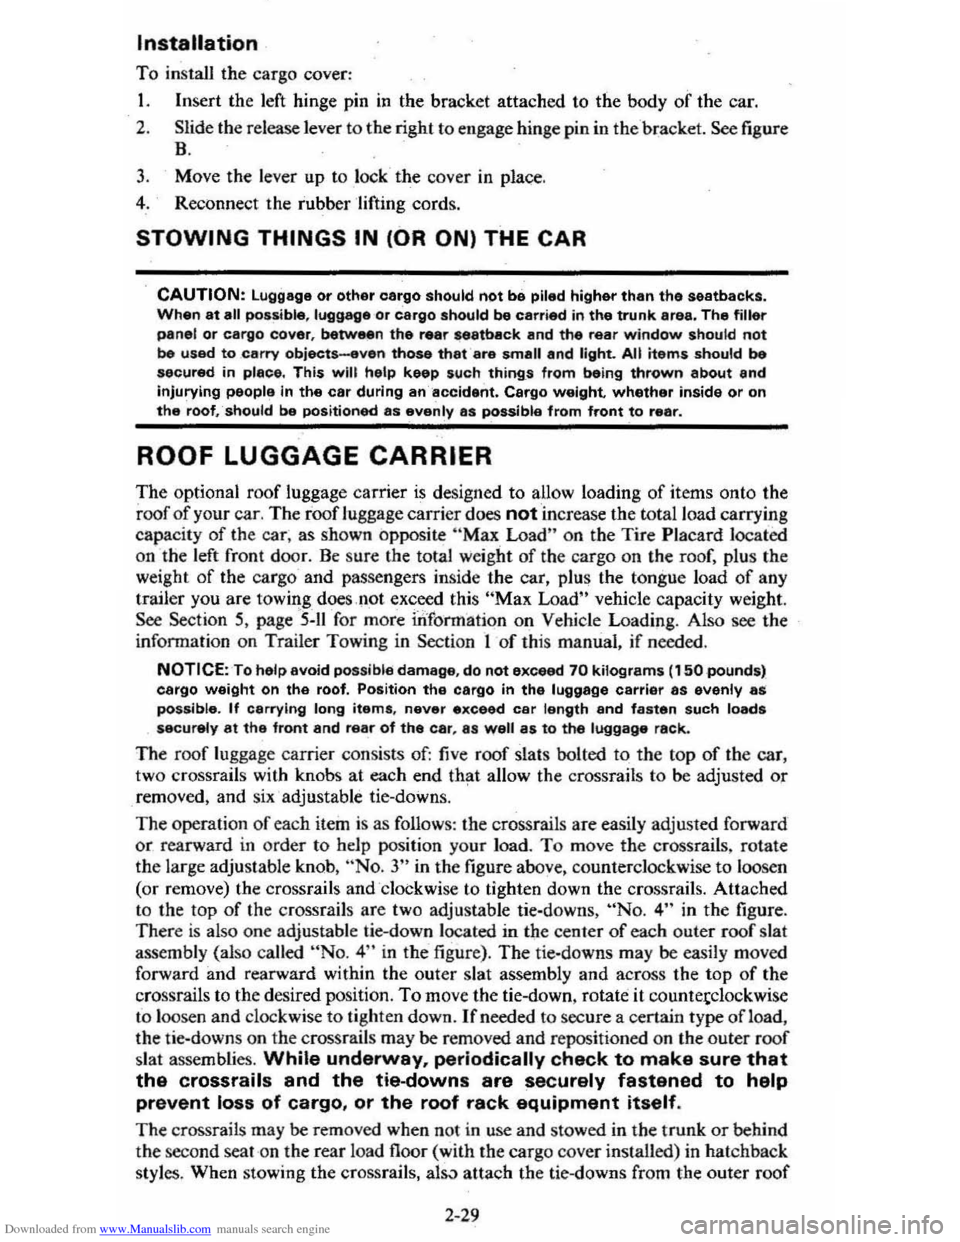
the large adjustable knob, ··No. 3" in the figure above. counterclockwise to loosen
(or remove) the crossrails and 'clockwise to tighten down the cros srails. Attached
to the top
of the crossrails are two adjustable tie-downs, "No.4" in the figure.
Ther e is also one adjustable lie-down located in the center of each outer roof slat
assembly (also called
"No.4" in the figure) . The tie-downs may be easily moved
forward and rearward within the outer slat assembly and across the top
of the
crossrails to the desired position.
To move the tie-down . rotate it countetclockwise
to loosen and clockwise to tighten down. If needed to sec ure a certain type of lead,
the tie-downs on the
crossratls may be removed and repos itioned on the outer roof
slat assemblies. While underway, periodically check to make sure that
the crossrails and the tie-downs are securely fastened to help
prevent loss of cargo, or the roof rack equipment itself.
The crossrails may be removed when not in use and stowed in the trunk or behind
the second seat on the rear load floor (with the carg o cover installed) in hatchback
style
s. When stowing the cressrails, al5..1 attach the tie-downs from the outer roof
2-29