1980 CHEVROLET CITATION power steering
[x] Cancel search: power steeringPage 22 of 95
Downloaded from www.Manualslib.com manuals search engine Air Conditioner
If your vehicle has an optional air cOnditioner , use the "Economy;' (" Vent" or
"Heater") position s whenever possible, The air conditioner compr essor is not on in these positions and the reduced engine load can improve fuel eco nomy.
Engine Maintenance
An engine that is properly maintained wjJl provide better fuel economy than .one
thai is not . One misfirin g spa rk plu g will cut fuel economy quite a bit , and will
make a difference in the amount of pollution _emitted fro m your vehicle .
Excess Weight
Fuel economy is related to the work the engine must do. The heavier the load,
the more fuel
it takes to run your vehicle. Keep weight to a minimum by taking o~t any luggage or cargo when it is not needed. .
Tire Inflation
Underinflation not only causes needLess wear of the tires, but can also waste fuel. It's a good idea to check tire pressures often and, for the best fuel econ omy, keep
your tires inflated to the highest
pr~suresshown on the Tire Placard on'the left
front doo r of your car.
Wheel Alignment
Improper toe alignment will cause the tires to roll at an angle, which will result
in faster tire wear.
It takes power to ove rcome this improper alignment which,
in tum, wastes fuel.
STEERING COLUMN CONTROLS
ANTI-THEFT STEERING COLUMN LOCK
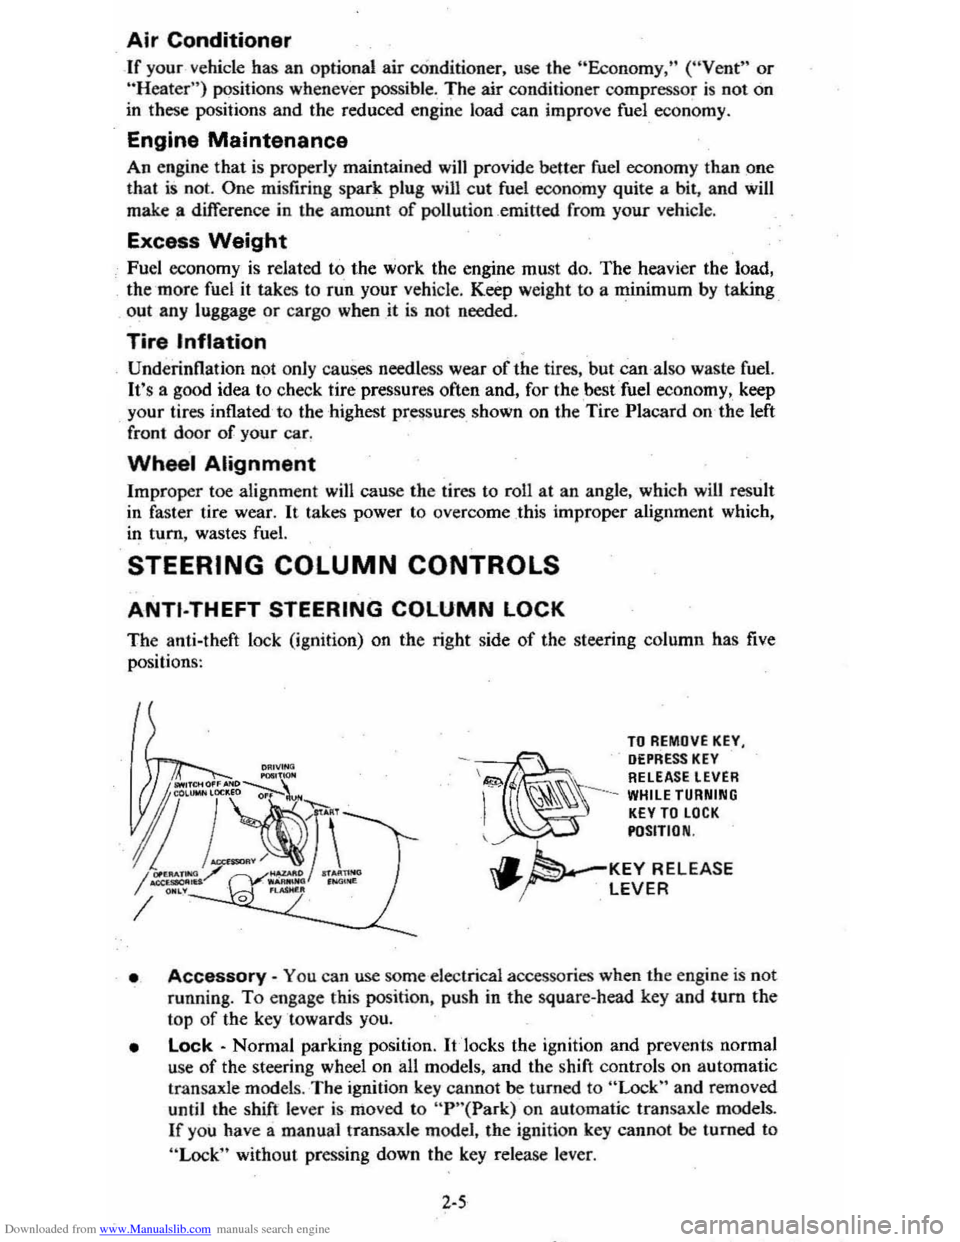
The anti-theft lock (ignition) on the right side of the steering column has five
positi on
s:
TO REMOVE KEY, DEPRESS KEY \&!;;>. RELEASE LEVER
-~ I
~~~ --WHILE TURNING KEY TO LOCK POSITION
.. ~'-KEY RELEASE "..~ LEVER
• Accessory -You ca n use some elec trical a ccessories when the e ngin e is not
running.
To engage this position, push in the square-head key and tum the
top of the key towards you.
• Lock -Norm al parking position. It 'locks the ignition and prev en ts normal
use
of the steering wheel on all models, and the shift controls on automatic
transaxl e model
s. The ignition key canno t be turned to "Lock" and removed
until the shift lever is mo ved to "P "( Park) on automatic transaxle mode1s .
If you have a manual transaxle model, the ignition key cannot be turned to
"Lock" without pressing down the key release leve r.
2-5
Page 29 of 95
Downloaded from www.Manualslib.com manuals search engine Proper Shift Points for Manual Transaxle
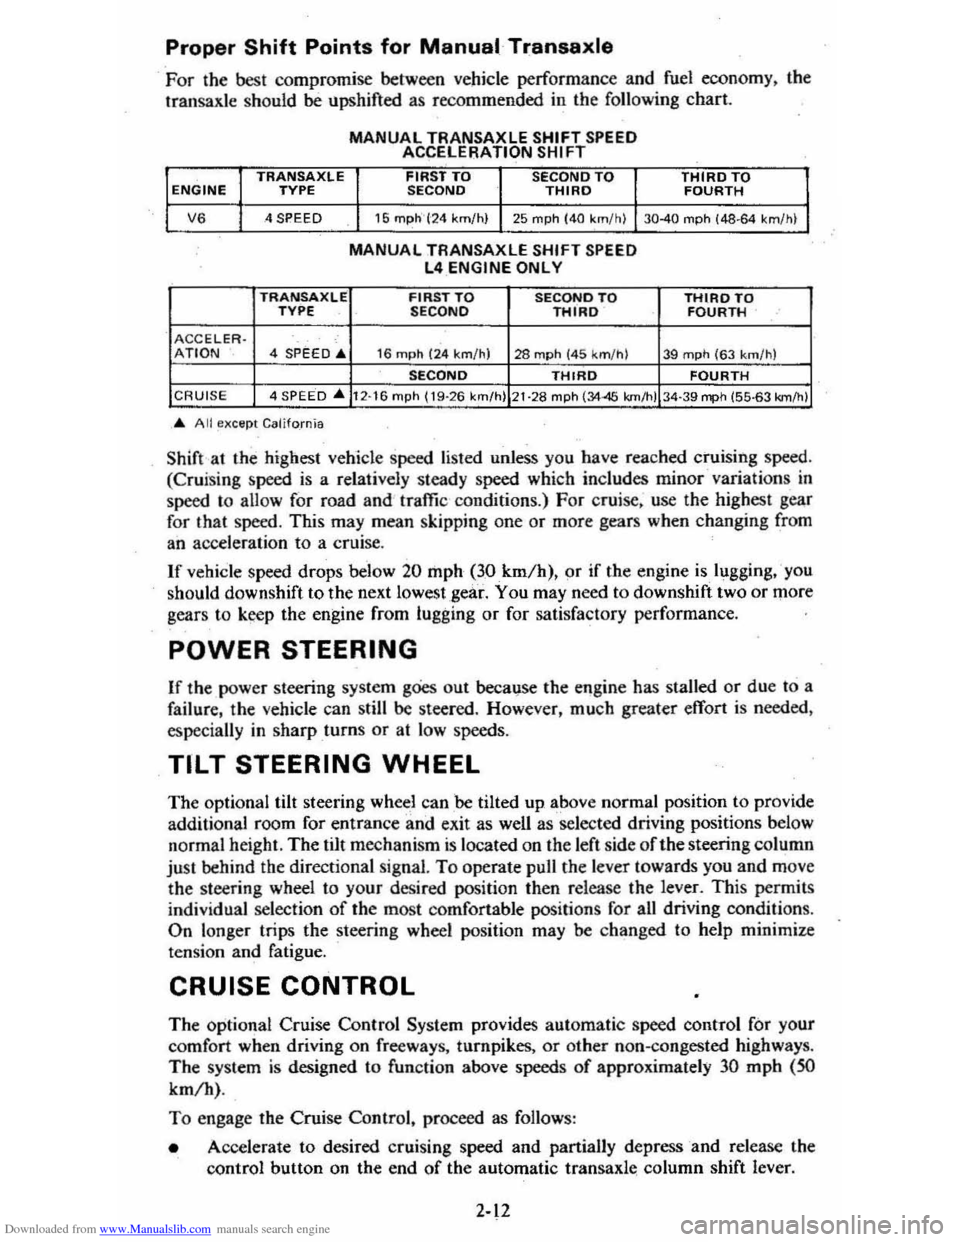
For the best compromise between vehicle performance and fuel economy . the Iransaxle should be upshifted as recommended in the following chart.
TRANSAXLE ENGINE TYPE
V6 4 SPEED
TRANSAXlE TVPE .
ACCELER · 4 ;PEED:" AnON
MANUAL TRANSAXLE SHIFT SPEED ACCELERATION SHIFT
FIRST TO
SECOND TO SECOND THIRD
16 mph" ('24 km/h) 25 mph (40 km/h)
MANUAL TAANSAXLE SHIFT SPEED L4 ENGINE ONL Y
FIRST TO SECQNOTO SECOND THIRD
16 mph (24 km/h) 28 mph (45 k m/h)
SECOND THIRD
THIRD TO FOURTH
30-40 mph (48·64 11m/h)
THIRD TO FOURTH
39 mph (63 km/h)
FOURTH CRUIS E 4 SPEED ... 12·16 mph (19-26 km/h) 21 ·28 mph (3445 km/h) 34·39 mph (55·63 km/h)
... All except California
Shift at the highest vehicle speed listed unless you have reached cruising speed.
(Cruising speed is a relatively steady speed which includes minor variations in
speed
to allow for road and traffic conditions.) For cruise. use the highest gear
for that speed. This may mean skipping one or more gears when changing from
an acceleration to a cruise.
If vehicle speed drops below 20 mph (30km/h). pr if the engine islugging,'you
should downshift to the next lowest ,gear.
You may need to downshift two or more
gears to k~p the engine from lugging or for satisfactory performance.
POWER STEERING
If the power steering system goes out becalj,se the engine has stalled or due to a
failure . the vehicle can still
be steered. However, much greater effort is needed.
especially in sharp
turns or at low speeds.
TILT STEERING WHEEL
The optional tilt steering wheel can be tilted up above normal position to provide
additional room for entrance and exit as well as selected driving positions below
normal height. The tilt mechanism
is located on the left side of the steering column
just behind the directional signal. To operate pull the lever towards you and move
the sleering wheel to your desired position then release the level". This permits
individual selection
of the most comfortable positions for all driving conditions. On longer trips the steering wheel position may be changed to help minimize
tension and fatigue.
CRUISE CONTROL
The optional Cruise Control System provides automatic speed control for your
comfort when driving on freeways, turnpikes.
or other non-congested highways.
The system is designed to function above speeds of approximately 30 mph (SO
km/h).
To engage the Cruise Control, proceed as follows:
• Accelerate to desired cruising speed and partially depress and release the
control button on the end
of the automatic transaxle: column shift lever.
2-12
Page 31 of 95
Downloaded from www.Manualslib.com manuals search engine CAUTION: Driving thr~gh water deep enough to wet the brakes may cause the brakes not to work as well. As 8 result the vehicle will not slow down at the usual
rate ; and it may pull to the right or left. After checking to the rear for other vehicle., apply the brakes lightly to check whether this has happened. To dry them quickly, lightly apply the brakes. At the-same time, k .. p a safe forward speed, with plenty of clear space ahead, to the rear, and to the side •. 00 this until the brakes return to normal.
The brake system warning light is covered in the "Instrument Panel" section.
Power Brakes
• If optional power assis t is lost because of a stalled engine or other reasons .
the brakes can normally still be applied with power assist at leas t two times
u sing reserv e power.
• Th e system is designed to bring the vehicle to a full stop on reserve power if the brake pedal is applied once and held down . However . the reserve power
is partly used up each time the brake pedal is applied and rele ased. Do not
pump the brakes when ,brake power assist has been lost, except when needed
to maintain steering control on slippery surfaces.
• Without power assist, the vehicle can still be stopped by pushing much harder
o n the brake pedal. However, the stopping distance may be longer. even
though the brakes themselves remain fully operational.
Self-Adjusting Brakes
• The brakes on this vehicle (exc,ept for the parking brake) are self-adjusting.
They have been design ed so
that periodic brake adjustment is not required.
• The drum brakes adjust themselves when the brakes are firml y applied while
the vehicle is moving backwards.
• The disc brakes adjust themselve s each time the brakes are used.
• If the brak e pedal goes down farther than nonnal. it may be due to a lack
of adjustment. To find out if this is the case, drive backward and forward
a few times , applying the brakes firmly when going each way.
• See yo ur dealer if pedal height does not return to normal, or if there is a rapid
increase in pedal travel, which could be a sign of other brake trouble .
• Also see your dealer if the parking brake needs adjustment' .
NOTICE: "Riding the brake" by resting your foot on the brake pedal when not intending to brake can cause overheated brakes. This can waar out the brake linings faster and damage the brakas thamselvas, 85 well 8S waste fuel.
DIMMER SWITCH
The dimmer switch that controls the headlight high/lo w beam is built into the
turn signal control. See the "Steering Column Controls" Section 2 of this manual.
PARKING BRAKE
• To set the parking brake, fully depress the foot pedal at the far left side.
• For better holding power, first press down the regular brake pedal with your
right foot. Then hold it while setting the parking brake with your lefl foo[.
•
To release the parking brake, pull the "Brake Release" handle located at the
lower left of the instrument panel.
• To help remind you. the brake system warning light is designed to come on if the parking brake control is not fully released and the ignition key is on.
2-14
Page 38 of 95
Downloaded from www.Manualslib.com manuals search engine lower Air Vents
Two control handles lOCated beneath the steering column open and close the tower
air vents. To compliment this system there is a power upper vent in the instrument
panel which is operated from the heater
control. The amount of air coming from the lower cutlets ~epends -on vehicle speed and the upper outJet~ depend on fan
'poed.
HEATER SYSTEM
I" .. ill A. HI
The windshield defrosting and defogging system assists in providing good visibility through designated areas of the windshield under most inclement weather
Conditions. For immedia_te operation of the vehicle. the windshield should be scraped clear.
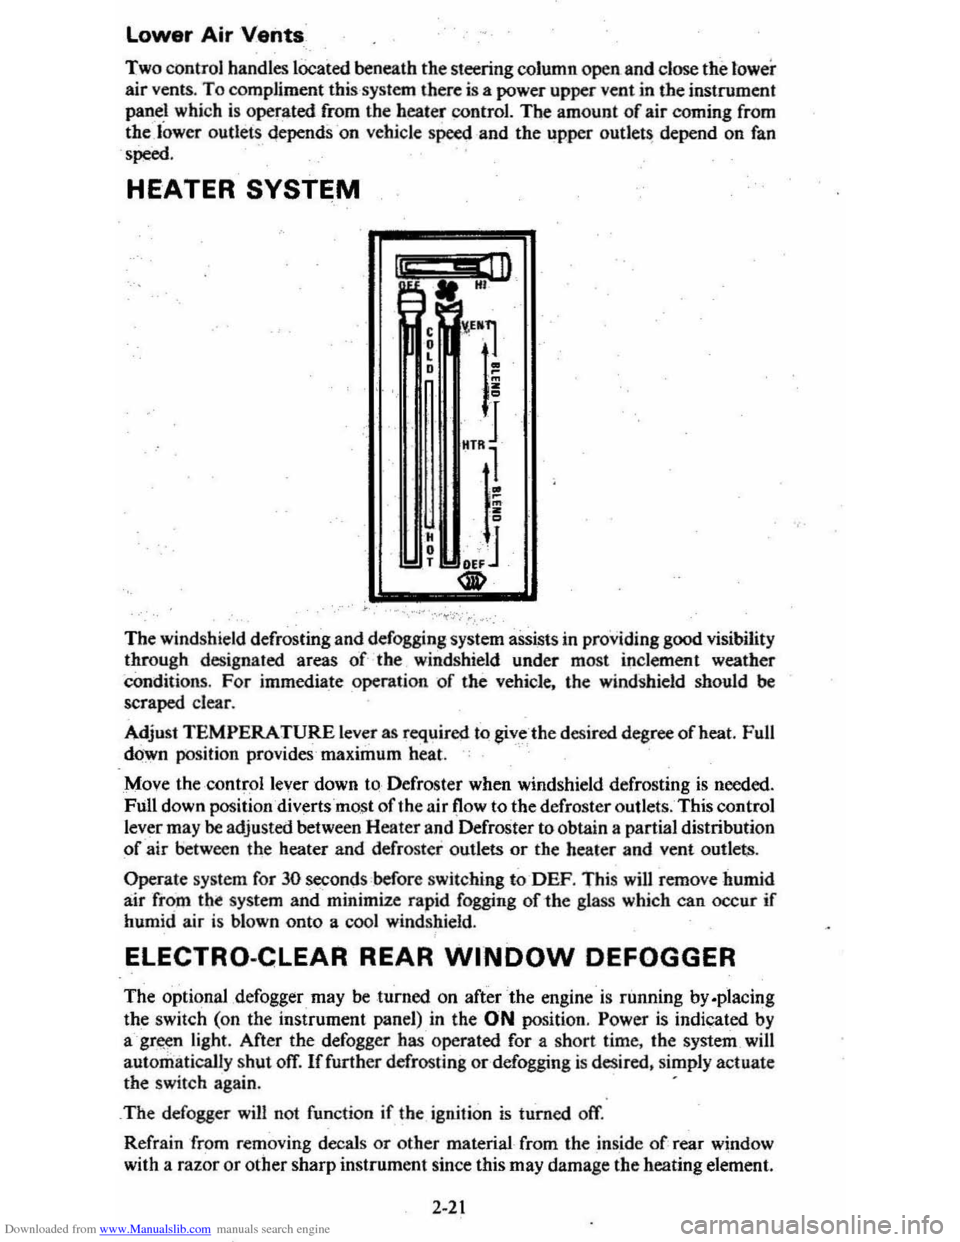
Adjust
TEMPERATURE lever as required to giv_c -the desired degree afheat. Full
down position provides'maximum heat.
Move the ·
controllever down to-Defroster when windshield defrosting is needed.
Full down position diverts most of the air (low to the defroster outlets. This control
lever may
be adjusted between Heater and Defroster to obtain a partial distribution
of air between the heater and defroster outlets or the heater and vent outlets.
Operate system for 30 seconds before switching to-DEF. This will remove humid
air from tht system and minimize rapid fogging of-the glass which can occur if humid air is blown onto a cool windshield.
ELECTRO-CLEAR REAR WINDOW DEFOGGER
The optional ,defogger may be turned on after the engine is running by.placing
the switch (on the instrument panel) in the ON position. Power is indicated by
agr~n light. After the defogger has operated for a short time. the system _will
automatically
shut ofT. If further defrosting or defogging is desired. simply actuate the switch again. .
_
The defogger will not function if the ignition is turned off.
Refrain from removing decals
or other material from the inside of rear window
with a
razor or other sharp instrument since this may damage the heating element.
2-21
Page 54 of 95
Downloaded from www.Manualslib.com manuals search engine • The compact spare .tire and wheel are design ed for use with each
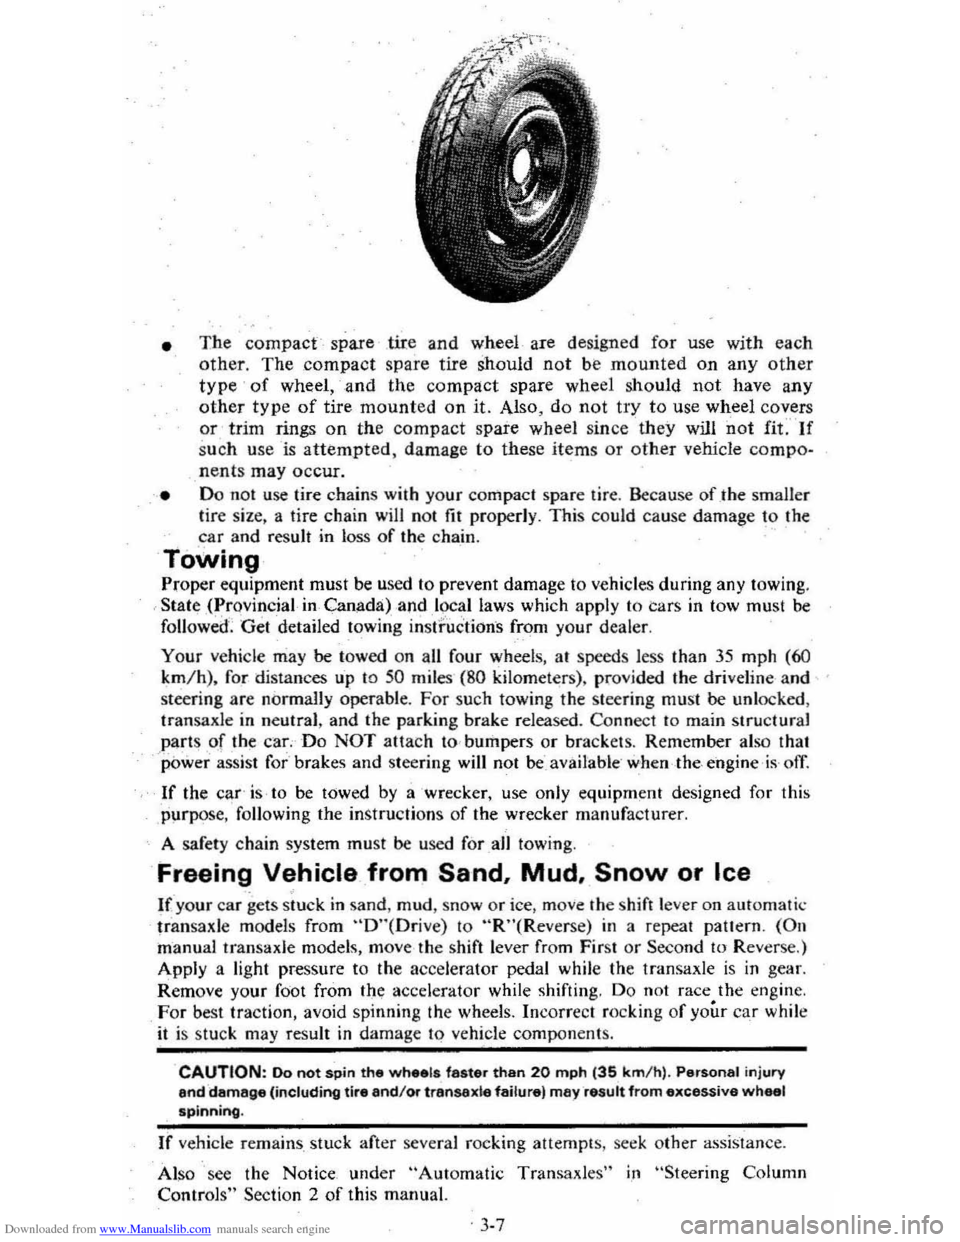
other. The compact spare tire should not be mounted on any other
type of wheel, and the compact spare wheel should not have any
other type of tire mounted on it. Also, do not try to use wheel covers or trim rings on the compact spare wheel since they will not fif" If
s u ch u se is attempted, damage to these items or other vehicle compo~
nent s may occur.
• Do 1I0t use tire chains with your compact spar e tir e. Because of .the smaller lire size, a tire chain will no t fit properly . This could cause damage to the car and result in loss of the cha,in.
Towing
Prop er equipment must be used 10 prevent damage to ve hicle s during any towing .
State ,(.,rovincial in Canada) ,and l~~l laws which apply to Cars in tow must be
followed '. Get detailed towing instructions from your deale r.
Your
vehicle may be towed on all fo ur wheels, at speeds less than 35 mph (60
km /h) , for distances u'p 1O 50 miles ( 8 0 kilometer s). pro vided the driveline and
steering are normally operabl
e. For such towing the steering must be unlocked ,
tran saxle in neutral , and the parking brake released . Co
nnec t to main structural
part s of th~ car; Do NOT attach to , bumpers or brackets . Remember also that power assist for brakes and steering will not beavailable ' when the, engine is ofl
If the car' is to be towed by a 'wrecker, use only equipm~nt designed for this
purpos
e, following the instru ction s of the wrecker manufacturer.
A safety chain system must
be used forall towing .
Freeing Vehicle from Sand. Mud. Snow or Ice
If your car gets stuck in sa nd , mud , snow or ice , move the s hift lever on aut om atic
tr ans ax le models from "D"(Orive) to "R"(Reverse) in a repeat pattern. (On
manual transaxle models, move the shift lever from First or Second to Rever se.)
Apply a
light pressure to the acce lerator pedal while the transaxle is in gear.
Remove your
foot from the;: accelerator while shifting . Do not race the engine.
For best traction, avoid spinnin g the wheels. Incorrect rocking of your car while it is stuc k may result in damage to vehicle components.
CAUTION: 00 not spin the wh •• ls faster than 20 mph (35 km/ h) . Personal injury end damage (including tire and/Of transexle failure) rna)' result from excessive wheal spinning.
If vehide re mains stuck after several roc king attempt s, s eek other assistan ce.
Also 'see the Notice under
"Automatic Transaxles" i,n "Steering Column
Contro ls" Section 2 of this manu al.
. 3-7
Page 60 of 95
Downloaded from www.Manualslib.com manuals search engine PART
NUMBER
1051516
1050017
1052277
1050172 1050173
1050174
1050214
t 1050237
1050244
1052280
1050427 1050429
1052349
1050729
1051055 1051398 1051515
1051772 1051855
1051858
1052103
1052271 1052272
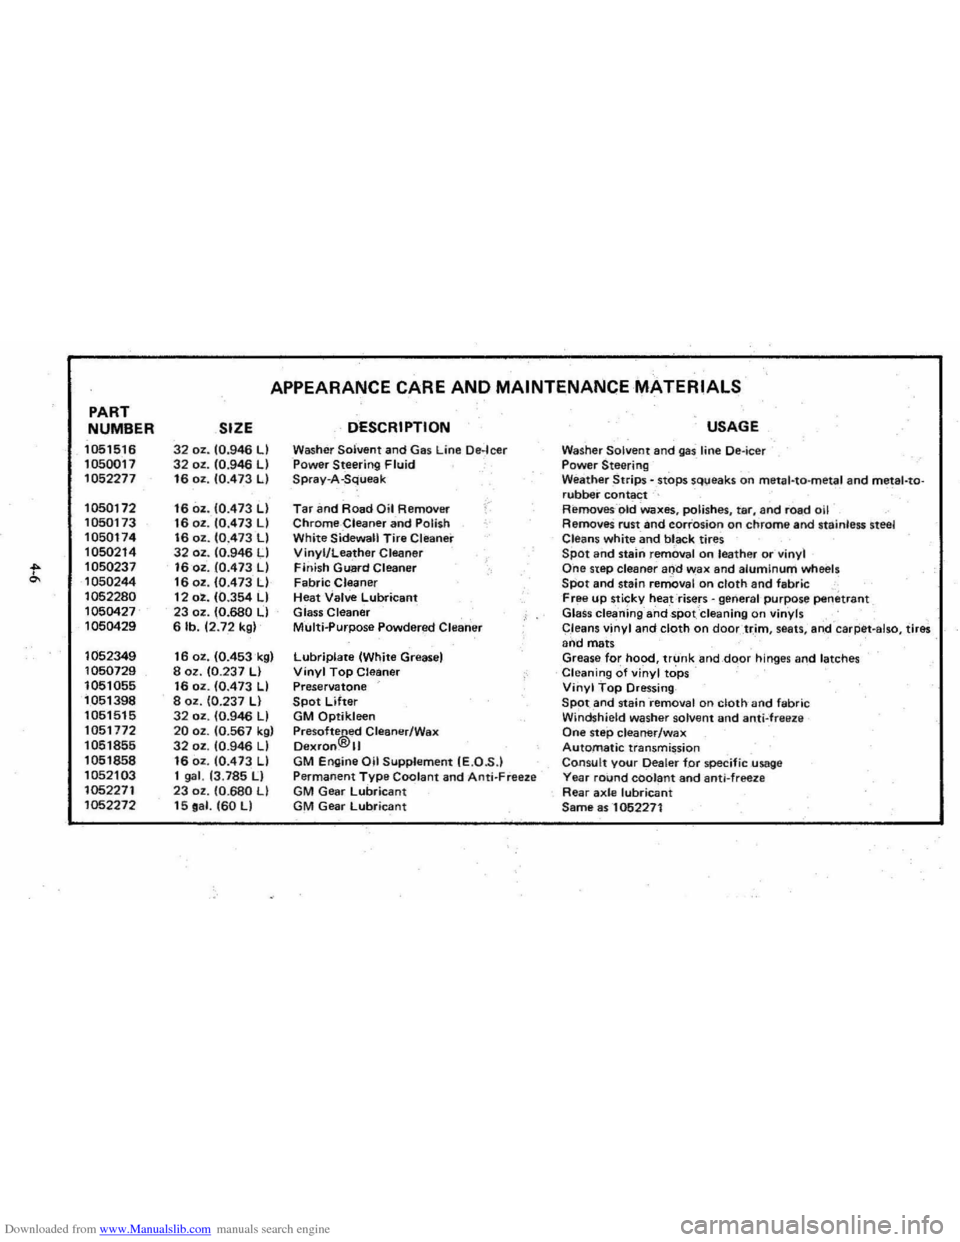
APPEARANCE CARE AND MAINTENANCE MATERIALS
SIZE DESCRIPTION
32 oz. 10.946 LI Washer Solvent and Gas Line De·leer 32 oz. 10.946 LI Power Steering Fluid 16 oz. 10.473 LI Spray-A-Squeak
16 oz. 10.473 LI Tar an d Road Oil Removirr /"
16 oz . 10.473 LI Chrome-Cleaner and Polish 16 oz. 10.473 LI White Sidewall Tire Cleaner 32 oz. 10:946 LI Vinyl/Leather Cleaner 16 oz . 10.473 LI Finish Guard Cleaner 16 oz. 10.473 LI Fabric Cleaner 12 oz. 10.354 LI Heat Valve Lubricant 23 oz. (0.680 LI Glass Cleaner 6 lb. 12.72 kgl Multi..purpose Powdered Clearier
16 oz. 10.453k91 Lubriplate (White Greasel 8 oz. 10.237 LI Vinyl Top Cleaner 16 oz. 10.473 LI Preservatone 8 oz. 10.237 LI Spot Lifter 32 oz. 10.946 LI GM Qptikleen 20 oz. 10.567 kgl Pre softe®ed Cleaner/Wax 32 oz. 10.946 LI Dexfon. II 16 oz. 10.473 LI GM Engine Oil Supplement IE.O .S .) 1 gal. 13.785 II Permanent Type Coolant and Anti- Freeze 23 oz . 10.680 LI GM Gear lubricant 15 oa l. 160 LI GM Gear Lubricant
USAGE
Washer Solvent and gas line Oe-ieer Power Steering Weather Strips - .stops sq\;leaks on meta l-ta-metal and metal-torubber contact Removes- -old Waxes, polishes, tar, and road oil RemoveS rust and corrosion on chrome and stainless steel
Cleans white and bl _ack tires Spot and stalrl removal o n leather or vinyl One step cleaner and wax and alumInum wh eels SPot and stain removal on cloth and fabric , Free up sticky heat risers -general 'purpose penetrant Glass cleaning ahdspot Cleaning on vinyls
C,leans vinyl and cloth on doortr,im , seats , ari,d -caq:iet -also, tires and mats Grease for hood, trunk and,dQor hinges and latches Cleaning of vinyl tops Vinyl Top Dressing SPOt and staini-emoval on cloth and fabric Windshield washer solvent and anti-freeze One step cleaner/wax Automatic transmission Consult your Dealer for specific usage Yea r round coolant and anti-freez e Rear axle lubricant Same as -1052271
Page 70 of 95
Downloaded from www.Manualslib.com manuals search engine CAUTION: If the air cleaner is removed during repair or maintenance, be sure to . put It back on correctly. If the air cleaner is not correctly installed, there could be II fire In the engine compartment (if there should happen to be a backfire), or other engine malfunction.
Power Steering System
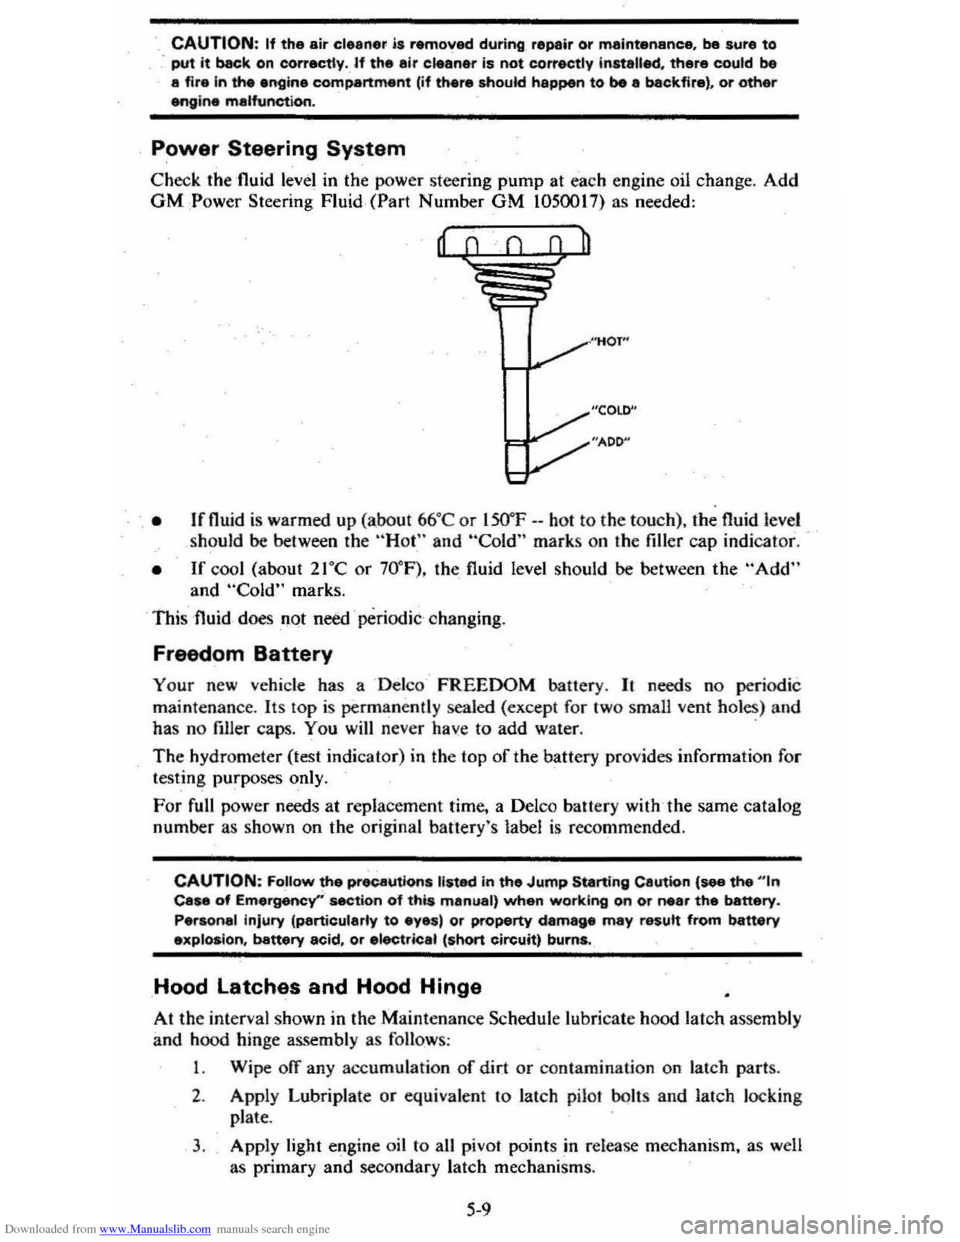
Check the 'fluid level in the power steering pump at each engine oil change. Add GM :Power Steering Fluid, (Part Number GM 1050017) as needed:
, • Ifnuid is warmed up (abo ut 66°C or lSO"F --hot to the to uch), the fluid level
should be between the "Hot" and "Cold" marks on the filler cap indicat or.
• If cool (about 21°C or 70° F), the fluid level should be between the "Add" and "Cold" marks.
This fluid
does not need ' periodic changing.
Freedom Battery
Your new vehicle has a Delco FREEDOM battery. It needs no periodic
maint enance . Its
lOp is permanently sealed (except for two small vent holes) and
has no filler caps. You will never have to add water. .
The hydrometer (test indicat or) in the top of the battery provides information for
testing purposes only.
For full power needs at repla cement time, a Delco battery with ,the same catalog
number as shown on the original banery's label
is recommended.
CAUTION: FoUow the precautions listed in the Jump Starting Cautton {see the "'n Case of Emergency''' section o"f this manual, when working on or near the battery.
Personal injury (particularly to eyes) or property damage may result from battery explosion, battery acid, or electric.1 (short circuit) burns.
Hood latches and Hood Hinge
At the interval shown in the Maintenance Schedule lubricate hood latch assembly
and hood hinge assembly as follows :
1 . Wipe off any accumulation
of dir.t or contamination on latch parts.
2. Apply Lubriplate or equivalent to latch pilaf bolts and latch loc king
plate .
3. Apply light engine oil to all pivot points in release mechanism, as well
as primary
and secondary latch mechanisms.
5-9
Page 90 of 95
Downloaded from www.Manualslib.com manuals search engine Switch Headlights .... TEMP (Temperature) .. Locks Door ...
2~19 2-17 1-2
Ignition ............................................. .. 2-5 1-1 2-2
2-25 Keys .. Theft Protection .. Lowering Seats .. Love Seat, Child & Infant: .. Lugglige/Cargo Capacity ... Luggage Rack ... Maintenance Record .. Maintenance Schedule .. Manual Transaxle Clutch Adjustment. .. .
1-10 5-11 2·29 7-12 5-.1
Maintenance ........................................... . 5-8
5-8
2-11
2· 10 2-12 4-1 4-5
1-3
Operating Tips .. Operation .. Shift Speeds. Metal Cleaners .. Metal Damage, Body ... Mirrors, Rearview .. Mobile Radios-. Monoxide Caution, Carbon .. . 2-25 2-1
2-1 2-2
2-2
2-15 Muffler ............................................... . New Car Break-In Period Octane Rating, Gasoline ... Odometer Oil, Engine Capacity .. Change Interval.. Dipstick ... Filter ... PreSsure Gage .. Pressure Light... Recommendation (Gas) .. OIL Light.. Openings, Roof... Opening The Hatchback ... Hood .. Windows ..
6-.1 5-3 (inside Back Cover) 5-3,7·1 2·1-9 2-17
5-3
2-17 (See "Roofs")
2·26 (Inside Back Cover) 1-5 Operating Speeds, New Car... 2-2 Operating Tips Fuel Economy.. 2-4 Trailer Towing.. 1-13 Transaxle... 2-9 Ventilation System.. 2.20 Operation in Foreign Countries.. 2"3 Outside Rearview Mirror.. 1.3 Overheating, Engine.. 3-3 Overseas Operation.. 2.3 Owner Assistance.. 6-1 Owner's Record... 7-11 Oxygen Sensor., 5.2 Paint Care.. 4-4
Paint Damage .. Parking;. Parking Brake .. Parking Lights .. PCV Valve & Filter .. Peda'·TI"avel, Brake ... Pedal Travel, Clutch .. Polishing & Waxing .. Pollution Control Power
4-' 2-. 2-14 7-3 7·2 2-14 5~8
.-. (See "Emission Contron
7-8
Antennas Brakes .. Door Locks .... Seats ... Steering Pressure, Oil Light ... Pressure. Tire Inflation ... Pulse Wiper ...
2-25
2-14
1-2 1-' 2·12
2-15
5-11
2-7
Pushing to Start ................................ .. 5-2 Radiator Antifreeze (Coolant) .. Cap, Prassure .. Checking Level .. Overheating .. Thermostat...
Radios & Antennas ... Raising Seats ... Rear Cargo Cover ...................... .. Compartment .. . Window Defogger .. Trailering .. Rearview Mirrors .. Reclining Seats .. Recovery Tank, Coolant .. Release
Hatc.hback
Hood .. Seatback Latch ... Reminder Lights ....
Replacement Fasteners
5-5 5-. 5-5 3-3 5-7
2-23 -2-25
2-25
2-:27
2-2,2-28 2-21 '·11 1-3 1-' 5-5
2-25 (Inside Back Cover)
1-' (See "Lights") 5-1
5-1 Replacement Maintenance Schedule .. Raplacement Owner's·Manual... 7-13 Replacement Parts ............. ....................... 7-2 Restraints .. Rocking Car When Stuck .. Roofs Carrying Cargo On ... Luggage Carrier .. Rack .. Vinyl .. Vista-Vent. ... Rotation, Tire .. Rustproofing .. Rust Protection ... Sefety Belts .. Seats (See
"Seat Belts") 3-7
1-3,2-2,9 2·29 2·29
'-5 2-26 5-12
'-5 '-5 (See "Seat Belts")
Adjustment.. 1-4 Child... 1-10 Folding.. 2-25 Latches..
1-5 Reclining.... . '-4 Seat Belts Care.. 4.3 Child Restraint ............................................ 1.10 Inspection.. 1-10 Lap/Shoulder.. 1-6 Light/Buzzer Reminder... 1;8 Pregn~nt Women .. Rear Seat. ... Self-Adjusting Brakes .. SENSOR Indicator ..
1-8 2-25 2-14 2-18,5-2 Sensor, Oxygen.... 2-18,5-2 Service & Maintenance.. 5-1 Service Station Information (InSide Back Cover) Sheet Metlll Damage... 4-5