1980 CHEVROLET CITATION brake fluid
[x] Cancel search: brake fluidPage 5 of 95
Downloaded from www.Manualslib.com manuals search engine SECTION 1
BEFORE DRIVING YOUR
CHEVROLET
DRIVER DAILY CHECKLIST
Be sure you know your vehicle and its, equipment and how to use it safely.
Before Entering the Vehicle
1. See that windows, mirrors, and lights are clean and unobstructed.
2. Check whether any tire is low or flat. (If any tire looks different from nonnal,
we recommend you check
it with a tire pressure gage.)
3. Check that all lights work.
4. Look for fluid leaks.
5. Be sure everything is properly stowed.
6. Check the area behind the vehicle if you are about to back up.
Before Driving Off
1. Lock all doors.
2. Adjust seat.
3. Adjust inside and outside mirrors.
4. Fasten seat belts.
5. Check that all the warning lights work as the key is turned to "'Start."
6. Check all gages (including the fuel gage).
7. Release the parking brake (and see that the "Brake" light turns om.
Seerelated topics in this manual, or the Maintenance Schedule folder, if problems
are found.
Guard Against Theft
For tips on how to protect your vehicle and its contents, see "Starting and
Operating" in section 2 of this manuaL
KEYS
Two different keys are· provided for the locks on your vehicle. The key code is
stamped on the "knock out" plug in each key head.
• Key with square head (letter "A" or "e") -for ignition lock only.
• Key with oval head (letter "8" or "0") ~ for all other locks.,
For vehicle security:
• Record the key code numbers; then knock the plugs out of the keys.
• Keep the key codes in a safe place (such as your wallet), NOT IN THE
VEHICLE.
If the original keys are lost, duplicates can
be made using the key codes. Contact
any
OM dealer or a locksmith.
If yO~i park in an attended lot, leave only your square-head ignition key.
1-1
Page 16 of 95
Downloaded from www.Manualslib.com manuals search engine Tir,s
When lowing trailers using a dead-weight hitch, inflate tires to the "Cold Tire
Pressure" for ·'Max . Load" show n on the Tire Placard on the left front door.
The allowable passenger and cargo load for this car,
also sh o wn on· the Tire
Placard, is reduced by the trailer tongue weight whenever the trailer is attached
t o the car.
Maintenance
More frequen.t servic e is requi red when using your car to pull a trailer. See Section
A of the Maint enance Schedule folder for Tran saxle Fluid and Engine Oil chang e
requirement~ for traitering.
Now and then. check that all trailer hitch bolts an d nuts are tight. Also see
"the Maintenance Schedule rol_def, and the Index in this manual , for important facts
o n
belts, coo ling system care and brake adjustment.
Break-In Schedule
See the new car break~in instru ctions in this manual. Also,. we recommend you
drive your new car for
500 mil es (800 kilometer s) before trailer tOwing. At the
" end
of this 500 mile (800 kilome te r) break-in period, avoid speeds over 50 mph (80 km/h) and full throttl e start s during the first 500 miles (800 kilometers) of
trailer towing.
If a new engine or transaxle is ins talled in you r car, observe the
same
care.
CAUTIONS:
Brakes -To help avoid personal injury due to poor braking action:
• Trailer brakes of adequate size are required on trailer s over 450 kilograms
(1,000 pounds) loaded weight.
• If you use trailer brakes with this car, follow the installation and balan ce
instructi ons
of the trailer brake maker.
• Do nol lap into the car's brake system if the trailer brake system uses more than 0.3 cubic centimeter (0.02 cubic inch) of nuid from the ca r's master
cylinder. In this case, the car's brake fluid capacity will not be enough to
operate
both the car and trailer brakes under all kind s, of use.
• All brak e fluid parts must be able to stand 20 685 kPa (3,000 psi). The brake
fluid tap must be made al th e upper rear master cylinder port. Copper tubing is subject to fatigue failure and must no t be used.
• Before going down a sleep or long grade , reduce speed and shift the tran saxle
into a lower gear to control your car's speed.
Try not to hold the brake pedal
down too long or too often. This could cause the brake s to get hot and not
work
as well.
Hitches -To help avoid personal injury due to sway caused by such things as
c rosswind
s, big trucks passing or road roughn ess, or due to sepa ration of the
trailer :
• Keep the trailer tongue load at 10% of the loaded trailer weight for
dead-w eight hitches. Tongue loads can be adjusted by proper distribution of the load in the trailer. This can be checked by weighing separately the loaded
trailer and then the tongue,
• When you remove a frailer hitch, be sure to seal any mountin g h'oles in the
body . This will help prevent entry of exhaust fumes, dirt or water. (See
"Engine Exhaust Gas Caution (Carbon Monoxide) " at the beginning of "Starting and Operating," Section 2 of this manual.)
1-12
Page 17 of 95
Downloaded from www.Manualslib.com manuals search engine NOTICE: Use only trailer hitches which permit normal operation of the Energy Absorbing Bumper System. if so equipped. For example. a rigid fore and .iUt connection between the bumper and any other part.of. the car may increase .damage in the event of II collision.
TRAILER TOWING TIPS
Getting Started
Before entering traffic with a frailer that has electric brakes, start the car and
trailer moving and apply the trailer brakes
by hand to be sure the trailer brakes
are working and the trailer electrical system
is connected .
. Engine Cooling
:
When going up long grades, you, can reduce the chance 'of engine overheating by
turning
off the air conditioner, if so equipped.
Transaxle
,See the method for checking the transaxle fluid le ve l. in "Service and
,.;.Maintenance," Section 5 of this manual .
Parking
You should not park cars with trailers on a grade (hill). However, if you must
park on a grade, these steps must be followed:
1. Apply the regular brakes.
2. Have someone place wheel' chocks under the trailer wheels.
3. When the wheel chocks are in place, release the regular brakes until the
chocks absorb the load .
4; Apply Ihe parking brake.
S. Shift Ihe transaxle 10 ··P"(Park).
If the car is parked on a grade. don't shift the transaxle 10 "P"(Park) until the
trailer wheels
are chocked and the parkinghrake, is set~ If you do, the weight of . the car and trailer may put so much force on the parking pawl in the transaxle
.
that it may be hard to shift oul of "P"(Park).
When starting , after being parked ' on a grade:
(; Apply the regular brakes and hold.
2 .
Stan th e engine in ··P"(Park) .
-3. Shift into gear and release the parking brake.
4. Release the regular brakes and drive until the chock s are free.
5. Apply the regular brakes and have your helper remove the chocks.
J.]3
Page 25 of 95
![CHEVROLET CITATION 1980 1.G Owners Manual Downloaded from www.Manualslib.com manuals search engine SINGLE WIPE
LOW SPEED (PULSE WIPER)
HIGH
SPEED
• Check the washer fluid levelregu]arly. Do it often when the weather
is bad.
• U CHEVROLET CITATION 1980 1.G Owners Manual Downloaded from www.Manualslib.com manuals search engine SINGLE WIPE
LOW SPEED (PULSE WIPER)
HIGH
SPEED
• Check the washer fluid levelregu]arly. Do it often when the weather
is bad.
• U](/manual-img/24/8083/w960_8083-24.png)
Downloaded from www.Manualslib.com manuals search engine SINGLE WIPE
LOW SPEED (PULSE WIPER)
HIGH
SPEED
• Check the washer fluid levelregu]arly. Do it often when the weather
is bad.
• Use a nuid such as OM Optikleen to help prevent freezing damage, and for better cleaning.
• Do not use radiator antifreeze in the 'windshield washer; ifcould cause
paint damage .
• In cold weather, warm the windshield with the defroster before using the washer-to help prevent Icing that my block
the driver's vision.
STARTING THE ENGINE
I.
2.
Apply the parking brake. . .
Automatic Trl!nsaxl..: Move the transaxle shift lever to "P"(Park) or "N" (Neutral) "P" Preferred). A starter safety device is
designed to keep the starter from operating if the shift lever is in any drive position. (If you need to fe-start the engine while the car is moving . move
the shift lever to "N.")
Manuel Transaxle· Press the clutch pedal to the floor and shift the transaxle to Neutral. Hold the clutch pedal to the floor while you are s tarting ,the engine. A starter safety device l,s d esigned to keep the starter
from operating if the clutch pedal is not fully depres sed.
3. Sta'rt the engine as outlined below for different conditions.
NOTICE: 00 not crenk the engil'. for more than 15 seconds at e time. Walt 10 to 15 seconds before trYiog agein.
• COLD ENGINE:
•
L·4 Engine Press the accelerator pedal to the floor and ·i slowly release It. With your foot off the pedal; crank the engine
by turning the ignition key to "Start ." Release the key when the engine
sta rts.
If the engine starts, but fails to run, repeat this procedure. •
• V-6 Engine: Press the accelerator pedal to the floor twice and slowly release it. With your foot off the pedal. crank the engine by turning the ignition key to 'Stan". Release key when engine
s tarts.
If the engine starts, but fails to run, repeat this procedure but press
the accelerat or pedal only
ONCE to the floor . :When the e ngine is
running smoothly (about 30 seconds), you_ can reduce the engine idle speecf by press ing down slightly on the accelerator pedal. then slowly
releasing it.
2-8
Page 35 of 95
Downloaded from www.Manualslib.com manuals search engine • This warning light docs no t do away with the need f or ~rake il),s.-pectio n and
maintenanc e. The brake fluid level must be checked regularly . See yo ur
Maint enance Schedule folder for
other brake checks.
If th e light comes on and stays o n when the ig nition key is on, after the brak e
pedal ha s been firmly pushed do wn, it may mean that there is somethin g wrong
wit'h one part of the brake system.
Wh at 10 do:
I. C heck to see that the pa rkin g brake has been released. If it has been ...
2. Pull off the road and sto p ca refully. And rememb er that:
• Stopping di stan ces may be longer .
• You may ha ve to pu sh hard er on the ped al.
• The pedal may go down farther {han no rm al.
3. Tryout the brake s by sta rrin g and stopping on the ro ad shoulder--then :
• If you judge it to be safe, drive cautiously at a safe speed to the neat est
dealer for repair , or
• Have vehicl e to w ed to dealer for repair .
Co ntinu ed dri ving with o
ut getting necessary re p a ir s co uld be dangerou s.
"EMISSIONS" INDICATOR
On so me cars, the word "EMISSIONS" is des ig ned to appear in a window in the spe ed om eter faceat certain int~rvals. This is a reminder that maintenan ce se rv ice
mu st
be performed on your ca r. One of two type s' o f se rvice is required :
• On cars equipped with the C-4 System, the oxygen sensor must be replaced with · a new sensor, or
• On
ca rs without the C -4 System, the cataly st in the catalyti c converter must
b e c han ged.
In either case, see yo ur Chl!~rolet dealer fo r se rvice when the "EMISSIONS "
indicat or appears. .
F or more information , see
"C-4 (Computer Contr olled Catalytic Conv erte r)
Syste m " and "Catalyti c Co nverter," both in "Service and Maintenance," Section
5 of thi s manual.
"CHECK ENGINE" LIGHT
If yo ur car has the C-4 System, a "CHECK ENGINE" light on the instrum ent
panel is des ig ned t o come on
during engine starting to le t y ou know th e bulb is
w orkin g. (The light will sla y o n a short time after th e e ngine s tarts .) If th e light
c o m es on whil e
drivin g, se rv ic e to the emi ssion contr ol sy stem may be re quired . Sc:e your Chevrolet deal er as soo n as: possible fo r an in spec tion of the sy ste m .
COlltinu ed driving without having [he C-4System serviced could eventually cause
d am age to the emission control system. It could also affect fuel economy and
driv ability.
See also '; C-4 (Comput er Co ntrolled Catalytic Converter) System" in ;'Ser vic e a nd
Mainte n ance, " Section 5 o f this manual.
Tachometer
The opti onal Tachomet ers indi cat e the speed of th e e ngin e in revoluti ons pe r minute. The indicated number, tim es ](x>o .. gives the engine s peed. Operatil.lg th e
engine w ith the tachom ete r r eading in the color- coded high ~peed area could lead to s~rious engine damage. The re are two tachom .e ter s us ed in the car depending on the e ngine option install ed in your car.
2-18
Page 49 of 95
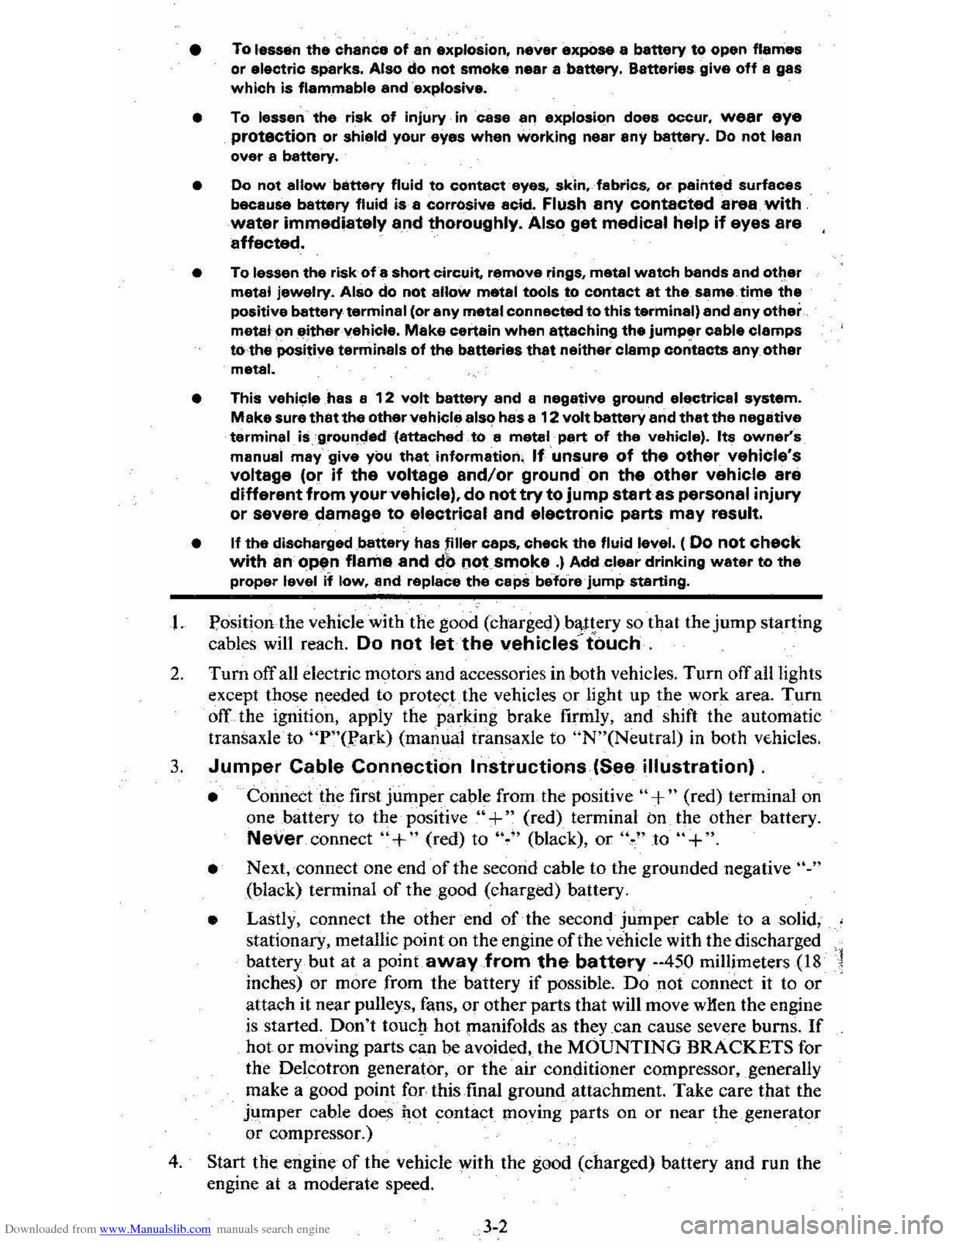
Downloaded from www.Manualslib.com manuals search engine • To lessen the chance of an explosion, never expose a battery to open flames
or electric sparks. Also do not smoke near a ,battery. Batteries give off a gas which is flammable and explosive.
• To lessen the risk of injury incase an explosion does occur, wear eye protection or shield your eyes when working near any battery. Do not lean over a battery.
• Do not allow battery fluid to contact eyes, skin, fabrics, or painted surfaces
because battery fluid is a corrOsiVe acid. Flush any contacted area with water immediately a,nd thoroughly. Also get medical help if eyes are affected.
• To lessen the riskofa short circuit. remove rings, metal watch bands and otl:ler metal jewelry. Also do not allow metal tools to contact at the same time the positive battery terminal (or any metal connected to this terminal) and any other metal em either "ehicle. Make certain when attaching the jumper cable clamps rothe positive terminals of the batteries that neither clamp contacts any other metal.
• This
vehicle has a 12 volt battery and a negative ground electrical system. Make sure that the other vehicle als~ has a 12 volt battery and that the negative terminal, is .'grounc::ted(attached to a metal, part of the vehicle). Its owner's manual may give you that information, If unsure of the other vehicle's voltage (or if the voltage and/or ground on the other vehicle are different from your vehicle). do not try to jump startas personal injury or severe damage to electrical and electronic parts may result.
• If the discharged battery has filler caps. check the fluid level. ( 00 not check with an Op~tn flame and db not smoke .) Add clear drinking water to the proper level if low, and replace the caps before jump starting.
I. Position, the vehicle with'the good (charged)ba,.ttery so that the jump starting
cables will reach.
Do not let the vehicles t"ouch.
2. Turn off all electric motors and accessories in both vehicles. Turn off all lights
except those needed to protect the vehicles or light up the work area. Turn
off the ignition, apply the parking brake firmly, and shift the automatic transaxleto "p"o.?ark) (manual transaxle to "N"(Neutral) in both vE-hicles.
3. Jumper Cable Connection Instructions (See illustration) .
• Connect the first jumper cable from the positive" +" (red) terininal on
one battery to the positive "+" (red) terminal on the other battery.
Never, connect "+" (red) to "~" (black), or '\" to "+".
• Next, connect one end of the second cable to the grounded negative "."
(black) tenninal of the good (charged) battery.
• Lastly, connect the othetend of the second jumper cable to a solid,
stationary, metallic point on the engine of the vehicle with the discharged
battery but at a
point away from the battery --450 millimeters (18 '1
inches) or more from the battery if possible. Do not connect it to or attach it near pulleys, fans, or other parts that will move wHen the engine
is started. Don't touctt hot manifolds as they _can cause severe burns. If hot or moving parts can be avoided, the MOUNTING BRACKETS for
the Delcotron generator,
or the air conditioner compressor, ,generally
make a good point for-this final ground attachment. Take care that the
jtimper cable does
hot contact moving parts on or near the generator
or compressor.)
4. Start the engine of the vehicle with the good (charged) battery and run the
engine at a moderate speed.
3-2
Page 51 of 95
Downloaded from www.Manualslib.com manuals search engine • pull over-to a 'safe p'late and stop (he car:-=Set the parking brake and shift to "P"(Park) (with a manual transaxle. shift to Neutral first, then set the parking
brake).
• DON'T TURN OFF THE ENGINE AND DON'T INCREASE THE ENGINE SPEED~ Let the engin e run at normal idle speed for two or three
minutes.
If the
''TEMP'' light still doesn't go off (or the gage needle doesn't start to drop) , NOW TURN OFF THE ENGINE and proceed as follows.
CAUTION: Keep henda, tools end clothing awey from'the engine COOling fen to help prevent personal Injury. This fen ia electric end can come on whether or not the eR8ine is runnirl'jJ. The fan Cen etert eutomatically in reapon .. to a heet ~, wrth the ignitkNl in ~Run."
• Lift the engine hood. Look at the coolant level.in the "see through " coolant
recovery tank. The coolant level should be at or above the "Fun Hot" mark
o n the tank.
If it looks like the coolant is boiling, wait until it stops before
proceeding You should :not need to remove the radiator cap to check the
coolant level and it can be dangerous if the coolant is still hot. See the
following Caution.
CAUTION: To help avoid the dange, of being burned:
• cia not remove the coolent recov.ry tank cap while the coolant is boiling.. and
• cia not remove the .rad~:_c.p white the engine end radiator are atill hot.
Scelding fluid and ateam can be blow, Qut under presau,.. If either cap ia taken off too soon.
• If the coolant level is low:
• look for leak s at the radiator hoses and connectio ns, heater hoses and
connections. radiator, and water pump.
See that the water pump belts
are not
brok~ or otT the pulleys and that the fan runs when the engine is running and theUTEMP" light ison (or the gage needle is in the
warning zone).
• add coolant to the recovery tank.
If the level in the recovery tank is at the correct level and the "TEMP" light (gage) still comes on, air may be-trappedin the, cooling system . This may prevent coolant
from returning to the radiator.
In this case. you may have to add coolant directly
to th e radiator.
See "Coolant Replacement" in "Service and Maintenance," Section 5 of this manual. Follow steps I and 10 for the correct way to remove
the radiator cap and add coolant to the radiator.
After the "TEMP" light is out (or the gage needle is out of the warning zone).
resume driving
at a reduced speed. Return to normal driving after about ten
minutes if the light does not come back on (or the gage needle does not go back
into the warning
~one).
J.4
Page 65 of 95
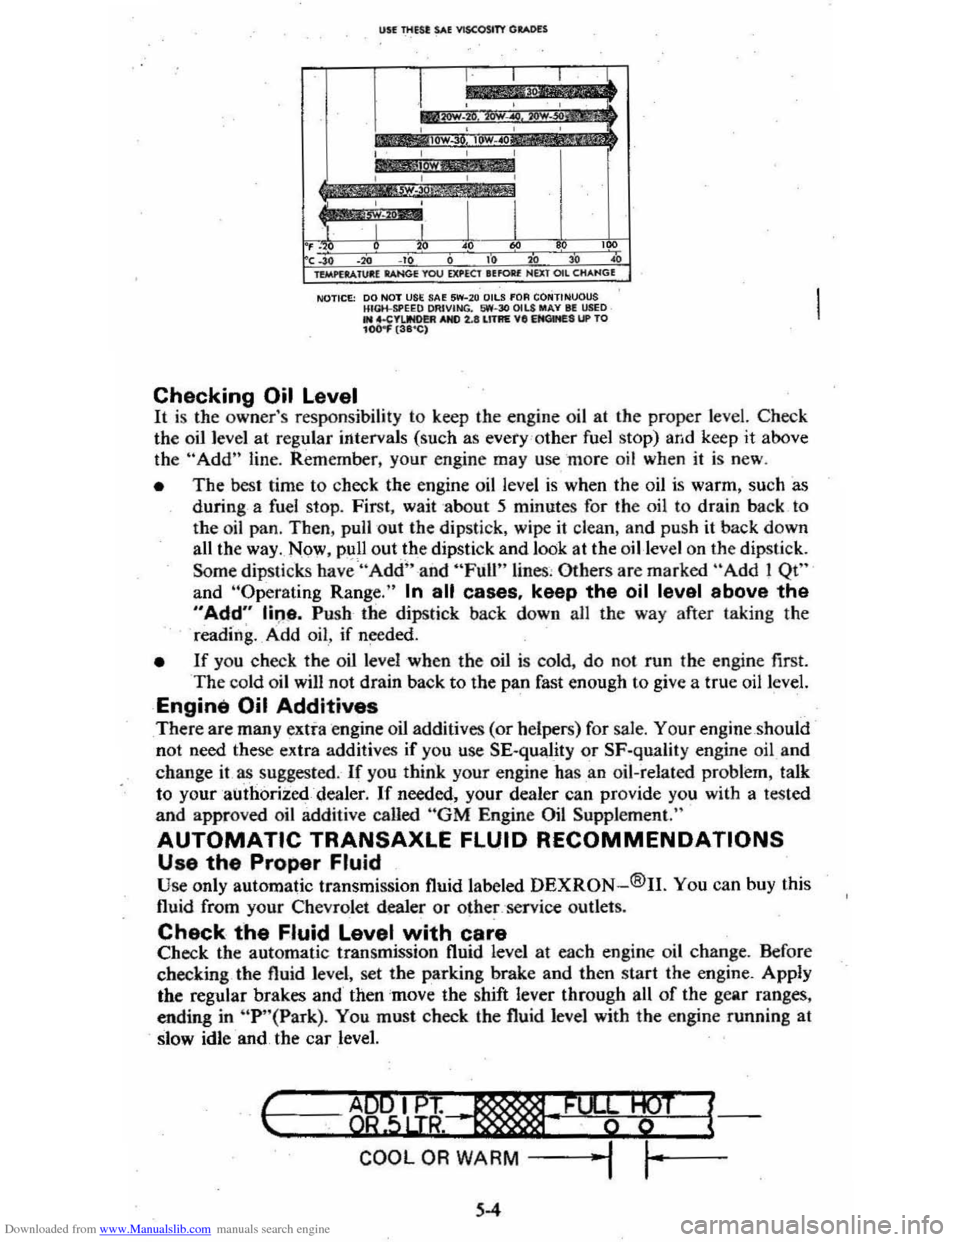
Downloaded from www.Manualslib.com manuals search engine USE Tlltst: SAE VISCOSITY GItotoDH
I , , , cl.
*
::0';'~ ,.,..~,: , , , ,
I
lOW , , , ,
,
I I I I , . , " • '" ,~, ." ., , " " " ~ lVitPl .... 1Ul:( lAN<* YOU ElU'EClltfOll( NUT OIl CHANG(
NOTICE: 00 NOT USE SA~ 5W-2 0 OilS fOA CONTINUOUS HIGH-SPEEQ OAIVING. 1,iW-30 OILS MAY III USED .. 4.CYIJNO!!R AND 2.lIll1AE VII EItClMES UP TO 104)
the oil level at regular intervals (such as every 'o ther fuel stop) and keep it above
th e "Add" line. Rem ember, your engine may use more oil when it is new .
• The best time to check the engine oil level is when the oil is warm, such as
during a fuel stop. First, wait about 5 minutes for the oil to drain back to
the oil pan, Then, pull out the dipstick, wipe
it clean, and push it back down
all the way . Now , pull out.th e dipstick and look at the oil-level on the dipstick.
Some
dipSlicks have "Add" and "Full" lines , Others are marked "Add! Qt"
and "Operaling Range." In all cases, keep the oil level above the
"Add" line. Push· the dipstick back down all the way after taking the
reading. _ A ·dd oil , if needed.
• If you check the oil level when the oil is cold, do no t run the engine first. The cold oil wilJ not drain back to the pan fast enough to give a true oil level.
Engine Oil Additives
There are many extra engine oil additives (or helpers) for sale. Your engine should
not need these extra additives if you use SE-quality or SF·quality engine oil and
change
it as suggested. If you think your engine has .an oil-related problem, talk
to your authorized dealer.
If needed, your dealer can provide you with a tested
and approved oil additive called "GM Engine Oil Supplement."
AUTOMATIC TRANSAXLE FLUID RECOMMENDATIONS
Use the Proper Fluid Use only automatic transmission fluid labe led DEXRON-®II. You can buy this
fluid from your Chevrolet dealer or
othe~,'service outlets.
Check the Fluid Level with care Check the automatic transmission fluid level at each engine oil change. Before
checking the fluid level, set the parking brake and then start the engine. AppJy
the regular brakes and then
'mov e the shift lever through all of the gear ranges,
ending in
"P '·(Park). You must check the fluid level with the engine funning at
slow idle and the car level.
I-c ..... --=---=..,~ ..... B9"""5IL.u;~~"-·, __ .........,; ..... _·F_%¥-W+--T -l{
COOL OR WARM -j ""I ,~-
5-4