1980 CHEVROLET CITATION ECU
[x] Cancel search: ECUPage 5 of 95
Downloaded from www.Manualslib.com manuals search engine SECTION 1
BEFORE DRIVING YOUR
CHEVROLET
DRIVER DAILY CHECKLIST
Be sure you know your vehicle and its, equipment and how to use it safely.
Before Entering the Vehicle
1. See that windows, mirrors, and lights are clean and unobstructed.
2. Check whether any tire is low or flat. (If any tire looks different from nonnal,
we recommend you check
it with a tire pressure gage.)
3. Check that all lights work.
4. Look for fluid leaks.
5. Be sure everything is properly stowed.
6. Check the area behind the vehicle if you are about to back up.
Before Driving Off
1. Lock all doors.
2. Adjust seat.
3. Adjust inside and outside mirrors.
4. Fasten seat belts.
5. Check that all the warning lights work as the key is turned to "'Start."
6. Check all gages (including the fuel gage).
7. Release the parking brake (and see that the "Brake" light turns om.
Seerelated topics in this manual, or the Maintenance Schedule folder, if problems
are found.
Guard Against Theft
For tips on how to protect your vehicle and its contents, see "Starting and
Operating" in section 2 of this manuaL
KEYS
Two different keys are· provided for the locks on your vehicle. The key code is
stamped on the "knock out" plug in each key head.
• Key with square head (letter "A" or "e") -for ignition lock only.
• Key with oval head (letter "8" or "0") ~ for all other locks.,
For vehicle security:
• Record the key code numbers; then knock the plugs out of the keys.
• Keep the key codes in a safe place (such as your wallet), NOT IN THE
VEHICLE.
If the original keys are lost, duplicates can
be made using the key codes. Contact
any
OM dealer or a locksmith.
If yO~i park in an attended lot, leave only your square-head ignition key.
1-1
Page 7 of 95
Downloaded from www.Manualslib.com manuals search engine CAUTION: For safety's s~ke, always lock the doors and any hatchback when driving. Along with using the seat belts properly, locking the doors, etc. helps prevent occupants from being thrown from the vehicl~ during accidents. It also helps prevent unintended opening of the doors and helps keep out intruders when stopped.
STOWING THINGS IN (OR ON) THE CAR
CAUTION: luggage or other cargo should not be piled higher than the seatbacks. When at all possible. luggage or cargo should be carried in the trunk area. The filler panel or cargo cover, betWeen the rear seatback and the rear window should not be used to carry objects-.even those that are small and light. All items should be secured in place. This will help keep such things from being thrown about and iniurying people in the car during an accident. Cargo weight. whether inside or on the roof, should be positioned as evenly as possible from front to rear.
INSIDE REARVIEW MIRROR
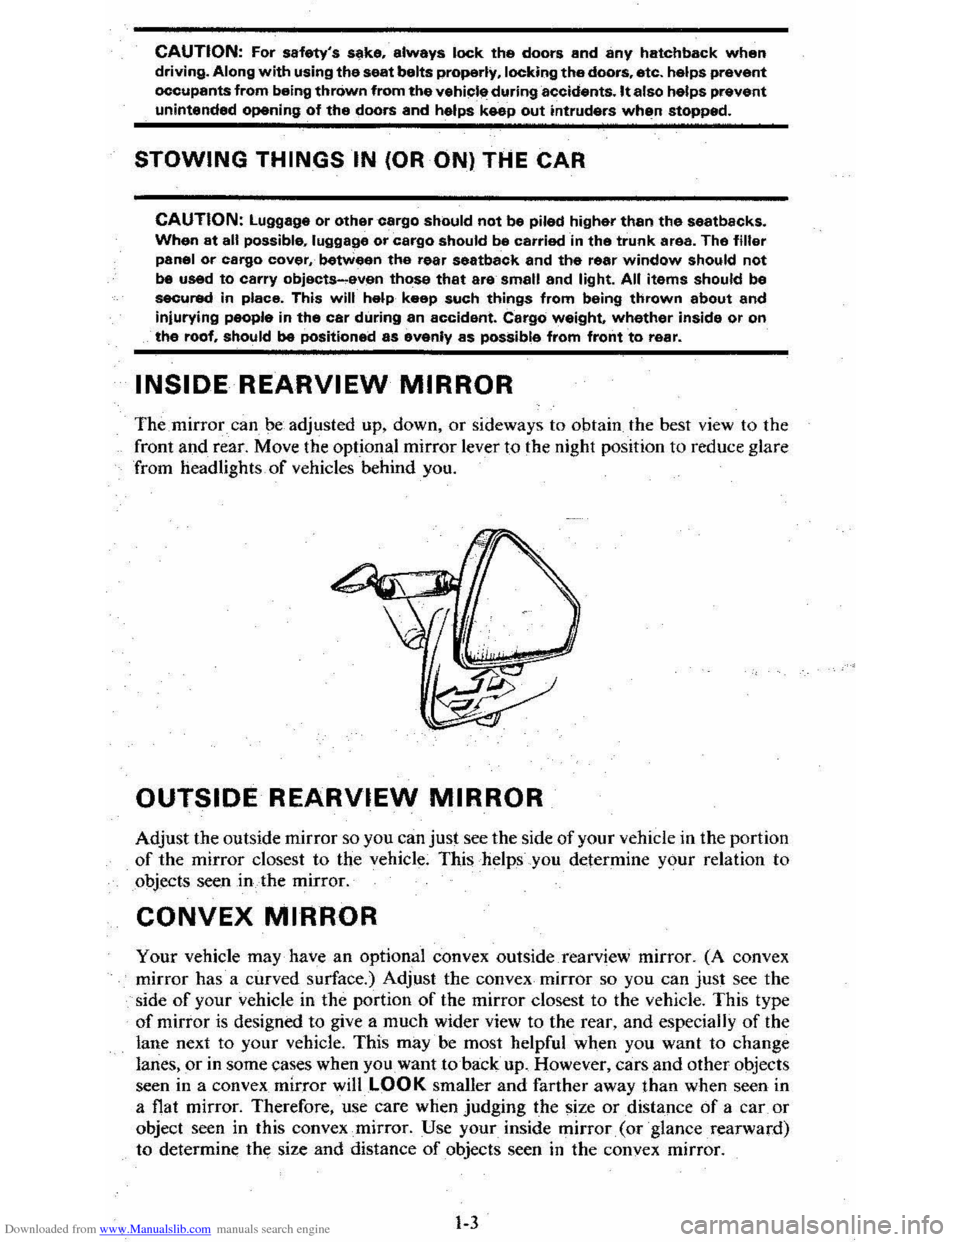
The mirror can be adjusted up, down, or sideways to obtain the best view to the
front
and rear. Move the optional mirror lever to the night position to reduce glare
from headlights of vehicles behind you.
OUTSIDE REARVIEW MIRROR
Adjust the outside mirror so you can just see the side of your vehicle in the portion of the mirror closest to the vehicle; This helps you determine your relation to
objects seen
in the mirror.
CONVEX MIRROR
Your vehicle may have an optional convex outside rearview mirror. (A convex
mirror has a curved surface.) Adjust the convex mirror so you can
just see the
side of your vehicle in the portion of the mirror closest to the vehicle. This type
of mirror is designed to give a much wider view to the rear, and especially of the
lane next to your vehicle. This
may· be most helpful when you want to change
lanes, or in some cases when you want to back up. However, cars and other objects
seen in a convex mirror
willLOOK smaller and farther away than when seen in
a flat mirror. Therefore, use care when Judging the size or distance of a car or
object seen in this convex
.. mirror. Use your inside mirror. (or ·glance .rearward)
to determine the size and distance of objects seen in the convex mirror.
1-3
Page 15 of 95
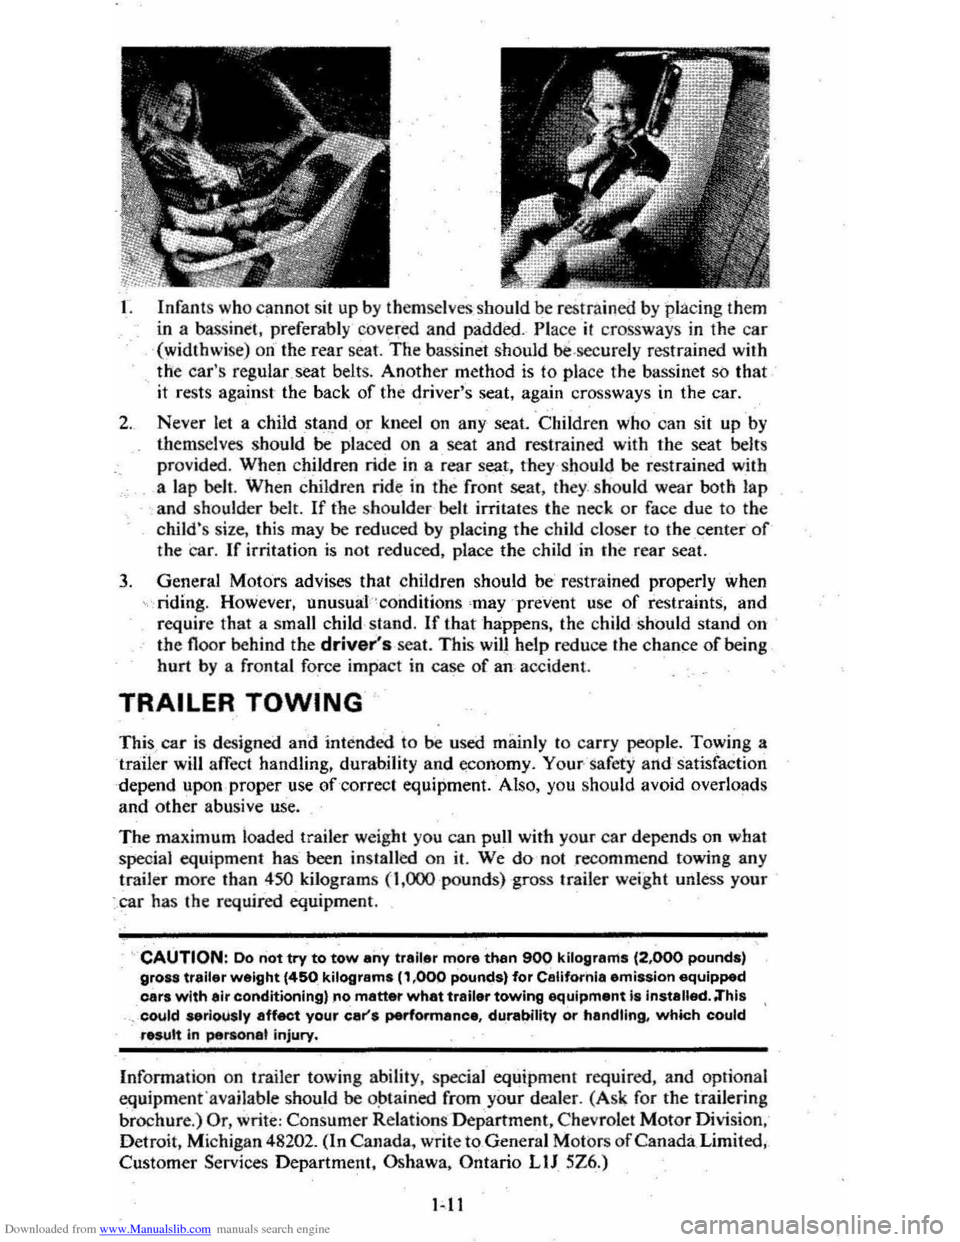
Downloaded from www.Manualslib.com manuals search engine L Infants who cannot sit up by themselves should be restr~ined b y placing them
in a bassinet, preferably cove~ed and padded .- Pl ace il crossways in the car
(widthwise) on-the rear seat.
The bassi net should bi!.secure ly restrained with
the car's reg ular seat belt
s. Another method is to pla ce the bassinet so that
it rests aga,inst the back of the driver's seat, again crossways in the car.
2. Never let a child sta~d or kneel on any seat. Children who can sit up by
them selves should be placed on a seat and restrained with the seat belts
provided. When children ride in a rear se:at, they should be restrained with
a lap
belt. When children ride in the fronf seat, they . ,should wear both lap
and
shou'lder belt. If the shoulder bell irritates the neck or face due to th e
child's size, this may be reduced by placing the child closer to the center of the car. If irritation is not red uced, place the child in the rear seat.
3. General Motors advises that children should be restr ained properly when
riding . However, unusual'~conditions 'may prevent use of restraints, and
requir e that a small child,
sland. If that happens, the c hild should stand on
the floo r behind the driver's seat. This will help reduce the chance of being
hurt
by a frontal force impact in case of an accident.
TRAILER TOWING
This car is designed and intended to be used mainly to car ry people. Towing a
trailer will affect handling, durability and economy_ Your'"safcty and satisfaction
depend upon,proper use
of correct equipment. Also. you should avoid overloads
and other abusive use.
The maximum loaded trailer weight you can pull with your car depends
on what special equipment has-been inst alled o n it. We do-n o t recommend towing any
trailer more than 450
kilograms (1,000 pounds) -gross trailer weight unless your
'car ha s .he required equipment.
CAUTION: Do not try to tow any trailer more than 900 kilograms (2.000 pounds)
gross trailer weight (450 kilograms (' .000 pounds) for California emission equipped
cars with air conditioning) no matter what trailer towing equipment is installed. ;This ,could .eriously affect your car'S performance. durability or handling. which could
result in personel injury.
Infonnati on on trailer towing ability, special equipment requir ed, and optional
equipm e
nfavailable should be o~lained from your dea ler . (Ask for the trailering
brochur e.)
Or, write: Consumer Relat ions Department , Chevrolet Motor Division ,
Detroit , Mi chigan
48202. (In Canada, write to General Motors of Canada Limited .
Custom
er Services Department, Oshawa. Ontario LlJ 5Z6.)
Page 44 of 95
Downloaded from www.Manualslib.com manuals search engine CAUTION: To help avoid personal injury and/or equipment damage-
• Do not try to remove the panel while the car is moving. Otherwise. the panel may become a hazard by falling into the car or flying off.
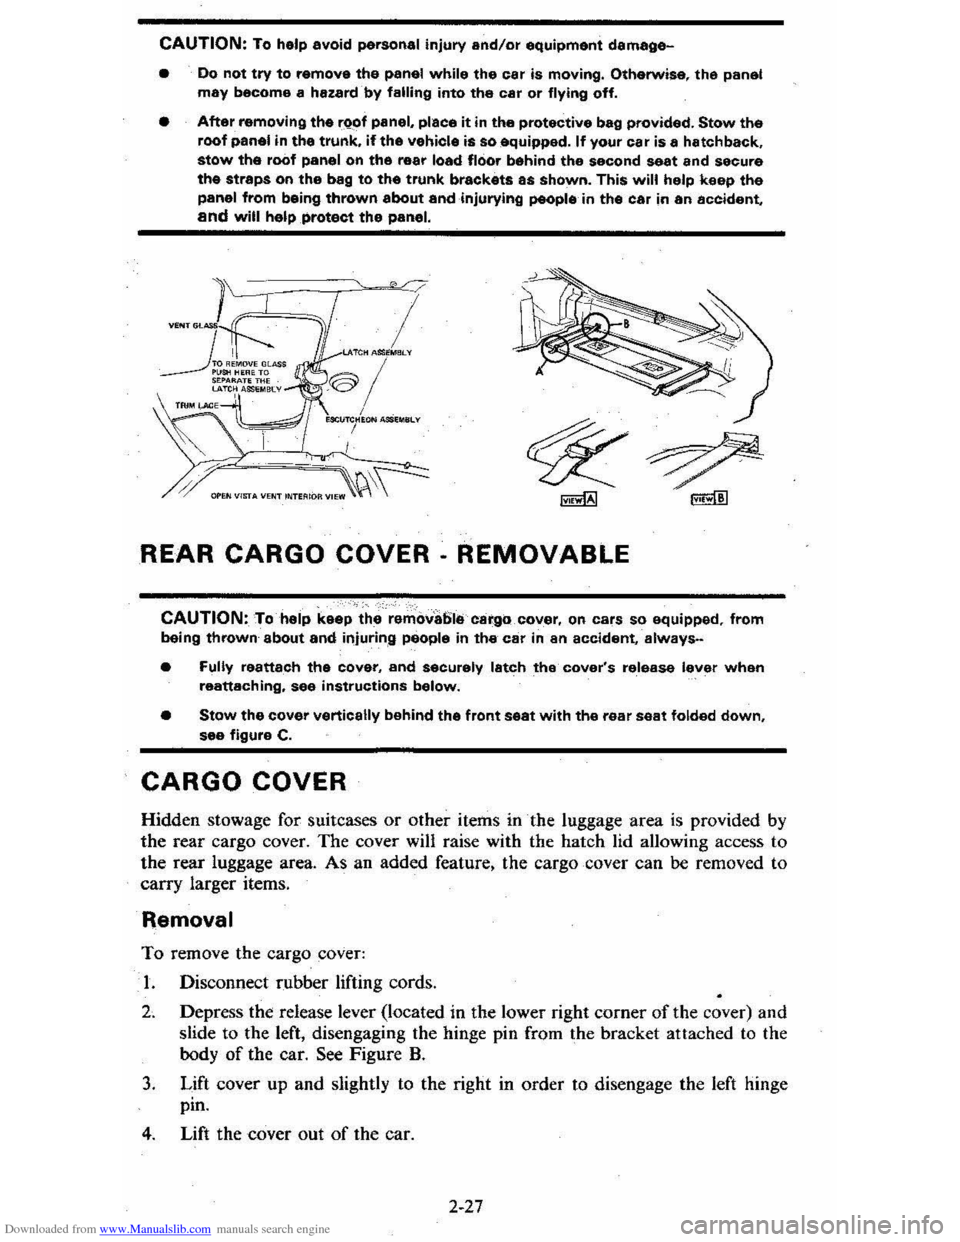
• After removing the rQof panel, place it in the protective bag provided. Stow the roof panel in the trunk. if the vehicle is so equipped. If your car is a hatchback. stow the roof panel on the rear load floor behind the second seat and secure the straps on the bag to the trunk brackets as shown. This will help keep the panel from being thrown about andinjurying people in the car in an accident, and will help protect the panel.
I LAlCH ASIl~MElLV
®/ , MClI~HION MSl .. SLv
I
REAR CARGO COVER· REMOVABLE
CAUTION: To help keep the remova61e cargo cover, on cars so equipped, from being thrown about and injuring people in the car in an accident, always-
• Fully reattach the cover, and securely latch the cover's release lever when reattaching, see instructions below.
• Stow the cover vertically behind the front seat with the rear seat folded down. see figure C.
CARGO COVER
Hidden stowage for suitcases or other items in the luggage area is provided by
the rear cargo cover. The cover will raise with the hatch lid allowing access to
the rear luggage area. As an added feature. the cargo cover can be removed to
carry larger items.
Removal
To remove the cargo cover:
1. Disconnect rubber lifting cords.
2. Depress the release lever (located in the lower right corner of the cover) and
slide to the left, disengaging the hinge pin from the bracket attached to the
body
of the car. See Figure B.
3. Lift cover up and slightly to the right in order to disengage the left hinge
pin.
4. Lift the cover out of the car.
2-27
Page 46 of 95
Downloaded from www.Manualslib.com manuals search engine Insta"ation
To install the cargo cover:
1. Insert the left hinge pin in the bracket attached to the body of the car.
2. Slide the release lever to the right to engage hinge pin in the 'bracket. See figure
B.
3. Move the lever up to lock the cover in place.
4. Reconnect the rubber 'lifting cords.
STOWING THINGS IN (OR ON) THE CAR
CAUTION: luggage or other cergo should not be piled higher than the seatbacks, When at all possible, luggage or cargo should be C8rrifHj in the trunk area. The filler panel or cargo cover, between the rear 88atback and the rear window should not be used to carry objects-even those that are small and light. All nems should be secured in place. This will help keep such things from being thrown about and Injurying people in the car during an accident. Cargo weight whether inside or on the roof, should be positioned as evenly as possible from front to rear.
ROOF LUGGAGE CARRIER
The optional roof luggage carrier is designed to allow loading of items onto the
roof
of your car. The roof luggage carrier does not increase the total load carrying
capacity of th e car , as shown opposite "Max Load" on the Tire Placard located
on the left front door. Be sure the total weight of the cargo on the roof, plus the
weight
of the cargo and passe ngers inside the car, plus the tongue load of any
trailer you are towing does
,1;10t exc_eed this "Max Load" vehicle capacity weight. See Section 5, page "5-11 for more information on Vehicle Loading . Also see the
infonnation on Trailer Towing
in Section 1 of this manual . if needed .
NOTICE:To helpayoid pOSSible damage, do not exceed 70 kilograms (1 50 pounds), cargo weight on the roof. Position the cargo in the luggage carrier as evenly as: pOssible. If carrying long items, never exceed car length and fasten such loads securely at the front and rear of the car, as well as to the luggage rack.
The roof luggage carrier consists of: five roof slats bolted to the top of the car,
two crossrails with knobs at each end th~t allow the crossrails to be adjusted or removed, and six' adjustable tie-downs.
The operation
of each item is as follows: the crossrails are easily adjusted forward
or rearward in order to help position your load. To move the crossrails , rotate
the large adjustable knob, ··No. 3" in the figure above. counterclockwise to loosen
(or remove) the crossrails and 'clockwise to tighten down the cros srails. Attached
to the top
of the crossrails are two adjustable tie-downs, "No.4" in the figure.
Ther e is also one adjustable lie-down located in the center of each outer roof slat
assembly (also called
"No.4" in the figure) . The tie-downs may be easily moved
forward and rearward within the outer slat assembly and across the top
of the
crossrails to the desired position.
To move the tie-down . rotate it countetclockwise
to loosen and clockwise to tighten down. If needed to sec ure a certain type of lead,
the tie-downs on the
crossratls may be removed and repos itioned on the outer roof
slat assemblies. While underway, periodically check to make sure that
the crossrails and the tie-downs are securely fastened to help
prevent loss of cargo, or the roof rack equipment itself.
The crossrails may be removed when not in use and stowed in the trunk or behind
the second seat on the rear load floor (with the carg o cover installed) in hatchback
style
s. When stowing the cressrails, al5..1 attach the tie-downs from the outer roof
2-29
Page 47 of 95
![CHEVROLET CITATION 1980 1.G Owners Manual Downloaded from www.Manualslib.com manuals search engine [I] ROOF RAIL ASM.
[1] CROSSRAILS
rnCROSSRAIL KNOBS
[!]TIE-DOWNS
slat assemblies to the ex ir a retairier provided on the to p of ea CHEVROLET CITATION 1980 1.G Owners Manual Downloaded from www.Manualslib.com manuals search engine [I] ROOF RAIL ASM.
[1] CROSSRAILS
rnCROSSRAIL KNOBS
[!]TIE-DOWNS
slat assemblies to the ex ir a retairier provided on the to p of ea](/manual-img/24/8083/w960_8083-46.png)
Downloaded from www.Manualslib.com manuals search engine [I] ROOF RAIL ASM.
[1] CROSSRAILS
rnCROSSRAIL KNOBS
[!]TIE-DOWNS
slat assemblies to the ex ir a retairier provided on the to p of eac h crossraiL
See you r Ch evrolet dealer for attachme nts to your Chev rolet luggage ca rrier to
h old bicycles, sk
is _and other it em s. and for straps to h eJp secure your cargo, whic h
a re avail"ab le a s accesso ries.
2-30
Page 53 of 95
Downloaded from www.Manualslib.com manuals search engine JACKING
CAUTION
To help avoid personal injury:
• Follow all jackin g and stowag e instructions.
• Use jack only fo r liftin g this venicle du -rin g wheel c h a ng e.
• Nev er ge t ben eath th e vehiCle, start or run en g in e while vehicle is supported b y jac k.
• Always securely res tow spare tire (o r flat tire ) an d all jackin g equipment.
Wheel Nut Torque
CAUTION: As soon as possible after Installing 8 wheel-and at the intervals shown on the chart-in the Maintenance Schedule foldet-han 8 m.chanic tighten whe&l nuta with II torque wrench to the specifications shown in "SpeCifications ," Section 7 of this manual. Wheel nuts should be tightened alternately and evenly to the correct torque. Never us. oil or grease on studs or nuts. Improperly tightened wheel nuts could eventually allow the wheel to come off while the vehicle is moving, possibty causing loss of control.IAlso see the Caution in "Service and Maintenance," Seetion 5 of this manual regarding the danger of mixing metric and customary fasteners.)
Stowage of Tire and Jack
CAUTION:·AlwaYs MOurely restow the spare tire assembty (or flat tire). all jacking equipment. and the cover, using the means provided. When driving the car with the compact spare installed and the reer seat folded down, stow the wheel cover flat on the rear floor behind the-right front seat. When the rear seat is up (or If It does not fold), stow the wheel cover in the trunk area. This will help keep such things from being thrown about and injuring peopla In the car in an accident.
Compact Spare
The compa ct sp are is des ig ned to save space in yo ur trunk, and its lighler weig ht
m ak es
it easi er to in stall if a flat tire occurs. The light~r weig ht als o helps improve fuel eco no my.
If you have a flat tire, follow the jack ing in struction s in this manual while keeping
t h ese point s in min d:
• Chec k inflati on press ure as soo n as practical after in sta llin g the s pa re ( use of a pocke t type: high pressure inflatio n gage is adv ised) and adjust to 415
k Pa (60 psi). The tire pressur e sh o uld be checked at least monthl y and kept at 415 kPa (60 ps i) while the tire is s tored.
• Co ntinuou s use at spe eds over 50 mph (80 km/h) is not re c omme nded .
NOTICE: Because this tire is amaUer than the standar d tire, vehicle ground clearance is reduced, Avoid driving over obstacles, and do not take your car U,rough an automatic car wash whila the spare is installed. The car may get caught possibly resulting in property damage.
• A trea d life of up to 3,000 mil es (4 800 kilomet ers) ca n b e expe cted, depe nding
on roa d condi tions and you r
driv ing habits . T o co nserve tire t read life. return the spar e to the sto rage area as soo n as the sta nd ard tir e ca n be repa ir ed -or
r
epl ac ed .
• Beca use the co mpac t spare was spec ifica lly designe d for your car, it s hould
no t be used on any other vehicle.
3-6
Page 62 of 95
Downloaded from www.Manualslib.com manuals search engine Section 5
SERVICE AND MAINTENANCE
CAUTION: As with any machine, take care when making any check, doing any maintenance. or making any repair. t6ayoid being injured. Note that some of the materials in this vehicle may be hazardous if used, serviced, or handled improperly. Improper or incomplete serVice could also lead to the vehicle itself not working properly which may result in personal injury, or damage to the vehicle or its equipment. If you have any question about carrying out some service, have the service done by 8 skilled mechanic.
REPLACEMENT FASTENERS
During car maintenance, any fasteners used to replace older ones must have the
same measurements and strength as those removed, whether metric or customary. (The numbers on the heads of metric bolts and on the surfaces of metric nuts show
their strength. Customary bolts use radial lines to show this, while most customary
nuts
do not have strength markings.) Fasteners taken from the car should be saved
for re-use in the same spot when possible. Where a fastener cannot be used again,
take care to choose a replacement that matches the old one.
For information and help, see your Chevrolet dealer.
CAUTION: This vehicle is primarily dimensioned in the metric system, Most fasteners are i'neti'icand many lire vary closein dimension to well-known customary fasteners in the inch system. Mismatched or incorrect fasteners can result in damage to the car or possibly personal injury.
MAINTENANCE SCHEDULE
For owner convenience , a separate folder has been provided with your vehicle
which contains a complete maintenance schedule. It also briefly describes the
safety, emission control, lubrication and general service your vehicle requires.
The Maintenance Schedule folder is supplemented by this section of the Owner's
Manual, as well as a Warranty Information folder also furnished with your vehicle.
Read all three publications for a full understanding
of your vehicle's maintenance
needs.
You can get a replacement Maintenance Schedule from your dealer or send the VIN(or serial) number of your vehicle to Consumer Relations, Chevrolet Central
Office, Chevrolet Motor Division, Detroit, Michigan 48202.
Fuel Cap
The fuel tank filler cap has a "screw-on ratcheting type" feature. To·remove:
•
Rotate cap counterclockwise to clear the inside of the filler neck. This
will allow any residual pressure
to escape.
• To install, reverse this procedure and tighten cap securely until a "ratcheting", clicking sound is heard indicating cap is on properly.
NOTICE: If you need to replace the fuel cap, use only a cap with these same features as specified for your model. An incorrect fuel cap can result in a serious malfunction of the fuel system or emission control system. You can get a correct replacement cap from your dealer.
5-1