2024 CHEVROLET SILVERADO EV phone
[x] Cancel search: phonePage 19 of 429
Chevrolet Silverado EV Owner Manual (GMNA-Localizing-U.S./Canada-
16702912) - 2024 - CRC - 1/23/23
18 Keys, Doors, and Windows
When the safety lock is enabled, adults and
older children will not be able to open the
rear door from the inside. Cancel the safety
locks to enable the doors to open from the
inside.
To cancel the safety lock:1. Unlock the door and open it from the outside.
2. Move the lever up to unlock. Do the same for the other door.
Digital Key
If equipped and enabled, the Digital Key
feature allows you to access and operate
the vehicle using a smartphone. Many of
the functions performed by a remote key
can also be done using a Digital Key. See
Remote Key Operation 09.
Only certain smartphones support Digital
Key. Please see the myChevrolet app to see
if your device is compatible.
If the smartphone battery is weak or if
there is interference with the signal, the
Driver Information Center (DIC) may display
NO KEY FOUND or NO REMOTE KEY WAS
DETECTED, PLACE KEY IN KEY POCKET THEN START YOUR VEHICLE when starting the
vehicle. Charge the smartphone battery as
soon as possible.
You can use the myChevrolet mobile app to
pair, manage, or delete your Digital Key.
If the Digital Key is not working:
.Check the distance. The smartphone may
be too far from the vehicle.
.Check the location. Other vehicles or
objects may be blocking the signal. Your
body could also impact the signal. Hold
the smartphone in your hand, away from
your body, and toward the vehicle for
best results.
.Check that the smartphone is turned on
and has sufficient battery power.
.Check the connection. Your smartphone’s
bluetooth connection must be enabled.
.Check the myChevrolet app. Ensure that it
is open. Try relaunching the app if it is
open but is still not working.
Setting up Digital Key
Digital Key is only available with an OnStar
account associated with the vehicle. 1. Log in to your OnStar account in the MyChevrolet mobile app. 2. Select the Digital Key menu option, and
follow the steps on your screen to pair
your phone.
Using Your Digital Key
Digital Key allows you to:
.Use keyless access features to lock and
unlock the vehicle’s doors, and access the
rear compartments without a remote key.
See “Keyless Access Operation” under
Remote Key Operation 09.
.Start the vehicle with just your phone
present.
.Use remote commands in the
myChevrolet app to lock, unlock, and
remote start the vehicle.
Digital Key Personal Identification
Number (PIN)
As an added security measure, you will have
the option to set up a PIN to be used with
the Digital Key. When a PIN is enabled, you
will be prompted to enter the PIN on your
infotainment screen before starting your
vehicle. After entering your PIN successfully,
the vehicle can be started for a short period
of time. If you do not start your vehicle
within that time, you will be prompted for
your PIN again.
Page 101 of 429
Chevrolet Silverado EV Owner Manual (GMNA-Localizing-U.S./Canada-
16702912) - 2024 - CRC - 1/13/23
100 Instruments and Controls
eTrunk™12 Volt Power Outlet
Caution
Leaving electrical equipment plugged in
for an extended period of time while the
vehicle is off will drain the battery.
Always unplug electrical equipment when
not in use and do not plug in equipment
that exceeds the maximum 15 amp
rating.
Certain accessory plugs may not be
compatible with the accessory power outlet
and could overload vehicle and adapter
fuses. If a problem is experienced, see your
dealer. When adding electrical equipment, be sure
to follow the proper installation instructions
included with the equipment. See
Add-On
Electrical Equipment 0321.
Caution
Hanging heavy equipment from the
power outlet can cause damage not
covered by the vehicle warranty. The
power outlets are designed for accessory
power plugs only, such as cell phone
charge cords.
Power Outlet 110/120 Volt Alternating
Current
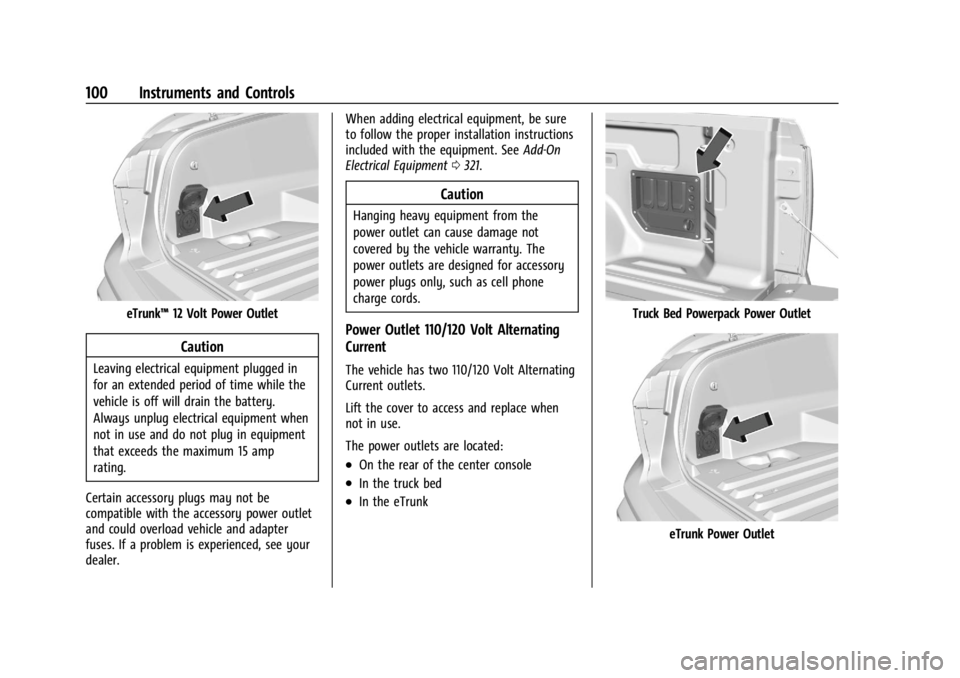
The vehicle has two 110/120 Volt Alternating
Current outlets.
Lift the cover to access and replace when
not in use.
The power outlets are located:
.On the rear of the center console
.In the truck bed
.In the eTrunk
Truck Bed Powerpack Power Outlet
eTrunk Power Outlet
Page 105 of 429

Chevrolet Silverado EV Owner Manual (GMNA-Localizing-U.S./Canada-
16702912) - 2024 - CRC - 1/13/23
104 Instruments and Controls
Troubleshooting
The power outlets will be momentarily
unavailable at the start and the end of a
350 kW DC Fast Charge. This is normal
operation.
For any error messages that can not be
resolved by resetting fault mode as
discussed earlier in this section, see your
dealer.
{Warning
The power outlets contain high-voltage
electrical equipment. Disassembling the
power outlets may result in electrical
shock causing personal injury or death.
Never attempt to disassemble a power
outlet.
Wireless Charging
If equipped and enabled, the vehicle has
wireless charging in the bin below the
climate control system. The system operates
at 145 kHz and wirelessly charges one Qi
compatible smartphone. The power output
of the system is capable of charging at a
rate up to 3 amp (15 W), as requested by
the compatible smartphone. SeeRadio
Frequency Statement 0404.
{Warning
Wireless charging may affect the
operation of an implanted pacemaker or
other medical devices. If you have one, it
is recommended to consult with your
doctor before using the wireless charging
system.
The vehicle must be on or Retained
Accessory Power (RAP) must be active. The
wireless charging feature may not correctly
indicate charging when the vehicle is in RAP,
during a Bluetooth phone call, or when
phone projection (e.g. Apple CarPlay/Android
Auto) is active. See Power Modes0197.
The operating temperature is −40 °C (−40 °F)
to 85 °C (185 °F) for the charging system and
0 °C (32 °F) to 35 °C (95 °F) for the phone.
A charging stopped alert may be displayed
on the infotainment screen, if the wireless
charger or smartphone are outside of
normal operating temperature. Charging will
automatically resume when a normal
operating temperature is reached.
{Warning
Remove all objects from the charger
before charging your compatible
smartphone. Objects, such as coins, keys,
rings, paper clips, or cards, between the
smartphone and charger may become
very hot.
On the rare occasion that the charging
system does not detect an object, and
the object gets wedged between the
smartphone and charger, remove the
smartphone and allow the object to cool
before removing it from the charger, to
prevent burns.
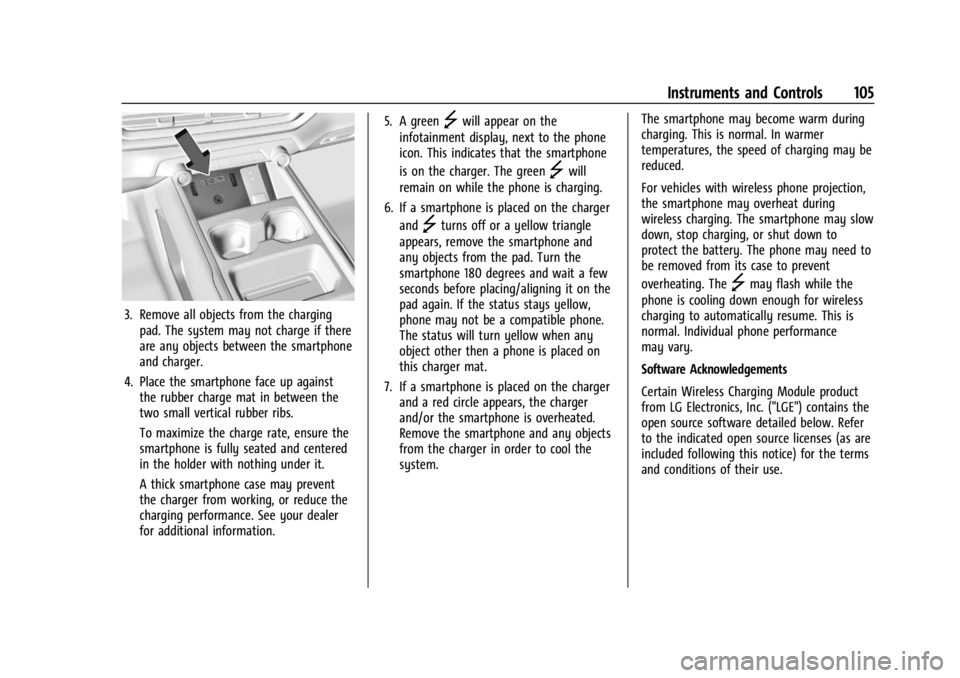
To charge a compatible smartphone: 1. Confirm the smartphone is capable of wireless charging.
2. The wireless charger is below the climate control system.
Page 106 of 429
Chevrolet Silverado EV Owner Manual (GMNA-Localizing-U.S./Canada-
16702912) - 2024 - CRC - 1/13/23
Instruments and Controls 105
3. Remove all objects from the chargingpad. The system may not charge if there
are any objects between the smartphone
and charger.
4. Place the smartphone face up against the rubber charge mat in between the
two small vertical rubber ribs.
To maximize the charge rate, ensure the
smartphone is fully seated and centered
in the holder with nothing under it.
A thick smartphone case may prevent
the charger from working, or reduce the
charging performance. See your dealer
for additional information. 5. A green
]will appear on the
infotainment display, next to the phone
icon. This indicates that the smartphone
is on the charger. The green
]will
remain on while the phone is charging.
6. If a smartphone is placed on the charger and
]turns off or a yellow triangle
appears, remove the smartphone and
any objects from the pad. Turn the
smartphone 180 degrees and wait a few
seconds before placing/aligning it on the
pad again. If the status stays yellow,
phone may not be a compatible phone.
The status will turn yellow when any
object other then a phone is placed on
this charger mat.
7. If a smartphone is placed on the charger and a red circle appears, the charger
and/or the smartphone is overheated.
Remove the smartphone and any objects
from the charger in order to cool the
system. The smartphone may become warm during
charging. This is normal. In warmer
temperatures, the speed of charging may be
reduced.
For vehicles with wireless phone projection,
the smartphone may overheat during
wireless charging. The smartphone may slow
down, stop charging, or shut down to
protect the battery. The phone may need to
be removed from its case to prevent
overheating. The
]may flash while the
phone is cooling down enough for wireless
charging to automatically resume. This is
normal. Individual phone performance
may vary.
Software Acknowledgements
Certain Wireless Charging Module product
from LG Electronics, Inc. ("LGE") contains the
open source software detailed below. Refer
to the indicated open source licenses (as are
included following this notice) for the terms
and conditions of their use.
Page 130 of 429
Chevrolet Silverado EV Owner Manual (GMNA-Localizing-U.S./Canada-
16702912) - 2024 - CRC - 1/13/23
Instruments and Controls 129
a lower cost by prioritizing charging during
the electrical provider’s off-peak period. The
vehicle will use these times to reach the
desired Charge Level by the scheduled time.
If the vehicle cannot reach the desired
charge level within these times, it will
charge as needed outside of this time
window.
Driver Information Center (DIC)
(Base Level)
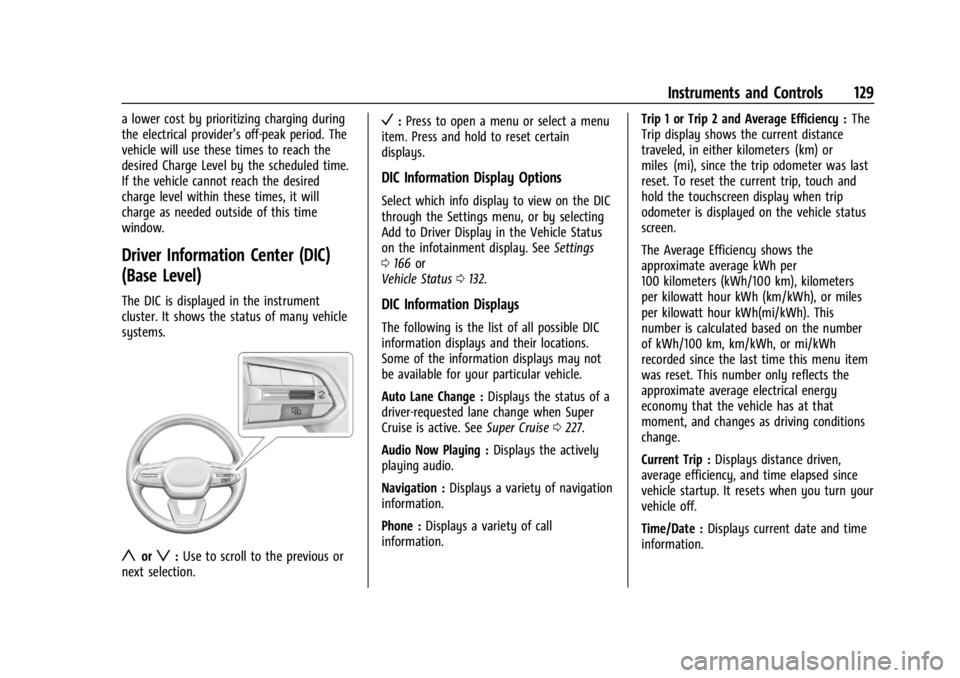
The DIC is displayed in the instrument
cluster. It shows the status of many vehicle
systems.
yorz:Use to scroll to the previous or
next selection.
V: Press to open a menu or select a menu
item. Press and hold to reset certain
displays.
DIC Information Display Options
Select which info display to view on the DIC
through the Settings menu, or by selecting
Add to Driver Display in the Vehicle Status
on the infotainment display. See Settings
0 166 or
Vehicle Status 0132.
DIC Information Displays
The following is the list of all possible DIC
information displays and their locations.
Some of the information displays may not
be available for your particular vehicle.
Auto Lane Change : Displays the status of a
driver-requested lane change when Super
Cruise is active. See Super Cruise0227.
Audio Now Playing : Displays the actively
playing audio.
Navigation : Displays a variety of navigation
information.
Phone : Displays a variety of call
information. Trip 1 or Trip 2 and Average Efficiency :
The
Trip display shows the current distance
traveled, in either kilometers (km) or
miles (mi), since the trip odometer was last
reset. To reset the current trip, touch and
hold the touchscreen display when trip
odometer is displayed on the vehicle status
screen.
The Average Efficiency shows the
approximate average kWh per
100 kilometers (kWh/100 km), kilometers
per kilowatt hour kWh (km/kWh), or miles
per kilowatt hour kWh(mi/kWh). This
number is calculated based on the number
of kWh/100 km, km/kWh, or mi/kWh
recorded since the last time this menu item
was reset. This number only reflects the
approximate average electrical energy
economy that the vehicle has at that
moment, and changes as driving conditions
change.
Current Trip : Displays distance driven,
average efficiency, and time elapsed since
vehicle startup. It resets when you turn your
vehicle off.
Time/Date : Displays current date and time
information.
Page 133 of 429
Chevrolet Silverado EV Owner Manual (GMNA-Localizing-U.S./Canada-
16702912) - 2024 - CRC - 1/13/23
132 Instruments and Controls
Off :Allows for no information to be
displayed in the cluster info display areas.
Right Zone
Auto Lane Change : Displays the status of a
driver-requested lane change when Super
Cruise is active. See Super Cruise0227.
Audio Now Playing : Displays the actively
playing audio.
Navigation : Displays a variety of navigation
information.
Phone : Displays a variety of call
information.
Off : Allows for no information to be
displayed in the cluster info display areas.
Vehicle Status
The following are all possible vehicle status
features.
To access the vehicle status menu touch
A
from the list of home page icons displayed
on the left side of the infotainment display.
Vehicle status content is shown on cards
that are grouped together in option tabs
that are displayed on the infotainment
display. Touching a card on the infotainment display
opens up a dialog box for that card. To
select a desired option within a dialog box,
touch the option and follow any message or
alerts that may display. Some options may
be unavailable while driving.
Touch Add to Driver Display to send the
desired card to the Driver Information
Center (DIC) on the instrument cluster.
Touch Remove from Driver Display to
remove the selected card from the
instrument cluster. See
Driver Information
Center (DIC) (Base Level) 0129 or
Driver Information Center (DIC) (Uplevel)
0 130.
Options
The following is the list of all possible cards
and their locations. Some of the cards may
not be available for your particular vehicle.
Overview
Displays an interactive 3-D rendered image
of your vehicle that shows performance and
health information.
Tire Pressure
Displays the approximate pressures of all
four tires. Tire pressure is displayed in either
kilopascal (kPa) or in pounds per square inch (psi). If the pressure is low, the value
for that tire is shown in amber. See
Tire
Pressure Monitor System 0351 and
Tire Pressure Monitor Operation 0351.
If equipped, Tire Temperature is located
below the tire pressure graphic. Tire
Temperature shows overall temperature as
either Cold, Cool, Normal, Warm, or Hot.
Normal is typical for normal driving while
Warm is typical for spirited driving.
Unknown displays when tire temperature
information is unavailable.
When selected, the following options may
be chosen in the dialog: Relearn Tire
Pressure, Turn Off/On Leak Detection, Reset
Leak Detection, and Add to Driver Display.
When enabled, you will receive alerts when
a fast and/or slow tire leak is detected. The
Leak Detection speeds shown are either Tire
Leak or Fast Leak. When disabled, you will
still receive low tire pressure alerts.
However, you will stop receiving additional
alerts when a tire is leaking air.
Energy Info
Energy Usage : Displays how energy is
being used for the current drive since the
last time the vehicle was started.
Percentages of the Driving, Remote Climate,
and Climate and Prep vehicle systems as
Page 135 of 429
Chevrolet Silverado EV Owner Manual (GMNA-Localizing-U.S./Canada-
16702912) - 2024 - CRC - 1/13/23
134 Instruments and Controls
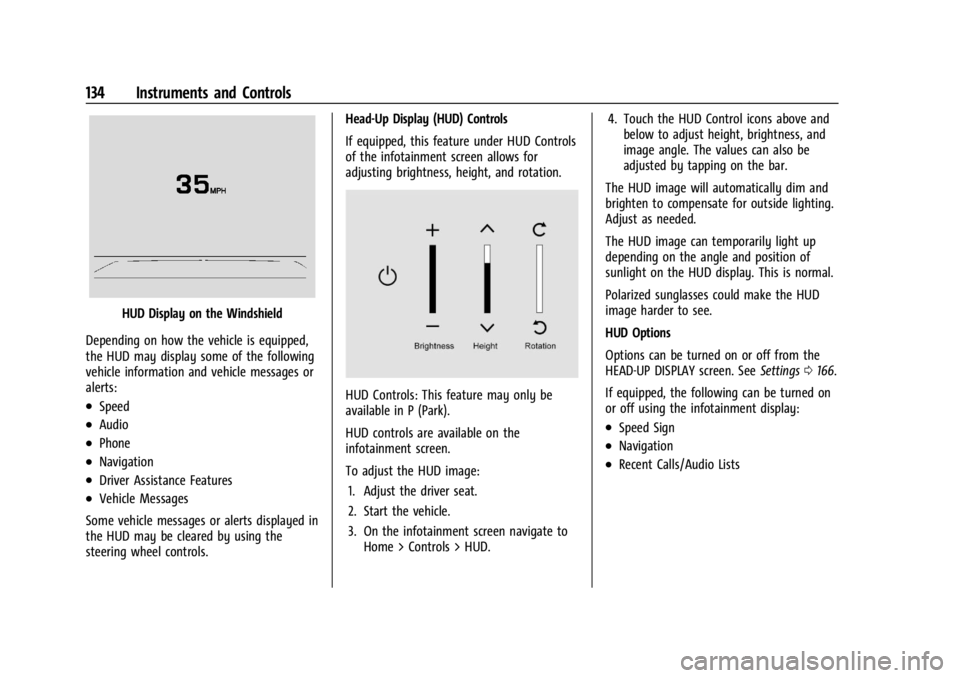
HUD Display on the Windshield
Depending on how the vehicle is equipped,
the HUD may display some of the following
vehicle information and vehicle messages or
alerts:
.Speed
.Audio
.Phone
.Navigation
.Driver Assistance Features
.Vehicle Messages
Some vehicle messages or alerts displayed in
the HUD may be cleared by using the
steering wheel controls. Head-Up Display (HUD) Controls
If equipped, this feature under HUD Controls
of the infotainment screen allows for
adjusting brightness, height, and rotation.
HUD Controls: This feature may only be
available in P (Park).
HUD controls are available on the
infotainment screen.
To adjust the HUD image:
1. Adjust the driver seat.
2. Start the vehicle.
3. On the infotainment screen navigate to Home > Controls > HUD. 4. Touch the HUD Control icons above and
below to adjust height, brightness, and
image angle. The values can also be
adjusted by tapping on the bar.
The HUD image will automatically dim and
brighten to compensate for outside lighting.
Adjust as needed.
The HUD image can temporarily light up
depending on the angle and position of
sunlight on the HUD display. This is normal.
Polarized sunglasses could make the HUD
image harder to see.
HUD Options
Options can be turned on or off from the
HEAD-UP DISPLAY screen. See Settings0166.
If equipped, the following can be turned on
or off using the infotainment display:
.Speed Sign
.Navigation
.Recent Calls/Audio Lists
Page 139 of 429
Chevrolet Silverado EV Owner Manual (GMNA-Localizing-U.S./Canada-
16702912) - 2024 - CRC - 1/13/23
138 Instruments and Controls
6. If your garage door does not reactduring testing, press the It Didn’t Work
button and proceed to Step 7.
The following steps require the location
and pressing of the Learn or Smart
button on the garage door opener
receiver inside the garage. These steps
may require a ladder and are time
sensitive.
7. Locate the Learn or Smart button on the garage door opener receiver in the
garage. The name and color may vary by
manufacturer but is usually located near
the antenna wire.
8. Press and release the Learn or Smart button on the garage door opener
receiver. Step 9 must be completed
within 30 seconds of pressing this
button.
9. Press the Test button on the infotainment screen. If your garage door
moves, then programming was
successful. You may need to press the
Test button several times. Indicate
successful programming by pressing the
It Worked button. 10. If programming is not successful,
press It Didn’t Work button and repeat
Steps 8–9, or consult HomeLink by
website or phone.
After your Universal Remote has been
successfully programmed, you can change
the name of the remote on the screen as
desired.
Some garage door openers require a
modification of Step 4. See “Radio Signals
for Some Gate Operators.”
For questions or programming help, visit
www.homelink.com/gm for self-help videos
or call 1–800–355–3515. For calls placed
outside the U.S., Canada, or Puerto Rico,
international rates will apply and may differ
based on landline or mobile phone.
Erasing Universal Remotes
To erase a programmed Universal Remote,
select the remote on the infotainment
screen. Then select “Delete.”
To erase ALL programmed Universal
Remotes, select any remote on the
infotainment screen. Then select
“Delete All.”
Radio Signals for Some Gate Operators
Some gate operators and radio-frequency
laws require transmitter signals to time out
or quit after several seconds of transmission.
This may not be long enough for the
Universal Remote system to pick up the
signal during programming.
If programming did not work, replace Step 4
under “Programming the Universal Remote
System,” with the following:
Press and release the hand-held transmitter
button every two seconds until the signal
has been found by the Universal Remote
System. Proceed to Step 5 under
“Programming the Universal Remote
System” to complete programming.
Universal Remote System
Operation
Using the Universal Remote System
Press the desired Universal Remote button
on the infotainment screen.