2024 CHEVROLET SILVERADO EV change time
[x] Cancel search: change timePage 277 of 429
Chevrolet Silverado EV Owner Manual (GMNA-Localizing-U.S./Canada-
16702912) - 2024 - CRC - 1/17/23
276 Driving and Operating
To turn LKA on and off, pressAon the
instrument panel to the left of the steering
wheel. If equipped, the indicator light on the
button comes on when LKA is on and turns
off when LKA is disabled. In some vehicles,
you must press the button for more than
three seconds to turn LKA off.
LKA is not available when Terrain Mode,
Snow/Ice Mode, or Off-Road Mode is
selected.
See Driver Mode Control 0209. See
Four-Wheel Steering 0210.
When attempting to enable LKA in any of
the above conditions, LKA UNAVAILABLE will
display.
When on,
Ais white, if equipped,
indicating that the system is not ready to
assist.
Ais green if LKA is ready to
assist. LKA may assist by gently turning the
steering wheel if the vehicle approaches a
detected lane marking.
Ais amber when
assisting. It may also provide a Lane
Departure Warning (LDW) alert by flashing
Aamber if the vehicle crosses a
detected lane marking. Additionally, there
may be three beeps, or the driver seat may
pulse three times, on the right or left,
depending on the lane departure direction. Take Steering
The LKA system does not continuously steer
the vehicle. If LKA does not detect active
driver steering, an alert and chime may be
provided. Steer the vehicle to dismiss. LKA
may become temporarily unavailable after
repeated take steering alerts.
When the System Does Not Seem to
Work Properly
The system performance may be
affected by:
.Close vehicles ahead.
.Sudden lighting changes, such as when
driving through tunnels.
.Banked roads.
.Roads with poor lane markings, such as
two-lane roads.
If the LKA system is not functioning
properly when lane markings are clearly
visible, cleaning the windshield may help.
A camera blocked message may display if
the camera is blocked. Some driver
assistance systems may have reduced
performance or not work at all. An LKA or
LDW unavailable message may display if the
systems are temporarily unavailable. This
message could be due to a blocked camera. The LKA system does not need service. Clean
the outside of the windshield behind the
rearview mirror.
LKA assistance and/or LDW alerts may occur
due to tar marks, shadows, cracks in the
road, temporary or construction lane
markings, or other road imperfections. This
is normal system operation; the vehicle does
not need service. Turn LKA off if these
conditions continue.
Surround Vision Recorder
If equipped, this system records the 360°
camera views to an SD card. Only images
are recorded, no sound. An SD card will be
needed for this system. The minimum
recommended SD card specifications are at
least 64GB with FAT32 file system, Class V30
or greater.
Page 279 of 429
Chevrolet Silverado EV Owner Manual (GMNA-Localizing-U.S./Canada-
16702912) - 2024 - CRC - 1/17/23
278 Driving and Operating
.All files can be viewed on the playback
app or when the SD card is read by a
personal computer (PC).
.Once the SD card is full, the oldest files
will be overwritten.
To Delete Data : Remove the SD card from
the vehicle and insert into a PC to manually
delete the file.
Error messages can occur if:
.No SD card is present.
.An empty SD card is present.
.The video files are the wrong format.
.The video files are corrupt.
.The SD card is full.
.There is a system error.
Other files should not be stored on the
same SD card as the surround vision
recorder files. Storing other files on the
same card may increase recording start up
and playback time or result in a loss of
data. An error message may be displayed if
no surround vision recorded video file is
available for playback.
Charging
When to Charge
When the high voltage battery is low, the
following charging messages may display on
the Driver Information Center (DIC):
CHARGE VEHICLE SOON : The battery needs
to be charged soon.
REDUCED ACCELERATION DRIVE WITH CARE :
The accelerator pedal response is reduced
and the remaining range value changes to
LOW, charge the vehicle immediately. See
Propulsion Power Messages 0136.
OUT OF ENERGY, CHARGE VEHICLE NOW :
The battery charge is fully depleted. The
vehicle will slow to a stop. Brake and
steering assist will continue operating. Once
stopped, turn the vehicle off.
Plug-In Charging
Plug-in charge times vary based on the
battery condition, charge level, and the
outside temperature. See Charging0123 for
charge mode selection.
Do not allow the vehicle to remain in
temperature extremes for long periods
without being driven or plugged in. When temperatures are below 0 °C (32 °F) and
above 32 °C (90 °F), plug in the vehicle to
maximize high voltage battery life.
In extreme temperature conditions, a full
charge will take additional time.
Charging will slow down as the battery fills
up. Charge the battery to 80% for daily
driving, or when driving in mountainous
terrain. The vehicle can be charged above
80% for long trips when not driving in
mountainous terrain.
It is normal to hear fans, pumps, and
electrical devices clicking while the vehicle is
turned off and charging.
The vehicle does not require indoor charging
area ventilation before, during, or after
charging.
The vehicle cannot be driven while the
charge cord is plugged into the vehicle.Caution
To avoid damage to the vehicle, make
sure the charging cord plug is in good
condition, is not worn or damaged, and is
connected securely to the vehicle's
charging port. If vehicle charging is
(Continued)
Page 294 of 429
Chevrolet Silverado EV Owner Manual (GMNA-Localizing-U.S./Canada-
16702912) - 2024 - CRC - 1/17/23
Driving and Operating 293
Utility Interruption of Charging
This vehicle responds to requests through
the utility company to limit or completely
block electrical power grid use. This feature
is inactive during DC charging. A utility
interruption will lengthen the vehicle
charge time.
When electrical grid power is completely
blocked, the vehicle will not charge until the
utility interruption has expired. The vehicle
should be left plugged in so that the vehicle
will automatically resume charging.
Changing the charge mode to Charge Now
or performing a delayed charging override
will not disable a utility interruption.
A message will display on the instrument
cluster indicating that a utility interruption
has occurred.
Charging Station Troubleshooting
If the vehicle does not charge after being
plugged in to a residential 240-volt charging
station:1. Verify that the charge mode is set to Charge Now.
2. Verify that the charging station circuit breaker is not tripped. 3. Plug the portable charge cord into the
wall outlet, verify that the indicator light
on the charge cord is solid green, and
connect it to the vehicle. See “Charge
Cord Status Indicators” inCharge Cord
0 286.
4. If the vehicle charges with the portable charge cord and a different 240-volt
charging station, such as a public station,
there may be a problem with the
charging station. Contact the charging
station manufacturer for service.
Electrical Requirements for
Battery Charging
The vehicle is designed for compatibility
with most standard vehicle charging
equipment in the region of sale. Check for
charger compatibility before purchasing a
charger
The portable charge cord defaults to
120 volts and 8 amps. Have the outlet
inspected before changing to 12 amps on the
Charging Screens. If 12 amps is selected, a
pop-up will show on the infotainment
display to confirm the change to 12 amps.
See the “Active Charging” section under
Charging 0123.
Caution
Do not use portable or stationary backup
generating equipment to charge the
vehicle. This may cause damage to the
vehicle's charging system. Only charge
the vehicle from utility supplied power.
Trailer Towing
General Towing Information
Only use towing equipment that has been
designed for the vehicle. Contact your dealer
or trailering dealer for assistance with
preparing the vehicle to tow a trailer. Read
the entire section before towing a trailer.
To tow a disabled vehicle, see Transporting
a Disabled Vehicle 0378. To tow the vehicle
behind another vehicle such as a motor
home, see Recreational Vehicle Towing
0 379.
Page 295 of 429
Chevrolet Silverado EV Owner Manual (GMNA-Localizing-U.S./Canada-
16702912) - 2024 - CRC - 1/17/23
294 Driving and Operating
Driving Characteristics and
Towing Tips
{Warning
You can lose control when towing a
trailer if the correct equipment is not
used or the vehicle is not driven properly.
For example, if the trailer is too heavy or
the trailer brakes are inadequate for the
load, the vehicle may not stop as
expected. You and others could be
seriously injured. The vehicle may also be
damaged, and the repairs would not be
covered by the vehicle warranty. Pull a
trailer only if all the steps in this section
have been followed. Ask your dealer for
advice and information about towing a
trailer with the vehicle.
Driving with a Trailer
Trailering is different than just driving the
vehicle by itself. Trailering affects handling,
acceleration, braking, and durability.
Successful and safe trailering requires proper
use of the correct equipment.The following information has many
time-tested, important trailering tips and
safety rules. Many of these are important
for your safety and that of your passengers.
Read this section carefully before towing a
trailer.
When towing a trailer:
.Become familiar with, and follow all state
and local laws that apply to trailer
towing. These requirements vary from
state to state.
.State laws may require the use of
extended side view mirrors. If your
visibility is limited or restricted while
towing, install extended side view mirrors
on your vehicle, even if not required.
.Do not tow a trailer during the first
800 km (500 mi) of vehicle use to prevent
damage to vehicle.
.Do not drive over 800 km/h (50 mph) and
do not make starts at full throttle during
the first 800 km (500 mi) of trailer
towing.
.Tow in D (Drive). Tow/Haul Mode is
recommended for heavier trailers. See
Driver Mode Control
0209.
.One-Pedal Driving can be a useful feature
when towing. See One-Pedal Driving
0 203. The following advanced driver assistance
features should be turned off when towing
a trailer, and may turn off automatically
when a trailer is detected:
.Park Assist
.Reverse Automatic Braking (RAB)
.Rear Cross Traffic Alert (RCTA)
.Rear Cross Traffic Braking (RCTB)
.Lane Change Alert (LCA)
.Super Cruise and Adaptive Cruise Control
(ACC), unless equipped with trailering
functionality, see
Adaptive Cruise Control
(Advanced) 0217.
Automatic Emergency Braking (AEB) and
Front Pedestrian Braking (FPB) should be set
to Alert unless equipped with Super Cruise.
Do not use Automatic Parking Assist (APA)
while towing a trailer.
Towing a trailer requires experience. The
combination of the vehicle and trailer is
longer and not as responsive as the vehicle
itself. Become familiar with handling and
braking of the combination by driving on a
level road surface before driving on public
roads.
Page 298 of 429
Chevrolet Silverado EV Owner Manual (GMNA-Localizing-U.S./Canada-
16702912) - 2024 - CRC - 1/17/23
Driving and Operating 297
Pulling the Trailer from the Water1. Press and hold the brake pedal.
2. Start the vehicle and shift into D (Drive) or L (Low).
3. Release the parking brake.
4. Let up on the brake pedal.
5. Drive slowly until the tires are clear of the chocks.
6. Stop and have someone pick up and store the chocks.
7. Slowly pull the trailer from the water.
Caution
If the vehicle tires begin to spin and the
vehicle begins to slide toward the water,
remove your foot from the accelerator
pedal and apply the brake pedal. Seek
help to have the vehicle towed up
the ramp.
Maintenance when Trailer Towing
The vehicle needs service more often when
used to tow trailers. See Maintenance
Schedule 0389. It is especially important to
check the cooling system and brake system
before and during each trip. Check periodically that all nuts and bolts on
the trailer hitch are tight.
Trailer Towing
Caution
Towing a trailer improperly can damage
the vehicle and result in costly repairs
not covered by the vehicle warranty. To
tow a trailer correctly, follow the
directions in this section and see your
dealer for important information about
towing a trailer with the vehicle.
Trailering is different than just driving the
vehicle by itself. Trailering means changes in
handling, acceleration, braking, and
durability. Successful, safe trailering takes
correct equipment, and it has to be used
properly.
The following information has many
time-tested, important trailering tips and
safety rules. Many of these are important
for your safety and that of your passengers.
Read this section carefully before pulling a
trailer.
Trailer Weight
{Warning
Never exceed the towing capacity for
your vehicle.
Safe trailering requires monitoring the
weight, speed, altitude, road grades, outside
temperature, and how frequently the vehicle
is used to tow a trailer.
Trailer Weight Ratings
When towing a trailer, the combined weight
of the vehicle, vehicle contents, trailer, and
trailer contents must be below all of the
maximum weight ratings for the vehicle,
including:
.Gross Combined Weight Rating (GCWR)
.Gross Vehicle Weight Rating (GVWR)
.Maximum Trailer Weight Rating
.Maximum Trailer Tongue Weight Rating
.Gross Axle Weight Rating-Rear (GAWR-RR)
See “Weight-Distributing Hitch and
Adjustment” underTowing Equipment 0301
to determine if equalizer bars are required
to obtain the maximum trailer weight
rating.
Page 308 of 429
Chevrolet Silverado EV Owner Manual (GMNA-Localizing-U.S./Canada-
16702912) - 2024 - CRC - 1/17/23
Driving and Operating 307
TRAILER GAIN:
Press a Trailer Gain button to recall the
current Trailer Gain setting. Each press and
release of the gain buttons will change the
Trailer Gain setting. Press the Trailer
Gain (+) or (−) to adjust. Press and hold to
continuously adjust the Trailer Gain. To turn
the output to the trailer off, adjust the
Trailer Gain setting to 0.0. This setting can
be adjusted from 0.0 to 10.0 with a trailer
connected or disconnected.
TRAILER OUTPUT: This displays anytime a
trailer with electric brakes is connected.
Output to the trailer brakes is based on the
amount of vehicle braking present and
relative to the Trailer Gain setting. Output is
displayed from 0–100% for each gain
setting.
The Trailer Output will indicate“- - - - - -”on
the Trailer Brake Display Page whenever the
following occur:
.No trailer is connected
.A trailer without electric brakes is
connected, no DIC message will display
.A trailer with electric brakes has become
disconnected, a CHECK TRAILER WIRING
message displays on the DIC
.There is a fault present in the wiring to
the trailer brakes, a CHECK TRAILER
WIRING message displays on the DIC
.The ITBC system is not working due to a
fault, a SERVICE TRAILER BRAKE SYSTEM
message displays in the DIC
Manual Trailer Brake Apply Lever
Slide this lever right to apply the trailer’s
electric brakes independent of the vehicle’s
brakes. Use this lever to adjust Trailer Gain
to achieve the proper power output to the
trailer brakes. This lever may also be used
to request additional trailer braking at any
time. The trailer and vehicle brake lamps
will come on when either vehicle brakes or
manual trailer brakes are applied and
properly connected.
Trailer Gain Adjustment Procedure
Trailer Gain should be set for a specific
trailering condition and it must be
readjusted anytime vehicle loading, trailer
loading, or road surface conditions change.
{Warning
Trailer brakes that are over-gained or
under-gained may not stop the vehicle
and the trailer as intended and can result (Continued)
Warning (Continued)
in a crash. Always follow the instructions
to set the Trailer Gain for the proper
trailer stopping performance.
To adjust Trailer Gain for each towing
condition: 1. Drive the vehicle with the trailer attached on a level road surface
representative of the towing condition
and free of traffic at about 32–40 km/h
(20–25 mph) and fully apply the Manual
Trailer Brake apply lever. Adjusting
Trailer Gain at speeds lower than
32–40 km/h (20–25 mph) may result in
an incorrect gain setting.
2. Adjust the Trailer Gain, using the Trailer Gain adjustment buttons, to just below
the point of trailer wheel lockup,
indicated by trailer wheel squeal or tire
smoke when a trailer wheel locks. Trailer
wheel lockup may not occur if towing a
heavily loaded trailer. In this case, adjust
the Trailer Gain to the highest allowable
setting for the towing condition.
Page 309 of 429
Chevrolet Silverado EV Owner Manual (GMNA-Localizing-U.S./Canada-
16702912) - 2024 - CRC - 1/17/23
308 Driving and Operating
3. Readjust Trailer Gain any time vehicleloading, trailer loading, or road surface
conditions change or if trailer wheel
lockup is noticed at any time while
towing.
Other ITBC-Related DIC Messages
TRAILER BRAKES CONNECTED: This message
will briefly display when a trailer with
electric brakes is first connected to the
vehicle. This message will automatically turn
off in about 10 seconds. This message can
be acknowledged before it automatically
turns off.
CHECK TRAILER WIRING: This message will
display if:
.The ITBC system first determines
connection to a trailer with electric brakes
and then the trailer harness becomes
disconnected from the vehicle.
‐ If the disconnect occurs while the
vehicle is stationary, this message will
automatically turn off in about
30 seconds. This message will also turn
off if it is acknowledged or if the trailer
harness is reconnected.
‐ If the disconnect occurs while the
vehicle is moving, this message will
continue until the vehicle is turned off. This message will also turn off if it is
acknowledged or if the trailer harness
is reconnected.
.There is an electrical fault in the wiring to
the trailer brakes. This message will
continue as long as there is an electrical
fault in the trailer wiring. This message
will also turn off if it is acknowledged.
To determine whether the electrical fault is
on the vehicle side or trailer side of the
trailer wiring harness connection: 1. Disconnect the trailer wiring harness from the vehicle.
2. Turn the vehicle off.
3. Wait 10 seconds, then turn the vehicle back to RUN.
4. If the CHECK TRAILER WIRING message reappears, the electrical fault is on the
vehicle side.
If the CHECK TRAILER WIRING message
only reappears when connecting the
trailer wiring harness to the vehicle, the
electrical fault is on the trailer side.
SERVICE TRAILER BRAKES OR REDUCED
TRAILER BRAKING: This message will display
if the electric trailer brake performance is
either reduced or non-functional. HOLD LAST KNOWN GAIN: This message will
display if it is no longer possible to adjust
the trailer brake gain. Trailer brakes may or
may not still be functional, and it is not
possible to adjust brake gain based on road
conditions. The trailer brakes may remain
functional until the next time the vehicle is
turned off.
TRAILER BRAKES DISABLED SERVICE
REQUIRED: This message will display when
there is a problem with the ITBC system.
If this message continues over multiple
restarts, have the vehicle serviced.
If the CHECK TRAILER WIRING, TRAILER
BRAKES DISABLED SERVICE REQUIRED,
SERVICE TRAILER BRAKE SYSTEM, or REDUCED
TRAILER BRAKING message displays while
driving, the ITBC system may not be fully
functional or may not function at all. When
traffic conditions allow, carefully pull the
vehicle over to the side of the road and turn
the vehicle off. Check the wiring connection
to the trailer and turn the vehicle back on.
If either of these messages continue, either
the vehicle or trailer needs service.
Page 316 of 429
Chevrolet Silverado EV Owner Manual (GMNA-Localizing-U.S./Canada-
16702912) - 2024 - CRC - 1/17/23
Driving and Operating 315
.Maintenance
.Checklist
.Weight
.Brakes (if equipped)
Each section shows high level status
information for the feature. Selecting a
section opens up a new screen with
additional information and/or options.
Selecting the checklist, camera,
or maintenance icon opens up the
corresponding screen.
Lights
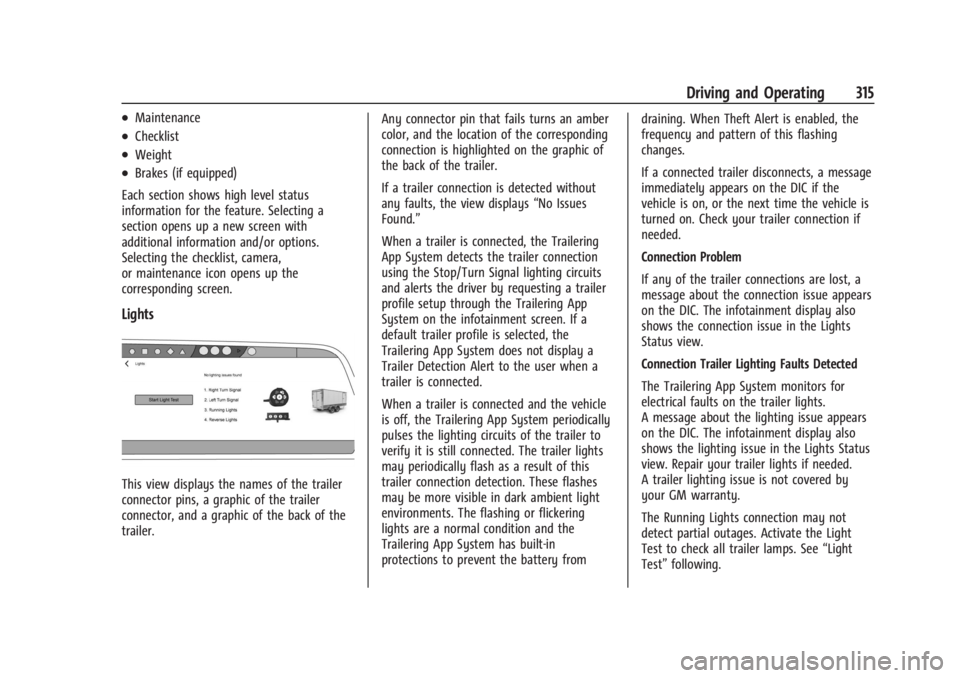
This view displays the names of the trailer
connector pins, a graphic of the trailer
connector, and a graphic of the back of the
trailer. Any connector pin that fails turns an amber
color, and the location of the corresponding
connection is highlighted on the graphic of
the back of the trailer.
If a trailer connection is detected without
any faults, the view displays
“No Issues
Found.”
When a trailer is connected, the Trailering
App System detects the trailer connection
using the Stop/Turn Signal lighting circuits
and alerts the driver by requesting a trailer
profile setup through the Trailering App
System on the infotainment screen. If a
default trailer profile is selected, the
Trailering App System does not display a
Trailer Detection Alert to the user when a
trailer is connected.
When a trailer is connected and the vehicle
is off, the Trailering App System periodically
pulses the lighting circuits of the trailer to
verify it is still connected. The trailer lights
may periodically flash as a result of this
trailer connection detection. These flashes
may be more visible in dark ambient light
environments. The flashing or flickering
lights are a normal condition and the
Trailering App System has built-in
protections to prevent the battery from draining. When Theft Alert is enabled, the
frequency and pattern of this flashing
changes.
If a connected trailer disconnects, a message
immediately appears on the DIC if the
vehicle is on, or the next time the vehicle is
turned on. Check your trailer connection if
needed.
Connection Problem
If any of the trailer connections are lost, a
message about the connection issue appears
on the DIC. The infotainment display also
shows the connection issue in the Lights
Status view.
Connection Trailer Lighting Faults Detected
The Trailering App System monitors for
electrical faults on the trailer lights.
A message about the lighting issue appears
on the DIC. The infotainment display also
shows the lighting issue in the Lights Status
view. Repair your trailer lights if needed.
A trailer lighting issue is not covered by
your GM warranty.
The Running Lights connection may not
detect partial outages. Activate the Light
Test to check all trailer lamps. See
“Light
Test” following.