2024 CHEVROLET SILVERADO EV change time
[x] Cancel search: change timePage 20 of 429
Chevrolet Silverado EV Owner Manual (GMNA-Localizing-U.S./Canada-
16702912) - 2024 - CRC - 1/23/23
Keys, Doors, and Windows 19
Even if PIN to Start is enabled, you can still
start your vehicle without entering a PIN if
a remote key is in the vehicle, or by using
your key card. See“Key Card”later in this
section.
PIN Settings
If you forget your PIN, would like to change
your PIN, or would like to enable/disable
your PIN, you can do so via the Digital Key
menu in your myChevrolet app.
PIN Lockout
If the PIN is entered incorrectly too many
times, you will need to wait several minutes
before attempting to enter your PIN again.
You can still start your vehicle by using a
remote key or key card. You may also reset
your PIN or disable the PIN setting via the
Digital Key menu in your myChevrolet app.
Key Card
Your vehicle may be equipped with a key
card that unlocks, locks, and starts the
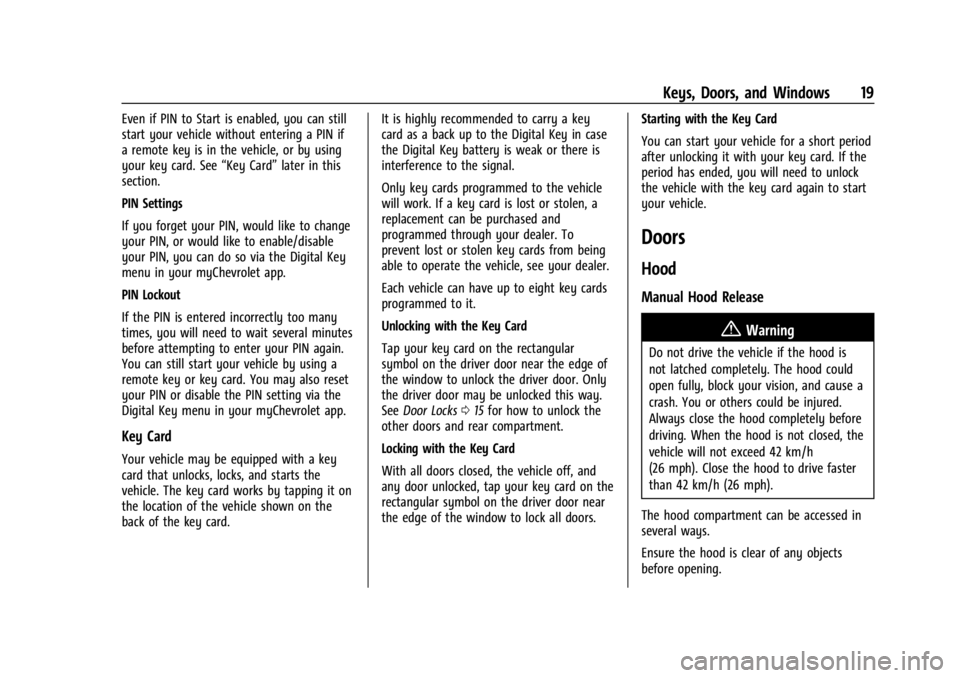
vehicle. The key card works by tapping it on
the location of the vehicle shown on the
back of the key card. It is highly recommended to carry a key
card as a back up to the Digital Key in case
the Digital Key battery is weak or there is
interference to the signal.
Only key cards programmed to the vehicle
will work. If a key card is lost or stolen, a
replacement can be purchased and
programmed through your dealer. To
prevent lost or stolen key cards from being
able to operate the vehicle, see your dealer.
Each vehicle can have up to eight key cards
programmed to it.
Unlocking with the Key Card
Tap your key card on the rectangular
symbol on the driver door near the edge of
the window to unlock the driver door. Only
the driver door may be unlocked this way.
See
Door Locks 015 for how to unlock the
other doors and rear compartment.
Locking with the Key Card
With all doors closed, the vehicle off, and
any door unlocked, tap your key card on the
rectangular symbol on the driver door near
the edge of the window to lock all doors. Starting with the Key Card
You can start your vehicle for a short period
after unlocking it with your key card. If the
period has ended, you will need to unlock
the vehicle with the key card again to start
your vehicle.
Doors
Hood
Manual Hood Release
{Warning
Do not drive the vehicle if the hood is
not latched completely. The hood could
open fully, block your vision, and cause a
crash. You or others could be injured.
Always close the hood completely before
driving. When the hood is not closed, the
vehicle will not exceed 42 km/h
(26 mph). Close the hood to drive faster
than 42 km/h (26 mph).
The hood compartment can be accessed in
several ways.
Ensure the hood is clear of any objects
before opening.
Page 36 of 429
Chevrolet Silverado EV Owner Manual (GMNA-Localizing-U.S./Canada-
16702912) - 2024 - CRC - 1/23/23
Keys, Doors, and Windows 35
Puddle Lamps
Puddle lamps project light to the area of
ground below the front and rear doors, on
both the driver and passenger side. See
Entry Lighting0144 and
Exit Lighting 0145.
Memory Mirrors
The vehicle may have memory mirrors. See
Memory Seats 045.
Lane Change Alert (LCA)
The vehicle may have LCA. See Lane Change
Alert (LCA) 0269.
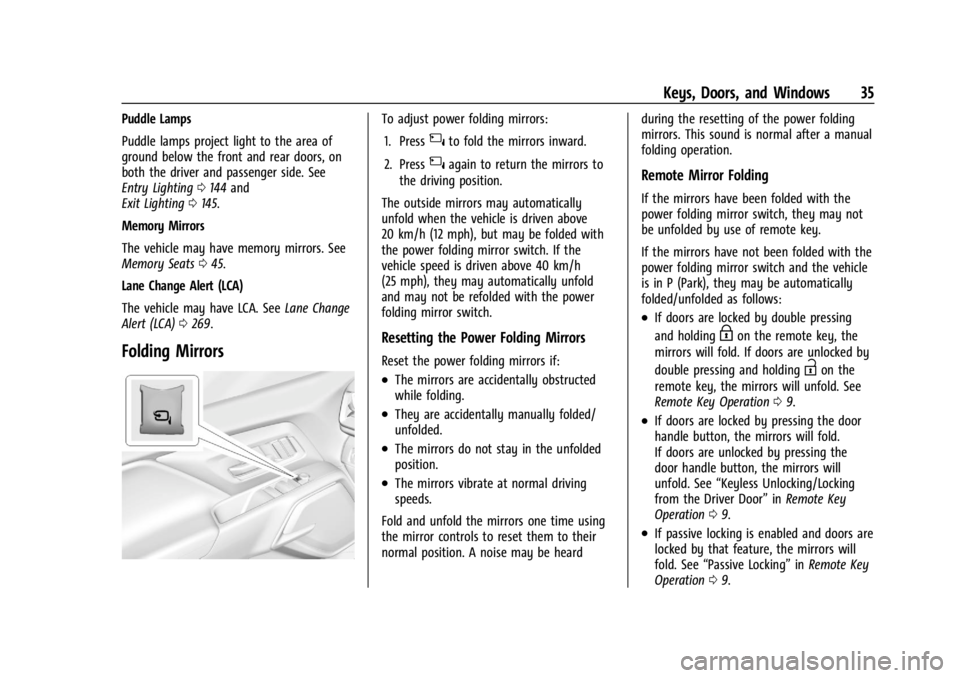
Folding Mirrors
To adjust power folding mirrors:
1. Press
{to fold the mirrors inward.
2. Press
{again to return the mirrors to
the driving position.
The outside mirrors may automatically
unfold when the vehicle is driven above
20 km/h (12 mph), but may be folded with
the power folding mirror switch. If the
vehicle speed is driven above 40 km/h
(25 mph), they may automatically unfold
and may not be refolded with the power
folding mirror switch.
Resetting the Power Folding Mirrors
Reset the power folding mirrors if:
.The mirrors are accidentally obstructed
while folding.
.They are accidentally manually folded/
unfolded.
.The mirrors do not stay in the unfolded
position.
.The mirrors vibrate at normal driving
speeds.
Fold and unfold the mirrors one time using
the mirror controls to reset them to their
normal position. A noise may be heard during the resetting of the power folding
mirrors. This sound is normal after a manual
folding operation.
Remote Mirror Folding
If the mirrors have been folded with the
power folding mirror switch, they may not
be unfolded by use of remote key.
If the mirrors have not been folded with the
power folding mirror switch and the vehicle
is in P (Park), they may be automatically
folded/unfolded as follows:
.If doors are locked by double pressing
and holding
Hon the remote key, the
mirrors will fold. If doors are unlocked by
double pressing and holding
Ion the
remote key, the mirrors will unfold. See
Remote Key Operation 09.
.If doors are locked by pressing the door
handle button, the mirrors will fold.
If doors are unlocked by pressing the
door handle button, the mirrors will
unfold. See “Keyless Unlocking/Locking
from the Driver Door” inRemote Key
Operation 09.
.If passive locking is enabled and doors are
locked by that feature, the mirrors will
fold. See “Passive Locking” inRemote Key
Operation 09.
Page 48 of 429
Chevrolet Silverado EV Owner Manual (GMNA-Localizing-U.S./Canada-
16702912) - 2024 - CRC - 1/13/23
Seats and Restraints 47
If the memory seat recalls to the wrong
position, remote key number 1 or 2 may not
match the memory button number positions
they were saved to. Try the other remote
key or try saving the positions to the other
1 or 2 memory button. See“Saving Seating
Positions” previously in this section.
Automatic Seat Entry Memory recalls are
only available for remote key numbers 1 and
2. Remote keys 3–8 will not provide Seat
Entry Memory recalls.
Auto Seat Exit Memory Recall
Seat Exit Memory will begin movement to
the seating position of the
B
button when:
.The vehicle is turned off and the driver
door is open or opened within a
short time.
.A seating position has been previously
been saved to the
Bmemory button.
See “Saving Seating Positions” previously
in this section.
.Seat Exit Memory is enabled. See
“Enabling Automatic Recalls” previously in
this section.
.The vehicle is in P (Park). Seat Exit Memory recall will continue if the
vehicle is shifted out of P (Park) prior to
reaching the saved memory position.
Seat Exit Memory is not linked to a remote
key. The seating position saved to
Bis
used for all drivers.
Cancel Memory Seating Recalls
.During any memory recall:
Press a power seat control
Press SET memory button
.During Manual memory recall:
Release 1, 2, or
Bmemory button
.During Auto Seat Entry Memory Recall:
Turn vehicle off
Press SET, 1, 2, or
Bmemory buttons
.During Auto Seat Exit Memory Recall:
Press SET, 1, 2, or
Bmemory buttons
Obstructions
If something has blocked the seat while
recalling a memory position, the recall may
stop. Remove the obstruction and try the
recall again. If the memory position still
does not recall, see your dealer.
Heated and Ventilated Front
Seats
{Warning
If temperature change or pain to the skin
cannot be felt, the seat heater may cause
burns. To reduce the risk of burns, use
care when using the seat heater,
especially for long periods of time. Do
not place anything on the seat that
insulates against heat, such as a blanket,
cushion, cover, or similar item. This may
cause the seat heater to overheat. An
overheated seat heater may cause a burn
or may damage the seat.
Page 72 of 429
Chevrolet Silverado EV Owner Manual (GMNA-Localizing-U.S./Canada-
16702912) - 2024 - CRC - 1/13/23
Seats and Restraints 71
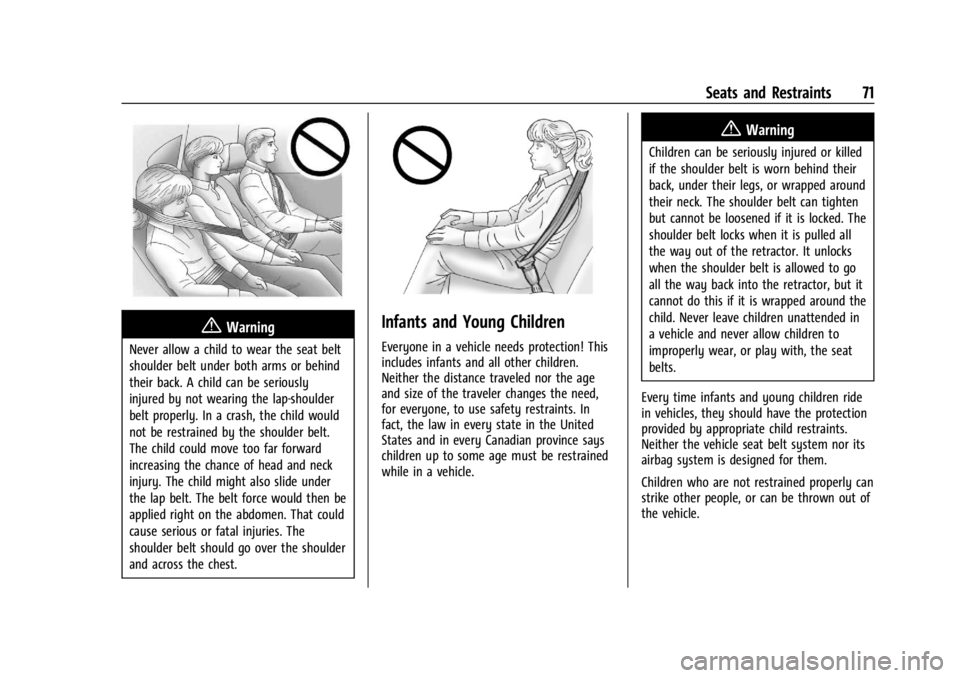
{Warning
Never allow a child to wear the seat belt
shoulder belt under both arms or behind
their back. A child can be seriously
injured by not wearing the lap-shoulder
belt properly. In a crash, the child would
not be restrained by the shoulder belt.
The child could move too far forward
increasing the chance of head and neck
injury. The child might also slide under
the lap belt. The belt force would then be
applied right on the abdomen. That could
cause serious or fatal injuries. The
shoulder belt should go over the shoulder
and across the chest.
Infants and Young Children
Everyone in a vehicle needs protection! This
includes infants and all other children.
Neither the distance traveled nor the age
and size of the traveler changes the need,
for everyone, to use safety restraints. In
fact, the law in every state in the United
States and in every Canadian province says
children up to some age must be restrained
while in a vehicle.
{Warning
Children can be seriously injured or killed
if the shoulder belt is worn behind their
back, under their legs, or wrapped around
their neck. The shoulder belt can tighten
but cannot be loosened if it is locked. The
shoulder belt locks when it is pulled all
the way out of the retractor. It unlocks
when the shoulder belt is allowed to go
all the way back into the retractor, but it
cannot do this if it is wrapped around the
child. Never leave children unattended in
a vehicle and never allow children to
improperly wear, or play with, the seat
belts.
Every time infants and young children ride
in vehicles, they should have the protection
provided by appropriate child restraints.
Neither the vehicle seat belt system nor its
airbag system is designed for them.
Children who are not restrained properly can
strike other people, or can be thrown out of
the vehicle.
Page 99 of 429
Chevrolet Silverado EV Owner Manual (GMNA-Localizing-U.S./Canada-
16702912) - 2024 - CRC - 1/13/23
98 Instruments and Controls
The heated steering wheel will turn on
when the auto heated seat is activated. The
heated steering wheel indicator will display
the state of the steering wheel heat.
SeeHeated and Ventilated Front Seats 047.
To turn this feature on or off, select
Settings > Vehicle > Comfort and
Convenience > Heated Steering Wheel >
Select ON or OFF.
Horn
To sound the horn, pressaon the
steering wheel.
Pedestrian Safety Signal
The vehicle is equipped with automatic
sound generation. The automatic sound is
generated to indicate the vehicle presence
to pedestrians. The sound changes if the
vehicle is speeding up or slowing down. It is
activated when the vehicle is shifted into a
forward gear, N (Neutral), or R (Reverse), up
to driving speeds of 34 km/h (21 mph).
Windshield Wiper/Washer
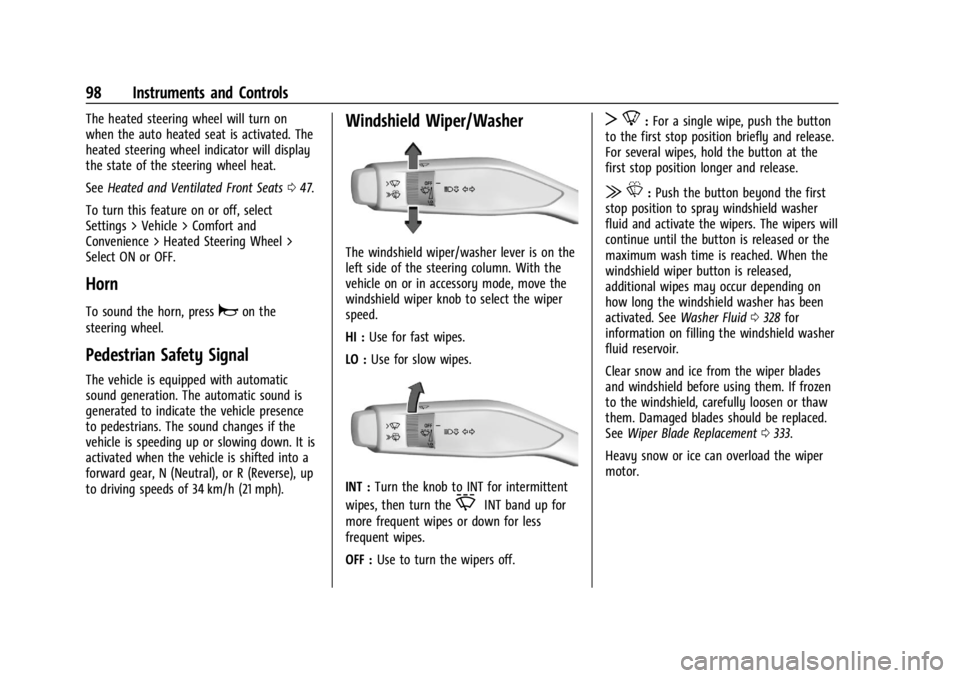
The windshield wiper/washer lever is on the
left side of the steering column. With the
vehicle on or in accessory mode, move the
windshield wiper knob to select the wiper
speed.
HI : Use for fast wipes.
LO : Use for slow wipes.
INT : Turn the knob to INT for intermittent
wipes, then turn the
OINT band up for
more frequent wipes or down for less
frequent wipes.
OFF : Use to turn the wipers off.
T8:For a single wipe, push the button
to the first stop position briefly and release.
For several wipes, hold the button at the
first stop position longer and release.
| L:Push the button beyond the first
stop position to spray windshield washer
fluid and activate the wipers. The wipers will
continue until the button is released or the
maximum wash time is reached. When the
windshield wiper button is released,
additional wipes may occur depending on
how long the windshield washer has been
activated. See Washer Fluid0328 for
information on filling the windshield washer
fluid reservoir.
Clear snow and ice from the wiper blades
and windshield before using them. If frozen
to the windshield, carefully loosen or thaw
them. Damaged blades should be replaced.
See Wiper Blade Replacement 0333.
Heavy snow or ice can overload the wiper
motor.
Page 122 of 429
Chevrolet Silverado EV Owner Manual (GMNA-Localizing-U.S./Canada-
16702912) - 2024 - CRC - 1/13/23
Instruments and Controls 121
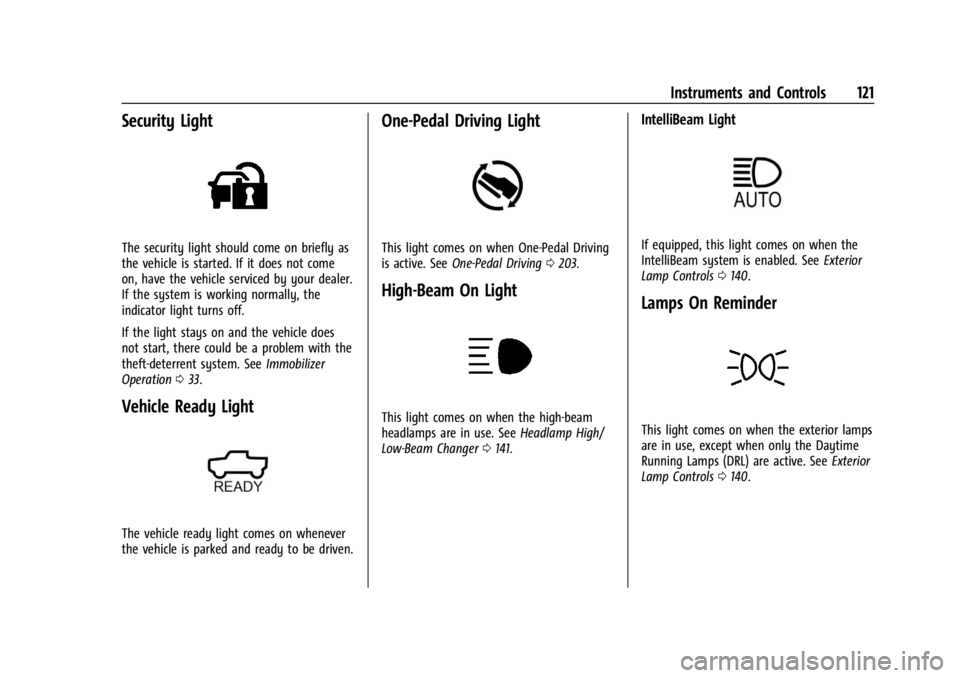
Security Light
The security light should come on briefly as
the vehicle is started. If it does not come
on, have the vehicle serviced by your dealer.
If the system is working normally, the
indicator light turns off.
If the light stays on and the vehicle does
not start, there could be a problem with the
theft-deterrent system. SeeImmobilizer
Operation 033.
Vehicle Ready Light
The vehicle ready light comes on whenever
the vehicle is parked and ready to be driven.
One-Pedal Driving Light
This light comes on when One-Pedal Driving
is active. See One-Pedal Driving 0203.
High-Beam On Light
This light comes on when the high-beam
headlamps are in use. See Headlamp High/
Low-Beam Changer 0141.
IntelliBeam Light
If equipped, this light comes on when the
IntelliBeam system is enabled. See Exterior
Lamp Controls 0140.
Lamps On Reminder
This light comes on when the exterior lamps
are in use, except when only the Daytime
Running Lamps (DRL) are active. See Exterior
Lamp Controls 0140.
Page 125 of 429
Chevrolet Silverado EV Owner Manual (GMNA-Localizing-U.S./Canada-
16702912) - 2024 - CRC - 1/13/23
124 Instruments and Controls
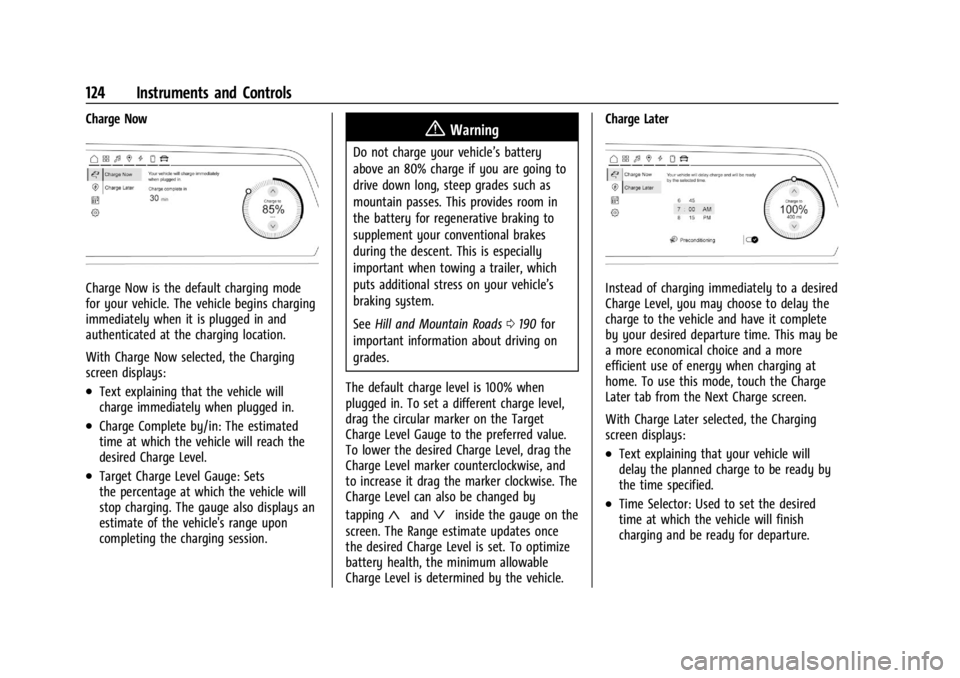
Charge Now
Charge Now is the default charging mode
for your vehicle. The vehicle begins charging
immediately when it is plugged in and
authenticated at the charging location.
With Charge Now selected, the Charging
screen displays:
.Text explaining that the vehicle will
charge immediately when plugged in.
.Charge Complete by/in: The estimated
time at which the vehicle will reach the
desired Charge Level.
.Target Charge Level Gauge: Sets
the percentage at which the vehicle will
stop charging. The gauge also displays an
estimate of the vehicle's range upon
completing the charging session.
{Warning
Do not charge your vehicle’s battery
above an 80% charge if you are going to
drive down long, steep grades such as
mountain passes. This provides room in
the battery for regenerative braking to
supplement your conventional brakes
during the descent. This is especially
important when towing a trailer, which
puts additional stress on your vehicle’s
braking system.
SeeHill and Mountain Roads 0190 for
important information about driving on
grades.
The default charge level is 100% when
plugged in. To set a different charge level,
drag the circular marker on the Target
Charge Level Gauge to the preferred value.
To lower the desired Charge Level, drag the
Charge Level marker counterclockwise, and
to increase it drag the marker clockwise. The
Charge Level can also be changed by
tapping
«andªinside the gauge on the
screen. The Range estimate updates once
the desired Charge Level is set. To optimize
battery health, the minimum allowable
Charge Level is determined by the vehicle. Charge Later
Instead of charging immediately to a desired
Charge Level, you may choose to delay the
charge to the vehicle and have it complete
by your desired departure time. This may be
a more economical choice and a more
efficient use of energy when charging at
home. To use this mode, touch the Charge
Later tab from the Next Charge screen.
With Charge Later selected, the Charging
screen displays:
.Text explaining that your vehicle will
delay the planned charge to be ready by
the time specified.
.Time Selector: Used to set the desired
time at which the vehicle will finish
charging and be ready for departure.
Page 126 of 429
Chevrolet Silverado EV Owner Manual (GMNA-Localizing-U.S./Canada-
16702912) - 2024 - CRC - 1/13/23
Instruments and Controls 125
.Target Charge Level Gauge: Sets
the percentage at which the vehicle will
stop charging. The gauge also displays an
estimate of the vehicle's range upon
completing the charging session.
.Preconditioning: Allows the vehicle to
heat or cool the cabin to your desired
temperature using energy from the
charger. This means energy from the
battery is not used to condition the cabin,
ensuring the vehicle gets the maximum
range from the charging session.
Preconditioning happens at the end of the
charge, and right before the
departure time.
To set the time at which the vehicle will
complete the charge and be ready for
departure:
Swipe up or down on each value within the
Time Selector until the preferred time is
selected. If the desired Charge Level cannot
be reached by the selected time, a message
will display that one of the two preferences
will need to be adjusted.
To adjust desired Charge Level in Charge
Later mode, see “Charge Now”earlier in this
section. Setting the Preconditioning preference:
Touch the switch to turn on Preconditioning.
Cabin Preconditioning temperature can be
adjusted by touching Preconditioning on this
screen, or in Settings.
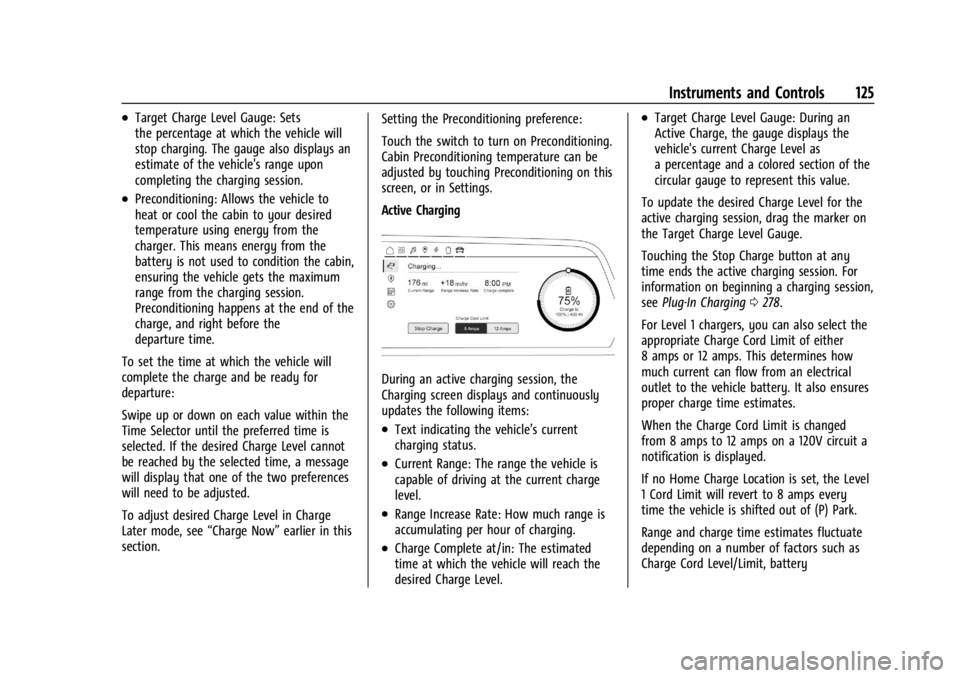
Active Charging
During an active charging session, the
Charging screen displays and continuously
updates the following items:
.Text indicating the vehicle’s current
charging status.
.Current Range: The range the vehicle is
capable of driving at the current charge
level.
.Range Increase Rate: How much range is
accumulating per hour of charging.
.Charge Complete at/in: The estimated
time at which the vehicle will reach the
desired Charge Level.
.Target Charge Level Gauge: During an
Active Charge, the gauge displays the
vehicle's current Charge Level as
a percentage and a colored section of the
circular gauge to represent this value.
To update the desired Charge Level for the
active charging session, drag the marker on
the Target Charge Level Gauge.
Touching the Stop Charge button at any
time ends the active charging session. For
information on beginning a charging session,
see Plug-In Charging 0278.
For Level 1 chargers, you can also select the
appropriate Charge Cord Limit of either
8 amps or 12 amps. This determines how
much current can flow from an electrical
outlet to the vehicle battery. It also ensures
proper charge time estimates.
When the Charge Cord Limit is changed
from 8 amps to 12 amps on a 120V circuit a
notification is displayed.
If no Home Charge Location is set, the Level
1 Cord Limit will revert to 8 amps every
time the vehicle is shifted out of (P) Park.
Range and charge time estimates fluctuate
depending on a number of factors such as
Charge Cord Level/Limit, battery