Page 59 of 560
591-2. Child safety
1
For safety and security
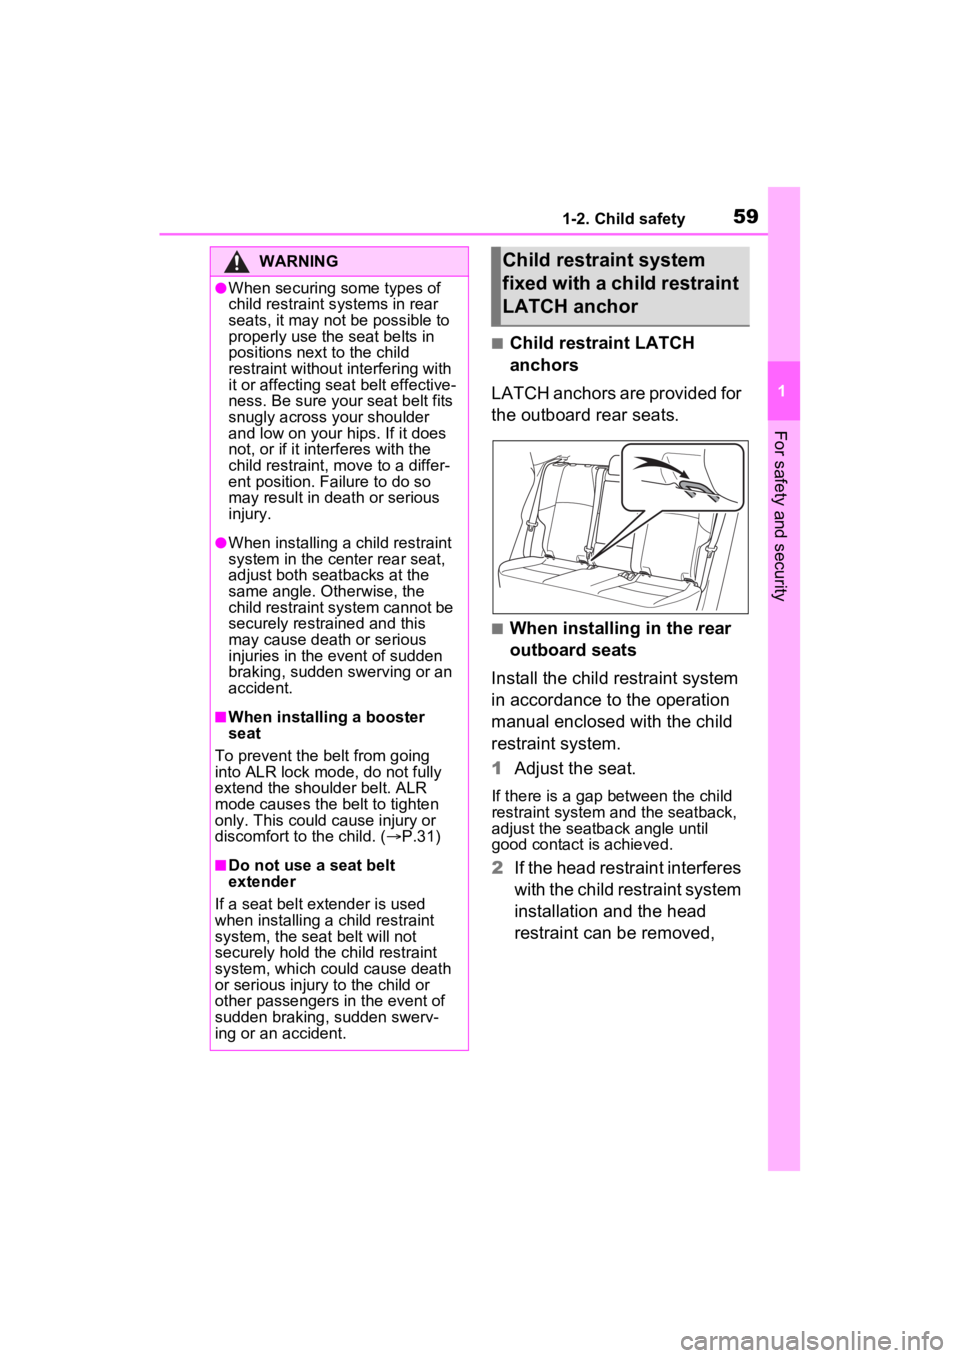
■Child restraint LATCH
anchors
LATCH anchors are provided for
the outboard rear seats.
■When installing in the rear
outboard seats
Install the child restraint system
in accordance to the operation
manual enclosed with the child
restraint system.
1 Adjust the seat.
If there is a gap between the child
restraint system and the seatback,
adjust the seatback angle until
good contact is achieved.
2If the head restraint interferes
with the child restraint system
installation and the head
restraint can be removed,
WARNING
●When securing some types of
child restraint s ystems in rear
seats, it may not be possible to
properly use the seat belts in
positions next to the child
restraint without interfering with
it or affecting seat belt effective-
ness. Be sure your seat belt fits
snugly across your shoulder
and low on your hips. If it does
not, or if it interferes with the
child restraint, move to a differ-
ent position. Failure to do so
may result in death or serious
injury.
●When installing a child restraint
system in the center rear seat,
adjust both seatbacks at the
same angle. Otherwise, the
child restraint system cannot be
securely restrained and this
may cause death or serious
injuries in the event of sudden
braking, sudden swerving or an
accident.
■When installing a booster
seat
To prevent the b elt from going
into ALR lock mode, do not fully
extend the shoulder belt. ALR
mode causes the belt to tighten
only. This could cause injury or
discomfort to the child. ( P.31)
■Do not use a seat belt
extender
If a seat belt extender is used
when installing a child restraint
system, the seat belt will not
securely hold the child restraint
system, which could cause death
or serious injury to the child or
other passengers in the event of
sudden braking, sudden swerv-
ing or an accident.
Child restraint system
fixed with a child restraint
LATCH anchor
Page 78 of 560
781-4. Hybrid system
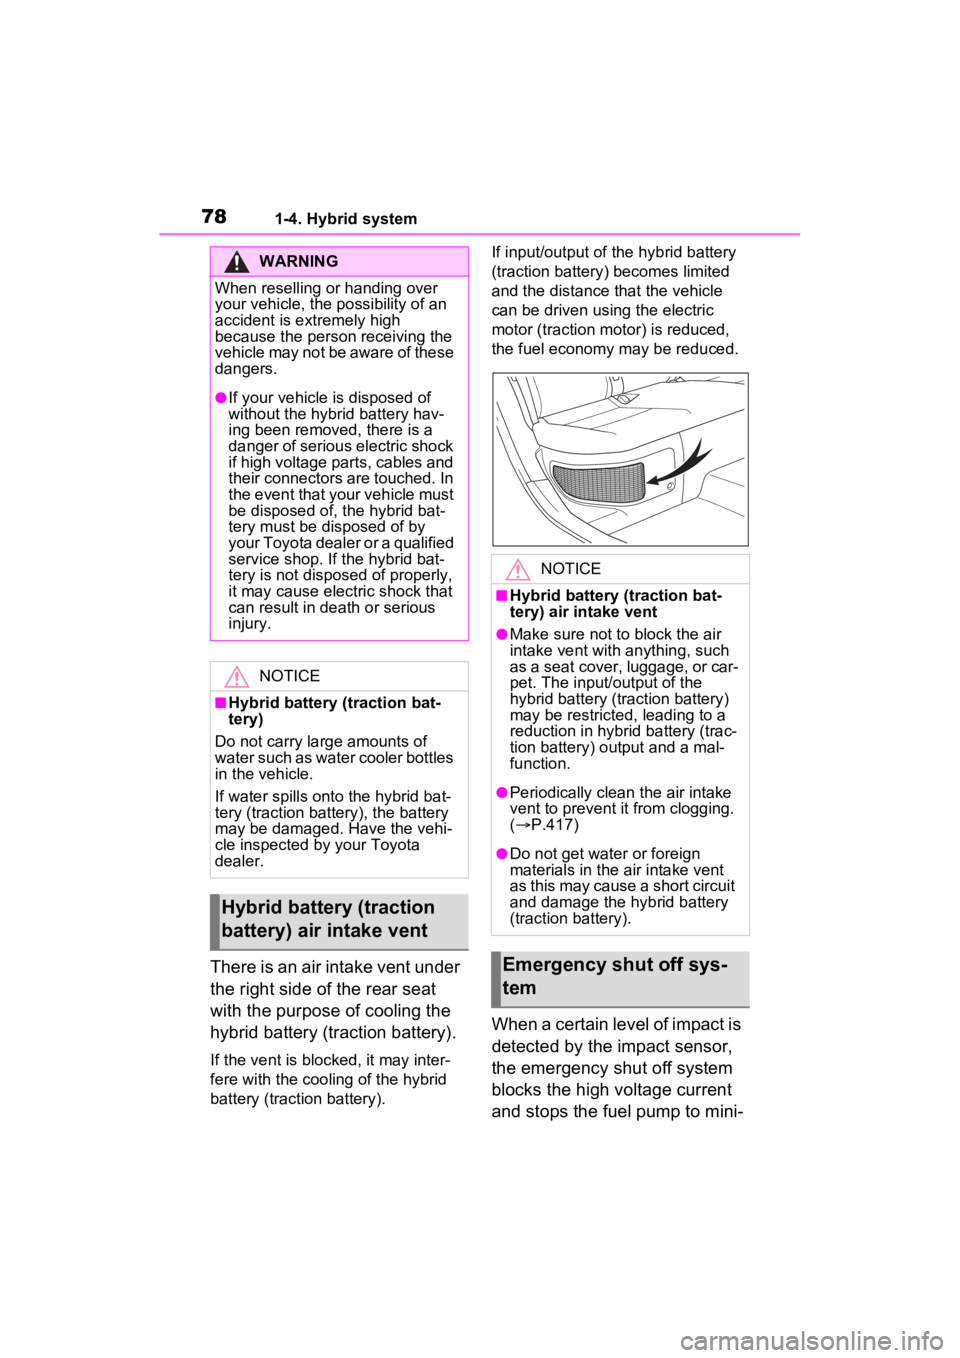
There is an air intake vent under
the right side of the rear seat
with the purpose of cooling the
hybrid battery (traction battery).
If the vent is blocked, it may inter-
fere with the cooling of the hybrid
battery (traction battery).If input/output of t
he hybrid battery
(traction battery) becomes limited
and the distance that the vehicle
can be driven using the electric
motor (traction motor) is reduced,
the fuel economy may be reduced.
When a certain level of impact is
detected by the impact sensor,
the emergency shut off system
blocks the high voltage current
and stops the fuel pump to mini-
WARNING
When reselling or handing over
your vehicle, the possibility of an
accident is extremely high
because the person receiving the
vehicle may not be aware of these
dangers.
●If your vehicle is disposed of
without the hybrid battery hav-
ing been removed, there is a
danger of serious electric shock
if high voltage parts, cables and
their connectors are touched. In
the event that your vehicle must
be disposed of, the hybrid bat-
tery must be disposed of by
your Toyota dealer or a qualified
service shop. If the hybrid bat-
tery is not dispos ed of properly,
it may cause electric shock that
can result in death or serious
injury.
NOTICE
■Hybrid battery (traction bat-
tery)
Do not carry large amounts of
water such as water cooler bottles
in the vehicle.
If water spills onto the hybrid bat-
tery (traction battery), the battery
may be damaged. Have the vehi-
cle inspected by your Toyota
dealer.
Hybrid battery (traction
battery) air intake vent
NOTICE
■Hybrid battery (traction bat-
tery) air intake vent
●Make sure not to block the air
intake vent with anything, such
as a seat cover, luggage, or car-
pet. The input/output of the
hybrid battery (traction battery)
may be restricted, leading to a
reduction in hybrid battery (trac-
tion battery) output and a mal-
function.
●Periodically clean the air intake
vent to prevent it from clogging.
( P.417)
●Do not get water or foreign
materials in the air intake vent
as this may cause a short circuit
and damage the hybrid battery
(traction battery).
Emergency shut off sys-
tem
Page 81 of 560
811-5. Theft deterrent system
1
For safety and security
■Items to check before lock-
ing the vehicle
To prevent unexpected trigger-
ing of the alarm and vehicle
theft, make sure of the following:
Nobody is in the vehicle.
The side windows are closed
before the alarm is set.
No valuables or other per-
sonal items are left in the
vehicle.
■Setting
Close the doors, hood, and lock
all the doors. The system will be
set automatically after 30 sec-
onds.
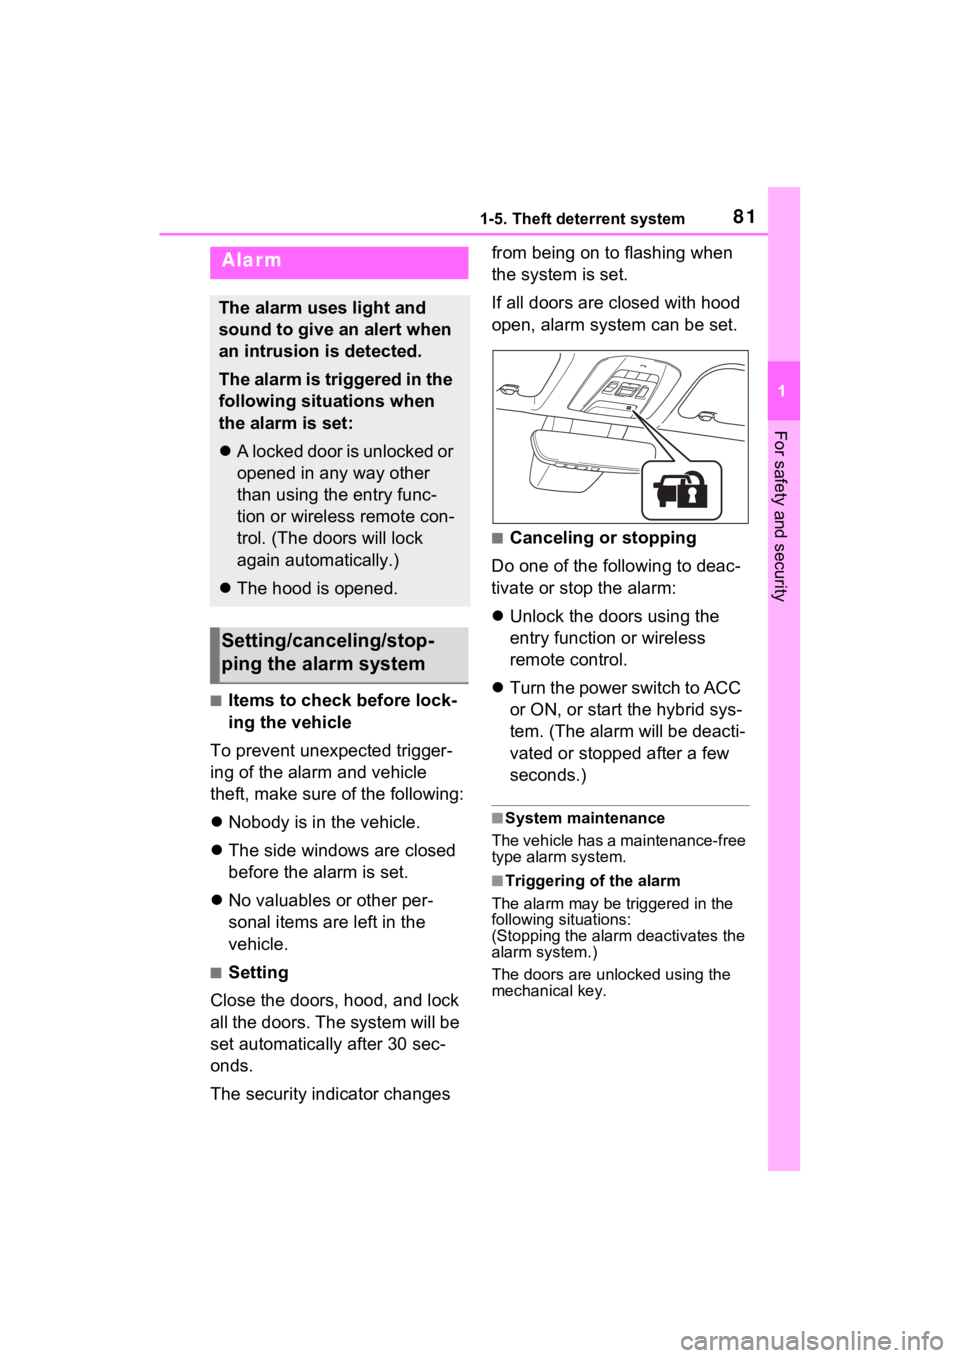
The security indicator changes from being on to flashing when
the system is set.
If all doors are closed with hood
open, alarm system can be set.
■Canceling or stopping
Do one of the following to deac-
tivate or stop the alarm:
Unlock the doors using the
entry function or wireless
remote control.
Turn the power switch to ACC
or ON, or start the hybrid sys-
tem. (The alarm will be deacti-
vated or stopped after a few
seconds.)
■System maintenance
The vehicle has a maintenance-free
type alarm system.
■Triggering of the alarm
The alarm may be triggered in the
following situations:
(Stopping the alarm deactivates the
alarm system.)
The doors are unlocked using the
mechanical key.
Alarm
The alarm uses light and
sound to give an alert when
an intrusion is detected.
The alarm is triggered in the
following situations when
the alarm is set:
A locked door is unlocked or
opened in any way other
than using the entry func-
tion or wireless remote con-
trol. (The doors will lock
again automatically.)
The hood is opened.
Setting/canceling/stop-
ping the alarm system
Page 82 of 560
821-5. Theft deterrent system
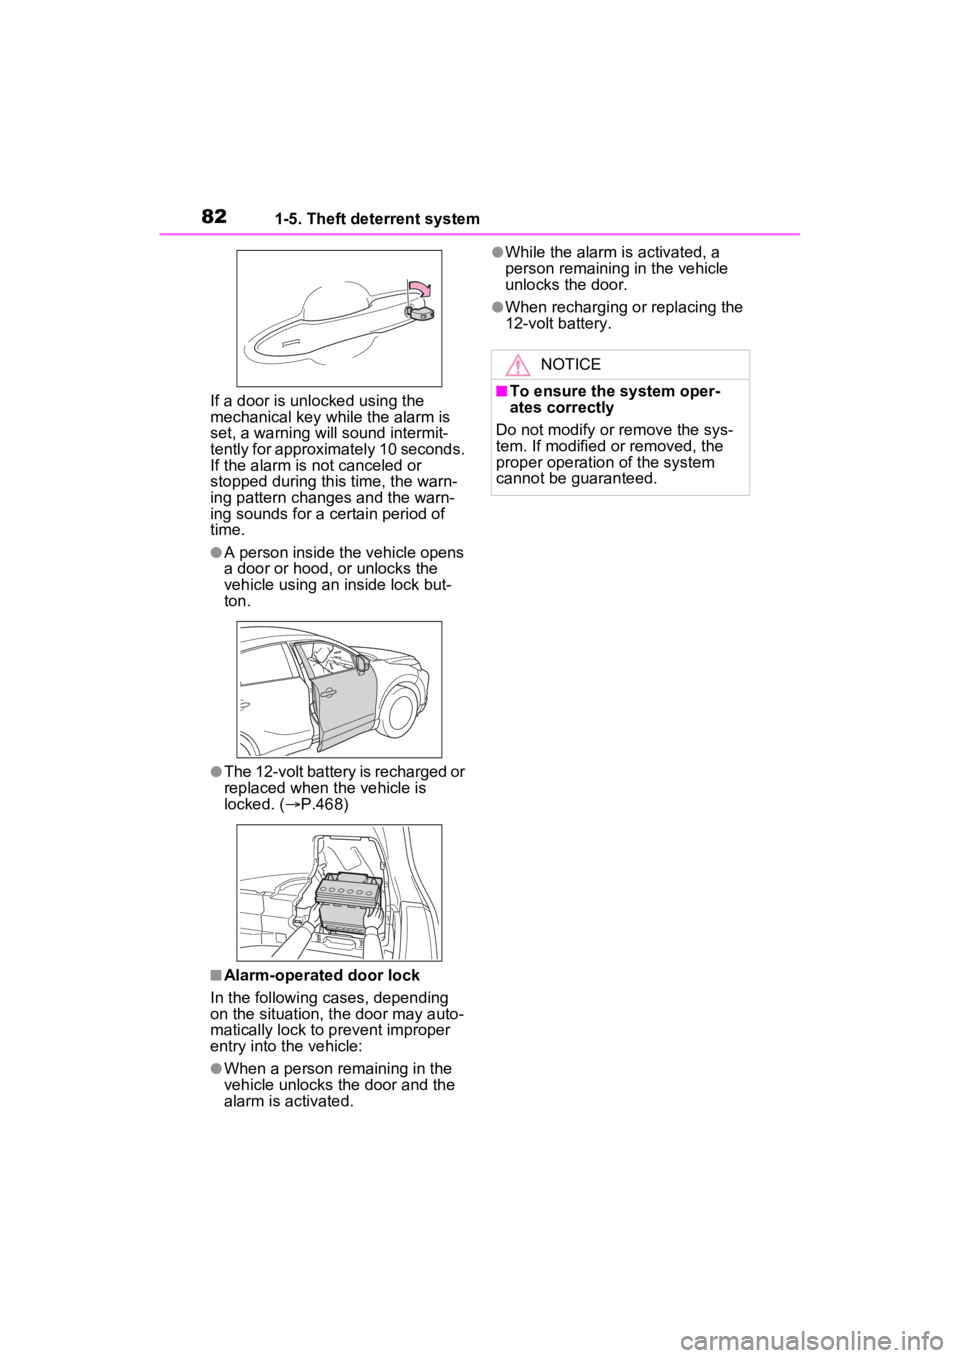
If a door is unlocked using the
mechanical key while the alarm is
set, a warning will sound intermit-
tently for approximately 10 seconds.
If the alarm is not canceled or
stopped during this time, the warn-
ing pattern change s and the warn-
ing sounds for a certain period of
time.
●A person inside the vehicle opens
a door or hood, or unlocks the
vehicle using an inside lock but-
ton.
●The 12-volt battery is recharged or
replaced when the vehicle is
locked. ( P.468)
■Alarm-operated door lock
In the following cases, depending
on the situation, th e door may auto-
matically lock to p revent improper
entry into the vehicle:
●When a person remaining in the
vehicle unlocks the door and the
alarm is activated.
●While the alarm i s activated, a
person remaining in the vehicle
unlocks the door.
●When recharging or replacing the
12-volt battery.
NOTICE
■To ensure the system oper-
ates correctly
Do not modify or remove the sys-
tem. If modified or removed, the
proper operation of the system
cannot be guaranteed.
Page 90 of 560
902-1. Instrument cluster
The units used on the meter and display may differ depending on the target
region.
Hybrid System Indicator
Displays hybrid system output or regeneration level ( P.91)
Multi-information display
Presents the driver with a variety of driving-related data ( P.111)
Displays warning messages if a malfunction occurs (P.451)
Clock
The GPS clock’s time is automatically adjus ted by utilizing GPS time infor-
mation.
For details, refer to the “MULTIMEDIA OWNER’S MANUAL”.
Speedometer
Displays the vehicle speed
Fuel gauge
Displays the quantity of fu el remaining in the tank
Odometer, trip meter and oil maintenance
Odometer:
Displays the total distance th at the vehicle has been driven
Gauges and meters (Vehicles with 7-inch multi-
information display)
The meters display various drive information.
Meter display
A
B
C
D
E
F
Page 95 of 560

952-1. Instrument cluster
2
Vehicle status information and indicators
Displays the selected shift position or selected shift range (P.208)
Clock
The GPS clock’s time is automatically adjus ted by utilizing GPS time infor-
mation.
Widget (Audio system-linked display) (if equipped)
Displays the selected audio s ource or track on the meter. ( P.116)
While list of items for content display area ( P.113) is displayed, widget
will not be displayed.
Distance to empty
Displays the driving rang e with remaining fuel (P.97)
Fuel gauge
Displays the quantity of fu el remaining in the tank
In the following sit uations, the actual quantity of fuel remain ing in the tank
may not be displayed correctly. Refer to P.98 if the actual quantity of fuel
remaining in the tank is not displayed correctly.
• A small amount of fuel is added.
• Fuel is added with the fuel gauge near or at “F”.
• The vehicle is stopp ed on an uneven surface, such as a slope.
• The vehicle is driven on a slope or around a curve.
Widget (Fuel economy)
Displays the engine coolant temperature ( P.116)
While list of items for content display area ( P.113) is displayed, widget
will not be displayed.
Engine coolant temperature gauge
Displays the engine c oolant temperature
Odometer and trip meter display ( P.98)
F
G
H
I
J
K
L
Page 96 of 560
962-1. Instrument cluster
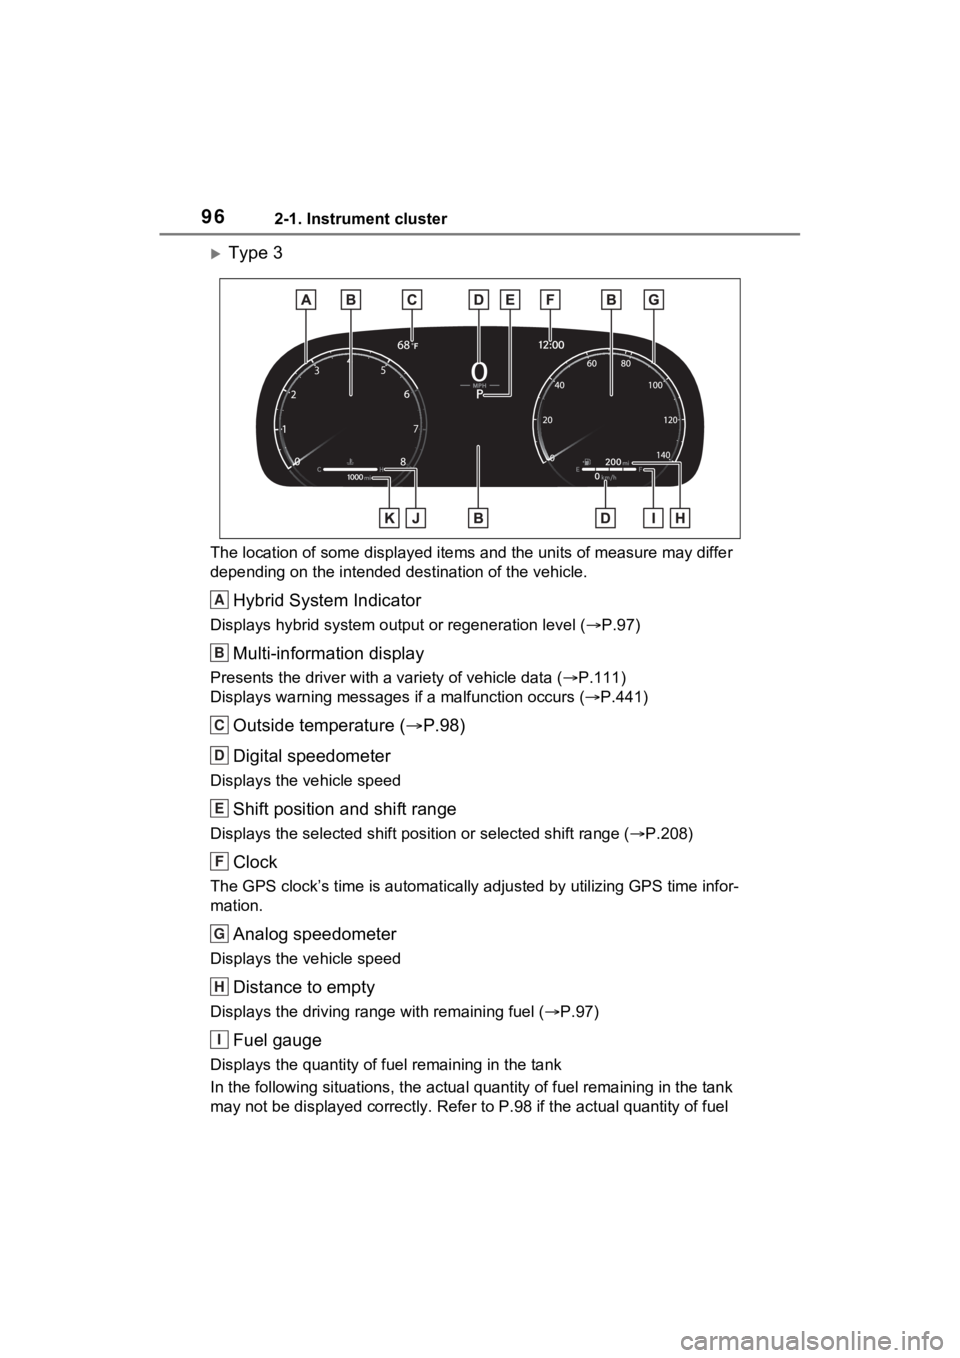
Type 3
The location of some displayed items and the units of measure may differ
depending on the intended des tination of the vehicle.
Hybrid System Indicator
Displays hybrid system output or regeneration level ( P.97)
Multi-information display
Presents the driver with a variety of vehicle data (P.111)
Displays warning messages if a malfunction occurs (P.441)
Outside temperature ( P.98)
Digital speedometer
Displays the vehicle speed
Shift position and shift range
Displays the selected shift posit ion or selected shift range (P.208)
Clock
The GPS clock’s time is automatically adjus ted by utilizing GPS time infor-
mation.
Analog speedometer
Displays the vehicle speed
Distance to empty
Displays the driving rang e with remaining fuel (P.97)
Fuel gauge
Displays the quantity of fu el remaining in the tank
In the following sit uations, the actual quantity of fuel remain ing in the tank
may not be displayed correctly. Refer to P.98 if the actual quantity of fuel
A
B
C
D
E
F
G
H
I
Page 133 of 560
133
3
3
Before driving
Before driving
3-1. Key informationKeys ............................ 134
3-2. Opening, closing and locking the doors
Side doors ................... 137
Back door .................... 142
Smart key system ....... 154
3-3. Adjusting the seats Front seats .................. 159
Rear seats................... 160
Driving position memory .................................. 162
Head restraints............ 166
3-4. Adjusting the steering wheel and mirrors
Steering wheel ............ 168
Inside rear view mirror 169
Digital Rear-view Mirror .................................. 170
Outside rear view mirrors .................................. 181
3-5. Opening, closing the win- dows
Power windows ........... 183