2023 TOYOTA VENZA HYBRID maintenance reset
[x] Cancel search: maintenance resetPage 91 of 560
912-1. Instrument cluster
2
Vehicle status information and indicators
Trip meter:
Displays the distance the vehicle has been driven since the meter was last
reset. Trip meters “A” and “B” c an be used to record and display different
distances independently.
Oil maintenance:
Displays the distance until the next engine oil change.
Shift position and shift range indicator
Displays the selected shift posit ion or selected shift range (P.208)
Outside temperature ( P.91)
Engine coolant temperature gauge
Displays the engine c oolant temperature
■The meters and display illumi-
nate when
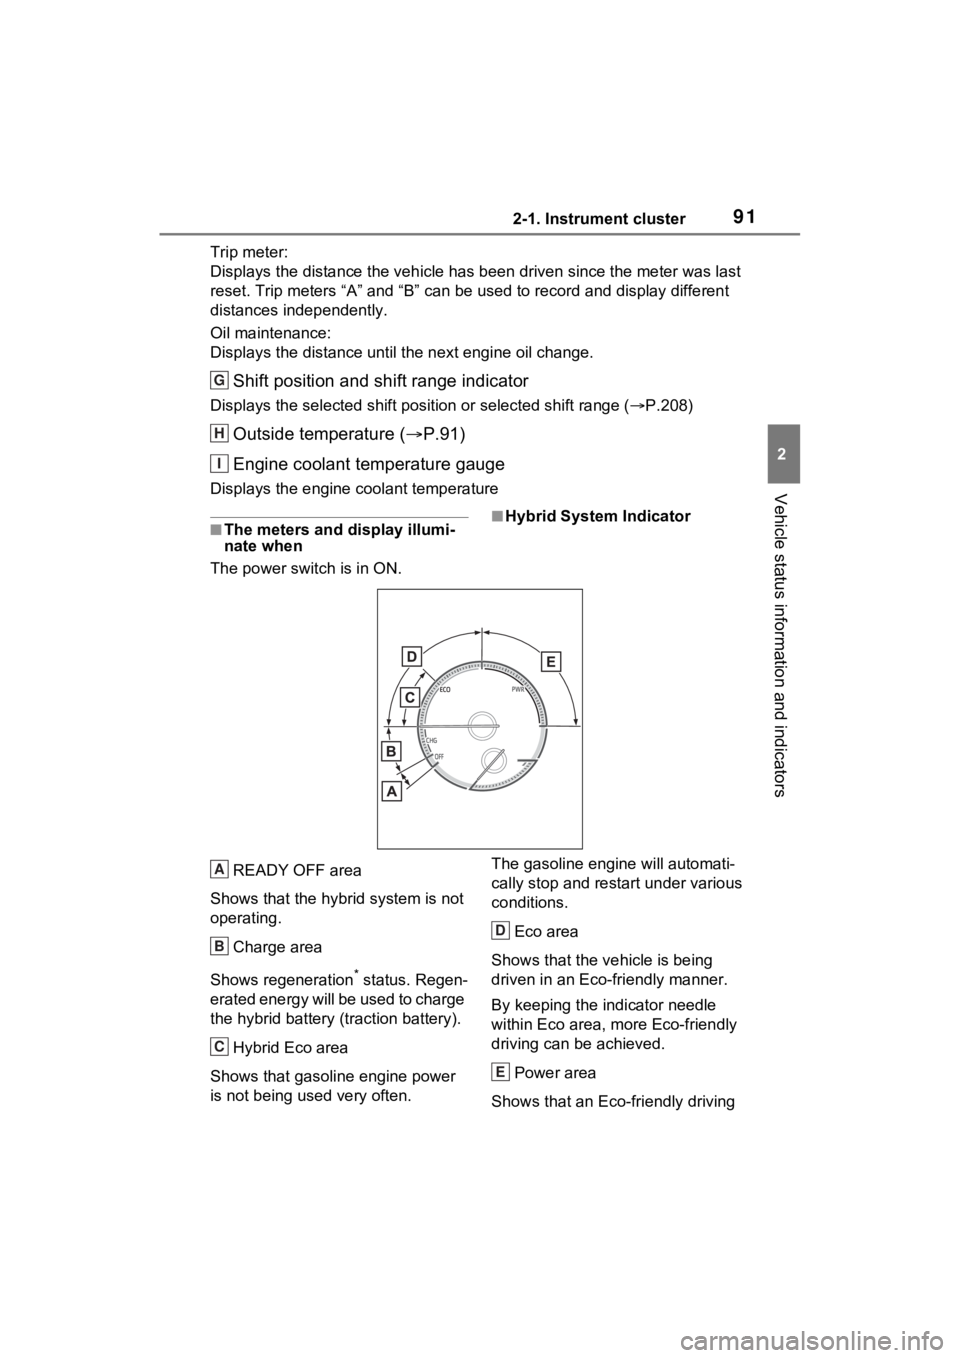
The power swit ch is in ON.■Hybrid System Indicator
READY OFF area
Shows that the hybrid system is not
operating.
Charge area
Shows regeneration
* status. Regen-
erated energy will be used to charge
the hybrid battery (traction battery).
Hybrid Eco area
Shows that gasoline engine power
is not being used very often. The gasoline engi
ne will automati-
cally stop and restart under various
conditions.
Eco area
Shows that the vehicle is being
driven in an Eco-friendly manner.
By keeping the indicator needle
within Eco area, more Eco-friendly
driving can be achieved.
Power area
Shows that an Eco-friendly driving
G
H
I
A
B
C
D
E
Page 93 of 560
932-1. Instrument cluster
2
Vehicle status information and indicators
When the trip meter is displayed,
pressing and holding the switch will
reset the trip meter.
Distance until next engine oil
change
Displays the distan ce the vehicle
can be driven until an oil change is
necessary.
■Changing the display
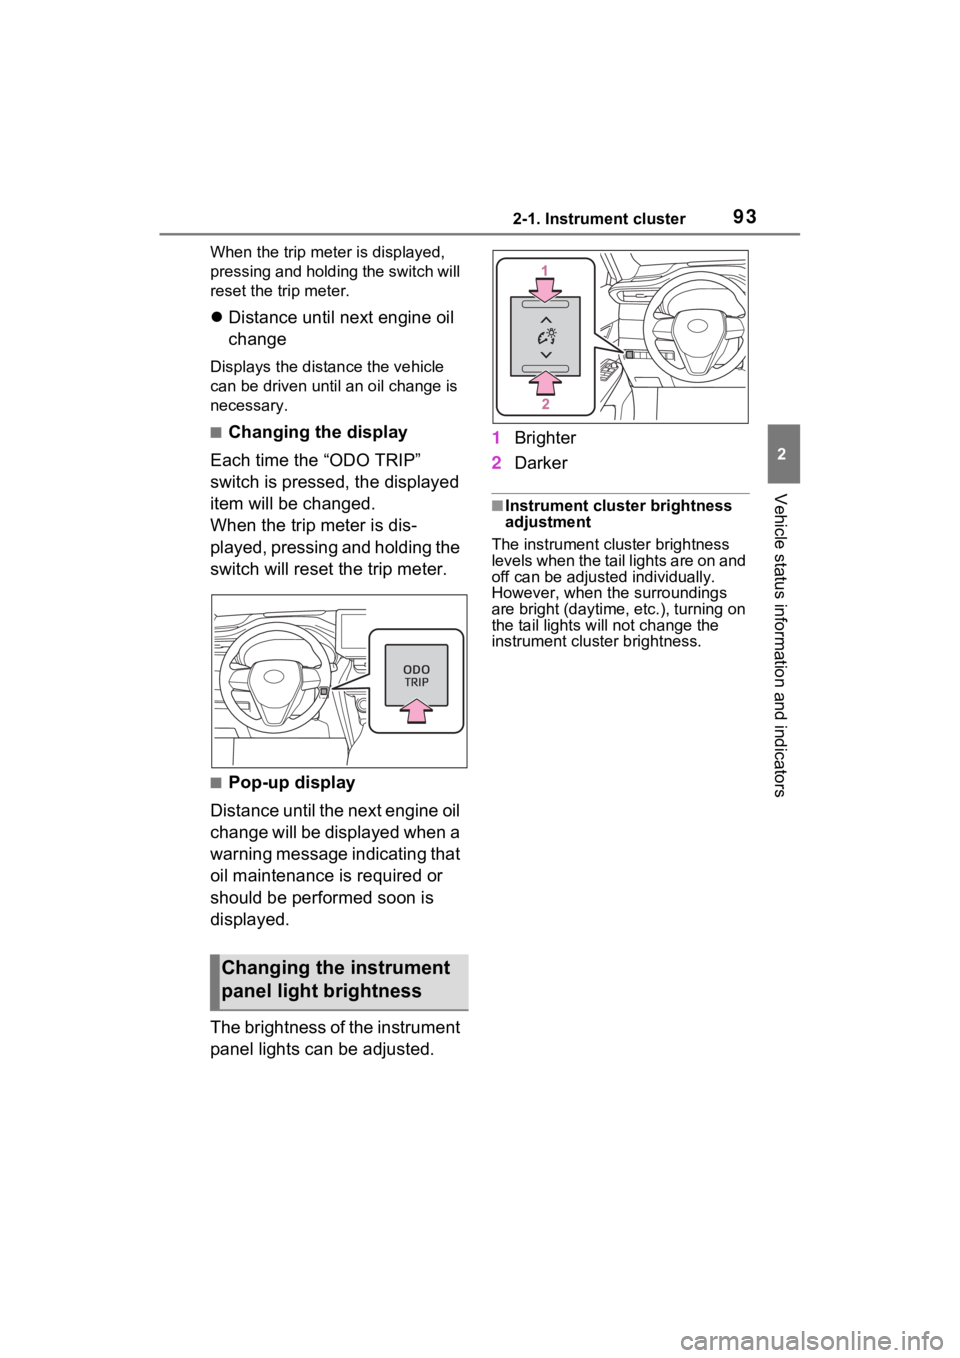
Each time the “ODO TRIP”
switch is pressed, the displayed
item will be changed.
When the trip meter is dis-
played, pressing and holding the
switch will reset the trip meter.
■Pop-up display
Distance until the next engine oil
change will be displayed when a
warning message indicating that
oil maintenance is required or
should be performed soon is
displayed.
The brightness of the instrument
panel lights can be adjusted. 1
Brighter
2 Darker
■Instrument cluster brightness
adjustment
The instrument cluster brightness
levels when the tail lights are on and
off can be adjusted individually.
However, when the surroundings
are bright (daytime, etc.), turning on
the tail lights will not change the
instrument cluster brightness.
Changing the instrument
panel light brightness
Page 99 of 560
992-1. Instrument cluster
2
Vehicle status information and indicators
■Display items
Odometer
Displays the total distance the vehi-
cle has been driven.
Trip meter A/trip meter B
Displays the distan ce the vehicle
has been driven si nce the meter
was last reset. Trip meters A and B
can be used to record and display
different distances independently.
When the trip meter is displayed,
pressing and holding the switch will
reset the trip meter.
Distance until next engine oil
change
Displays the distan ce the vehicle
can be driven until an oil change is
necessary.
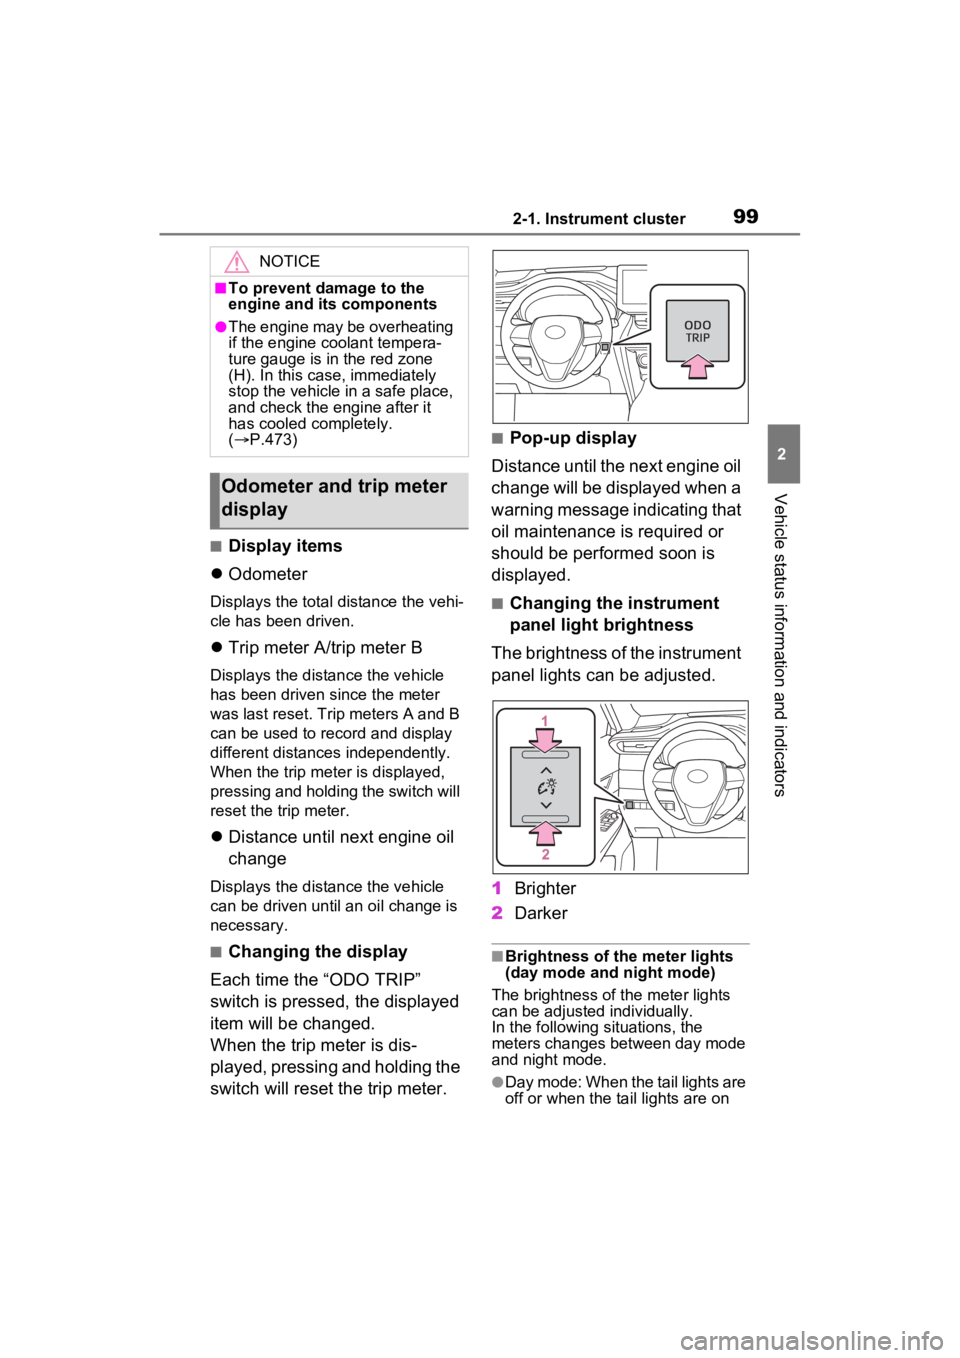
■Changing the display
Each time the “ODO TRIP”
switch is pressed, the displayed
item will be changed.
When the trip meter is dis-
played, pressing and holding the
switch will reset the trip meter.
■Pop-up display
Distance until the next engine oil
change will be displayed when a
warning message indicating that
oil maintenance is required or
should be performed soon is
displayed.
■Changing the instrument
panel light brightness
The brightness of the instrument
panel lights can be adjusted.
1 Brighter
2 Darker
■Brightness of the meter lights
(day mode and night mode)
The brightness of the meter lights
can be adjusted individually.
In the following si tuations, the
meters changes between day mode
and night mode.
●Day mode: When the tail lights are
off or when the ta il lights are on
NOTICE
■To prevent damage to the
engine and its components
●The engine may be overheating
if the engine coolant tempera-
ture gauge is in the red zone
(H). In this case, immediately
stop the vehicle in a safe place,
and check the engine after it
has cooled completely.
( P.473)
Odometer and trip meter
display
Page 108 of 560

1082-1. Instrument cluster
Road Sign Assist on/off
Select to enable/disable the RSA
(Road Sign Assist).
“Notification method”
Select to change e ach notification
method used to notify the driver
when the system recognizes
excess speed and Do Not Enter
sign.
“Notification Level”
Select to change e ach notification
level used to notify the driver when
the system recognizes a speed limit
sign.
■ DRCC
Select to change the curve
speed reduction function setting.
■ Vehicle Settings
PBD (Power Back Door)
( P.143)
Select to set up the following items.
• System settings
Select to enable/disable the power
back door system.
• “Hands Free” (if equipped)
Select to enable/disable the Hands
Free Power Back Door operation.
• “Opening Adjustment”
Select the open position when
power back door is fully open.
•“Volume”
Select to set the volume of the
buzzer which sounds when the
power back door system operates.
“TPWS setting” (Tire Pres-
sure Warning System) (
P.402)
• “Setting Pressure”
Select to initialize the tire pressure
warning system.
• “Identify Wheel”
Select to change the tire pressure
warning system sen sor ID code set.
To enable this function, a second
set of tire pressure warning system
sensor ID codes must be registered
by a Toyota dealer. For information
regarding changing the registered
ID code set, contact your Toyota
dealer.
• “Setting Unit”
Select to change the units of mea-
sure displayed.
Rear Seat Reminder
( P.139)
Select to enable/disable the rear
seat reminder function.
“Scheduled Maintenance”
( P.380)
Select to reset the scheduled main-
tenance information (message indi-
cating maintenance is required and
distance until the next mainte-
nance) after all ma intenance is per-
formed.
Oil Maintenance
Select to reset the Oil maintenance.
( P.392)
■ Settings
“Language”
Select to change the language on
the multi-information display.
“Units”
Select to change the units of mea-
Page 120 of 560

1202-1. Instrument cluster
Select to initialize the tire pres-
sure warning system.
• “Identifying Each Wheel & Posi- tion”
Select to change the tire pressure
warning system sensor ID code
set. To enable this function, a
second set of tire pressure warn-
ing system sensor ID codes must
be registered by a Toyota dealer.
For information regarding chang-
ing the registered ID code set,
contact your Toyota dealer.
• “Pressure unit setting” Select to change the units of
measure displayed.
“Scheduled Maintenance”
( P.380)
Select to reset the scheduled
maintenance information
(message indicating mainte-
nance is required and dis-
tance until the next
maintenance) after all mainte-
nance is performed.
Oil Maintenance
Select to reset the Oil mainte-
nance. ( P.392)
Rear Seat Reminder
( P.139)
Select to enable/disable the
rear seat reminder function.
■ Settings
“Language”
Select to change the lan-
guage on the multi-informa-
tion display.
“Units”
Select to change the unit of measure for fuel consump-
tion.
Meter Type
Select to change the meter
type setting.
Meter Style
Select to change the meter
style.
Dial Type
Select to change dial type.
( P.94)
EV indicator
Select to enable/disable the
EV indicator.
Fuel Economy
Select to change the display
on Fuel Economy. ( P.114)
Hybrid System
Select to enable/disable refer-
ence operation range.
Drive Info
Select to change displayed
items on drive information dis-
play. ( P.116)
Pop-Up Display
Select to enable/disable the
pop-up displays, which may
appear in some situations.
Default Settings
Select to reset the meter dis-
play settings.
■Suspension of the settings dis-
play
●Some settings cannot be changed
while driving. When changing set-
tings, park the vehicle in a safe
place.
Page 380 of 560
3806-2. Maintenance
■Resetting the message indicat-
ing maintenance is required
After the required maintenance is
performed according to the mainte-
nance schedule, please reset the
reminder light or message.
To reset the reminder light or mes-
sage, follow the procedure
described below:
Vehicles with 7-inch multi-informa-
tion display
1 Press or of the meter
control switches on the steering
wheel and select .
2 Press or of the meter
control switches and select
“ Vehicle Settings”.
Then press and hold .
3 Press or of the meter
control switches and select
“Scheduled Maintenance”, and
then press .
4 Select “Yes” and press .
A message will be displayed when
the reset proced ure has been com-
pleted.
Vehicles with 12.3-inch multi-infor-
mation display
1 Press and hold to display the
cursor on the content display
area (center) of the multi-infor-
mation display.
2 Press or of the meter
control switches to select and
then press .
3 Press or of the meter
control switches and select .
Then press . 4
Press or of the meter
control switch es and select
“Scheduled Maintenance”. Then
press .
5 Select “Yes” and press .
A message will be d isplayed when
the reset procedure has been com-
pleted.
You can perform some mainte-
nance procedures by yourself.
Please be aware that do-it-your-
self maintenance may affect
warranty coverage.
The use of Toyota Repair Manuals
is recommended.
For details about warranty cover-
age, refer to the separate “Owner’s
Warranty Informat ion Booklet” or
“Owner’s Manual Supplement”.
Do-it-yourself mainte-
nance
Page 392 of 560
3926-3. Do-it-yourself maintenance
■Engine oil consumption
A certain amount of engine oil will
be consumed while driving. In the
following situatio ns, oil consump-
tion may increase, and engine oil
may need to be ref illed in between
oil maintenance intervals.
●When the engine is new, for
example directly after purchasing
the vehicle or after replacing the
engine
●If low quality oil or oil of an inap-
propriate viscosity is used
●When driving at high engine
speeds or with a heavy load, or
when driving while accelerating or
decelerating frequently
●When leaving the engine idling for
a long time, or wh en driving fre-
quently through heavy traffic
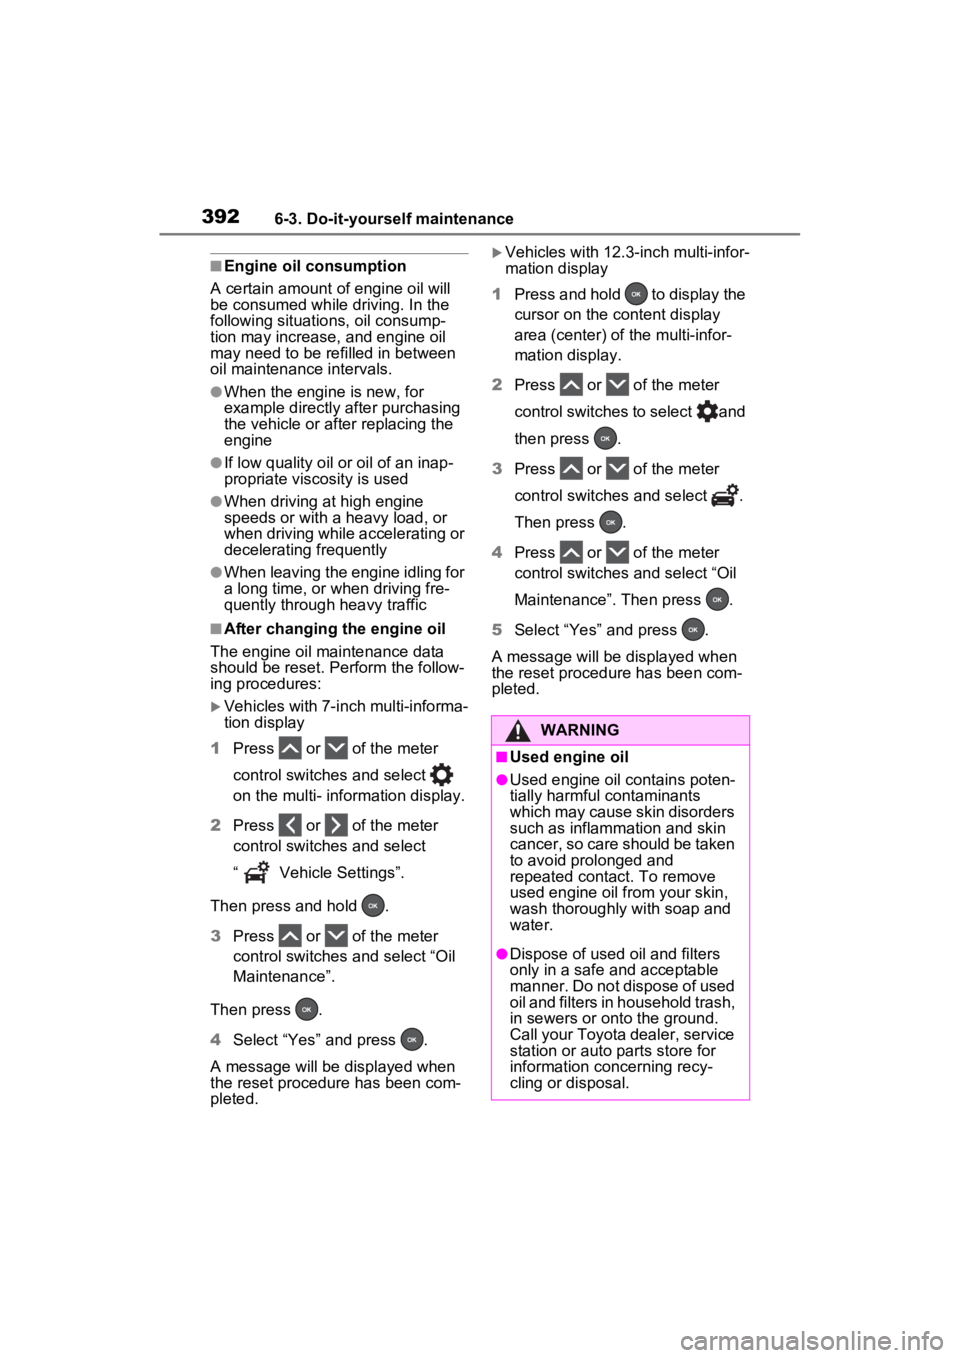
■After changing the engine oil
The engine oil maintenance data
should be reset. Perform the follow-
ing procedures:
Vehicles with 7-inch multi-informa-
tion display
1 Press or of the meter
control switches and select
on the multi- information display.
2 Press or of the meter
control switches and select
“ Vehicle Settings”.
Then press and hold .
3 Press or of the meter
control switches and select “Oil
Maintenance”.
Then press .
4 Select “Yes” and press .
A message will be displayed when
the reset proced ure has been com-
pleted.
Vehicles with 12.3-inch multi-infor-
mation display
1 Press and hold to display the
cursor on the content display
area (center) of the multi-infor-
mation display.
2 Press or of the meter
control switches to select and
then press .
3 Press or of the meter
control switches and select .
Then press .
4 Press or of the meter
control switches and select “Oil
Maintenance”. Then press .
5 Select “Yes” and press .
A message will be displayed when
the reset procedure has been com-
pleted.
WARNING
■Used engine oil
●Used engine oil contains poten-
tially harmful contaminants
which may cause skin disorders
such as inflammation and skin
cancer, so care should be taken
to avoid prolonged and
repeated contact. To remove
used engine oil from your skin,
wash thoroughly with soap and
water.
●Dispose of used oil and filters
only in a safe and acceptable
manner. Do not dispose of used
oil and filters in h ousehold trash,
in sewers or onto the ground.
Call your Toyota dealer, service
station or auto parts store for
information concerning recy-
cling or disposal.
Page 408 of 560

4086-3. Do-it-yourself maintenance
■When initializing
●Initialization is performed while
driving at a vehicle speed of
approximately 25 mph (40 km/h)
or more.
●Make sure to carry out initializa-
tion after adjusting the tire inflation
pressure. Also, make sure the
tires are cold before carrying out
initialization or tir e inflation pres-
sure adjustment.
●The tire pressure warning system
can be initialized by yourself, but
depending on the driving condi-
tions and driving environment, ini-
tialization may take some time to
complete.
■The initialization operation
●If you have accidentally turned the
power switch to OFF during initial-
ization, it is not necessary to
restart the initia lization again as
initialization will restart automati-
cally when the power switch has
been turned to ON for the next
time.
●If you accidentally perform initial-
ization when initi alization is not
necessary, adjust the tire inflation
pressure to the specified level
when the tires are cold, and con-
duct initialization again.
●While the position of each tire is
being determined and the inflation
pressures are not being displayed
on the multi-information display, if
the inflation pres sure of a tire
drops, the tire pressure warning
light will come on.
■If the tire pressure warning sys-
tem is not initialized properly
●In the following si tuations, initial-
ization may take longer than usual
to be completed or may not be
possible. Normally, initialization
completes within approximately
30 minutes.
• Vehicle is not driven at approxi- mately 25 mph ( 40 km/h) or more • Vehicle is driven on unpaved
roads
• Vehicle is driven near other vehi-
cles and system cannot recog-
nize tire pressure warning valve
and transmitters o f your vehicle
over those of other vehicles.
• If the vehicle is driven in heavy traffic or another situation where
other vehicles are driven close by,
it may take time f or the system to
recognize the ti re pressure warn-
ing valve and transmitters of your
vehicle over those of other vehi-
cles.
●If initialization does not complete
after driving for 1 hour or more,
park the vehicle in a safe place for
approximately 20 minutes and
then drive the v ehicle again.
●If the vehicle is reversed during
initialization, the data up to that
point is reset, so p erform the ini-
tialization procedure again from
the beginning.
●In the following situations, initial-
ization will not be started or was
not completed properly and the
system will not oper ate properly.
Perform the initialization proce-
dure again.
• If, when attempting to start initial- ization, the tire pressure warning
light does not blink 3 times.
• If, when the veh icle has been
driven for about 20 minutes after
performing initialization, the tire
pressure warning light blinks for
approximately 1 minute and then
illuminates.
If initialization cannot be completed
after performing the above proce-
dure, contact your Toyota dealer.