2023 TOYOTA RAV4 PRIME ESP
[x] Cancel search: ESPPage 196 of 662

1963-1. Instrument cluster
Select to set the items on the upper
and lower side of the drive informa-
tion screen from three items, aver-
age speed, distance and total time.
“Closing Display”
Select to set the i tems displayed
when the power switch is turned off.
“Pop-Up Display” (if
equipped)
Select to enable/d isable the follow-
ing pop-up displays, which may
appear in some situations.
• Intersection guidance display of the navigation system-linked sys-
tem (if equipped)
• Incoming call display of the hands-free phone system (if
equipped)
• Audio operation (if equipped)
• Volume operation (if equipped)
• Voice control (if equipped)
“Calender”
Select to set up the calender.
This can only be set if GPS calibra-
tion of clock is tur ned off in the mul-
timedia system settings.
“MID OFF”
A blank screen is displayed.
“Default Settings”
Select to reset the meter display
settings.
■Suspension of the settings dis-
play
●In the following si tuations, opera-
tion of the setting s display will be
temporarily suspended.
• When a warning message appears on the multi-information
display • When the vehicle begins to move
●Settings for functions not
equipped to the vehicle are not
displayed.
●When a function is turned off, the
related settings for that function
are not selectable.
Select to display warning mes-
sages and measures to be
taken if a malfunction is
detected. (
P.552)
Displays suggestions to the
driver in the following situations.
To select a response to a dis-
played suggestion, use the
meter control switches.
WARNING
■Cautions during setting up
the display
As the hybrid system needs to be
operating during setting up the
display, ensure that the vehicle is
parked in a place with adequate
ventilation. In a closed area such
as a garage, exhaust gases
including harmful carbon monox-
ide (CO) may collect and enter
the vehicle. This may lead to
death or a serious health hazard.
NOTICE
■During setting up the display
To prevent 12-vo lt battery dis-
charge, ensure that the hybrid
system is operating while setting
up the display features.
Warning message display
Convenience Services
(Suggestion function)
Page 208 of 662
2083-1. Instrument cluster
Displays suggestions to the
driver in the following situations.
To select a response to a dis-
played suggestion, use the
meter control switches.
■Suggestion to enable the
power back door (if
equipped)
If the power back door system is
disabled on the screen and
the power back door switch on
the instrument panel is oper-
ated, a suggestion message will
be displayed asking if you wish
to enable the power back door
system. To enable the power
back door system, select “Yes”.
After enabling the power back
door system, press the power
back door switch again to open
or close the power back door.
■Suggestion to turn on the
headlights
If the headlights turn off, and the
vehicle speed is 5 km/h (3 mph)
or higher for a certain amount of
time when the surroundings are
dark, a suggestion message will
be displayed.
■Suggestion to turn off the
headlights
If the headlights are left on for a
certain amount of time with the
headlight switch in after the power switch has been turned
off, a suggestion message will
be displayed asking if you wish
to turn the headlights off.
To turn the headlights off, select
“Yes”.
If a front door is
opened after the
power switch is tu rned off, this sug-
gestion message will not be dis-
played.
To close all of the power win-
dows, select “Yes”.
■Customization
Some functions can be customized.
(Customizable features: P.599)
Convenience Services
(Suggestion function)
Page 209 of 662
2093-1. Instrument cluster
3
Vehicle status information and indicators
*: If equipped
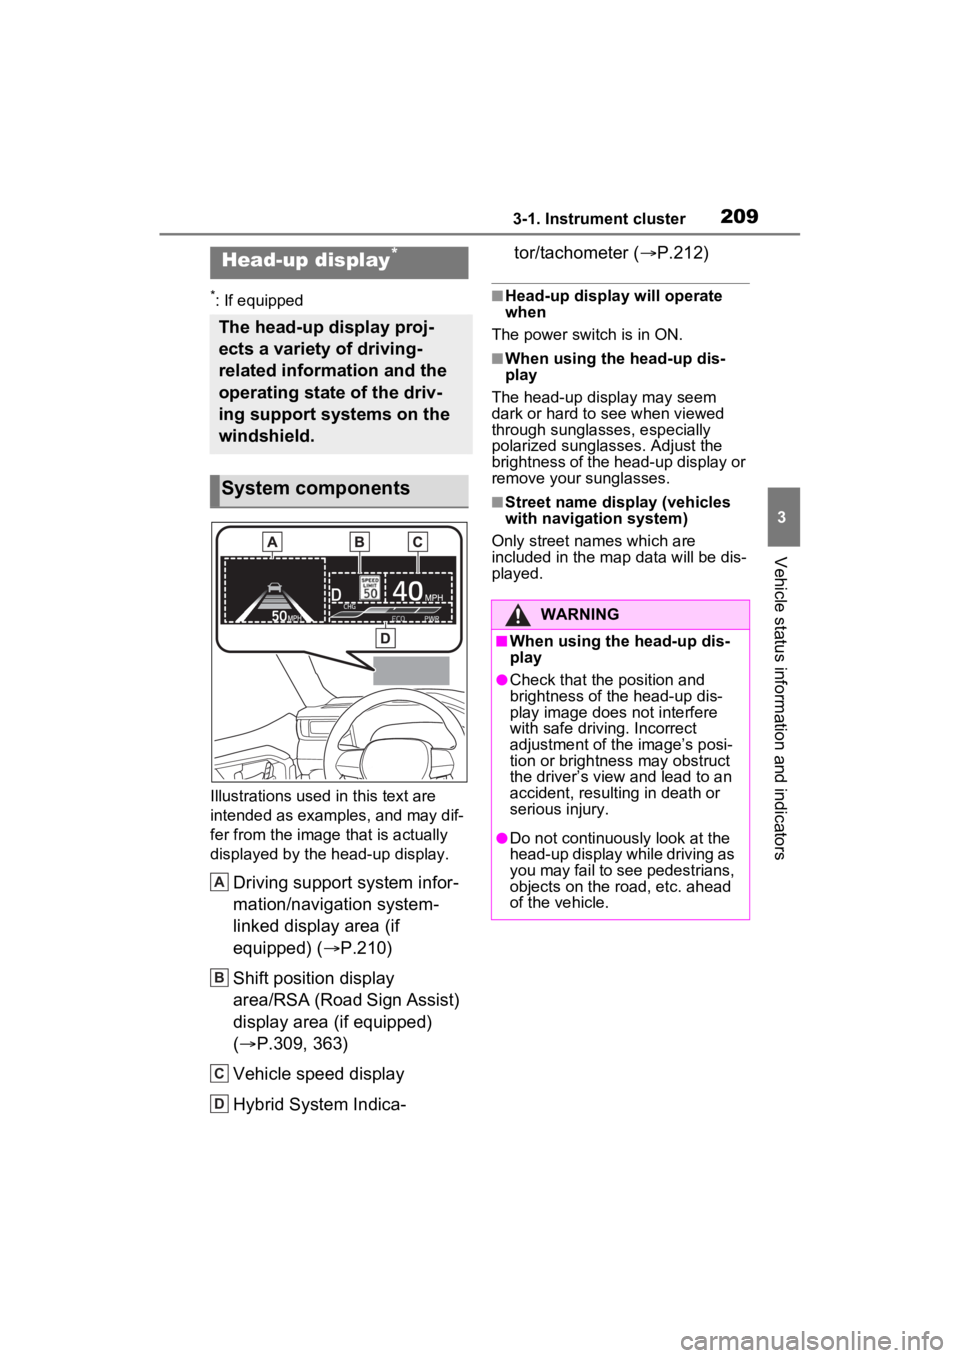
Illustrations used in this text are
intended as examples, and may dif-
fer from the image that is actually
displayed by the head-up display.
Driving support system infor-
mation/navigation system-
linked display area (if
equipped) ( P.210)
Shift position display
area/RSA (Road Sign Assist)
display area (if equipped)
( P.309, 363)
Vehicle speed display
Hybrid System Indica- tor/tachometer (
P.212)
■Head-up display will operate
when
The power switch is in ON.
■When using the head-up dis-
play
The head-up display may seem
dark or hard to see when viewed
through sunglasses, especially
polarized sunglasses. Adjust the
brightness of the head-up display or
remove your sunglasses.
■Street name display (vehicles
with navigation system)
Only street names which are
included in the map data will be dis-
played.
Head-up display*
The head-up display proj-
ects a variety of driving-
related information and the
operating state of the driv-
ing support systems on the
windshield.
System components
A
B
C
D
�:�$�5�1�,�1�*
■When using the head-up dis-
play
●Check that the position and
brightness of the head-up dis-
play image does not interfere
with safe driving. Incorrect
adjustment of the image’s posi-
tion or brightness may obstruct
the driver’s view and lead to an
accident, resulting in death or
serious injury.
●Do not continuously look at the
head-up display while driving as
you may fail to see pedestrians,
objects on the road, etc. ahead
of the vehicle.
Page 225 of 662
2254-2. Opening, closing and locking the doors
4
Before driving
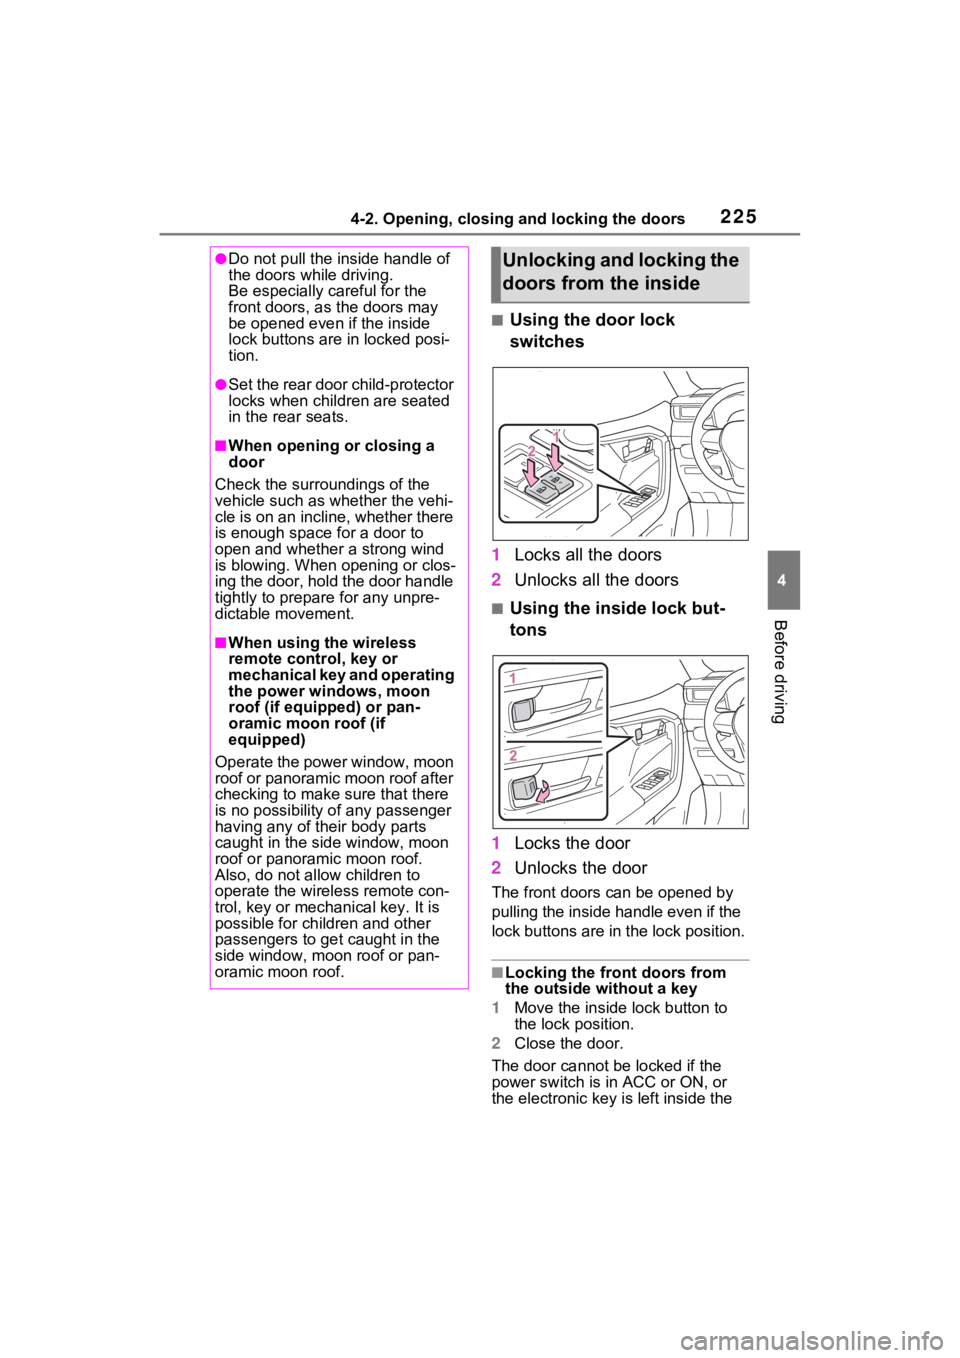
■Using the door lock
switches
1 Locks all the doors
2 Unlocks all the doors
■Using the inside lock but-
tons
1 Locks the door
2 Unlocks the door
The front doors c an be opened by
pulling the inside handle even if the
lock buttons are in the lock position.
■Locking the front doors from
the outside without a key
1 Move the inside l ock button to
the lock position.
2 Close the door.
The door cannot be locked if the
power switch is in ACC or ON, or
the electronic key is left inside the
●Do not pull the inside handle of
the doors while driving.
Be especially careful for the
front doors, as the doors may
be opened even if the inside
lock buttons are in locked posi-
tion.
●Set the rear door child-protector
locks when children are seated
in the rear seats.
■When opening or closing a
door
Check the surroundings of the
vehicle such as whether the vehi-
cle is on an incline, whether there
is enough space for a door to
open and whether a strong wind
is blowing. When opening or clos-
ing the door, hold the door handle
tightly to prepare for any unpre-
dictable movement.
■When using the wireless
remote control, key or
mechanical key and operating
the power windows, moon
roof (if equipped) or pan-
oramic moon roof (if
equipped)
Operate the power window, moon
roof or panoramic moon roof after
checking to make sure that there
is no possibility of any passenger
having any of their body parts
caught in the side window, moon
roof or panoramic moon roof.
Also, do not allo w children to
operate the wireless remote con-
trol, key or mechanical key. It is
possible for children and other
passengers to get caught in the
side window, moon roof or pan-
oramic moon roof.
Unlocking and locking the
doors from the inside
Page 252 of 662

2524-3. Adjusting the seats
door is unlocked with smart key
system, the driving position can-
not be recalled. In this case, press
the driving position button which
has been set.
■Customization
Settings (e.g. the unlock door set-
tings of the memory recall function)
can be customized. (Customizable
features: P.608)
■Front seats
1 Up
Pull the head restraints up.
2Down
Push the head restraint down while
pressing the lock release button
.
Head restraints
Head restraints are pro-
vided for all seats.
WARNING
■Head restraint precautions
Observe the following precautions
regarding the head restraints.
Failure to do so may result in
death or serious injury.
●Use the head restraints
designed for each respective
seat.
●Adjust the head restraints to the
correct position at all times.
●After adjusting the head
restraints, push down on them
and make sure they are locked
in position.
●Do not drive with the head
restraints removed.
Vertical adjustment
A
Page 256 of 662
2564-4. Adjusting the steering wheel and mirrors
*: If equipped
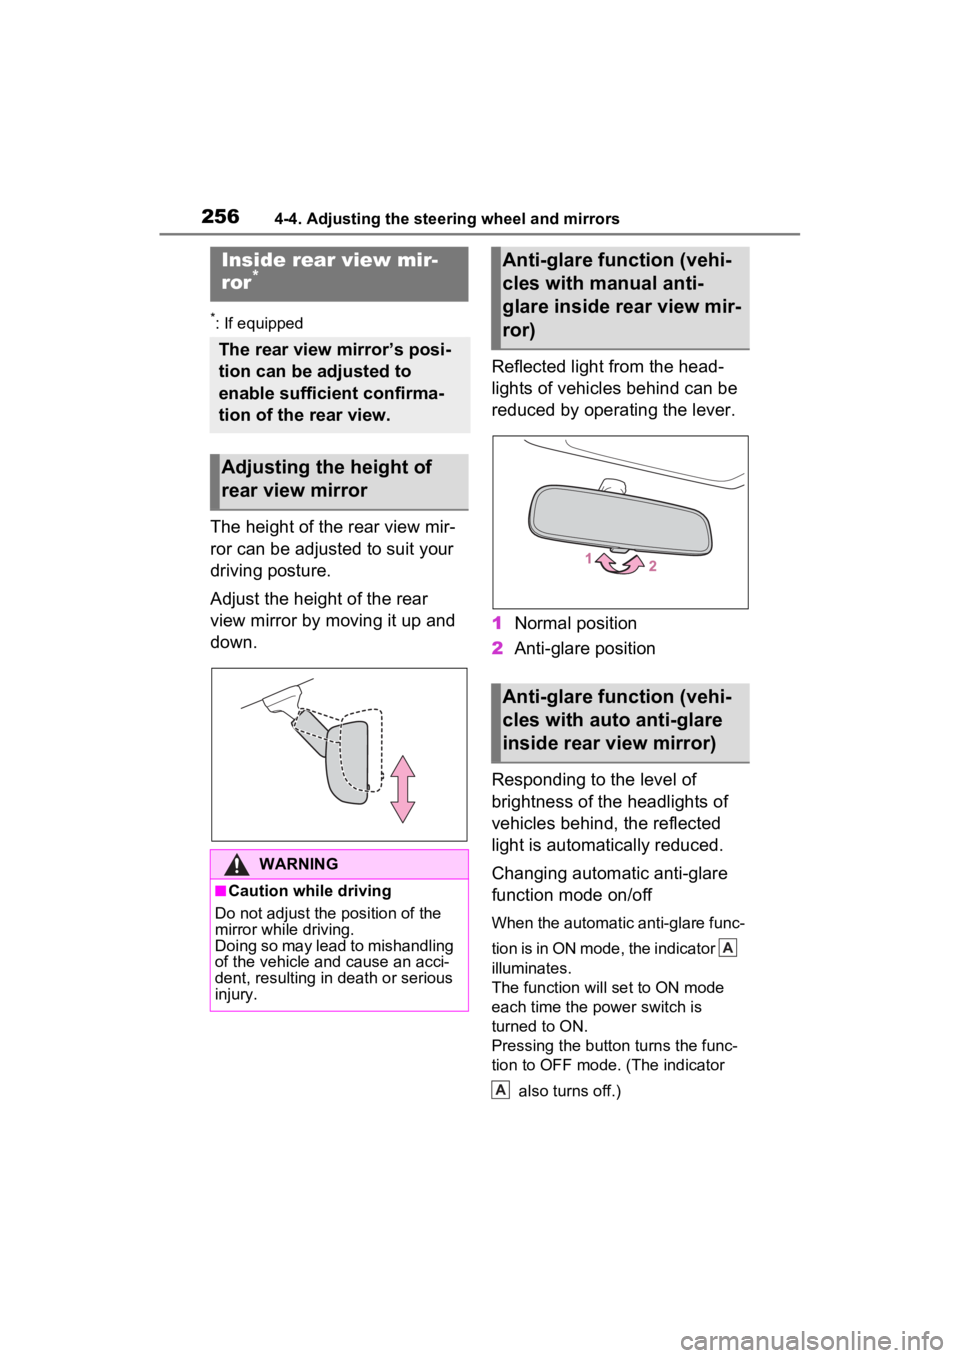
The height of the rear view mir-
ror can be adjusted to suit your
driving posture.
Adjust the height of the rear
view mirror by moving it up and
down.Reflected light from the head-
lights of vehicles behind can be
reduced by operating the lever.
1
Normal position
2 Anti-glare position
Responding to the level of
brightness of the headlights of
vehicles behind, the reflected
light is automatically reduced.
Changing automatic anti-glare
function mode on/off
When the automatic anti-glare func-
tion is in ON mode, the indicator
illuminates.
The function will set to ON mode
each time the power switch is
turned to ON.
Pressing the button turns the func-
tion to OFF mode. (The indicator also turns off.)
Inside rear view mir-
ror*
The rear view mirror’s posi-
tion can be adjusted to
enable sufficient confirma-
tion of the rear view.
Adjusting the height of
rear view mirror
WARNING
■Caution while driving
Do not adjust the position of the
mirror while driving.
Doing so may lead to mishandling
of the vehicle and cause an acci-
dent, resulting in death or serious
injury.
Anti-glare function (vehi-
cles with manual anti-
glare inside rear view mir-
ror)
Anti-glare function (vehi-
cles with auto anti-glare
inside rear view mirror)
A
A
Page 257 of 662

2574-4. Adjusting the steering wheel and mirrors
4
Before driving
■To prevent sensor error (vehi-
cles with auto anti-glare inside
rear view mirror)
To ensure that the sensors operate
properly, do not touch or cover
them.
*: If equipped
Digital Rear-view Mir-
ror*
The Digital Rear-view Mirror
is a system that uses the
camera on the rear of the
vehicle and displays its
image on the display of the
Digital Rear-view Mirror.
The Digital Rear-view Mirror
can be changed between
optical mirror mode and dig-
ital mirror mode by operat-
ing the lever.
The Digital Rear-view Mirror
allows the driver to see the
rear view despite obstruc-
tions, such as the head
restraints or luggage,
ensuring rear visibility.
Also, the rear seats are not
displayed and privacy of the
passengers is enhanced.
WARNING
Observe the following precau-
tions.
Failure to do so may result in
death or serious injury.
■Before using the Digital Rear-
view Mirror
●Make sure to adjust the mirror
before driving. ( P.260)
• Change to optical mirror mode and adjust the position of the
Digital Rear-view Mirror so that
the area behind your vehicle
can be viewed properly.
Page 260 of 662
2604-4. Adjusting the steering wheel and mirrors
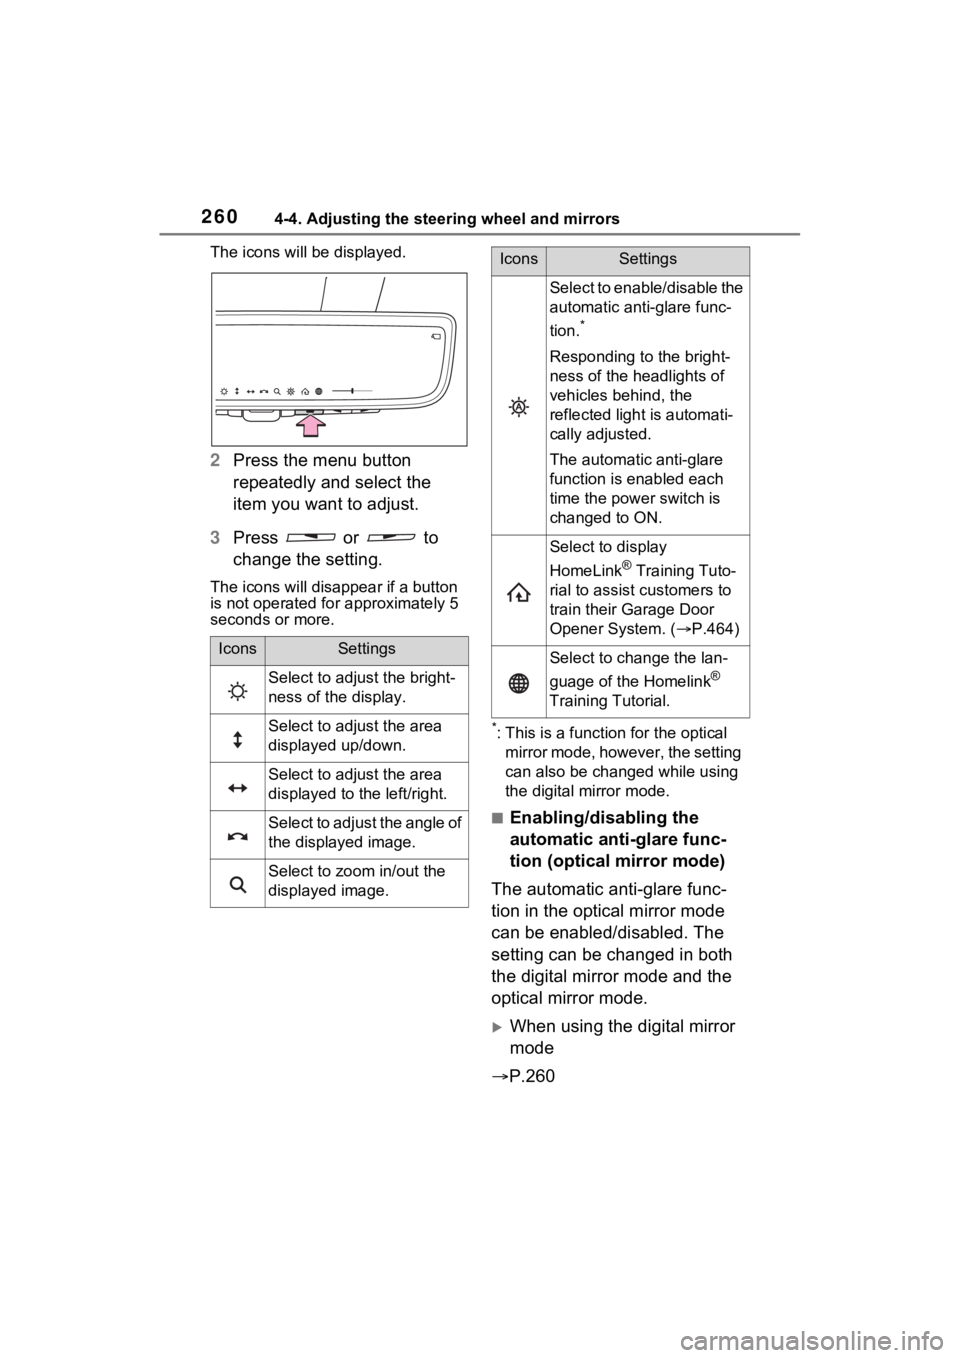
The icons will be displayed.
2Press the menu button
repeatedly and select the
item you want to adjust.
3 Press or to
change the setting.
The icons will disapp ear if a button
is not operated fo r approximately 5
seconds or more.
*: This is a functi on for the optical
mirror mode, however, the setting
can also be changed while using
the digital mirror mode.
■Enabling/disabling the
automatic anti-glare func-
tion (optical mirror mode)
The automatic anti-glare func-
tion in the optical mirror mode
can be enabled/disabled. The
setting can be changed in both
the digital mirror mode and the
optical mirror mode.
When using the digital mirror
mode
P.260
IconsSettings
Select to adjust the bright-
ness of the display.
Select to adjust the area
displayed up/down.
Select to adjust the area
displayed to the left/right.
Select to adjust the angle of
the displayed image.
Select to zoom in/out the
displayed image.
Select to enable/disable the
automatic anti-glare func-
tion.
*
Responding to the bright-
ness of the headlights of
vehicles behind, the
reflected light is automati-
cally adjusted.
The automatic anti-glare
function is enabled each
time the power switch is
changed to ON.
Select to display
HomeLink
® Training Tuto-
rial to assist customers to
train their Garage Door
Opener System. ( P.464)
Select to change the lan-
guage of the Homelink
®
Training Tutorial.
IconsSettings