2023 TOYOTA PRIUS PRIME change time
[x] Cancel search: change timePage 123 of 680

1232-2. Charging
2
Plug-in hybrid system
■If the charging connector can-
not be unlocked
P.104
■Calendar settings
Charging schedule is performed
according to the date and time
shown on the multi-information dis-
play.
If the calendar settings check
screen is displayed when an
attempt was made to register a
charge schedule, check that the cor-
rect date is set. If it is incorrect, be
sure to correct it.
If the calendar info rmation is wrong,
the charging schedule function will
not operate normally.
The current date and time is auto-
matically set using GPS. However, if
the automatic setting of the clock is
turned off on the Multimedia Dis-
play, it is necessary to set the date
and time. For details regarding the
setting of date, refer to P.166, and
regarding setting of the time, refer to
“MULTIMEDIA OWNER’S MAN-
UAL”.
When registering the charging
schedule, the following settings
can be changed.
■Select the charging mode
One of the two following
charging modes can be
selected.
WARNING
■After charging
Remove the plug if it will not be
used for a long time.
Dirt and dust may accumulate
plug or outlet, which could cause
a malfunction or fire, possibly
leading to death or serious injury.
NOTICE
■After charging
●Store the AC charging cable out
of reach from infants and chil-
dren.
●After removing the plug from the
outlet, keep it in a safe place
free from moisture and dust.
The AC charging cable or plug
may be damaged if the cable is
stepped on or ridden over by the
vehicle.
●After removing the AC charging
connector from the AC charging
inlet, make sure to close the AC
charging port lid.
If the AC charging port lid is left
open, water or foreign objects
may enter the AC charging inlet,
which could lead to vehicle dam-
age.
Using the charging
schedule function
AC charging can be carried
out at the desired time by
registering the charging
schedule.
Settings of the charging
schedule function
Page 125 of 680

1252-2. Charging
2
Plug-in hybrid system
time*
*
: For details regarding setting clock, refer to “MULTIMEDIA OWNER’S
MANUAL”.
●The calendar is set to the correct
date ( P.166)
●Check that the power switch is
turned off
●After registering the charging
schedule, connect the AC
charging connector
The charging start time is deter-
mined based on the charging
schedule at the time that the AC
charging connector was connected.
●Connect the AC charging connec-
tor before the start time
When the charging mode is set to
“Start” or “Start at set time”, if you
connect the AC charging connector
after the set start time, the next
charging schedule will be refer-
enced.
When the charging mode is set to
“Start-Stop” or “Start and stop at set
times”, if you connect the AC
charging connector after the start
time, charging will start immediately
and charging will be performed until
the stop time.
●After connecting the AC charging
connector, check that the
charging indicator of the charging
port flashes ( P.96)
●Do not use an outlet that has a
power cut off function (including a
charging schedule function)
Use an outlet that constantly sup-
plies electricity. For outlets where
the power is cut off due to a
charging schedule function, etc.,
charging may not be carried out
according to plan if the power is cut
off during the set time.
■When the AC charging connec-
tor remains connected to the
vehicle
●When the charging mode is set to
“Start” or “Start at set time”, even
if multiple consecutive charging
schedules are registered, the next
charge will not be carried out
according to the charging sched-
ule until the AC charging connec-
tor is removed and reconnected
after charging completes. Also,
when the hybrid battery (traction
battery) is fully charged, charging
according to the charging sched-
ule will not be carried out.
●If the charging stop time is
reached before the hybrid battery
(traction battery) is fully charged
and the charging mode is set to
“Start-Stop” or “Start and stop at
set times”, the nearest charging
schedule after the stop time is
updated as the next charging
schedule, and charging is
repeated until the battery is fully
charged.
■Smartphone-linked operation (if
equipped)
After applying to Toyota Apps, it is
possible to use the smartphone
application to change charging
schedule settings.
For details about Toyota Apps, refer
to http://www.toyota.com/
connectedservices in the United
States and
http://www.toyota.ca/connected
in
Canada.
■When charging schedules are
ignored
When the following operations are
performed while the charging
schedule is on standby, charging
schedule is temporarily canceled
and charging is started.
●When turning “My Room Mode”
on ( P.134)
●When turning “Charge Now” on
( P.128, 132)
Page 128 of 680

1282-2. Charging
Each time is pressed, the
selected charging schedule
switches between on and off.
When set to off, a charging sched-
ule is ignored and charging accord-
ing to the charging schedule is not
carried out.
■Changing the registered
charging schedules
The registered charging sched-
ules can be modified or deleted.
1 Display the “Charging Sched-
ule” screen. ( P.126)
2 Press or of the meter
control switches to select
“Scheduled Events”, and
then press .
A list of the registered charging
schedule will be displayed.
3Press or of the meter
control switches to select the item to operate, and perform
the necessary operation.
“Edit”
Select the contents are desired to
be changed, press and hold
and then select “Edit”.
Change the desired settings as
described starting from step 4 of
the “Registering the charging
schedule” procedure. ( P.126)
Select “Save” and press to save
the settings.
“Delete”
Select the contents are desired to
be changed, press and hold
and then select “Delete”.
A deletion confir mation screen will
be displayed.
Press or of the meter con-
trol switches to select “Yes”, and
then press to delete the
selected charging schedule.
To cancel deletion of the registered
contents, select “No” and then
press .
■Setting “Charge Now” to on
The “Charge Now” setting can
be changed by performing one
of the two following procedures.
Page 129 of 680

1292-2. Charging
2
Plug-in hybrid system
Operation on “Charging
Schedule” screen
1 Display the “Charging Sched-
ule” screen. ( P.126)
2 Press or of the meter
control switches to select
“Charge Now”, and then
press .
Each time is pressed, “Charge
Now” switches between on and off.
Operation on “Trip Summary”
screen
1 Turn the power switch off.
The “Trip Summary” screen* is dis-
played on the multi-information dis-
play.
(If the door is op ened while waiting
for charging schedule, the same
screen will be displayed.)
*: If “Trip Summary” is not set to
“Charging Schedule” on the
screen of the multi-informa-
tion display, the “Trip Summary”
is not displayed. In this case,
check the settings on the multi-
information display.
2 Press to set “Charge
Now” to on.
Each time is pressed, “Charge
Now” switches between on and off.
After setting operations are
complete, charging starts when
the AC charging connector is
connected. ( P.116)
■Displaying “Next Event”
1 Display the “Charging Sched-
ule” screen. ( P.126) 2
Press or of the meter
control switches to select
“Next Event”, and then press
.
The “Next Event” screen will be dis-
played.
■When charging schedule set-
ting operations are canceled
When the vehicle is in the following
conditions, charging schedule set-
ting operations are canceled.
●The power switch is operated
before the settings are confirmed
●The vehicle starts off
●A display with a higher priority
than that of the charging schedule
setting is shown
■When charging schedule are
changed while charging
If the charging schedule is changed,
the next event will be updated and
charging may stop. After changing
the charging schedule, check the
next event.
If you want to continue charging,
turn on “Charge Now”.
WARNING
■Cautions while performing
the setting operation
When performing the setting
operation while the hybrid system
is operated, ensure that the vehi-
cle is parked in a place with ade-
quate ventilation. In a closed area
such as a garage, exhaust gases
including harmful carbon monox-
ide (CO) may collect and enter
the vehicle. This may lead to
death or a serious health hazard.
Page 131 of 680

1312-2. Charging
2
Plug-in hybrid system
“Add” button
Touch to add a new item to the charging schedule. (P.131)
“Edit” button
Touch to change or delete registered items on the charging schedule.
( P.132)
“Charge now” button
Each time the button is touched, “Charge now” switches between on and
off. ( P.132)
Return button
Touch to close the “Charging schedule” screen.
■Registering the charging
schedule
1 Display the “Charging sched-
ule” screen. ( P.130)
2 Touch “Add”.
The “Add event” screen will be dis-
played on the screen.
3Select charging mode.
Touch the button in the row of the
“Start at set time” or “Start and stop
at set times”.
4Touch buttons on the screen,
operate the screen and
select desired time, and then
touch “OK”.
When the charging mode is “Start
at set time”, set the charging start
time.
When the charging mode is “Start
and stop at set times”, also set the charging stop time.
5
Touch “Repeat”, and touch
the desired day to activate
the repeated setting, and
then touch “OK”.
Each time the day is touched, the
repeated setting for the selected
day switches between on and off.
When turned on, the check box is
highlighted and the charging sched-
ule is repeated on that day. It is
possible to turn more than one day
on.
B
C
D
E
Page 132 of 680

1322-2. Charging
6After setting operations are
complete, touch “Save”.
The charging schedule is added to
the list and an icon is added to the
“Charging schedule” screen.
■Switching charging sched-
ules between on and off
1 Display the “Charging sched-
ule” screen. ( P.130)
2 Touch “Edit”.
The “Events” screen will be dis-
played on the screen.
3From the items displayed on
the screen, touch or
in the row of the charging
schedule you wish to change.
If the charging schedule you wish to
change is not displayed on the
screen, scroll the list up and down
to display it.
Each time the button is touched,
the charging schedule switches
between (on) and (off).
■Changing the registered
charging schedules
1 Display the “Charging sched-
ule” screen. ( P.130)
2 Touch “Edit”.
The “Events” screen will be dis-
played on the screen.
3Touch “Edit” on the “Events”
screen.
4 From the items displayed on
the screen, touch the
charging schedule you wish
to change.
Changing registered items:
Change the desired settings as
described starting from step 3 of
the “Registering the charging
schedule” procedure. ( P.131)
When a setting is changed, its icon
on the calendar also changes.
Deleting registered items:
Touch “Delete”.
A deletion confirmation message
will be displayed.
Touch “Delete” to delete the
selected charging schedule.
When a charging schedule is
deleted, its icon is also deleted from
the “Charging schedule” screen.
■Turning “Charge now” on
1 Display the “Charging sched-
ule” screen. ( P.130)
2 Touch of “Charge now”.
Each time the button is touched,
“Charge now” switches between
(on) and (off).
Page 133 of 680
1332-2. Charging
2
Plug-in hybrid system
After setting operations are
complete, charging starts when
the AC charging connector is
connected. (P.116)
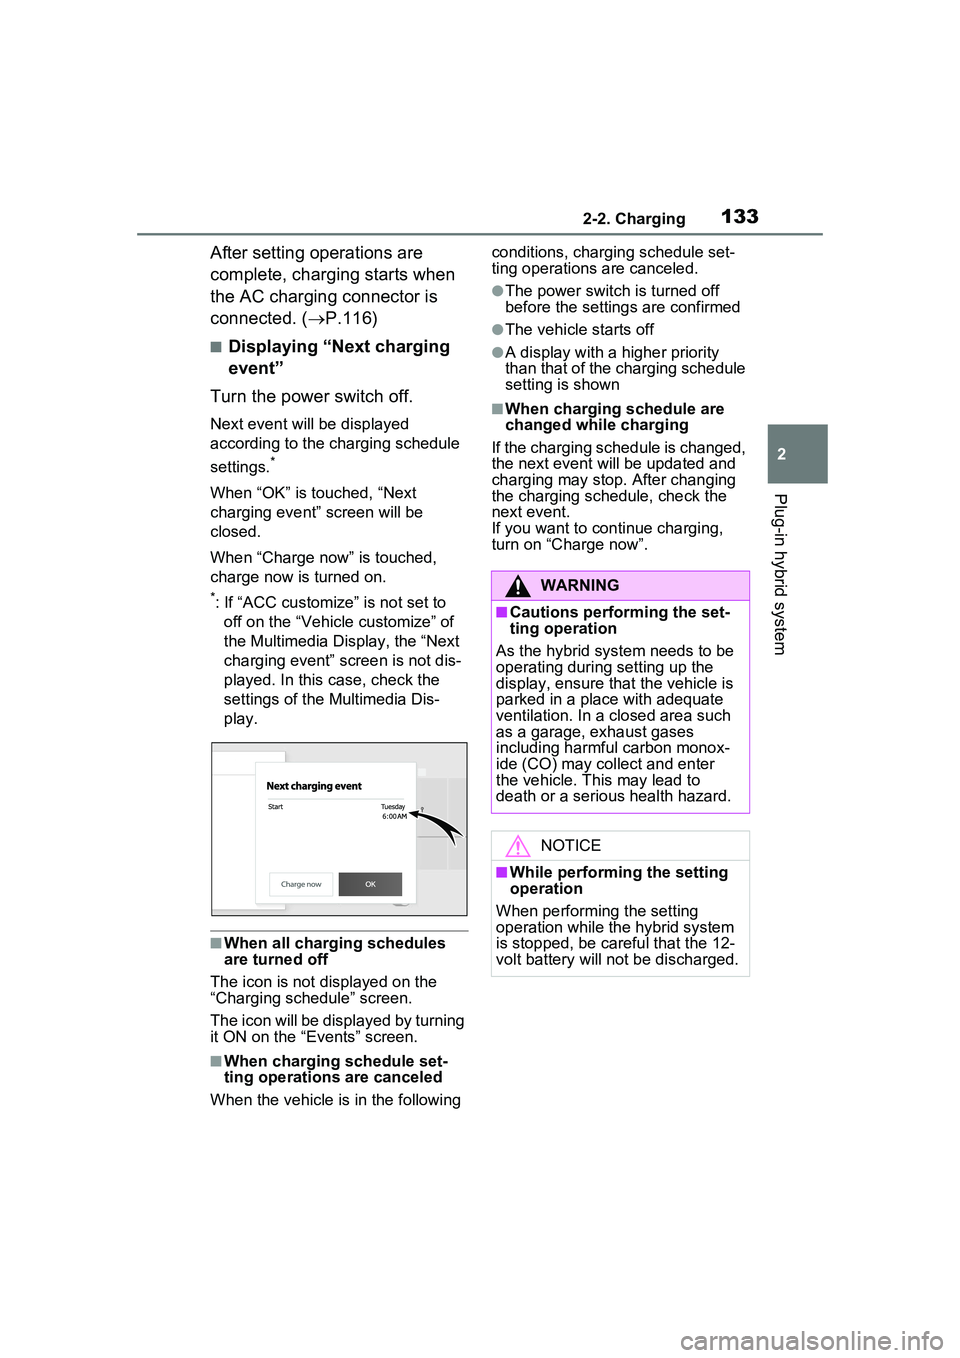
■Displaying “Next charging
event”
Turn the power switch off.
Next event will be displayed
according to the charging schedule
settings.
*
When “OK” is touched, “Next
charging event” screen will be
closed.
When “Charge now” is touched,
charge now is turned on.
*: If “ACC customize” is not set to off on the “Vehicle customize” of
the Multimedia Display, the “Next
charging event” screen is not dis-
played. In this case, check the
settings of the Multimedia Dis-
play.
■When all charging schedules
are turned off
The icon is not displayed on the
“Charging schedule” screen.
The icon will be displayed by turning
it ON on the “Events” screen.
■When charging schedule set-
ting operations are canceled
When the vehicle is in the following conditions, charging schedule set-
ting operations are canceled.
●The power switch is turned off
before the settings are confirmed
●The vehicle starts off
●A display with a higher priority
than that of the charging schedule
setting is shown
■When charging schedule are
changed while charging
If the charging schedule is changed,
the next event will be updated and
charging may stop. After changing
the charging schedule, check the
next event.
If you want to continue charging,
turn on “Charge now”.
WARNING
■Cautions performing the set-
ting operation
As the hybrid system needs to be
operating during setting up the
display, ensure that the vehicle is
parked in a place with adequate
ventilation. In a closed area such
as a garage, exhaust gases
including harmful carbon monox-
ide (CO) may collect and enter
the vehicle. This may lead to
death or a serious health hazard.
NOTICE
■While performing the setting
operation
When performing the setting
operation while the hybrid system
is stopped, be careful that the 12-
volt battery will not be discharged.
Page 142 of 680

1422-2. Charging
*: For details regarding setting clock, refer to “MULTIMEDIA OWNER’S
MANUAL”.
■Cannot change charging schedule from smartphone applica-
tion (if equipped)
*
*: In order to use the smartphone application, it is necessary to apply to Toyota Apps. For details about Toyota Apps, refer to
http://www.toyota.com/connectedservices
in the United States and
http://www.toyota.ca/connected
in Canada.
■Charging starts, even though charging schedule is registered
AC charging connector is not con-
nected to vehicleBefore using the charging schedule,
connect the AC charging connector.
AC charging connector was con-
nected after set time
Connect the AC charging connector
before the time set in “Start” or “Start
at set time”.
When the charging mode is set to
“Start-Stop” or “Start and stop at set
times”, the hybrid battery (traction
battery) will charge even if the start
time has passed, if the AC charging
connector is connected before the
stop time.
Likely causeCorrection procedure
Smartphone is outside its coverage
area
Check the signal strength. If the
smartphone is outside its coverage
area, move to a place with a better
signal.
Likely causeCorrection procedure
“Charge Now” is set to on
When charging according to the
charging schedule, set “Charge
Now” to off. ( P.128, 132)
Charging schedule is set to offCheck that charging schedule is not
set to off. ( P.127, 132)
Likely causeCorrection procedure