2023 TOYOTA COROLLA HYBRID radio
[x] Cancel search: radioPage 137 of 496
1373-2. Opening, closing and locking the doors
3
Before driving
●Interior buzzer sounds continu-
ously
■Battery-saving function
The battery-saving function will be
activated in order to prevent the
electronic key battery and the
12-volt battery from being dis-
charged while the vehicle is not
operated for a long time.
●In the following situations, the
smart key system may take some
time to unlock the doors.
• The electronic key has been left within approximately 11 ft. (3.5 m)
of the outside of the vehicle for 2
minutes or longer.
• The smart key system has not been used for 5 days or longer.
●If the smart key
system has not
been used for 14 days or longer,
the doors cannot be unlocked
from any door except the driver’s
door. In this case, hold the driver’s
door handle, or use the wireless
remote control or mechanical key
to unlock the doors.
■Electronic key battery-saving
function
●When battery-saving mode is set,
battery depletion is minimized by
stopping the electronic key from
receiving radio waves.
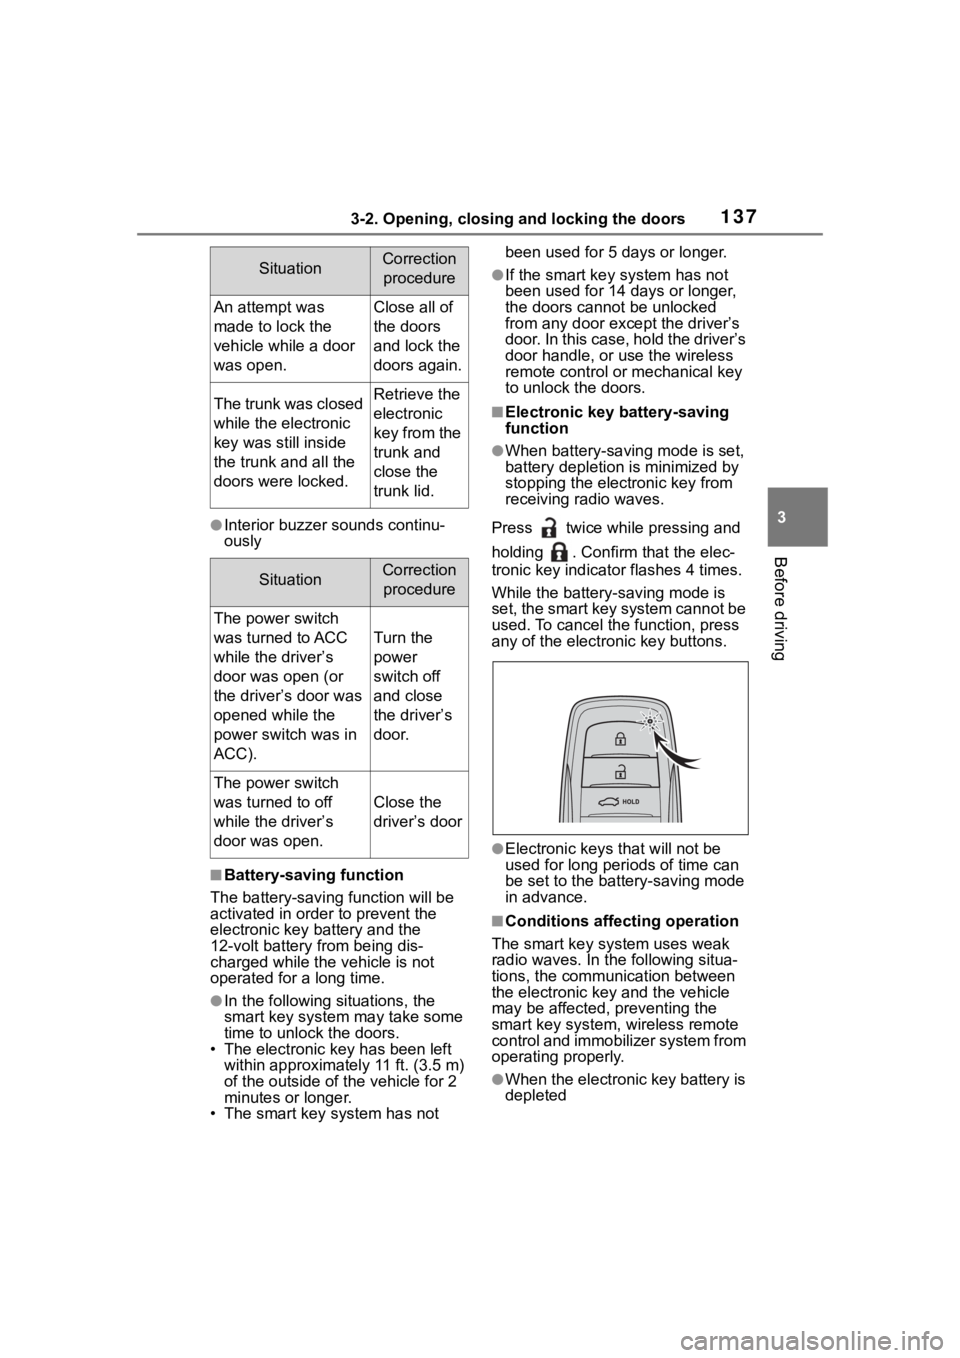
Press twice while pressing and
holding . Confirm that the elec-
tronic key indicator flashes 4 times.
While the battery-saving mode is
set, the smart key system cannot be
used. To cancel the function, press
any of the electronic key buttons.
●Electronic keys that will not be
used for long periods of time can
be set to the battery-saving mode
in advance.
■Conditions affecting operation
The smart key system uses weak
radio waves. In the following situa-
tions, the communication between
the electronic key and the vehicle
may be affected, preventing the
smart key system, wireless remote
control and immobilizer system from
operating properly.
●When the electronic key battery is
depleted
SituationCorrection
procedure
An attempt was
made to lock the
vehicle while a door
was open.Close all of
the doors
and lock the
doors again.
The trunk was closed
while the electronic
key was still inside
the trunk and all the
doors were locked.Retrieve the
electronic
key from the
trunk and
close the
trunk lid.
SituationCorrection procedure
The power switch
was turned to ACC
while the driver’s
door was open (or
the driver’s door was
opened while the
power switch was in
ACC).
Turn the
power
switch off
and close
the driver’s
door.
The power switch
was turned to off
while the driver’s
door was open.
Close the
driver’s door
Page 138 of 496

1383-2. Opening, closing and locking the doors
●Near a TV tower, electric power
plant, gas station, radio station,
large display, airpo rt or other facil-
ity that generates strong radio
waves or electrical noise
●When carrying a portable radio,
cellular phone, cordless phone or
other wireless communication
device
●When the electronic key is in con-
tact with, or is covered by the fol-
lowing metallic objects
• Cards to which al uminum foil is
attached
• Cigarette boxes that have alumi- num foil inside
• Metallic wallets or bags
• Coins
• Hand warmers made of metal
• Media such as CDs and DVDs
●When other wireless keys (that
emit radio waves) are being used
nearby
●When carrying the electronic key
together with the following devices
that emit radio waves
• Another vehicle’s electronic key or a wireless key that emits radio
waves
• Personal computers or personal digital assistants (PDAs)
• Digital audio players
• Portable game systems
●If window tint with a metallic con-
tent or metallic objects are
attached to the rear window
●When the electronic key is placed
near a battery charger or elec-
tronic devices
●When the vehicle is parked in a
pay parking spot where radio
waves are emitted
If the doors cannot be
locked/unlocked using the smart key
system, lock/unlock the doors by
performing any of the following:
●Bring the electronic key close to
either front door handle and oper-
ate the entry function.
●Operate the wireless remote con- trol.
If the doors cannot be
locked/unlocked using the above
methods, use the mechanical key.
( P.408)
If the hybrid system cannot be
started using the smart key system,
refer to P.409.
■Note for the entry function
●Even when the electronic key is
within the effective range (detec-
tion areas), the system may not
operate properly in the following
cases:
• The electronic key is too close to the window or outside door han-
dle, near the ground, or in a high
place when the doors are locked
or unlocked.
• The electronic key is near the ground or in a high place, or too
close to the center of the rear
bumper when the trunk is opened.
• The electronic key is on the instru- ment panel, rear package tray or
floor, or in the door pockets or
glove box when the hybrid system
is started or power switch modes
are changed.
●Do not leave the electronic key on
top of the instrument panel or near
the door pockets when exiting the
vehicle. Depending on the radio
wave reception conditions, it may
be detected by the antenna out-
side the cabin and the door will
become lockable from the outside,
possibly trapping the electronic
key inside the vehicle.
●As long as the electronic key is
within the effective range, the
doors may be locked or unlocked
by anyone. However, only the
doors detecting the electronic key
can be used to unlock the vehicle.
●Even if the electro nic key is not
inside the vehicle, it may be possi-
ble to start the hybrid system if the
electronic key is near the window.
●The doors may unlock or lock if a
large amount of water splashes on
Page 140 of 496

1403-2. Opening, closing and locking the doors
ate properly. (The alarm may go off
accidentally, or the door lock pre-
vention function may not operate.)
●Do not leave the electronic key
inside the trunk.
The key confinement prevention
function may not operate, depend-
ing on the location of the key (the
inside edge of the trunk), condi-
tions (inside a met al bag, close to
metallic objects) and the radio
waves in the surrounding area.
( P.135)
■If the smart key system does
not operate properly
●Locking and unlocking the doors:
P. 4 0 8
●Starting the hybrid system:
P. 4 0 9
■Customization
Some functions can be customized.
( P.442)
■If the smart key system has
been deactivated in a custom-
ized setting
●Locking and unlocking the doors:
Use the wireless remote control or
mechanical key. ( P.127, 408)
●Starting the hybrid system and
changing power switch modes:
P. 4 0 9
●Stopping the hybrid system:
P. 1 7 4
WARNING
■Caution regarding interfer-
ence with electronic devices
●People with implantable car-
diac pacemakers, cardiac
resynchronization ther-
apy-pacemakers or implantable
cardioverter defibrillators should
keep away from the smart key
system antennas. ( P.136)
The radio waves may affect the
operation of such devices. If
necessary, the entry function
can be disabled. Ask your Toy-
ota dealer for details, such as
the frequency of radio waves
and timing of the emitted radio
waves. Then, consult your doc-
tor to see if you should disable
the entry function.
●Users of any electrical medical
device other than implantable
cardiac pacemakers, cardiac
resynchronization ther-
apy-pacemakers or implantable
cardioverter defibrillators should
consult the manufacturer of the
device for information about its
operation under the influence of
radio waves.
Radio waves could have unex-
pected effects on the operation
of such medical devices.
Ask your Toyota dealer for details
on disabling the entry function.
Page 205 of 496

2054-5. Using the driving support systems
4
Driving
■Situations in which the sensors
may not operate properly
●When the height or inclination of
the vehicle has been changed due
to modifications
●When the windshield is dirty,
fogged up, cracked or damaged
●When the ambient temperature is
high or low
●When mud, water, snow, dead
insects, foreign matter, etc., is
attached to the front of the sensor
●When in inclement weather such
as heavy rain, fog, snow, or a
sandstorm
●When water, snow, dust, etc. is
thrown up in front of the vehicle, or
when driving through mist or
smoke
●When the headlig hts are not illu-
minated while driving in the dark,
such as at night o r when in a tun-
nel
●When the lens of a headlight is
dirty and illumination is weak
●When the headlights are mis-
aligned
●When a headlight is malfunction-
ing
●When the headlights of another
vehicle, sunlight, or reflected light
shines directly into the front cam-
era
●When the brightness of the sur-
rounding area changes suddenly
●When driving near a TV tower,
broadcasting station, electric
power plant, radar equipped vehi-
cles, etc., or other location where
strong radio waves or electrical
noise may be present
●When a wiper blade is blocking
the front camera
●When in a location or near objects
which strongly reflect radio waves,
such as the following:
• Tunnels
• Truss bridges
• Gravel roads
• Rutted, snow-covered roads
• Walls
• Large trucks
• Manhole covers
• Guardrail
• Metal plates
●When near a step or protrusion
●When a detectable vehicle is nar-
row, such as a small mobility vehi-
cle
●When a detectable vehicle has a
small front or rear end, such as an
unloaded truck
●When a detectable vehicle has a
low front or rear end, such as a
low bed trailer
●When a detectable vehicle has
extremely high ground clearance
WARNING
■Front camera installation area
on the windshield
If the system determines that the
windshield may be fogged up, it
will automatically operate the
heater to defog the part of the
windshield around the front cam-
era. When cleaning, etc., be care-
ful not to touch the area around
the front camera until the wind-
shield has cooled sufficiently, as
touching it may cause burns.
Page 295 of 496
2955-4. Other interior features
5
Interior features
■The wireless charger can be
operated when
The power switch i s in ACC or ON.
■Portable devices that can be
charged
●Portable devices compatible with
the Qi wireless charging standard
can be charged by the wireless
charger. However, compatibility
with all devices which meet the Qi
wireless charging standard is not
guaranteed.
●The wireless charger is designed
to supply low power electricity (5
W or less) to a cellular phone,
smartphone, or other portable
device.
■If a cover or accessory is
attached to the portable device
Do not charge a portable device if a cover or accessory w
hich is not Qi
compatible is atta ched. Depending
on the type of cover (including for
certain genuine manufacture parts)
and/or accessory a ttached, it may
not be possible to charge the porta-
ble device. If the portable device is
placed on the charging area and
does not charge, remove the cover
and/or accessories.
■If interference is heard in AM
radio broadcasts while
charging
Turn off the wireless charger and
check if the noise is reduced. If
noise is reduced, press and hold the
power supply switch of the wireless
charger for 2 se conds. The fre-
quency of the wireless charger is
changed and noise may be
reduced. When the frequency is
changed, the operation indicator
light will blink (orange) 2 times.
Operation indicator lightSuspected causeMeasure
Blinks (orange) at a one
second interval continu-
ouslyVehicle to charger com-
munication failure.
If the hybrid system is
turned on, off and then
restart the hybrid sys-
tem.
If the power switch is in
ACC, start the hybrid
system.
Blinks (orange) 3 times
repeatedly
A foreign object exists
between the portable
device and charging
area.
Remove the foreign
object.
Portable device is not
positioned properly on
the charging area.If there is a case or
cover attached to the
portable device, remove
it.
Blinks (orange) 4 times
repeatedlyThe temperature of the
wireless charger is
excessively high.
Stop charging, remove
the portable device from
the charging tray, wait
for the temperature to
drop, and then start
charging again.
Page 329 of 496
3296-3. Do-it-yourself maintenance
6
Maintenance and care
4Press or to select
“Vehicle Settings” and then
press and hold .
5 Press or to select
“TPWS setting” and then
press .
6 Press or to select
“Pressure unit setting”.
7 Press or to select the
desired unit and then press
.
7-inch display
1 Park the vehicle in a safe
place and turn the power
switch off.
Changing the unit cannot be per-
formed while the vehicle is moving.
2Turn the power switch to ON.
3 Select of the multi-infor-
mation display and then
press .
4 Press or to select
“Vehicle Settings” and then
press and hold .
5 Press or to select
“TPWS setting” and then
press .
6 Press or to select
“Pressure unit setting”. 7
Press or to select the
desired unit and then press
.
■Routine tire inflation pressure
checks
The tire pressure warning system
does not replace routine tire inflation
pressure checks . Make sure to
check tire inflation pressure as part
of your routine o f daily vehicle
checks.
■Tire inflation pressure
●It may take a few minutes to dis-
play the tire inflation pressure
after the power switch is turned to
ON. It may also take a few min-
utes to display the tire inflation
pressure after infl ation pressure
has been adjusted.
●Tire inflation pressure changes
with temperature.
The displayed values may also be
different from the values mea-
sured using a tire pressure gauge.
■Situations in which the tire
pressure warning system may
not operate properly
●In the following cases, the tire
pressure warning system may not
operate properly.
• If non-genuine Toyota wheels are used.
• A tire has been replaced with a
tire that is not an OE (Original
Equipment) tire.
• A tire has been replaced with a
tire that is not of the specified size.
• Tire chains, etc. are equipped.
• An auxiliary-support ed run-flat tire
is equipped.
• If a window tint that affects the radio wave signals is installed.
• If there is a lot of snow or ice on the vehicle, particularly around the
wheels or wheel housings.
• If the tire inflation pressure is extremely higher than the speci-
fied level.
Page 330 of 496
3306-3. Do-it-yourself maintenance
• If tires not equipped with tire pres-
sure warning valves and transmit-
ters are used.
• If the ID code on the tire pressure warning valves and transmitters is
not registered in the tire pressure
warning computer.
●Performance may be affected in
the following situations.
• Near a TV tower, electric power plant, gas station, radio station,
large display, airpo rt or other facil-
ity that generates strong radio
waves or electrical noise.
• When carrying a portable radio, cellular phone, cordless phone or
other wireless communication
device.
●When the vehicle is parked, the
time taken for the warning to start
or go off could be extended.
●When tire inflation pressure
declines rapidly for example when
a tire has burst, the warning may
not function.
■Warning performance of the tire
pressure warning system
The warning of the tire pressure
warning system will change in
accordance with driving conditions.
For this reason, the system may
give a warning even if the tire pres-
sure does not reach a low enough
level, or if the p ressure is higher
than the pressure that was adjusted
to when the system was initialized.
When replacing tires or wheels,
tire pressure warning valves and
transmitters must also be
installed.
When new tire pressure warning
valves and transmitters are installed, new ID codes must be
registered in the tire pressure
warning computer and the tire
pressure warning system must
be initialized. Have tire pressure
warning valves and transmitter
ID codes registered by your Toy-
ota dealer. (
P.336)
■Replacing tires and wheels
If the ID code of the tire pressure
warning valve and tr ansmitter is not
registered, the tire pressure warning
system will not work properly. After
driving for about 20 minutes, the tire
pressure warning light blinks for 1
minute and stays on to indicate a
system malfunction.
Installing tire pressure
warning valves and trans-
mitters
NOTICE
■Repairing or replacing tires,
wheels, tire pressure warn-
ing valves, transmitters and
tire valve caps
●When removing or fitting the
wheels, tires or the tire pressure
warning valves and transmit-
ters, contact your Toyota dealer
as the tire pressure warning
valves and transmitters may be
damaged if not handled cor-
rectly.
●Make sure to install the tire
valve caps. If the tire valve caps
are not installed, water could
enter the tire pressure warning
valves and the tire pressure
warning valves could be bound.
●When replacing tire valve caps,
do not use tire valve caps other
than those specified. The cap
may become stuck.
Page 436 of 496
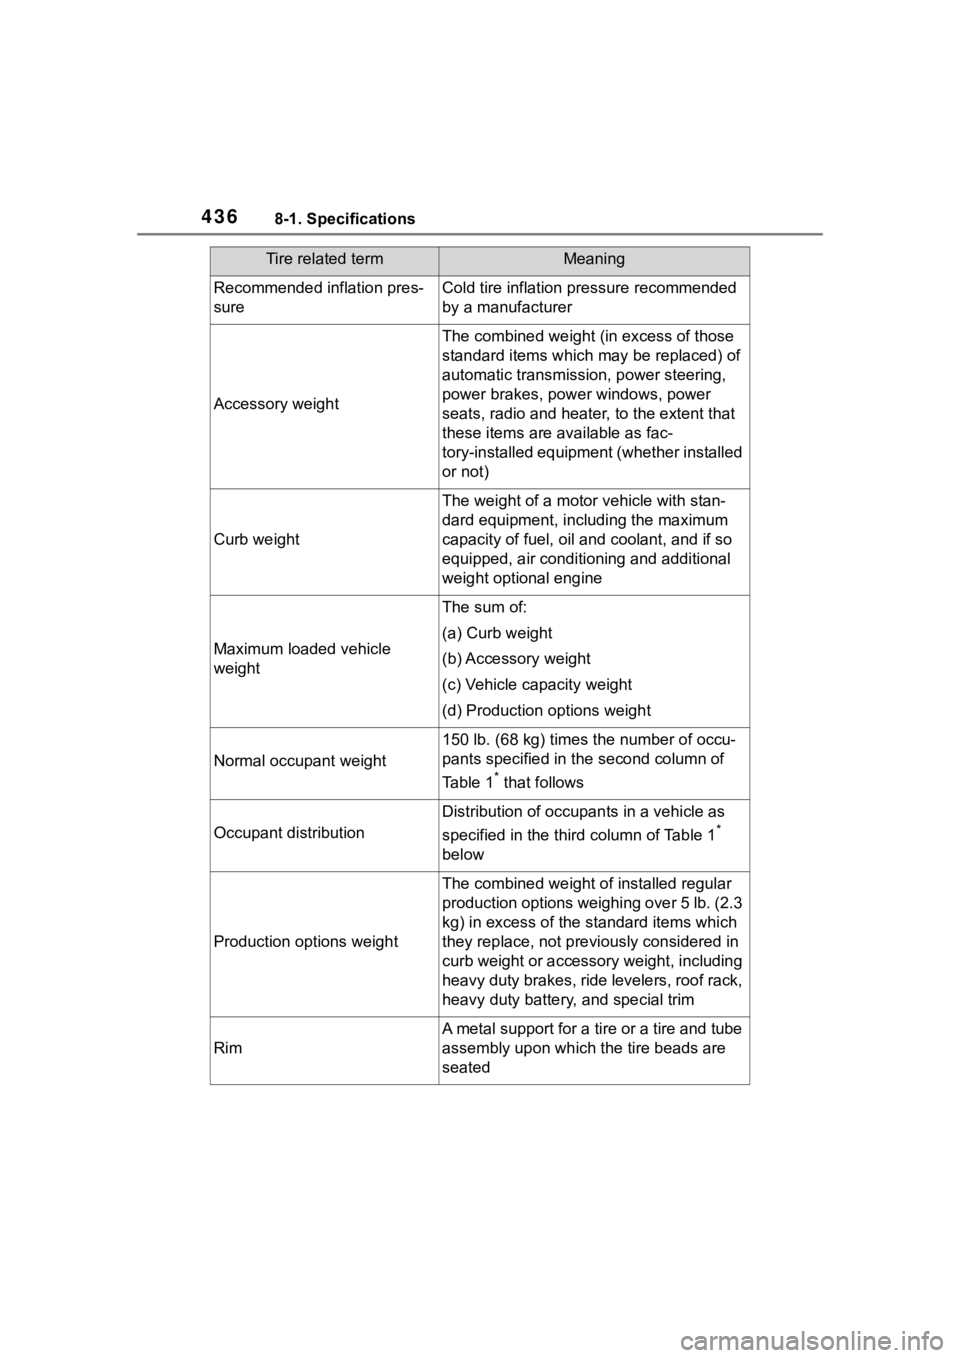
4368-1. Specifications
Recommended inflation pres-
sureCold tire inflation pressure recommended
by a manufacturer
Accessory weight
The combined weight (in excess of those
standard items which may be replaced) of
automatic transmission, power steering,
power brakes, power windows, power
seats, radio and heater, to the extent that
these items are available as fac-
tory-installed equipment (whether installed
or not)
Curb weight
The weight of a motor vehicle with stan-
dard equipment, including the maximum
capacity of fuel, oil and coolant, and if so
equipped, air conditioning and additional
weight optional engine
Maximum loaded vehicle
weight
The sum of:
(a) Curb weight
(b) Accessory weight
(c) Vehicle capacity weight
(d) Production options weight
Normal occupant weight
150 lb. (68 kg) times the number of occu-
pants specified in the second column of
Table 1
* that follows
Occupant distribution
Distribution of occupan ts in a vehicle as
specified in the thi rd column of Table 1
*
below
Production options weight
The combined weight o f installed regular
production options weighing over 5 lb. (2.3
kg) in excess of the s tandard items which
they replace, not previously considered in
curb weight or accessory weight, including
heavy duty brakes, ride levelers, roof rack,
heavy duty battery, and special trim
Rim
A metal support for a tire or a tire and tube
assembly upon which the tire beads are
seated
Tire related termMeaning