2023 TOYOTA COROLLA CROSS belt
[x] Cancel search: beltPage 73 of 500
732-1. Instrument cluster
2
Vehicle status information and indicators
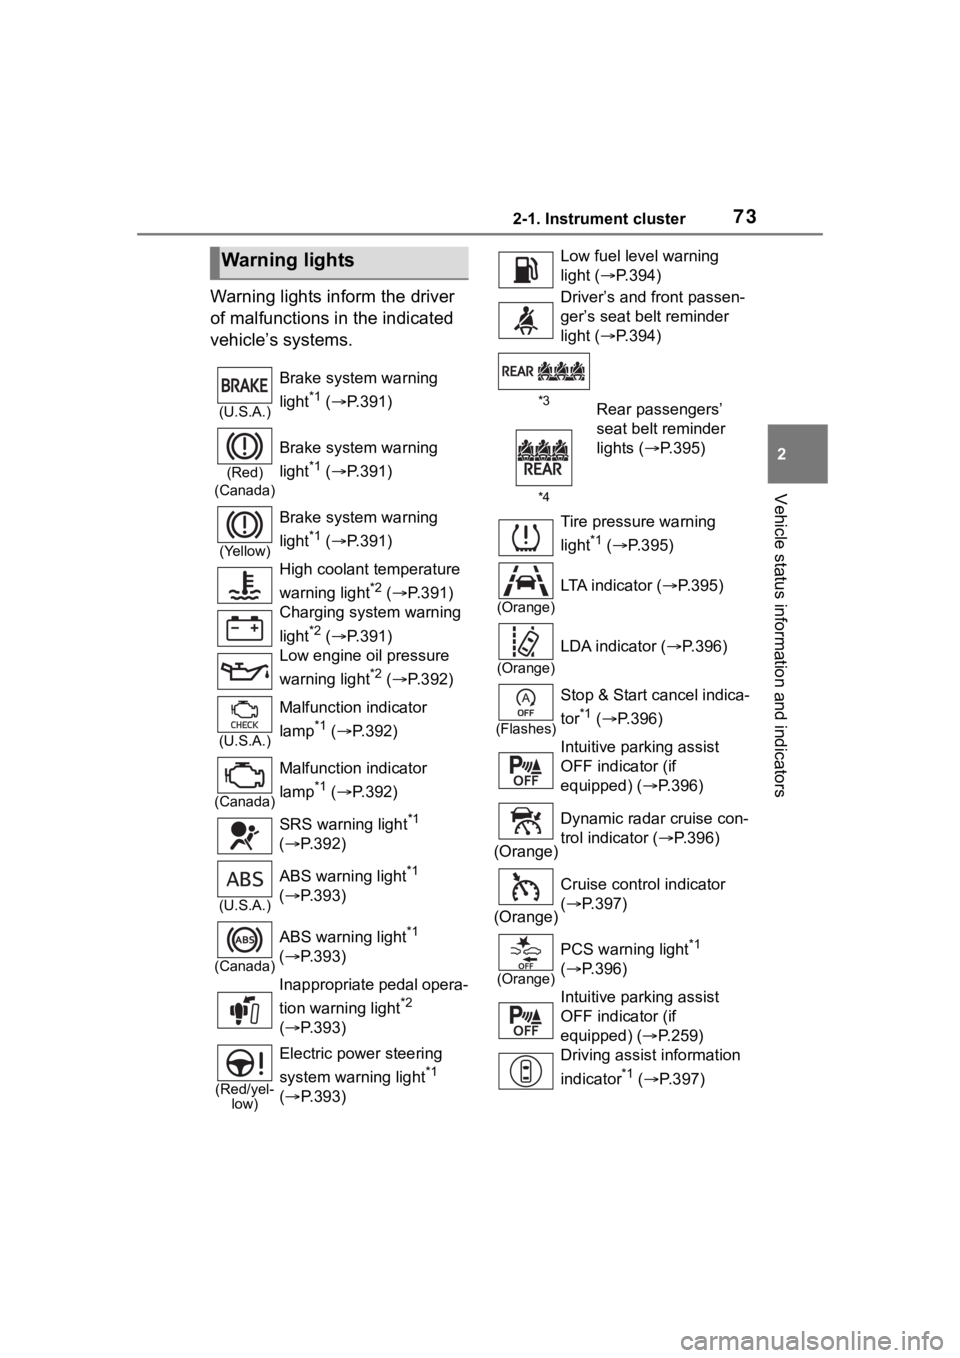
Warning lights inform the driver
of malfunctions in the indicated
vehicle’s systems.
Warning lights
(U.S.A.)
Brake system warning
light
*1 ( P.391)
(Red)
(Canada)
Brake system warning
light
*1 ( P.391)
(Yellow)
Brake system warning
light
*1 ( P.391)
High coolant temperature
warning light
*2 ( P.391)
Charging system warning
light
*2 ( P.391)
Low engine oil pressure
warning light
*2 ( P.392)
(U.S.A.)
Malfunction indicator
lamp
*1 ( P.392)
(Canada)
Malfunction indicator
lamp
*1 ( P.392)
SRS warning light
*1
( P.392)
(U.S.A.)
ABS warning light*1
( P.393)
(Canada)
ABS warning light*1
( P.393)
Inappropriate pedal opera-
tion warning light
*2
( P.393)
(Red/yel-
low)
Electric power steering
system warning light
*1
( P.393)
Low fuel leve l warning
light ( P.394)
Driver’s and front passen-
ger’s seat belt reminder
light ( P.394)
*3
*4Rear passengers’
seat belt reminder
lights ( P.395)
Tire pressure warning
light
*1 ( P.395)
(Orange)
LTA indicator ( P.395)
(Orange)
LDA indicator ( P.396)
(Flashes)
Stop & Start cancel indica-
tor
*1 ( P.396)
Intuitive parking assist
OFF indicator (if
equipped) ( P.396)
(Orange) Dynamic radar cruise con-
trol indicator (
P.396)
(Orange) Cruise control indicator
(
P.397)
(Orange)
PCS warning light*1
( P.396)
Intuitive parking assist
OFF indicator (if
equipped) ( P.259)
Driving assist information
indicator
*1 ( P.397)
Page 124 of 500
1243-3. Adjusting the seats
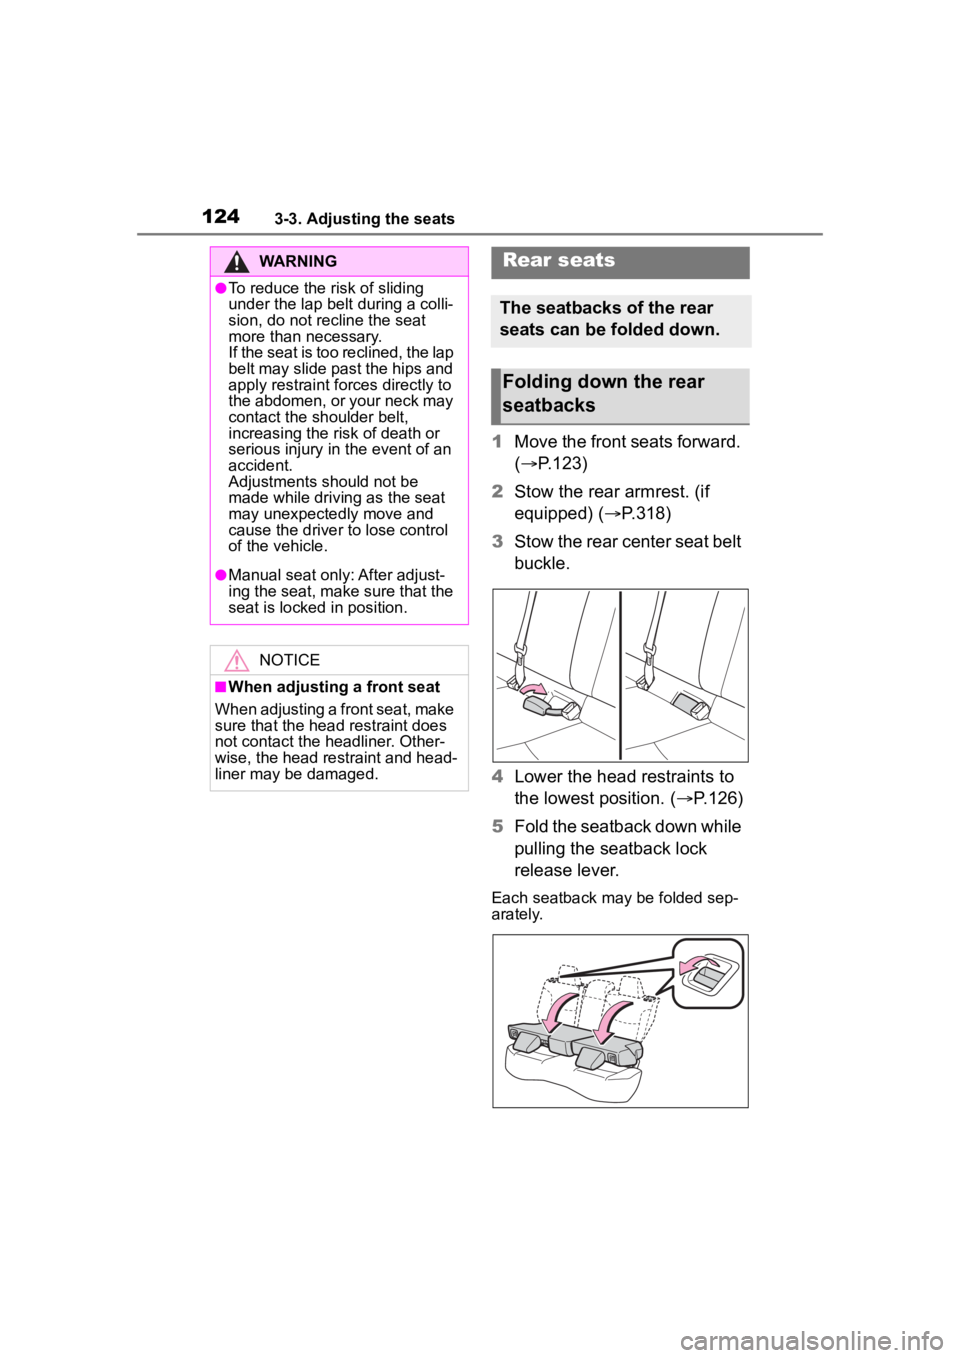
1Move the front seats forward.
( P.123)
2 Stow the rear armrest. (if
equipped) ( P.318)
3 Stow the rear center seat belt
buckle.
4 Lower the head restraints to
the lowest position. ( P.126)
5 Fold the seatback down while
pulling the seatback lock
release lever.
Each seatback may be folded sep-
arately.
WARNING
●To reduce the risk of sliding
under the lap belt during a colli-
sion, do not recline the seat
more than necessary.
If the seat is too reclined, the lap
belt may slide past the hips and
apply restraint forces directly to
the abdomen, or your neck may
contact the shoulder belt,
increasing the risk of death or
serious injury in the event of an
accident.
Adjustments should not be
made while driving as the seat
may unexpectedly move and
cause the driver to lose control
of the vehicle.
●Manual seat only: After adjust-
ing the seat, make sure that the
seat is locked in position.
NOTICE
■When adjusting a front seat
When adjusting a front seat, make
sure that the head restraint does
not contact the headliner. Other-
wise, the head restraint and head-
liner may be damaged.
Rear seats
The seatbacks of the rear
seats can be folded down.
Folding down the rear
seatbacks
Page 125 of 500
1253-3. Adjusting the seats
3
Before driving
WARNING
Observe the following precau-
tions. Failure to do so may result
in death or serious injury.
■When folding the rear seat-
backs down
●Do not fold the seatbacks down
while driving.
●Stop the vehicle on level
ground, set the parking brake
and shift the shift lever to P.
●Do not allow anyone to sit on a
folded seatback or in the lug-
gage compartment while driv-
ing.
●Do not allow child ren to enter
the luggage compartment.
●Be careful not to get your hand
caught when folding the rear
seatbacks.
●Adjust the position of the front
seats before folding down the
rear seatbacks so that the front
seats do not interfere with the
rear seatbacks when folding
down the rear seatbacks.
■After returning the rear seat-
back to the upright position
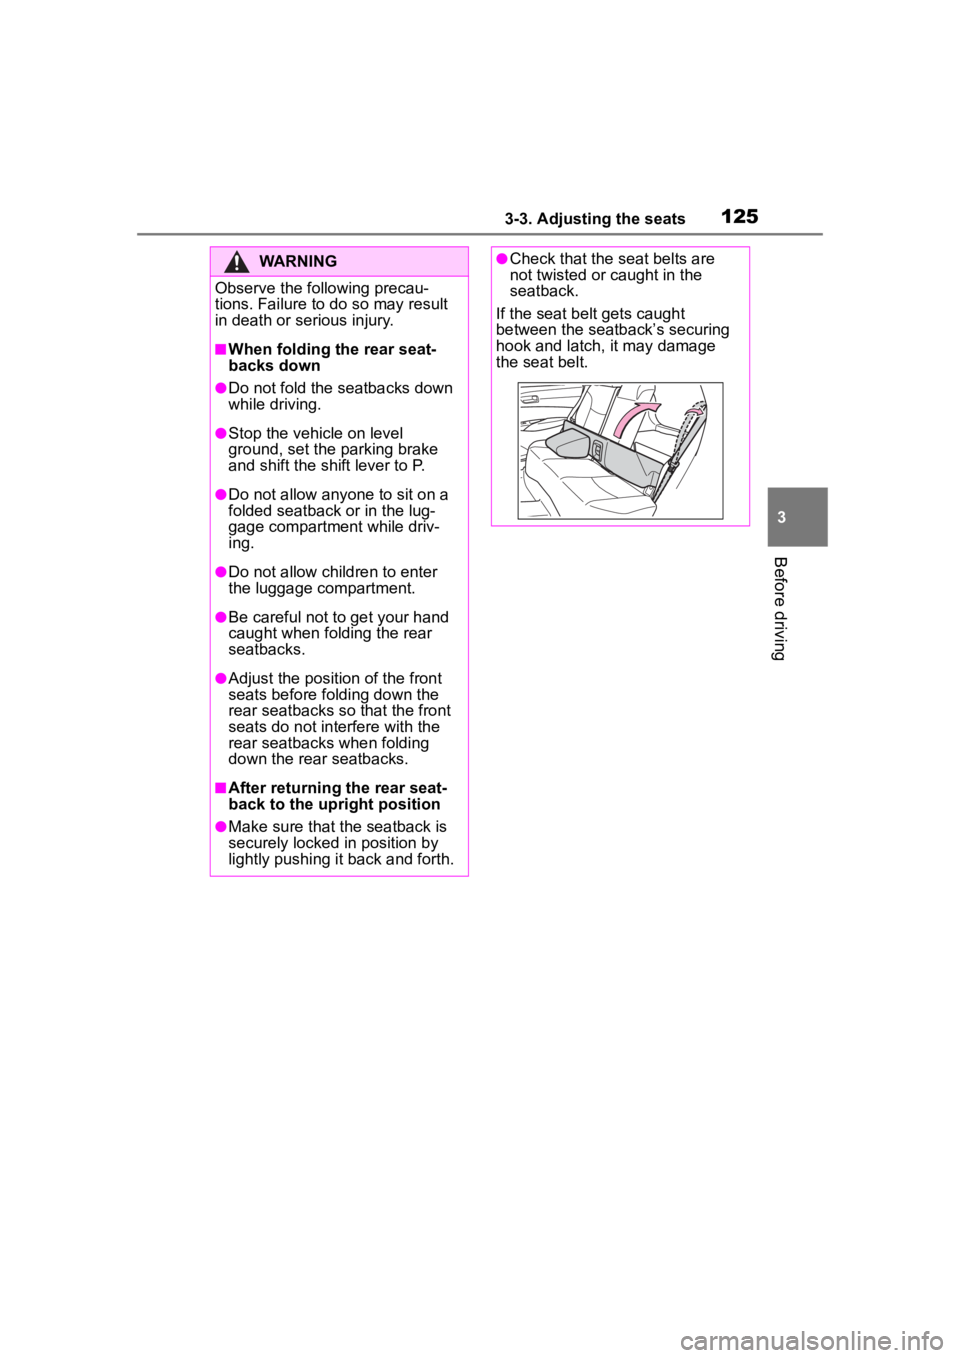
●Make sure that the seatback is
securely locked in position by
lightly pushing it back and forth.
●Check that the seat belts are
not twisted or caught in the
seatback.
If the seat belt gets caught
between the seatback’s securing
hook and latch, it may damage
the seat belt.
Page 149 of 500
1494-1. Before driving
4
Driving
WARNING
●Receptacles containing gaso-
line
●Aerosol cans
■Storage precautions
Observe the following precau-
tions.
Failure to do so m ay prevent the
pedals from being depressed
properly, may block the driver’s
vision, or may result in items hit-
ting the driver or passengers, pos-
sibly causing an accident.
●Stow cargo and luggage in the
luggage compartment when-
ever possible.
●Do not stack cargo and luggage
in the luggage compartment
higher than the seatbacks.
●When you fold down the rear
seats, long items should not be
placed directly behind the front
seats.
●Never allow anyone to ride in
the luggage compartment. It is
not designed for passengers.
They should ride in their seats
with their seat belts properly
fastened.
●Do not place cargo or luggage
in or on the following locations.
• At the feet of the driver
• On the front passenger or rear seats (when stacking items)
• On the luggage cover
• On the instrument panel
• On the dashboard
●Secure all items in the occupant
compartment.
■Capacity and distribution
●Do not exceed the maximum
axle weight rating or the total
vehicle weight rating.
●Even if the total load of occu-
pant’s weight and the cargo
load is less than the total load
capacity, do not apply the load
unevenly. Improper loading may
cause deterioration of steering
or braking control which may
cause death or serious injury.
■When using a roof luggage
carrier (vehicles with roof
rails)
Observe the following precau-
tions:
●Place the cargo so that its
weight is distributed evenly
between the front and rear
axles.
●If loading long or wide cargo,
never exceed the vehicle overall
length or width. (
P.428)
●Before driving, m ake sure the
cargo is securely fastened on
the roof luggage carrier.
●Loading cargo on the roof lug-
gage carrier will make the cen-
ter of gravity of the vehicle
higher. Avoid high speeds, sud-
den starts, sharp turns, sudden
braking or abrupt maneuvers,
otherwise it may result in loss of
control or vehicle rollover due to
failure to operate this vehicle
correctly and result in death or
serious injury.
●If driving for a long distance, on
rough roads, or at high speeds,
stop the vehicle now and then
during the trip to make sure the
cargo remains in its place.
●Do not exceed 75 lb. (34 kg)
cargo weight on the roof lug-
gage carrier.
Page 173 of 500
1734-2. Driving procedures
4
Driving
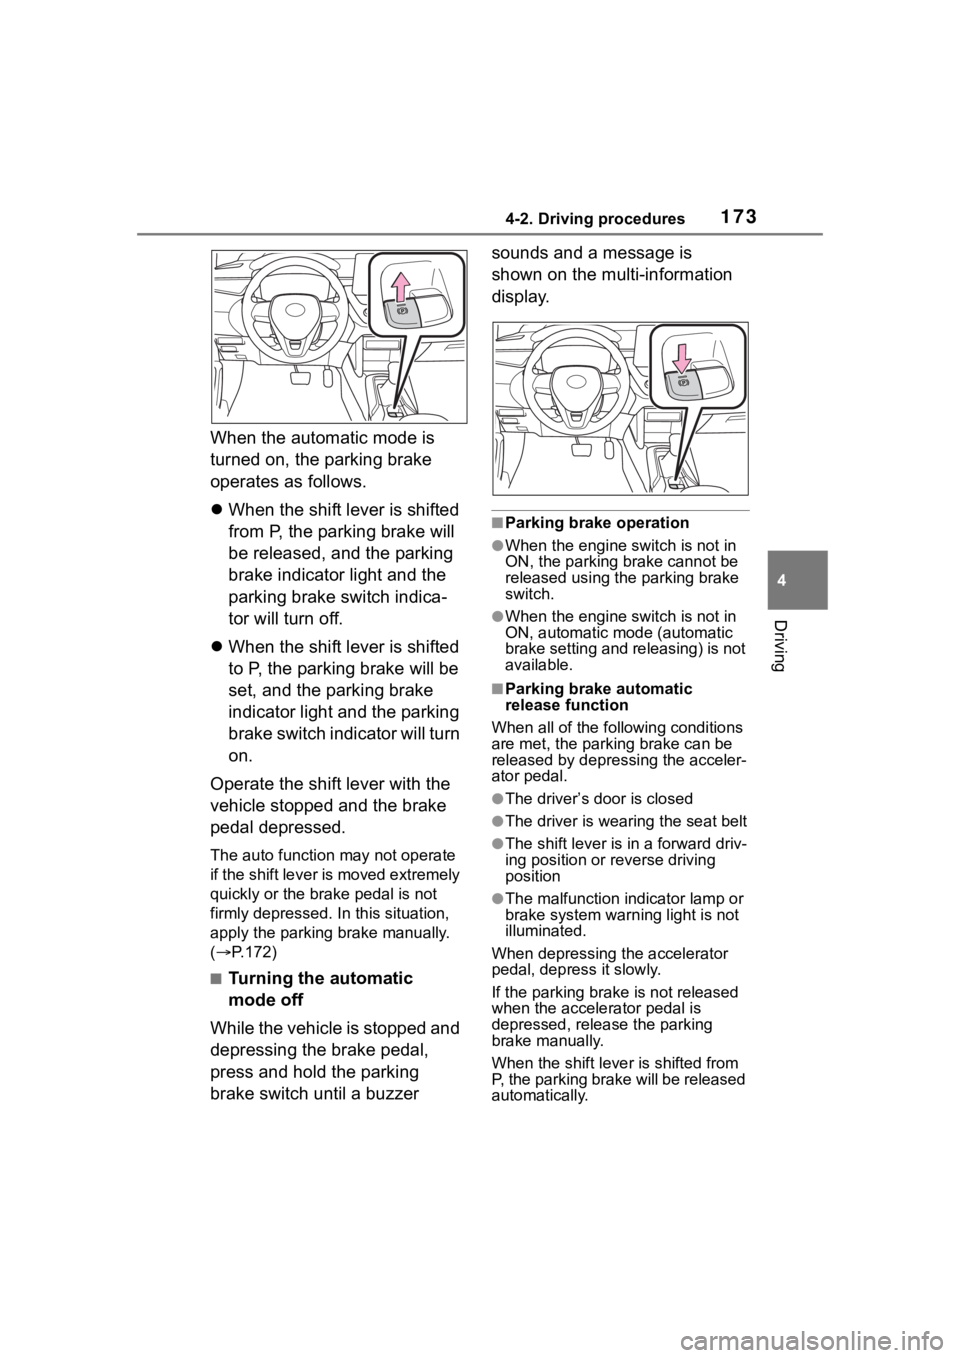
When the automatic mode is
turned on, the parking brake
operates as follows.
When the shift lever is shifted
from P, the parking brake will
be released, and the parking
brake indicator light and the
parking brake switch indica-
tor will turn off.
When the shift lever is shifted
to P, the parking brake will be
set, and the parking brake
indicator light and the parking
brake switch indicator will turn
on.
Operate the shift lever with the
vehicle stopped and the brake
pedal depressed.
The auto function may not operate
if the shift lever is moved extremely
quickly or the brake pedal is not
firmly depressed. In this situation,
apply the parking brake manually.
( P.172)
■Turning the automatic
mode off
While the vehicle is stopped and
depressing the brake pedal,
press and hold the parking
brake switch until a buzzer sounds and a message is
shown on the multi-information
display.
■Parking brake operation
●When the engine switch is not in
ON, the parking brake cannot be
released using the parking brake
switch.
●When the engine switch is not in
ON, automatic mode (automatic
brake setting and releasing) is not
available.
■Parking brake automatic
release function
When all of the fo llowing conditions
are met, the parking brake can be
released by depressing the acceler-
ator pedal.
●The driver’s door is closed
●The driver is wearing the seat belt
●The shift lever is in a forward driv-
ing position or reverse driving
position
●The malfunction in dicator lamp or
brake system warning light is not
illuminated.
When depressing the accelerator
pedal, depress it slowly.
If the parking brak e is not released
when the accelerator pedal is
depressed, release the parking
brake manually.
When the shift lever is shifted from
P, the parking brake will be released
automatically.
Page 174 of 500
1744-2. Driving procedures
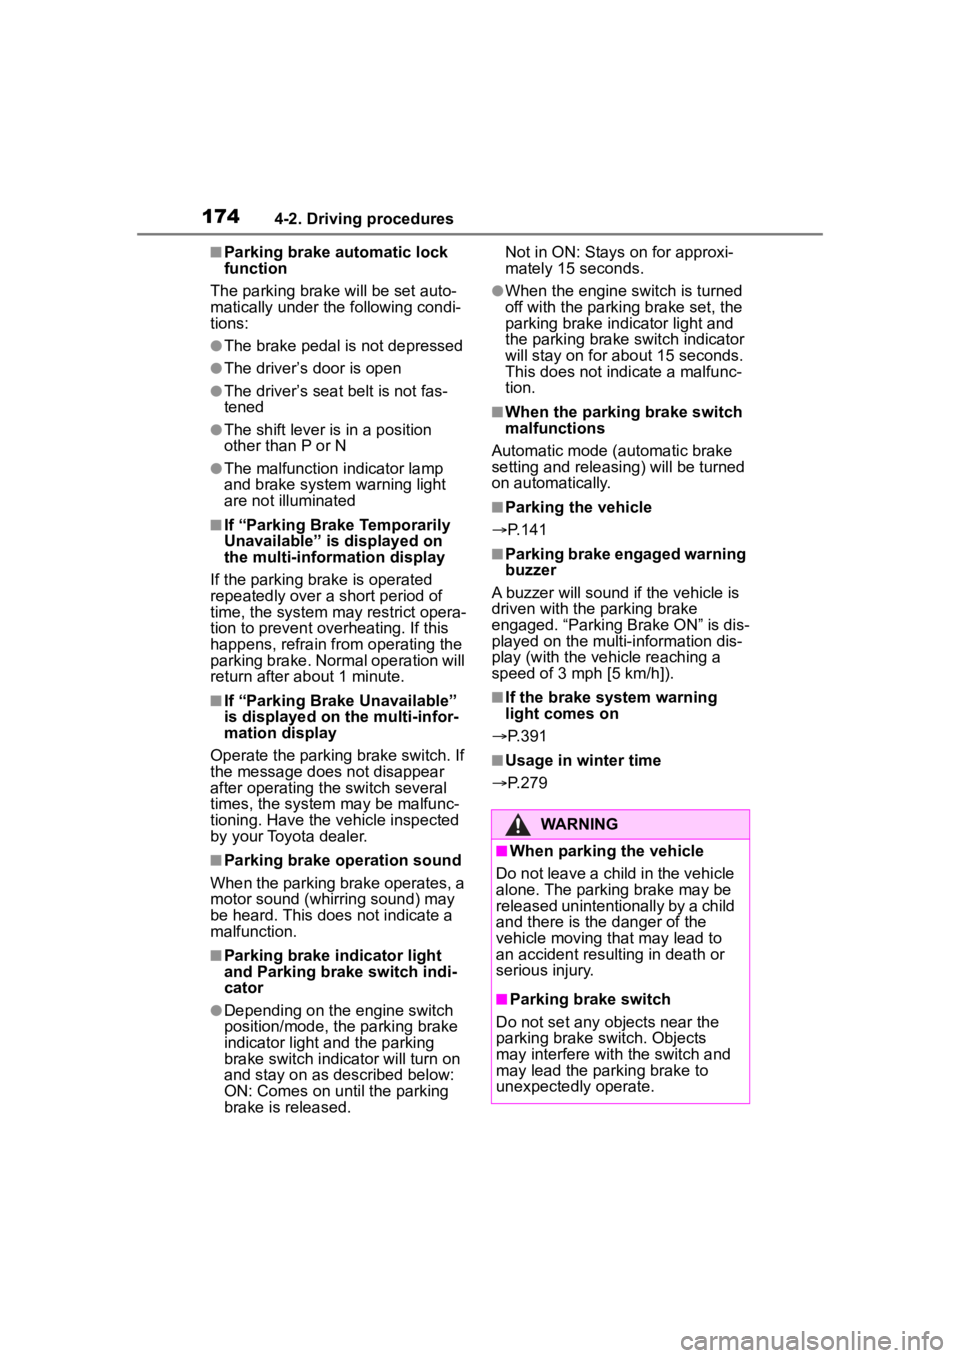
■Parking brake automatic lock
function
The parking brake will be set auto-
matically under the following condi-
tions:
●The brake pedal is not depressed
●The driver’s door is open
●The driver’s seat belt is not fas-
tened
●The shift lever is in a position
other than P or N
●The malfunction indicator lamp
and brake system warning light
are not illuminated
■If “Parking Brake Temporarily
Unavailable” i s displayed on
the multi-information display
If the parking brake is operated
repeatedly over a short period of
time, the system may restrict opera-
tion to prevent overheating. If this
happens, refrain from operating the
parking brake. Nor mal operation will
return after about 1 minute.
■If “Parking Brake Unavailable”
is displayed on the multi-infor-
mation display
Operate the parking brake switch. If
the message does not disappear
after operating the switch several
times, the system may be malfunc-
tioning. Have the vehicle inspected
by your Toyota dealer.
■Parking brake operation sound
When the parking brake operates, a
motor sound (whirring sound) may
be heard. This does not indicate a
malfunction.
■Parking brake indicator light
and Parking brake switch indi-
cator
●Depending on the engine switch
position/mode, the parking brake
indicator light and the parking
brake switch indicator will turn on
and stay on as described below:
ON: Comes on until the parking
brake is released. Not in ON: Stays
on for approxi-
mately 15 seconds.
●When the engine switch is turned
off with the parking brake set, the
parking brake indicator light and
the parking brake switch indicator
will stay on for abo ut 15 seconds.
This does not indicate a malfunc-
tion.
■When the parking brake switch
malfunctions
Automatic mode (automatic brake
setting and releas ing) will be turned
on automatically.
■Parking the vehicle
P.141
■Parking brake engaged warning
buzzer
A buzzer will sound if the vehicle is
driven with the parking brake
engaged. “Parking Brake ON” is dis-
played on the multi-information dis-
play (with the vehicle reaching a
speed of 3 mph [5 km/h]).
■If the brake system warning
light comes on
P.391
■Usage in winter time
P.279
WARNING
■When parking the vehicle
Do not leave a child in the vehicle
alone. The parking brake may be
released unintentionally by a child
and there is the danger of the
vehicle moving that may lead to
an accident resulting in death or
serious injury.
■Parking brake switch
Do not set any objects near the
parking brake switch. Objects
may interfere with the switch and
may lead the parking brake to
unexpectedly operate.
Page 175 of 500
1754-2. Driving procedures
4
Driving
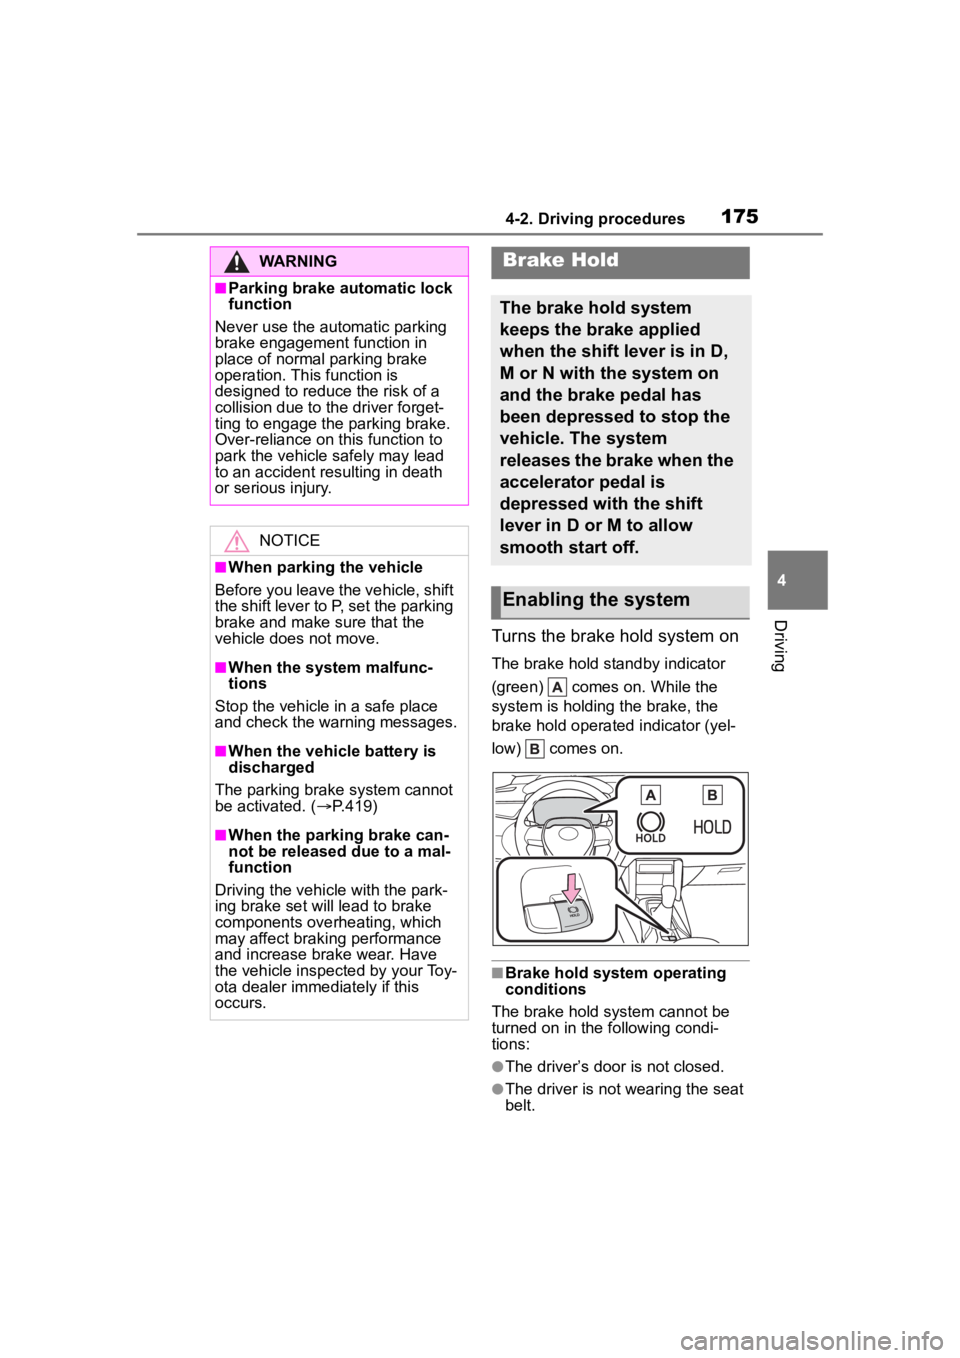
Turns the brake hold system on
The brake hold standby indicator
(green) comes on. While the
system is holding the brake, the
brake hold operated indicator (yel-
low) comes on.
■Brake hold system operating
conditions
The brake hold system cannot be
turned on in the following condi-
tions:
●The driver’s door is not closed.
●The driver is not wearing the seat
belt.
WARNING
■Parking brake automatic lock
function
Never use the automatic parking
brake engagement function in
place of normal parking brake
operation. This function is
designed to reduc e the risk of a
collision due to the driver forget-
ting to engage the parking brake.
Over-reliance on this function to
park the vehicle safely may lead
to an accident resulting in death
or serious injury.
NOTICE
■When parking the vehicle
Before you leave the vehicle, shift
the shift lever to P, set the parking
brake and make sure that the
vehicle does not move.
■When the system malfunc-
tions
Stop the vehicle in a safe place
and check the warning messages.
■When the vehicle battery is
discharged
The parking brake system cannot
be activated. ( P.419)
■When the parking brake can-
not be released due to a mal-
function
Driving the vehicle with the park-
ing brake set will lead to brake
components overheating, which
may affect braking performance
and increase brake wear. Have
the vehicle inspected by your Toy-
ota dealer immediately if this
occurs.
Brake Hold
The brake hold system
keeps the brake applied
when the shift lever is in D,
M or N with the system on
and the brake pedal has
been depressed to stop the
vehicle. The system
releases the brake when the
accelerator pedal is
depressed with the shift
lever in D or M to allow
smooth start off.
Enabling the system
Page 176 of 500
1764-2. Driving procedures
●The parking brake is engaged.
If any of the conditions above are
detected when the brake hold sys-
tem is enabled, the system will turn
off and the brake hold standby indi-
cator light will go of f. In addition, if
any of the conditions are detected
while the system is holding the
brake, a warning buzzer will sound
and a message will be shown on the
multi-information display. The park-
ing brake will then be set automati-
cally.
■Brake hold function
●If the brake pedal is left released
for a period of about 3 minutes
after the system has started hold-
ing the brake, the parking brake
will be set automatically. In this
case, a warning buzzer sounds
and a message is shown on the
multi-informat ion display.
●To turn the system off while the
system is holding the brake, firmly
depress the brake pedal and
press the button again.
●The brake hold function may not
hold the vehicle when the vehicle
is on a steep inclin e. In this situa-
tion, it may be necessary for the
driver to apply the brakes. A warn-
ing buzzer will sound and the
multi-informatio n display will
inform the driver of this situation. If
a warning message is shown on
the multi-information display, read
the message and follow the
instructions.
●When do not wish for the parking
brake to operate automatically,
press and hold the brake hold
switch until the standby indicator
(green) turns off, and then turn the
engine switch off.
■When the parking brake is set
automatically while the system
is holding the brakes
Perform any of the following opera-
tions to release the parking brake.
●Depress the accelerator pedal. (The parking brake will not be
released automatically if the seat
belt is not fastened.)
●Operate the parking brake switch
with the brake pedal depressed.
Make sure that the parking brake
indicator light goes off. ( P.172)
■When an inspection at your
Toyota dealer is necessary
When the brake hold standby indi-
cator (green) does not illuminate
even when the brake hold switch is
pressed with the brake hold system
operating conditions met, the sys-
tem may be malf unctioning. Have
the vehicle inspected at your Toyota
dealer.
■If “Brake Hold Malfunction
Press Brake to Deactivate Visit
Your Dealer” or “Brake Hold
Malfunction Visit Your Dealer”
is displayed on the multi-infor-
mation display
The system may be malfunctioning.
Have the vehicle inspected by your
Toyota dealer.
■Warning messages and buzzers
Warning messages and buzzers are
used to indicate a system malfunc-
tion or to inform the driver of the
need for caution. If a warning mes-
sage is shown on the multi-informa-
tion display, read the message and
follow the instructions.
■If the brake hold operated indi-
cator flashes
P.398
WARNING
■When the vehicle is on a
steep incline
Take care when using the brake
hold system on a steep incline,
exercise caution. The brake hold
function may not hold brakes in
such situations. Also, the system
may not activate depending on
the angle of the slope.