2023 TOYOTA 86 warning
[x] Cancel search: warningPage 89 of 449

892-1. Instrument cluster
2
Vehicle status information and indicators
TRACK modeMulti-information display
Presents the driver with a variety of vehicle data (P.93)
Displays warning messages in case of a malfunction (P.357)
Tachometer
Displays the engine speed in revolutions per minute
The red zone will be lower than n ormal, when the engine is cold
Outside temperature
Displays the outside temperature within the range of -40°F (-40 °C) to 122°F
(50°C). Low outside temperature indicator comes on when the amb ient
temperature is 37°F (3°C) or lower.
Clock
Engine coolant temperature gauge
Displays the engine c oolant temperature
Fuel gauge
Speedometer
Shift position and gear position ( P.149, 154)
Odometer and trip meter display ( P.90)
■REV indicator
When the engine speed reaches
a set speed, the shift position
and shift range indicator will illu-
minate in orange and a buzzer
will sound. If the engine speed enters the red zone, the shift
position and shift range indicator
will illuminate in red.
The default setting for the REV indi-
cator is disabled. The setting can
be enabled/disabled on of the
A
C
D
Page 90 of 449
902-1. Instrument cluster
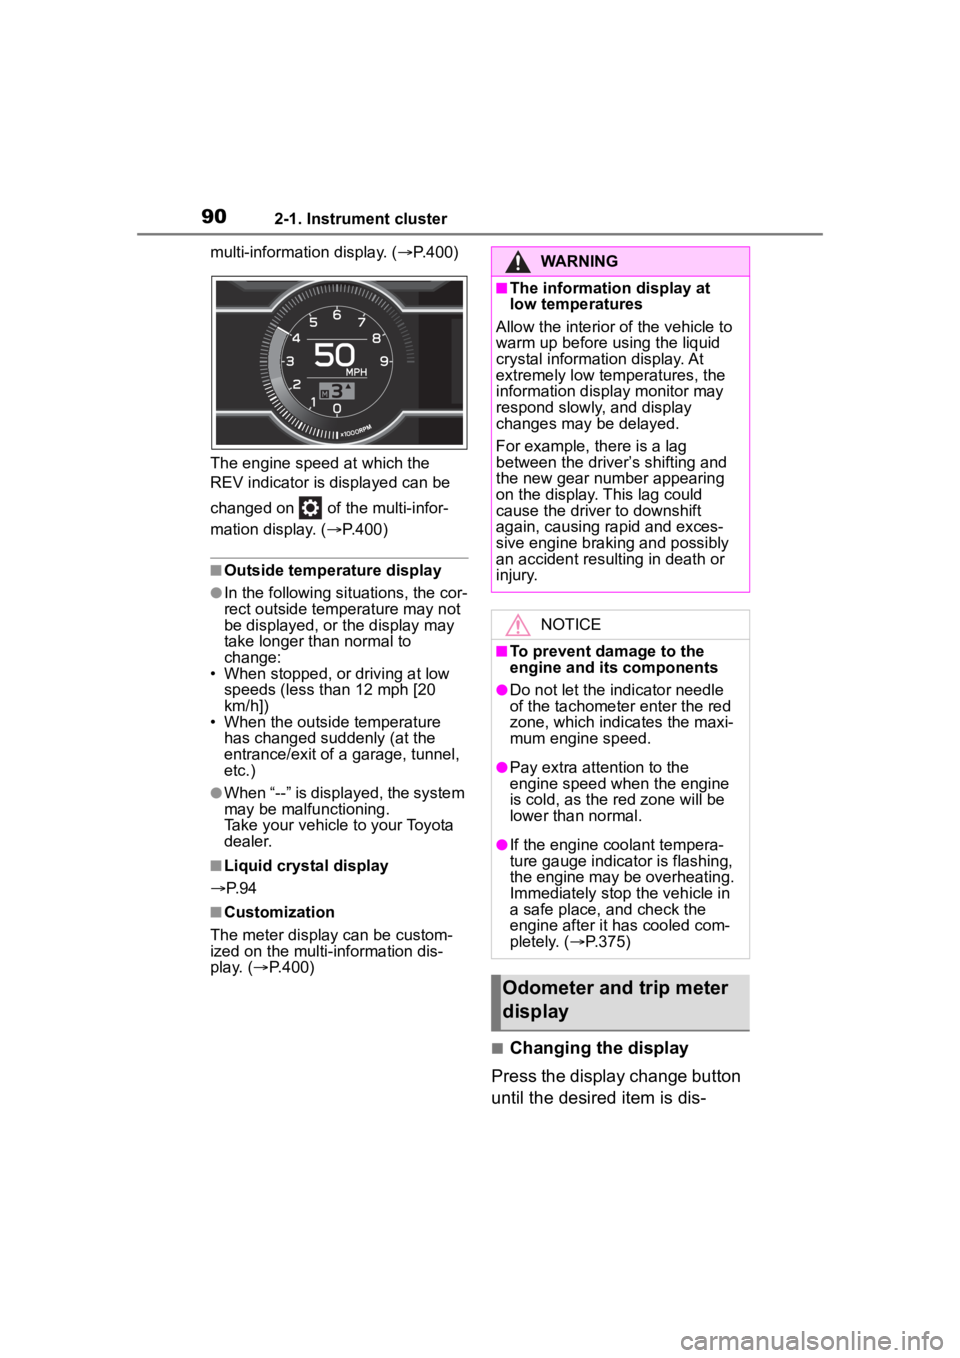
multi-information display. (P.400)
The engine speed at which the
REV indicator is d isplayed can be
changed on of the multi-infor-
mation display. ( P.400)
■Outside temperature display
●In the following si tuations, the cor-
rect outside tempe rature may not
be displayed, or the display may
take longer than normal to
change:
• When stopped, or driving at low speeds (less than 12 mph [20
km/h])
• When the outside temperature has changed suddenly (at the
entrance/exit of a garage, tunnel,
etc.)
●When “--” is displayed, the system
may be malfunctioning.
Take your vehicle to your Toyota
dealer.
■Liquid crystal display
P. 9 4
■Customization
The meter display can be custom-
ized on the multi-information dis-
play. ( P.400)
■Changing the display
Press the display change button
until the desired item is dis-
WARNING
■The information display at
low temperatures
Allow the interior of the vehicle to
warm up before using the liquid
crystal information display. At
extremely low temperatures, the
information disp lay monitor may
respond slowly, and display
changes may be delayed.
For example, there is a lag
between the driver’s shifting and
the new gear number appearing
on the display. This lag could
cause the driver to downshift
again, causing rapid and exces-
sive engine braking and possibly
an accident resulting in death or
injury.
NOTICE
■To prevent damage to the
engine and its components
●Do not let the indicator needle
of the tachometer enter the red
zone, which indicates the maxi-
mum engine speed.
●Pay extra attention to the
engine speed when the engine
is cold, as the red zone will be
lower than normal.
●If the engine coolant tempera-
ture gauge indicator is flashing,
the engine may be overheating.
Immediately stop the vehicle in
a safe place, and check the
engine after it has cooled com-
pletely. ( P.375)
Odometer and trip meter
display
Page 93 of 449
932-1. Instrument cluster
2
Vehicle status information and indicators
■Display
Normal display
By selecting menu icons on the
multi-information display, a vari-
ety of driving-related information
can be displayed. The
multi-information display can
also be used to change display
settings and other vehicle set-
tings.
Warning or advice pop-up dis-
plays are also displayed in cer-
tain situations.
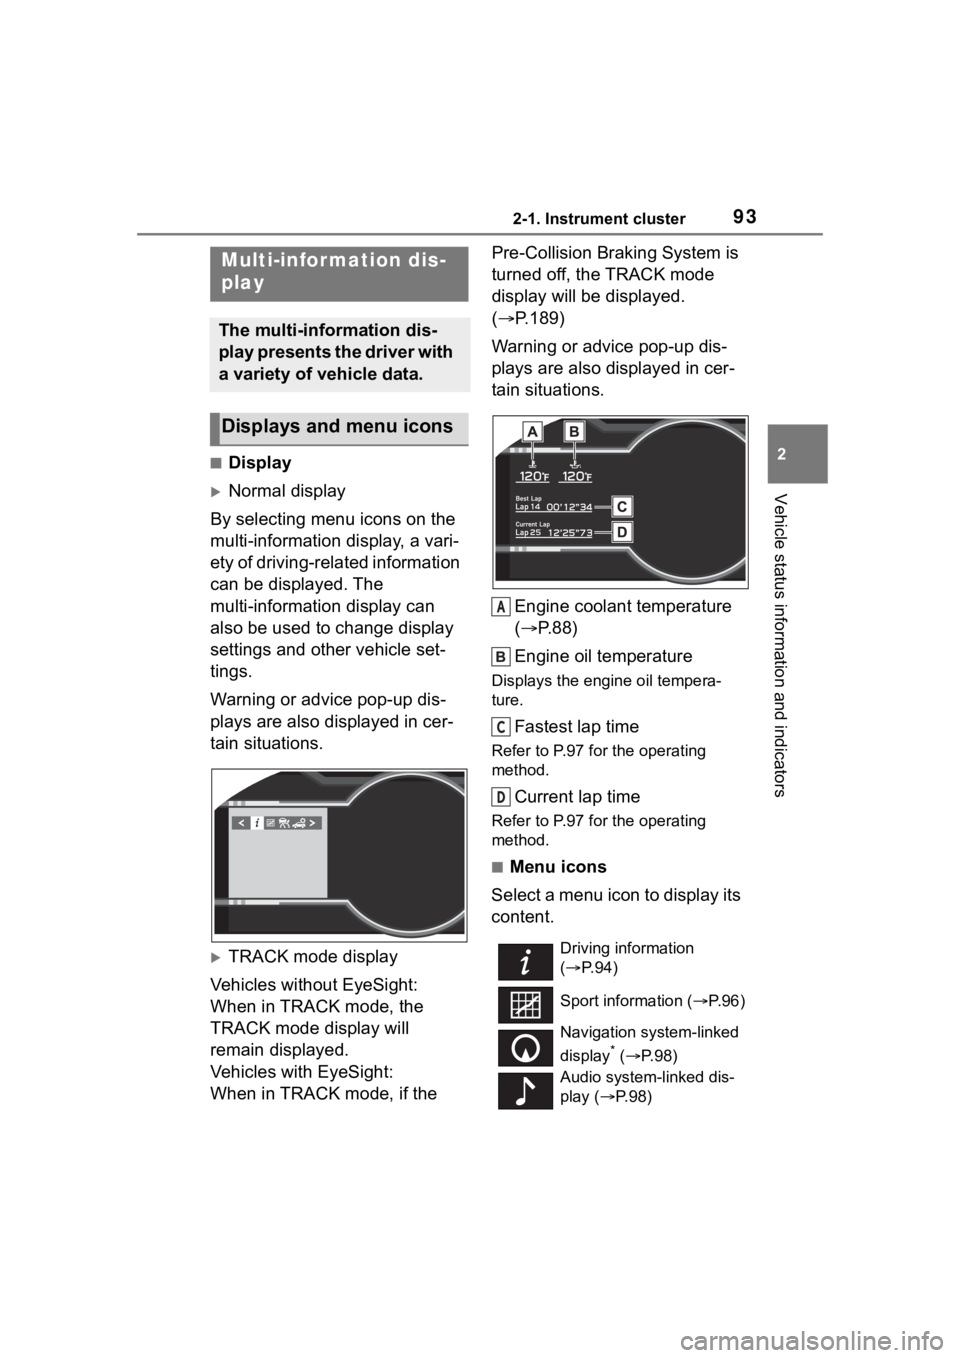
TRACK mode display
Vehicles without EyeSight:
When in TRACK mode, the
TRACK mode display will
remain displayed.
Vehicles with EyeSight:
When in TRACK mode, if the Pre-Collision Braking System is
turned off, the TRACK mode
display will be displayed.
(
P.189)
Warning or advice pop-up dis-
plays are also displayed in cer-
tain situations.
Engine coolant temperature
( P.88)
Engine oil temperature
Displays the engine oil tempera-
ture.
Fastest lap time
Refer to P.97 for the operating
method.
Current lap time
Refer to P.97 for the operating
method.
■Menu icons
Select a menu icon to display its
content.
Multi-infor mation dis-
play
The multi-information dis-
play presents the driver with
a variety of vehicle data.
Displays and menu icons
Driving information
( P. 9 4 )
Sport information ( P.96)
Navigation system-linked
display
* ( P. 9 8 )
Audio system-linked dis-
play ( P. 9 8 )
A
C
D
Page 94 of 449
942-1. Instrument cluster
*: Displayed when the navigation system of Apple CarPlay or
Android Auto is operating. For
details, refer to the “MULTIMEDIA
OWNER’S MANUAL”.
■Liquid crystal display
Small spots or light spots may
appear on the display. This phenom-
enon is characteristi c of liquid crys-
tal displays, and there is no problem
continuing to use the display.
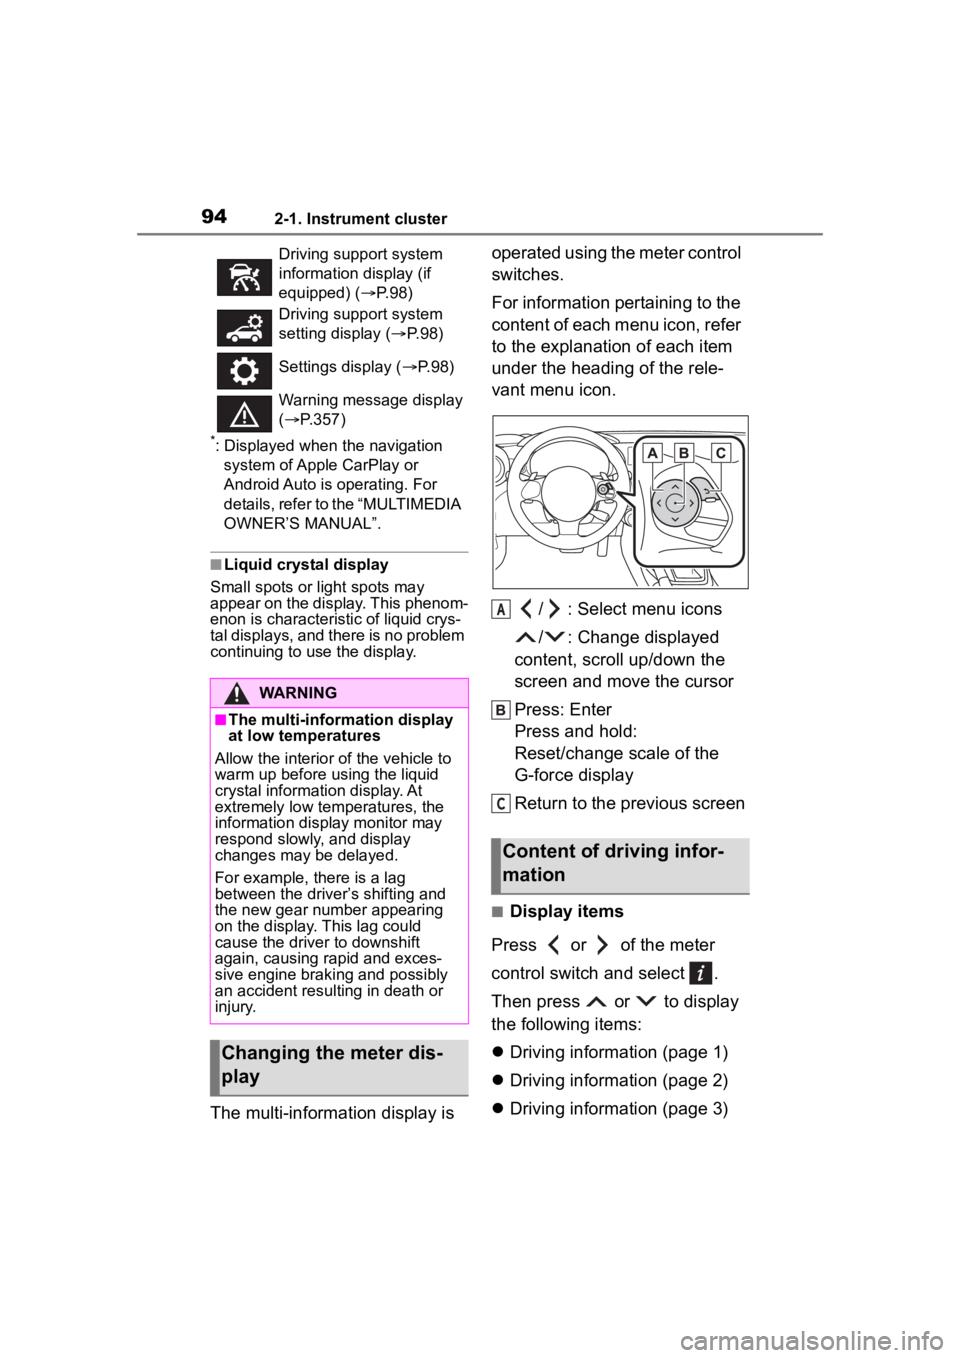
The multi-information display is operated using the meter control
switches.
For information pertaining to the
content of each menu icon, refer
to the explanation of each item
under the heading of the rele-
vant menu icon.
/ : Select menu icons
/ : Change displayed
content, scroll up/down the
screen and move the cursor
Press: Enter
Press and hold:
Reset/change scale of the
G-force display
Return to the previous screen
■Display items
Press or of the meter
control switch and select .
Then press or to display
the following items:
Driving information (page 1)
Driving information (page 2)
Driving information (page 3)
Driving support system
information display (if
equipped) ( P. 9 8 )
Driving support system
setting display ( P. 9 8 )
Settings display ( P. 9 8 )
Warning message display
( P.357)
WARNING
■The multi-information display
at low temperatures
Allow the interior of the vehicle to
warm up before u sing the liquid
crystal informat ion display. At
extremely low temperatures, the
information display monitor may
respond slowly, and display
changes may be delayed.
For example, there is a lag
between the driver’s shifting and
the new gear number appearing
on the display. This lag could
cause the driver to downshift
again, causing rapid and exces-
sive engine braking and possibly
an accident resulting in death or
injury.
Changing the meter dis-
play
Content of driving infor-
mation
A
C
Page 99 of 449
992-1. Instrument cluster
2
Vehicle status information and indicators
Select to enable/disable the startup
screen when the engine switch is
turned to ON.
GSI (if equipped)
Select to enable/disable the shift
position indicator and shift-up indi-
cator.
REV. (REV indicator)
• Select to enable/disable the REV
indicator.
• Select to enable/disable the sounding of a buzzer when the
REV indicator is illuminated.
• Select to set the engine speed at which the REV indicator (orange)
will begin to be displayed.
■Vehicle functions and set-
tings that can be changed
P.400
■Suspension of the settings dis-
play
●Some settings cannot be changed
while driving. When changing set-
tings, park the vehicle in a safe
place.
●If a warning message is displayed,
operation of the settings display
will be suspended.
WARNING
■Cautions during setting up
the display
As the engine needs to be run-
ning during setting up the display,
ensure that the vehicle is parked
in a place with adequate ventila-
tion. In a closed area such as a
garage, exhaust gases including
harmful carbon monoxide (CO)
may collect and enter the vehicle.
This may lead to death or a seri-
ous health hazard.
NOTICE
■While setting up the display
To prevent batte ry discharge,
ensure that the engine is running
while setting up the display fea-
tures.
Page 106 of 449
1063-2. Opening, closing and locking the doors and trunk
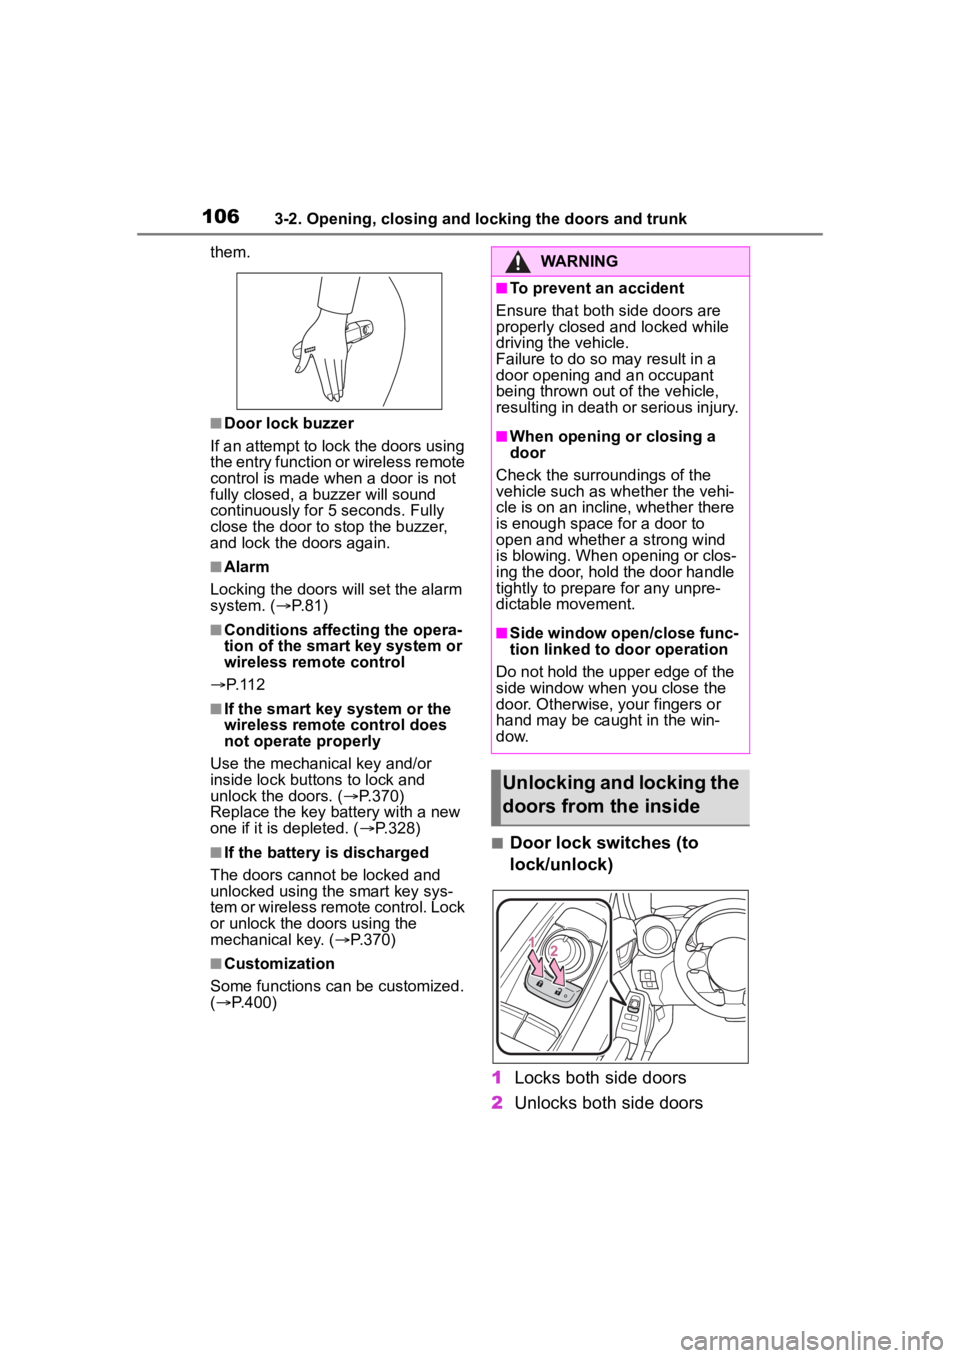
them.
■Door lock buzzer
If an attempt to lock the doors using
the entry function or wireless remote
control is made w hen a door is not
fully closed, a buzzer will sound
continuously for 5 seconds. Fully
close the door to stop the buzzer,
and lock the doors again.
■Alarm
Locking the doors will set the alarm
system. ( P.81)
■Conditions affecting the opera-
tion of the smart key system or
wireless remo te control
P. 1 1 2
■If the smart key system or the
wireless remote control does
not operate properly
Use the mechanical key and/or
inside lock buttons to lock and
unlock the doors. ( P.370)
Replace the key battery with a new
one if it is depleted. ( P.328)
■If the battery is discharged
The doors cannot be locked and
unlocked using the smart key sys-
tem or wireless remote control. Lock
or unlock the doors using the
mechanical key. ( P.370)
■Customization
Some functions can be customized.
( P.400)
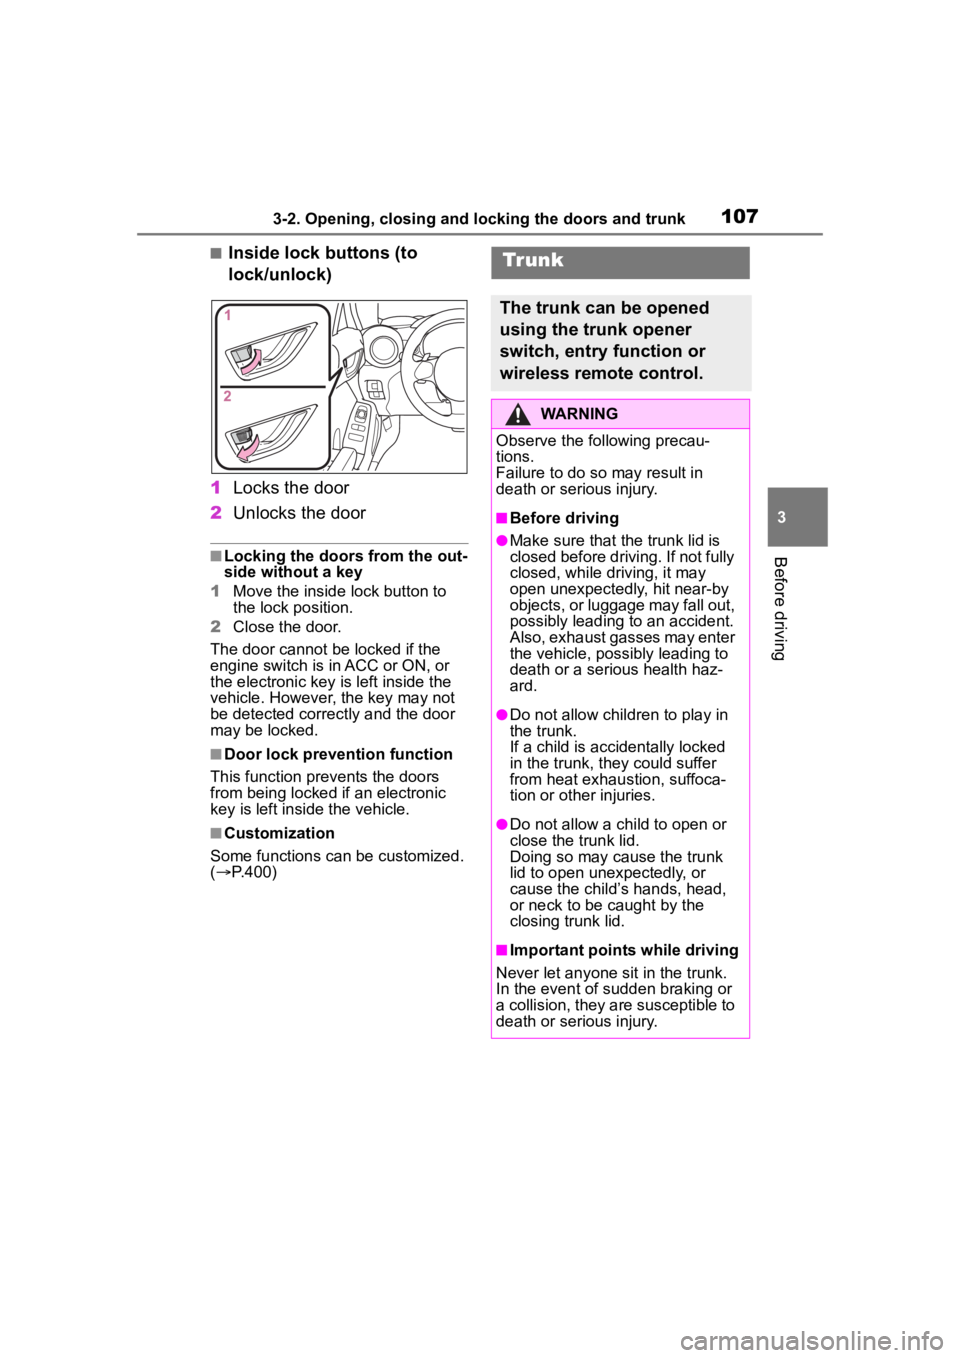
■Door lock switches (to
lock/unlock)
1 Locks both side doors
2 Unlocks both side doors
WARNING
■To prevent an accident
Ensure that both side doors are
properly closed and locked while
driving the vehicle.
Failure to do so may result in a
door opening and an occupant
being thrown out o f the vehicle,
resulting in death o r serious injury.
■When opening or closing a
door
Check the surroundings of the
vehicle such as wh ether the vehi-
cle is on an incline, whether there
is enough space for a door to
open and whether a strong wind
is blowing. When opening or clos-
ing the door, hold the door handle
tightly to prepare for any unpre-
dictable movement.
■Side window open/close func-
tion linked to door operation
Do not hold the upper edge of the
side window when you close the
door. Otherwise, your fingers or
hand may be caught in the win-
dow.
Unlocking and locking the
doors from the inside
Page 107 of 449
1073-2. Opening, closing and locking the doors and trunk
3
Before driving
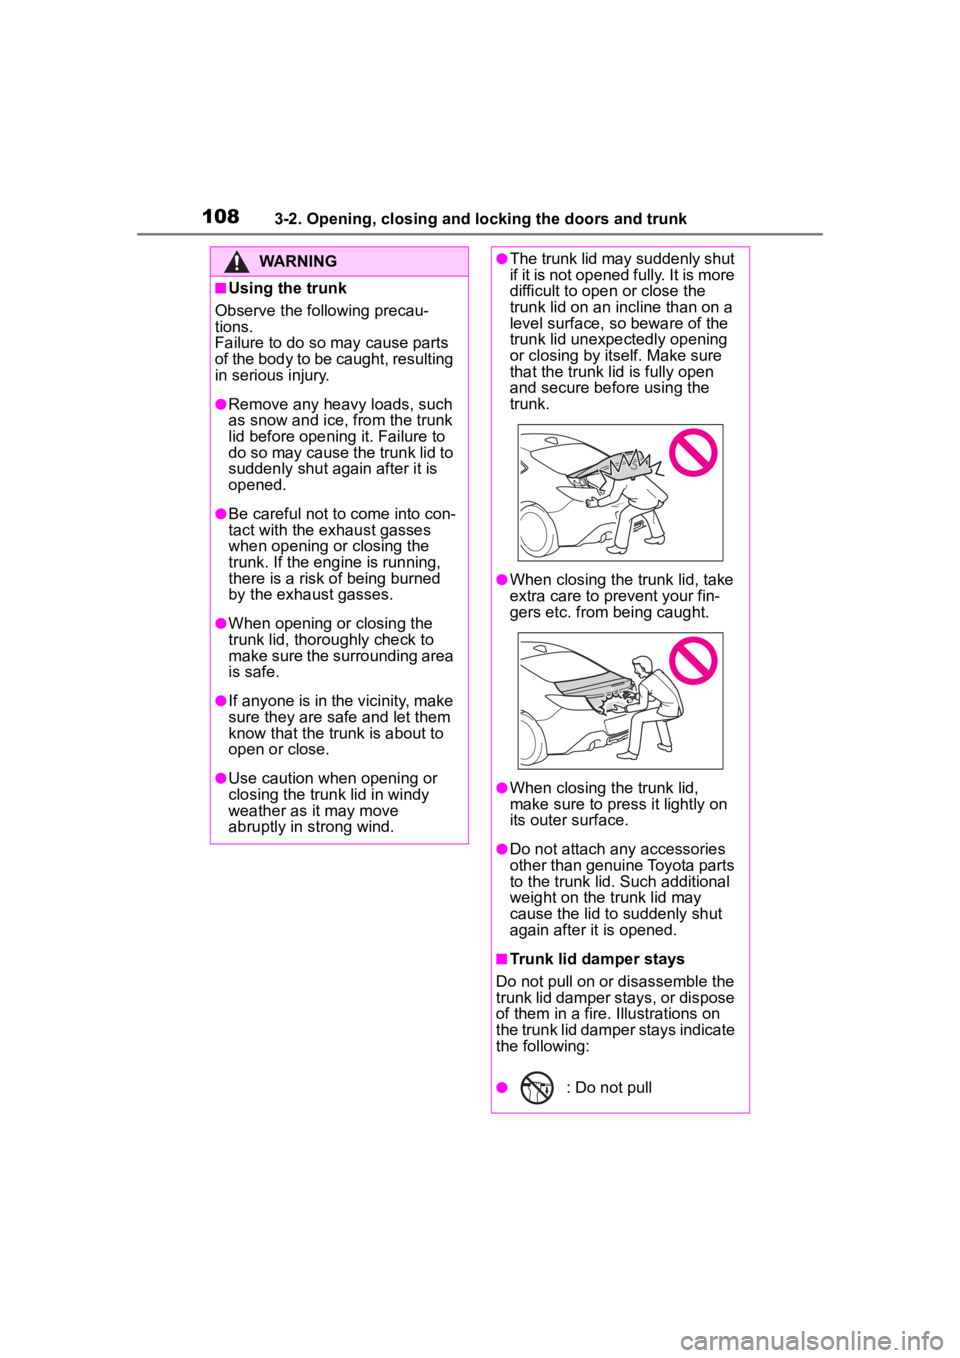
■Inside lock buttons (to
lock/unlock)
1 Locks the door
2 Unlocks the door
■Locking the doors from the out-
side without a key
1 Move the inside lock button to
the lock position.
2 Close the door.
The door cannot be locked if the
engine switch is in ACC or ON, or
the electronic key is left inside the
vehicle. However, the key may not
be detected correctly and the door
may be locked.
■Door lock prevention function
This function prevents the doors
from being locked if an electronic
key is left inside the vehicle.
■Customization
Some functions can be customized.
( P.400)
Tr unk
The trunk can be opened
using the trunk opener
switch, entry function or
wireless remote control.
WARNING
Observe the following precau-
tions.
Failure to do so may result in
death or serious injury.
■Before driving
●Make sure that the trunk lid is
closed before driving. If not fully
closed, while driving, it may
open unexpectedly, hit near-by
objects, or luggage may fall out,
possibly leading to an accident.
Also, exhaust gasses may enter
the vehicle, possibly leading to
death or a serious health haz-
ard.
●Do not allow child ren to play in
the trunk.
If a child is accidentally locked
in the trunk, they could suffer
from heat exhaustion, suffoca-
tion or other injuries.
●Do not allow a child to open or
close the trunk lid.
Doing so may cause the trunk
lid to open unexpectedly, or
cause the child’s hands, head,
or neck to be caught by the
closing trunk lid.
■Important points while driving
Never let anyone sit in the trunk.
In the event of sudden braking or
a collision, they are susceptible to
death or serious injury.
Page 108 of 449
1083-2. Opening, closing and locking the doors and trunk
WARNING
■Using the trunk
Observe the following precau-
tions.
Failure to do so may cause parts
of the body to be caught, resulting
in serious injury.
●Remove any heavy loads, such
as snow and ice, from the trunk
lid before opening it. Failure to
do so may cause the trunk lid to
suddenly shut again after it is
opened.
●Be careful not to come into con-
tact with the exhaust gasses
when opening or closing the
trunk. If the eng ine is running,
there is a risk of being burned
by the exhaust gasses.
●When opening or closing the
trunk lid, thoroughly check to
make sure the surrounding area
is safe.
●If anyone is in the vicinity, make
sure they are safe and let them
know that the trunk is about to
open or close.
●Use caution when opening or
closing the trunk lid in windy
weather as it may move
abruptly in strong wind.
●The trunk lid may suddenly shut
if it is not opened fully. It is more
difficult to ope n or close the
trunk lid on an incline than on a
level surface, so beware of the
trunk lid unexpectedly opening
or closing by itself. Make sure
that the trunk lid is fully open
and secure before using the
trunk.
●When closing the trunk lid, take
extra care to pre vent your fin-
gers etc. from being caught.
●When closing the trunk lid,
make sure to press it lightly on
its outer surface.
●Do not attach any accessories
other than genuine Toyota parts
to the trunk lid. Such additional
weight on the trunk lid may
cause the lid to suddenly shut
again after it is opened.
■Trunk lid damper stays
Do not pull on or disassemble the
trunk lid damper stays, or dispose
of them in a fire. Illustrations on
the trunk lid damper stays indicate
the following:
●: Do not pull