2023 TOYOTA 86 warning
[x] Cancel search: warningPage 153 of 449
1534-2. Driving procedures
4
Driving
Each time the shift lever or paddle
shift switches are operated, the
gear changes up or down one gear
and the selected gear, “1” through
“6”, will be set.
The selected gear, from M1 to M6,
will be fixed and displayed on the
meter.
When in manual mode, the gear
will not change unless the shift
lever or paddle shift switches
are operated.
However, even when in the
manual mode, the gears will be
automatically changed in the fol-
lowing situation:
When vehicle speed drops
(downshift only).
When engine oil temperature
is high and engine speed
rises close to the red zone.
■Downshifting restriction warn-
ing buzzer
If downshifting operations are per-
formed at a vehicle speed by which
downshifting is not possible (when
downshifting will cause the engine
speed to enter the red zone), a
buzzer will sound to w arn the driver
that downshifting cannot be per-
formed.
*: If equipped
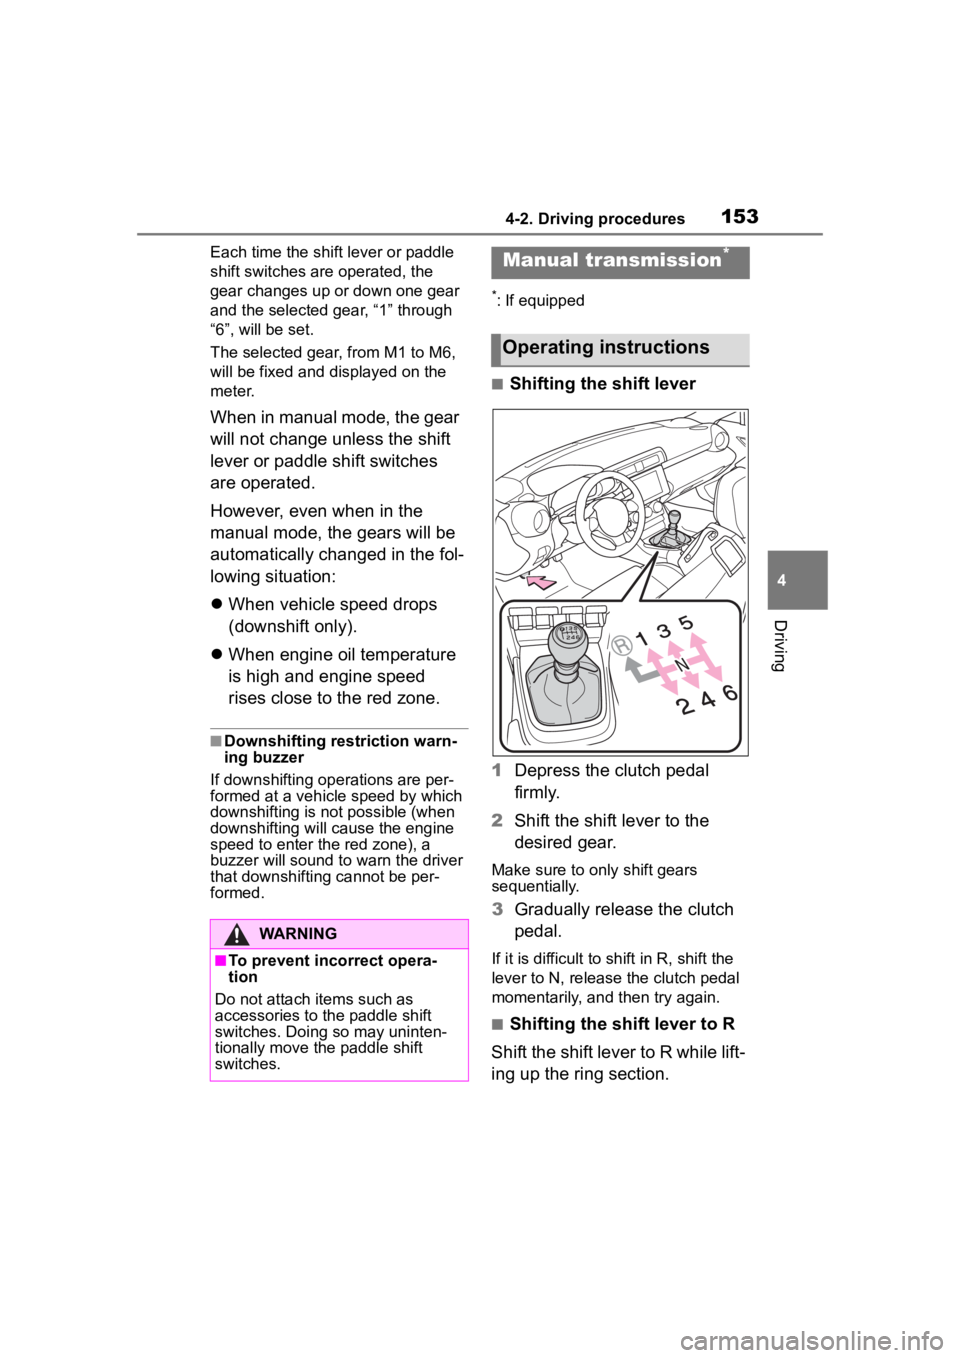
■Shifting the shift lever
1 Depress the clutch pedal
firmly.
2 Shift the shift lever to the
desired gear.
Make sure to only shift gears
sequentially.
3Gradually release the clutch
pedal.
If it is difficult to shift in R, shift the
lever to N, release the clutch pedal
momentarily, and then try again.
■Shifting the shift lever to R
Shift the shift lever to R while lift-
ing up the ring section.
WARNING
■To prevent incorrect opera-
tion
Do not attach items such as
accessories to the paddle shift
switches. Doing so may uninten-
tionally move the paddle shift
switches.
Manual transmission*
Operating instructions
Page 156 of 449
1564-2. Driving procedures
turn signal lights will blink 3 times.
■If the turn signals do not
stop flashing after turning
left or right, or if you want
to stop them flashing
Operate the lever in the oppo-
site direction to either position 2
or 3. If you move the lever to
either position 1 or 4, the
selected turn signals will flash.
■Turn signals can be operated
when
The engine switch is in ON.
■If the indicator flashes faster
than usual
Check that a light bulb in the front or
rear turn signal lights has not
burned out.
■If the turn signals stop flashing
before a lane change has been
performed
Operate the lever again.
■Customization
Some functions can be customized.
( P.400)
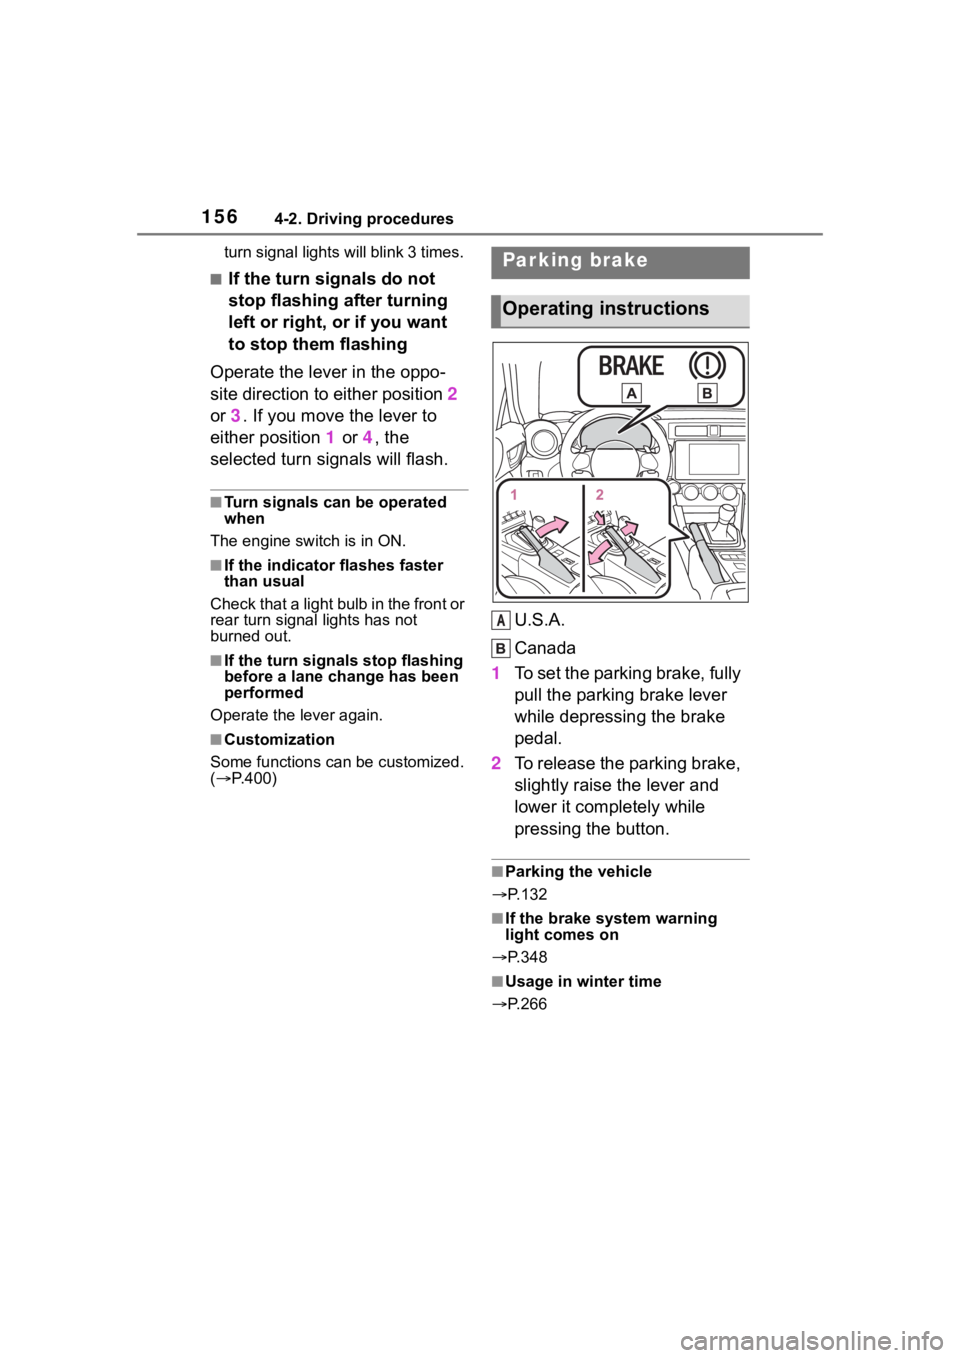
U.S.A.
Canada
1 To set the parking brake, fully
pull the parking brake lever
while depressing the brake
pedal.
2 To release the parking brake,
slightly raise the lever and
lower it completely while
pressing the button.
■Parking the vehicle
P.132
■If the brake system warning
light comes on
P.348
■Usage in winter time
P.266
Parking brake
Operating instructions
A
Page 161 of 449
1614-3. Operating the lights and wipers
4
Driving
*: If equipped
The SRH (Steering Responsive
Headlights) is a function which,
according to the steering wheel
operation and vehicle speed
when the vehicle is being driven
forward, automatically adjusts
the angle of the headlights to
illuminate intersections and cor-
ners, improving visibility.
This function operates when the
vehicle speed is 5 mph (8 km/h) or
higher.
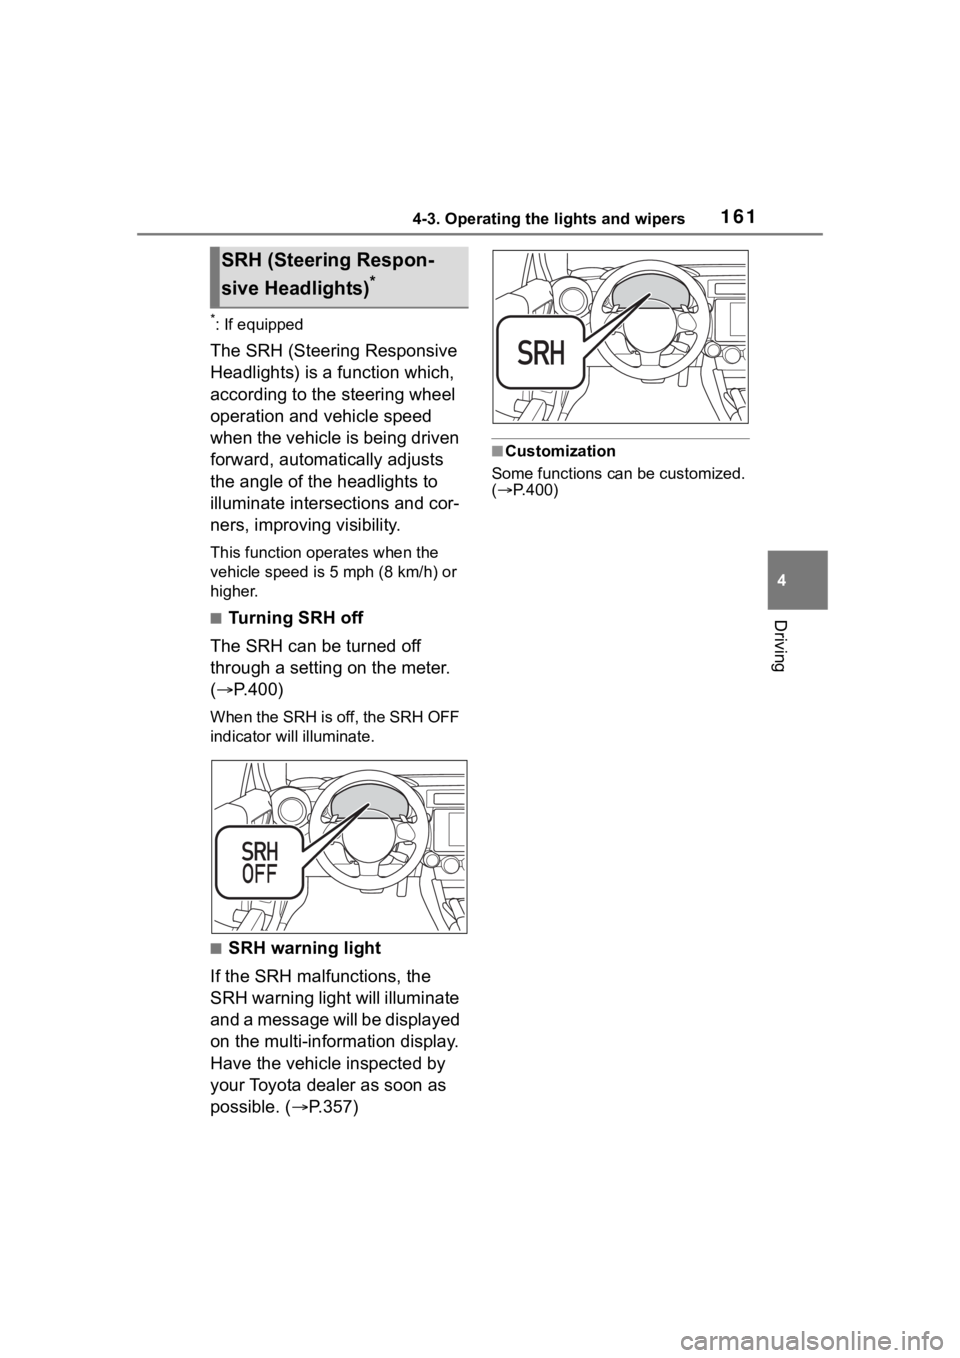
■Tu r n i n g S R H o f f
The SRH can be turned off
through a setting on the meter.
( P.400)
When the SRH is off, the SRH OFF
indicator will illuminate.
■SRH warning light
If the SRH malfunctions, the
SRH warning light will illuminate
and a message will be displayed
on the multi-information display.
Have the vehicle inspected by
your Toyota dealer as soon as
possible. ( P.357)
■Customization
Some functions can be customized.
( P.400)
SRH (Steer ing Respon-
sive Headlights)
*
Page 162 of 449
1624-3. Operating the lights and wipers
*: If equipped
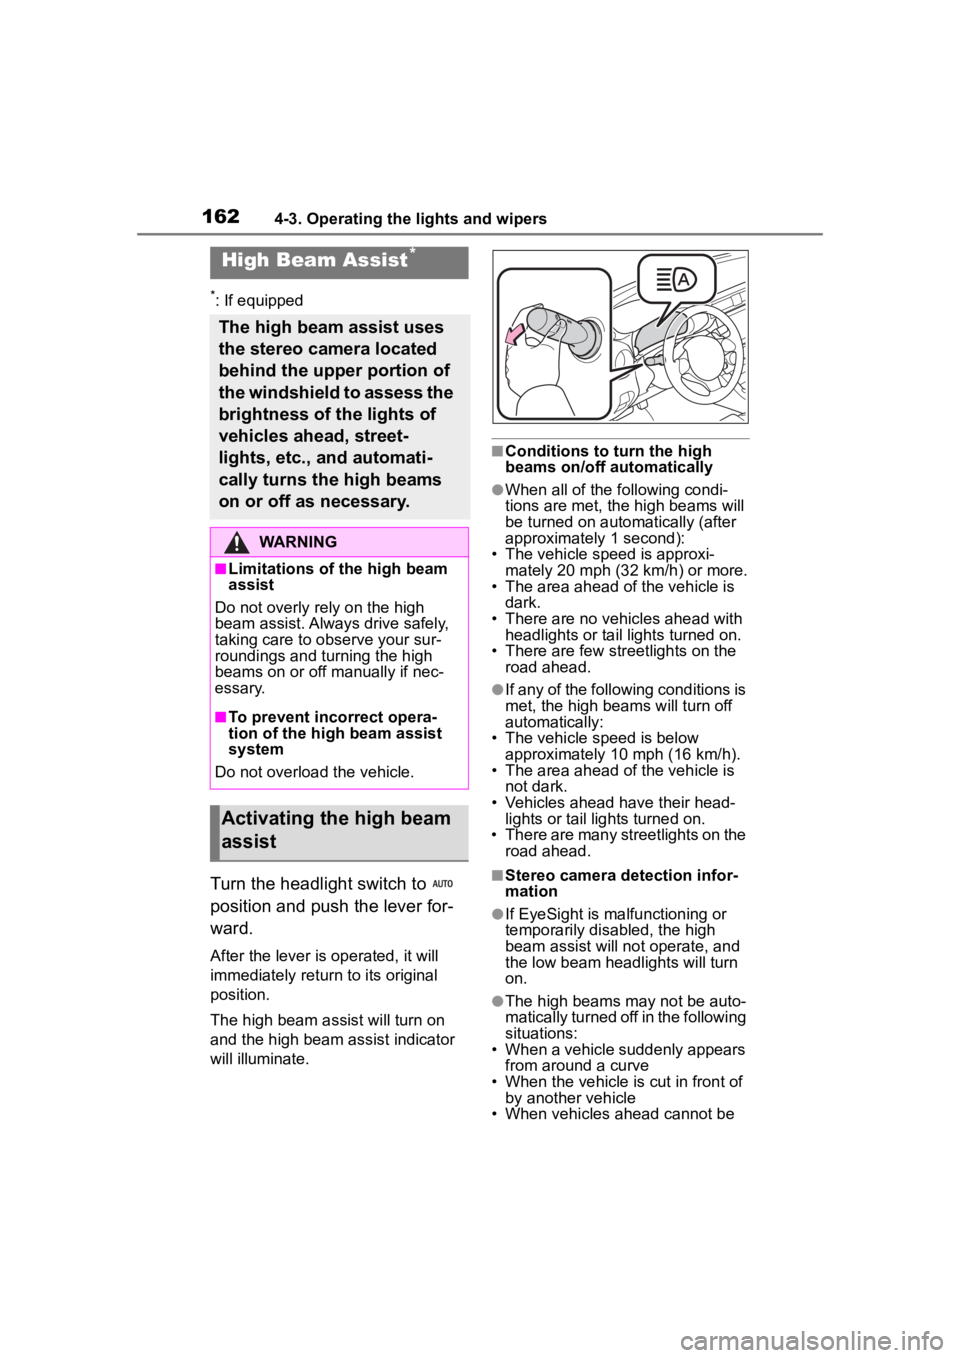
Turn the headlight switch to
position and push the lever for-
ward.
After the lever is operated, it will
immediately return to its original
position.
The high beam ass ist will turn on
and the high beam assist indicator
will illuminate.
■Conditions to turn the high
beams on/off automatically
●When all of the following condi-
tions are met, the high beams will
be turned on autom atically (after
approximately 1 second):
• The vehicle speed is approxi-
mately 20 mph (32 km/h) or more.
• The area ahead of the vehicle is dark.
• There are no vehicles ahead with headlights or tail lights turned on.
• There are few str eetlights on the
road ahead.
●If any of the following conditions is
met, the high beams will turn off
automatically:
• The vehicle speed is below
approximately 10 mph (16 km/h).
• The area ahead of the vehicle is not dark.
• Vehicles ahead have their head- lights or tail lights turned on.
• There are many streetlights on the
road ahead.
■Stereo camera detection infor-
mation
●If EyeSight is malfunctioning or
temporarily disabled, the high
beam assist will no t operate, and
the low beam headlights will turn
on.
●The high beams m ay not be auto-
matically turned off in the following
situations:
• When a vehicle suddenly appears
from around a curve
• When the vehicle is cut in front of by another vehicle
• When vehicles ahead cannot be
High Beam Assist*
The high beam assist uses
the stereo camera located
behind the upper portion of
the windshield to assess the
brightness of the lights of
vehicles ahead, street-
lights, etc., and automati-
cally turns the high beams
on or off as necessary.
WARNING
■Limitations of the high beam
assist
Do not overly rely on the high
beam assist. Always drive safely,
taking care to o bserve your sur-
roundings and turning the high
beams on or off manually if nec-
essary.
■To prevent incorrect opera-
tion of the high beam assist
system
Do not overload the vehicle.
Activating the high beam
assist
Page 164 of 449
1644-3. Operating the lights and wipers
The sensitivity of the high beam
assist function can be lowered
by using the following opera-
tions.
1After turning the engine
switch to ON, turn the head-
light switch to position
and push the lever forward.
2 After the high beam assist
indicator on the meter will
illuminate, turn the engine
switch off.
3 Turn the engine switch to ON
and within approximately 15
seconds, press the switch
more than 10 times consecu-
tively.
When the sensitivity of the high
beam assist function is lowered, the
high beam assist i ndicator on the
meter will flash.
■The sensitivity of the high beam
assist function
●The sensitivity of the high beam
assist function cannot be lowered
in the following conditions:
• Adaptive Cruise Control or Con- ventional Cruise Control indicator
is illuminated.
• The EyeSight warning light is illu- minated.
●The sensitivity of the high beam
assist function re turns to normal
level the next time the engine
switch is turned off and the engine
is restarted.
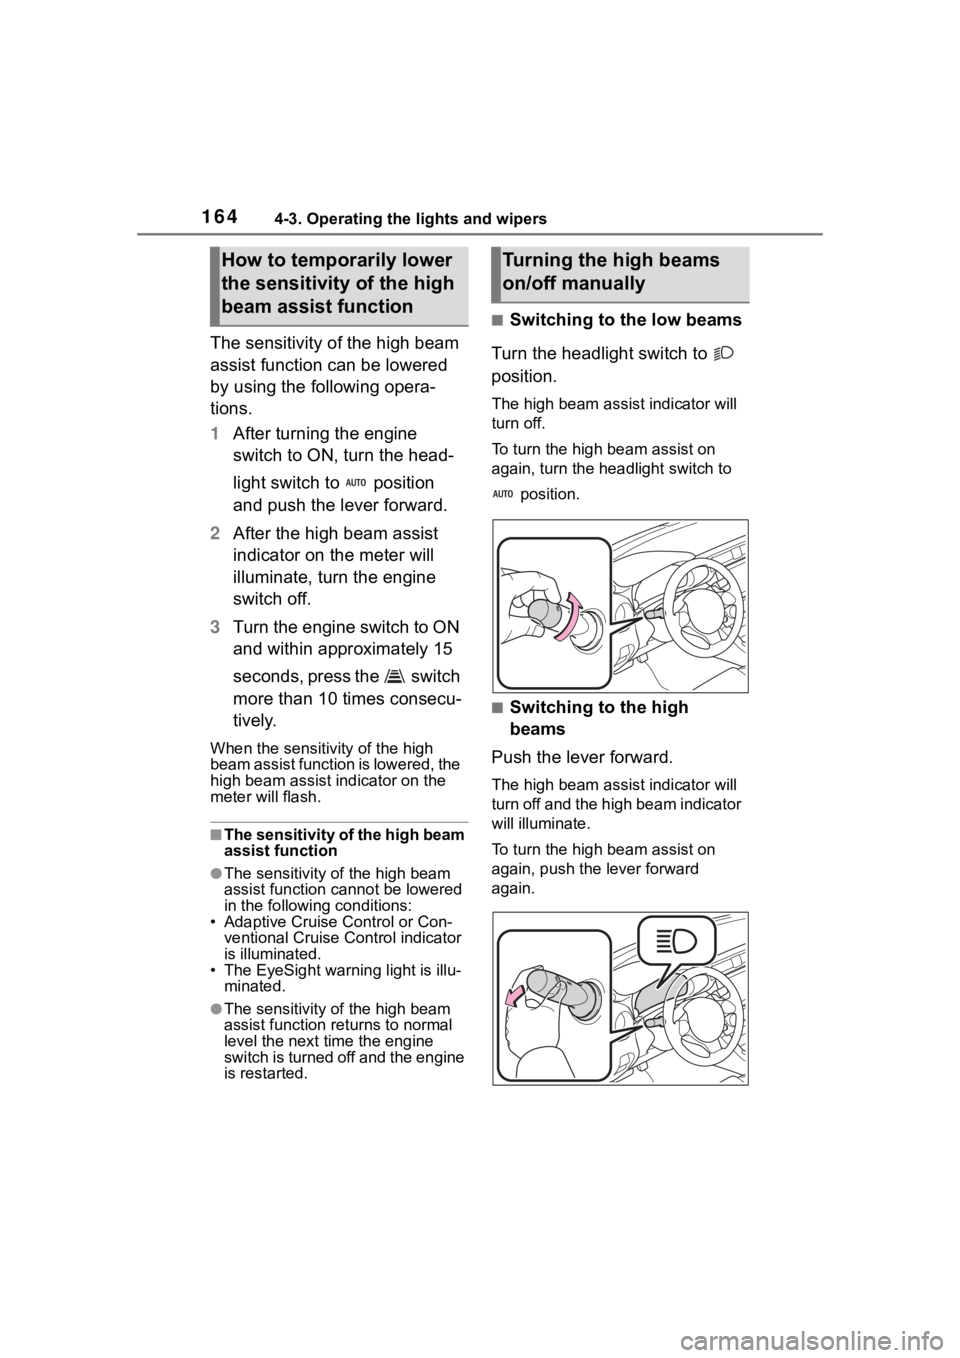
■Switching to the low beams
Turn the headlight switch to
position.
The high bea m assist indicator will
turn off.
To turn the high beam assist on
again, turn the headlight switch to
position.
■Switching to the high
beams
Push the lever forward.
The high bea m assist indicator will
turn off and the high beam indicator
will illuminate.
To turn the high beam assist on
again, push the lever forward
again.
How to temporarily lower
the sensitivity of the high
beam assist functionTurning the high beams
on/off manually
Page 166 of 449
1664-3. Operating the lights and wipers
■The windshield wiper and
washer can be operated when
The engine switch is in ON.
■If no windshield washer fluid
sprays
Check that the wash er nozzles are
not blocked if there is washer fluid in
the windshield washer fluid reser-
v oi r.
WARNING
■Caution regarding the use of
washer fluid
When it is cold, do not use the
washer fluid until the windshield
becomes warm. The fluid may
freeze on the windshield and
cause low visibility. This may lead
to an accident, resulting in death
or serious injury.
NOTICE
■When the washer fluid tank is
empty
Do not operate the switch continu-
ally as the washer fluid pump may
overheat.
■When a nozzle becomes
blocked
In this case, contact your Toyota
dealer. Do not try to clear it with a
pin or other object. The nozzle will
be damaged.
Page 167 of 449
1674-4. Refueling
4
Driving
4-4.Refueling
Close both side doors and
windows, and turn the engine
switch off.
Confirm the type of fuel.
■Fuel types
P. 3 8 8
■Fuel tank opening for unleaded
gasoline
To help prevent incorrect fueling,
your vehicle has a fuel tank opening
that only accommodates the spe-
cial nozzle on unle aded fuel pumps.
■If the malfunction indicator
lamp illuminates
The malfunction indicator lamp may
illuminate erroneous ly if refueling is
performed repeatedly when the fuel
tank is nearly full.
Opening the fuel tank
cap
Perform the following steps
to open the fuel tank cap:
Before refueling the vehi-
cle
WARNING
■When refueling the vehicle
Observe the following precautions
while refueling the vehicle. Failure
to do so may result in death or
serious injury.
●Do not handle fuel indoors.
●After exiting the vehicle and
before opening the fuel door,
touch an unpainted metal sur-
face to discharge any static
electricity. It is important to dis-
charge static electricity before
refueling because sparks result-
ing from static electricity can
cause fuel vapors to ignite while
refueling.
●Always hold the grips on the
fuel tank cap and turn it slowly
to remove it.
A whooshing sound may be
heard when the f uel tank cap is
loosened. Wait until the sound
cannot be heard before fully
removing the cap. In hot
weather, pressurized fuel may
spray out the filler neck and
cause injury.
●Do not allow anyone that has
not discharged static electricity
from their body to come close to
an open fuel tank.
●Do not allow anyone to
approach the area of the vehicle
near the fuel f iller pipe while
refueling is in progress.
●Do not inhale vaporized fuel.
Fuel contains substances that
are harmful if inhaled.
●Do not smoke while refueling
the vehicle.
Doing so may cause the fuel to
ignite and cause a fire.
●Do not return to the vehicle or
touch any person or object that
is statically charged.
This may cause static electricity
to build up, resulting in a possi-
ble ignition hazard.
■When refueling
Observe the following precautions
to prevent fuel overflowing from
the fuel tank:
Page 168 of 449
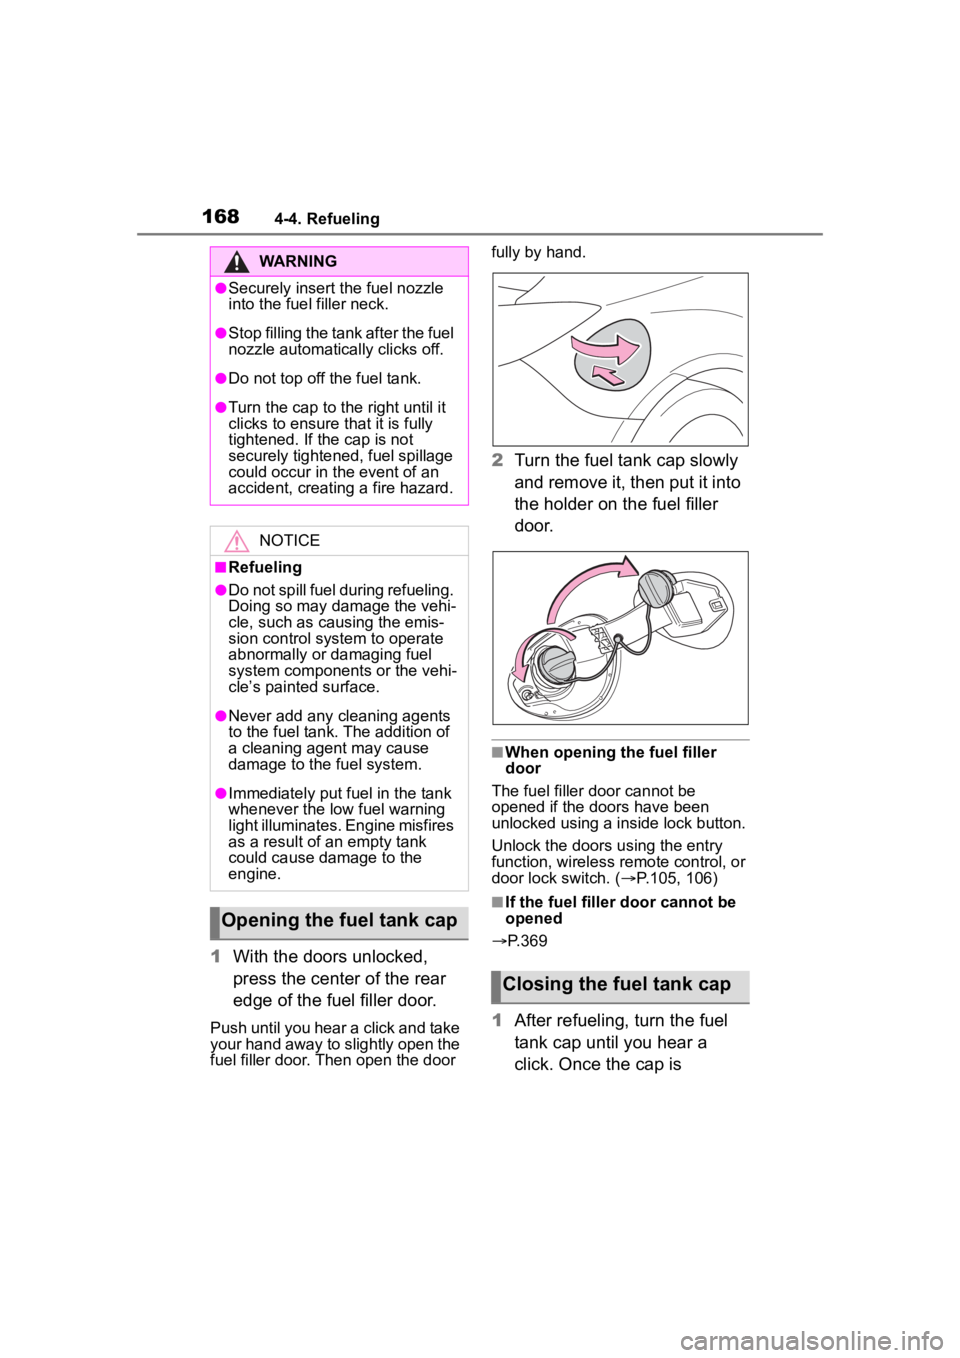
1684-4. Refueling
1With the doors unlocked,
press the center of the rear
edge of the fuel filler door.
Push until you hear a click and take
your hand away to slightly open the
fuel filler door. Then open the door fully by hand.
2
Turn the fuel tank cap slowly
and remove it, then put it into
the holder on the fuel filler
door.
■When opening the fuel filler
door
The fuel filler door cannot be
opened if the doo rs have been
unlocked using a inside lock button.
Unlock the doors u sing the entry
function, wireless remote control, or
door lock switch. ( P.105, 106)
■If the fuel filler door cannot be
opened
P.369
1 After refueling, turn the fuel
tank cap until you hear a
click. Once the cap is
WARNING
●Securely insert the fuel nozzle
into the fuel filler neck.
●Stop filling the tank after the fuel
nozzle automatically clicks off.
●Do not top off the fuel tank.
●Turn the cap to the right until it
clicks to ensure that it is fully
tightened. If the cap is not
securely tightened, fuel spillage
could occur in t he event of an
accident, creating a fire hazard.
NOTICE
■Refueling
●Do not spill fuel during refueling.
Doing so may damage the vehi-
cle, such as causing the emis-
sion control system to operate
abnormally or damaging fuel
system components or the vehi-
cle’s painted surface.
●Never add any cleaning agents
to the fuel tank. The addition of
a cleaning agent may cause
damage to the fuel system.
●Immediately put fuel in the tank
whenever the low fuel warning
light illuminates. Engine misfires
as a result of an empty tank
could cause damage to the
engine.
Opening the fuel tank cap
Closing the fuel tank cap