2023 PEUGEOT EXPERT child lock
[x] Cancel search: child lockPage 45 of 348

43
Access
2Malfunction
An audible signal repeated three times while
using the function indicates a fault with the
system.
Have it checked by a PEUGEOT dealer or a
qualified workshop.
If the "Hands-free tailgate access
self-locking" option is selected in the
vehicle menu and after closing the door,
check that the vehicle is properly locked.
Locking will not take place:
–
if the ignition is on,
–
if one of the doors or the tailgate is open,
–
if a "Keyless Entry and Start" remote
control is inside the vehicle.
If a number of gestures with your foot have
no effect, wait a few seconds before starting
again.
The system is automatically deactivated in
heavy rain or with accumulations of snow
.
If it does not work, make sure that the
remote control is not exposed to a source of
electromagnetic interference (smartphone,
etc.).
Operation may be affected if using a
prosthetic leg.
This system may not work correctly if your
vehicle is fitted with a towbar.
The side door may open or close without warning if:
–
Y
our vehicle is fitted with a towbar.
– A trailer is coupled or decoupled.
– A bicycle carrier is installed or removed.
–
Bicycles are loaded on to or unloaded from
the bicycle carrier
.
–
Something is deposited or lifted behind the
vehicle.
–
An animal approaches the bumper
,
–
The vehicle is washed.
–
The vehicle is being serviced.
–
A
wheel is changed.
To avoid any sudden operation, keep the key
away from the detection zone (also from the
boot’s interior sides) or deactivate the function
in the vehicle configuration menu.
Ensure that no person or object might
prevent the correct opening or closing of
the doors.
Be aware of children when operating the
doors.
Side-hinged rear doors
► After first opening the left-hand door , pull the
lever A towards you to open the right-hand door.
Closing
► First close the right-hand door , then the left-
hand door.
If the left-hand door is closed first, a
buffer stop located on the edge of the
right-hand door prevents it closing.
If the left-hand side-hinged door is not properly
closed, the "door open " warning lamp
lights up CarM an uals 2 .c o m
Page 49 of 348

47
Access
2Automatic activation
(Depending on version)
The system is activated automatically 2 minutes
after the last door or the boot is closed.
►
T
o avoid triggering the alarm on entering the
vehicle, first press the unlocking button on the
remote control or unlock the vehicle using the
"Keyless Entry and Start" system.
Electric windows
1. Left-hand front.
2. Right-hand front.
Operation
► To open/close the window manually, press/
pull the switch without passing the point of
resistance; the window stops as soon as the
switch is released.
►
T
o open/close the window automatically,
press/pull the switch fully, beyond the point of
resistance; the window opens/closes completely
when the switch is released (pressing the switch
again stops the movement of the window).
The electric window controls remain operational for about 45 seconds after
the ignition is switched off if the front doors
are not open.
After that time, the controls are disabled. To
reactivate them, switch the ignition on again.
Safety anti-pinch
If your vehicle is fitted with the safety anti-pinch
function, when the window rises and meets an
obstacle, it stops and partially lowers.
In the event of unwanted opening of the window
on closing, press the control until the window
opens completely. Within 4 seconds, pull the
control until the window closes.
The safety anti-pinch does not operate while
doing this.
Reinitialising the electric
windows
After reconnecting the battery, or in the event
of abnormal window movement, the anti-pinch
function must be reinitialised.
The anti-pinch function is disabled during the
following sequence of operations.
For each window:
►
Lower the window fully
, then raise it; it will
rise in steps of a few centimetres each time the
control is pressed. Repeat the operation until the
window is fully closed.
►
Continue to pull the control for at least one
second after the window reaches the closed
position.
If an electric window meets an obstacle
during operation, the movement of the
window must be reversed. To do this, press
the relevant control.
When the driver operates the passenger
electric window control, it is important to
ensure that nothing can prevent the window
from closing properly.
Pay particular attention to children when
operating the windows.
Do not put your head or arms through the
open windows when the vehicle is moving -
risk of serious injury! CarM an uals 2 .c o m
Page 75 of 348

73
Ease of use and comfort
3
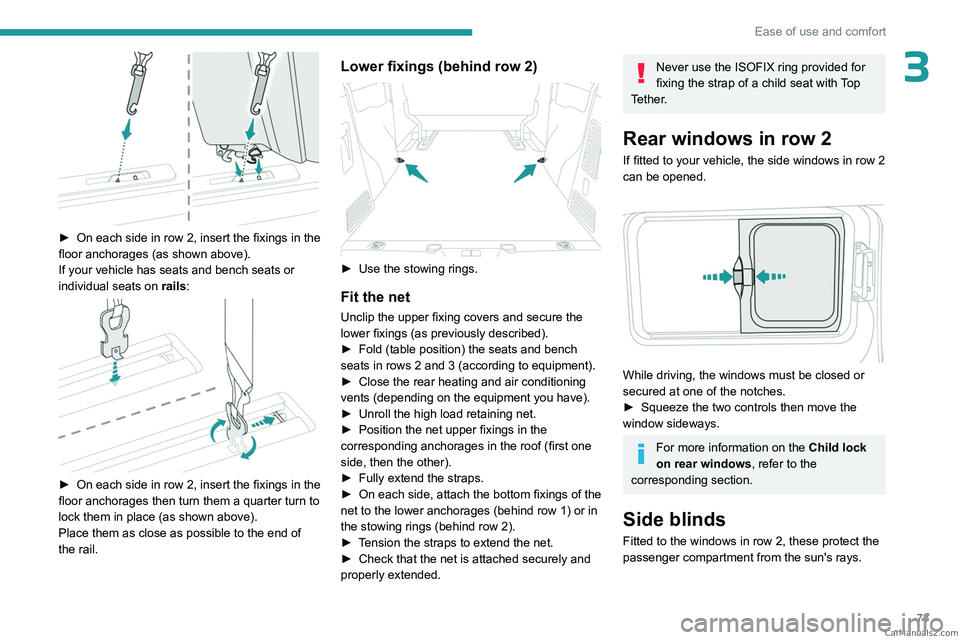
► On each side in row 2, insert the fixings in the
floor anchorages (as shown above).
If your vehicle has seats and bench seats or
individual seats on rails:
► On each side in row 2, insert the fixings in the
floor anchorages then turn them a quarter turn to
lock them in place (as shown above).
Place them as close as possible to the end of
the rail.
Lower fixings (behind row 2)
► Use the stowing rings.
Fit the net
Unclip the upper fixing covers and secure the
lower fixings (as previously described).
►
Fold (table position) the seats and bench
seats in rows 2 and 3 (according to equipment).
►
Close the rear heating and air conditioning
vents (depending on the equipment you have).
►
Unroll the high load retaining net.
►
Position the net upper fixings in the
corresponding anchorages in the roof (first one
side, then the other).
►
Fully extend the straps.
►
On each side, attach the bottom fixings of the
net to the lower anchorages (behind row 1) or in
the stowing rings (behind row 2).
►
T
ension the straps to extend the net.
►
Check that the net is attached securely and
properly extended.
Never use the ISOFIX ring provided for
fixing the strap of a child seat with Top
Tether.
Rear windows in row 2
If fitted to your vehicle, the side windows in row 2
can be opened.
While driving, the windows must be closed or
secured at one of the notches.
►
Squeeze the two controls then move the
window sideways.
For more information on the Child lock
on rear windows , refer to the
corresponding section.
Side blinds
Fitted to the windows in row 2, these protect the
passenger compartment from the sun's rays.
CarM an uals 2 .c o m
Page 112 of 348

11 0
Safety
Make sure that the seat belt is correctly
positioned and tightened.
For child seats with a support leg, ensure that
the support leg is in firm and steady contact
with the floor.
An incorrectly installed child seat in a vehicle compromises the child's safety in
the event of an accident.
Ensure that there is no seat belt or seat belt
buckle under the child seat, as this could
destabilise it.
Remember to fasten the seat belts or the
child seat harness keeping the slack relative
to the child's body to a minimum, even for
short journeys.
When installing a child seat using the seat
belt, ensure that the seat belt is tightened
correctly on the child seat and that it secures
the child seat firmly on the vehicle seat. If
the passenger seat is adjustable, move it
forwards if necessary.
Remove the head restraint before
installing a child seat with a backrest on a
passenger seat.
Ensure that the head restraint is stored or
attached securely to prevent it from being
thrown around the vehicle in the event of
sharp braking. Refit the head restraint once
the child seat has been removed.
Installing a booster seat
The chest part of the seat belt must be
positioned on the child's shoulder without
touching the neck.
Ensure that the lap part of the seat belt
passes correctly over the child's thighs.
Use a booster seat with a backrest, equipped
with a belt guide at shoulder level.
Additional protections
To prevent accidental opening of the
doors and rear windows, use the "Child lock".
Take care not to open the rear windows by
more than one third.
To protect young children from the sun's rays,
fit side blinds on the rear windows.
As a safety measure, do not leave:
–
A
child alone and unsupervised inside a
vehicle.
–
A
child or an animal in a vehicle which is
exposed to the sun, with the windows closed.
–
The keys within reach of children inside the
vehicle.
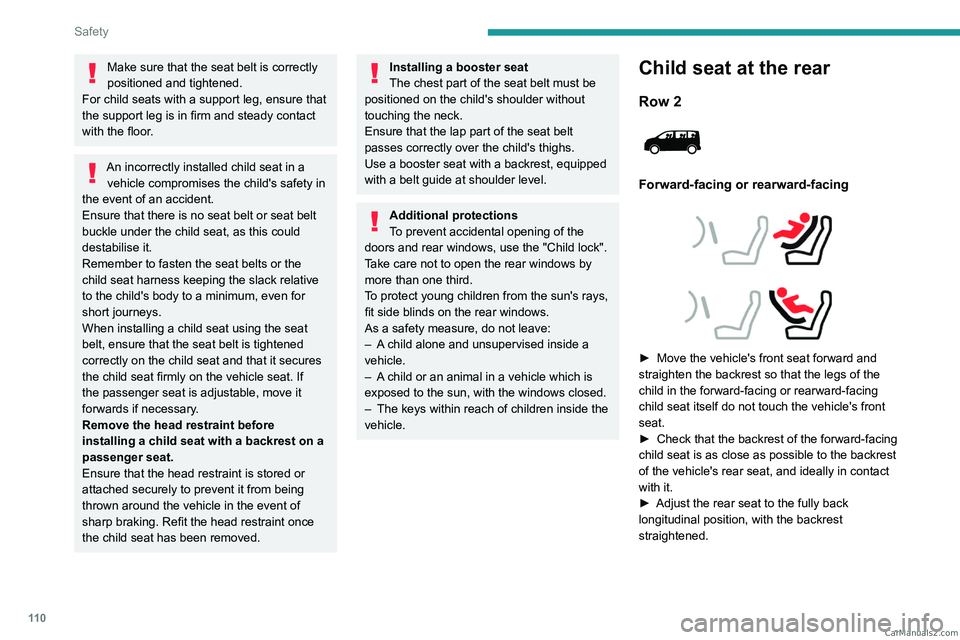
Child seat at the rear
Row 2
Forward-facing or rearward-facing
► Move the vehicle's front seat forward and
straighten the backrest so that the legs of the
child in the forward-facing or rearward-facing
child seat itself do not touch the vehicle's front
seat.
►
Check that the backrest of the forward-facing
child seat is as close as possible to the backrest
of the vehicle's rear seat, and ideally in contact
with it.
►
Adjust the rear seat to the fully back
longitudinal position, with the backrest
straightened. CarM an uals 2 .c o m
Page 133 of 348

131
Safety
5Manual child lock
Mechanical system to prevent opening of the
sliding side door using its interior lever.
Locking/Unlocking
► Rotate the control located on the edge of the
side door up
to lock it, or down to unlock it.
Electric child lock
Remote control system to
prevent opening of the rear
doors (sliding side door(s), side-
hinged rear doors or tailgate
(depending on version)) using
their interior controls.
This control prevents the opening of the rear
doors using their interior handles and the use of
the rear electric windows.
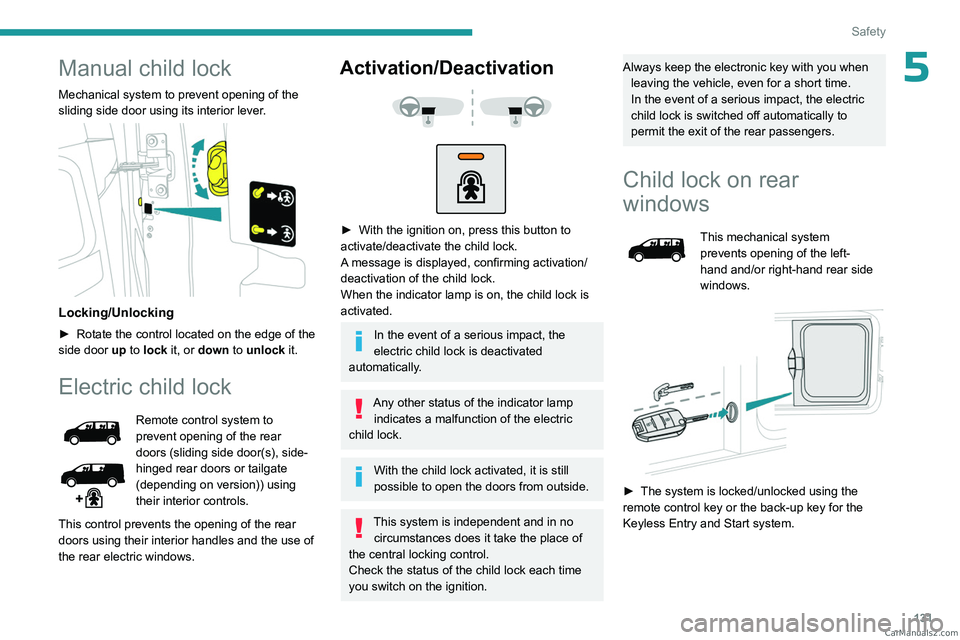
Activation/Deactivation
► With the ignition on, press this button to
activate/deactivate the child lock.
A
message is displayed, confirming activation/
deactivation of the child lock.
When the indicator lamp is on, the child lock is
activated.
In the event of a serious impact, the
electric child lock is deactivated
automatically.
Any other status of the indicator lamp indicates a malfunction of the electric
child lock.
With the child lock activated, it is still
possible to open the doors from outside.
This system is independent and in no circumstances does it take the place of
the central locking control.
Check the status of the child lock each time
you switch on the ignition.
Always keep the electronic key with you when leaving the vehicle, even for a short time.
In the event of a serious impact, the electric
child lock is switched off automatically to
permit the exit of the rear passengers.
Child lock on rear
windows
This mechanical system
prevents opening of the left-
hand and/or right-hand rear side
windows.
► The system is locked/unlocked using the
remote control key or the back-up key for the
Keyless Entry and Start system. CarM an uals 2 .c o m
Page 199 of 348

197
Practical information
7Never top up from an AdBlue® dispenser
reserved for heavy goods vehicles.
Recommendations on storage
AdBlue® freezes at about -11°C and deteriorates
above +25°C. Containers should be stored in a
cool area and protected from direct sunlight.
Under these conditions, the fluid can be kept for
at least a year.
If the fluid has frozen, it can be used once it has
completely thawed out at room temperature.
Never store AdBlue® containers in your
vehicle.
Precautions for use
AdBlue® is a urea-based solution. This fluid is
non-flammable, colourless and odourless (when
kept in a cool place).
In the event of contact with the skin, wash the
affected area with soap and running water. In the
event of contact with the eyes, immediately rinse
the eyes with large amounts of water or with an
eye wash solution for at least 15 minutes. Seek
medical attention if you feel a persistent burning
sensation or irritation.
If swallowed, immediately wash out the mouth
with clean water and then drink plenty of water.
In certain conditions (high temperature, for
example), the risk of release of ammonia cannot
be excluded: do not inhale the fluid. Ammonia
vapours have an irritant effect on mucous
membranes (eyes, nose and throat).
Store AdBlue® out of the reach of
children, in its original container.
Procedure
Before starting the top-up procedure, ensure that
the vehicle is parked on a flat and level surface.
In wintry conditions, ensure that the temperature
of the vehicle is above -11°C. Otherwise the
AdBlue
® may be frozen and so cannot be poured
into the tank. Park the vehicle in a warmer area
for a few hours to allow the top-up to be carried
out.
Never pour the AdBlue® into the Diesel
fuel tank.
If any AdBlue® is splashed, or if there are
any spillages on the bodywork, rinse
immediately with cold water or wipe with a
damp cloth.
If the fluid has crystallised, clean it off using a
sponge and hot water.
Important: in the event of a top-up after
a breakdown because of a lack of
AdBlue, it is essential to wait around 5
minutes before switching on the ignition,
without opening the driver’s door,
unlocking the vehicle, inserting the key
into the ignition switch, or bringing the
key for the "Keyless Entry and Start"
system into the passenger compartment.
Switch on the ignition, then wait for 10
seconds before starting the engine.
►
Switch off the ignition and remove the key
from the switch to switch off the engine.
or
►
With the Keyless Entry and Start system,
press the "
START/STOP" button to switch off the
engine.
Accessing the AdBlue® tank
► To access the AdBlue® tank, open the front
left-hand door.
►
T
urn the blue cap a 6
th of a turn
anti-clockwise.
►
Release the cap upwards.
►
With a container of
AdBlue
®: after checking
the expiry date, read the instructions on the
label carefully before pouring the contents of the
container into the vehicle's AdBlue
® tank.
►
With an
AdBlue® pump: insert the nozzle and
fill the tank until the nozzle automatically cuts
out. CarM an uals 2 .c o m
Page 288 of 348

286
Alphabetical index
Charge level indicator (Electric) 22
Charging cable
180
Charging cable (Electric)
179
Charging connector
(Electric)
178, 183, 185–186
Charging flap (Electric)
178, 183, 185–186
Charging system (Electric)
5, 8, 27, 176, 191
Charging the traction battery
(Electric)
22, 176, 183, 185–186
Checking the engine oil level
19
Checking the levels
191–193
Checking tyre pressures
(using the kit)
204, 206–207
Checks
191, 194–196
Checks, routine
194–195
Child lock
131
Child lock on rear windows
131
Children
106, 113, 119–121, 128, 128–129
Children (safety)
131
Child seats
106, 109–116, 128
Child seats, conventional
112–116
Child seats, i-Size
128
Child seats, ISOFIX
119–121, 128, 128–129
Cleaning (advice)
177, 199–201
Closing the boot
44
Closing the doors
29, 33, 43–44
Collision Risk Alert
162–163
Compressor, tyre inflation
204
Configuration, vehicle
26–27
Connected applications
269
Connection, Android Auto
251, 269
Connection, Apple CarPlay
251, 268Connection,
Bluetooth
239, 252–253, 269–270, 274–275
Connection, Wi-Fi network
270
Connectivity
268
Consumptions
27
Container, AdBlue®
197
Control, emergency boot release
36
Control, emergency door
29, 34–35
Control, heated seats
50–51
Control stalk, lighting
88
Control stalk, wipers
93–95
Control unit
179–180
Courtesy lamp
86
Courtesy lamp, front
86–87, 215
Courtesy lamp, rear
86–87, 215
Courtesy lamps
86–87, 215
Crew cab, fixed
65–66
Crew cab, folding
66
Cruise control
151, 153–154, 156–158
Cruise control,
adaptive
153–154, 158, 161–163
Cruise control,
adaptive with Stop function
153–154
Cruise control by
speed limit recognition
153–154
D
DAB (Digital Audio Broadcasting) -
Digital radio
235–236, 249, 272
Date (setting)
28, 255, 277
Daytime running lamps 89, 212–213
Deactivating the passenger
airbag
107, 111–112
Deactivation of DSC (ESC)
101
Deadlocking
34
Deferred charging
27
Deferred charging (Electric)
27, 178, 183, 186
Defrosting
52, 81
Defrosting, rear screen
82
Demisting
81
Demisting, rear
82
Dimensions
229
Dipstick
19, 192
Direction indicators
(turn signals)
89, 212–214, 216
Display, head-up
11
Domestic charging
180
Domestic charging (Electric)
184–186, 227
Door pockets
68
Doors, rear
43–44
Doors, side
39
Doors, side-hinged
33–34, 43–44, 214
Drive,
electric
5, 8, 27, 176, 189, 191, 216, 220, 227
Driver’s attention warning
166
Drive selector (Electric)
145, 195
Driving
132–133
Driving aids camera (warnings)
150
Driving aids (recommendations)
150
Driving economically
7
Driving modes
146
Driving modes (Electric)
146–147 CarM an uals 2 .c o m