2023 PEUGEOT EXPERT maintenance
[x] Cancel search: maintenancePage 3 of 348
Welcome
Thank you for choosing a Peugeot Expert/e-Expert or a Peugeot
Traveller/e-Traveller.
This document contains the key information and recommendations you
will need to be able to explore your vehicle in complete safety. We strongly
recommend familiarising yourself with it, as well as the Maintenance and
Warranty Guide.
003C
00470052004600580050004800510057
country in which it was sold.
The descriptions and illustrations are for guidance only.
0024005800570052005000520045004C004F004800560003
004800540058004C00530050004800510057
If ownership of your vehicle is transferred, please ensure this Han is
passed on to the new owner.
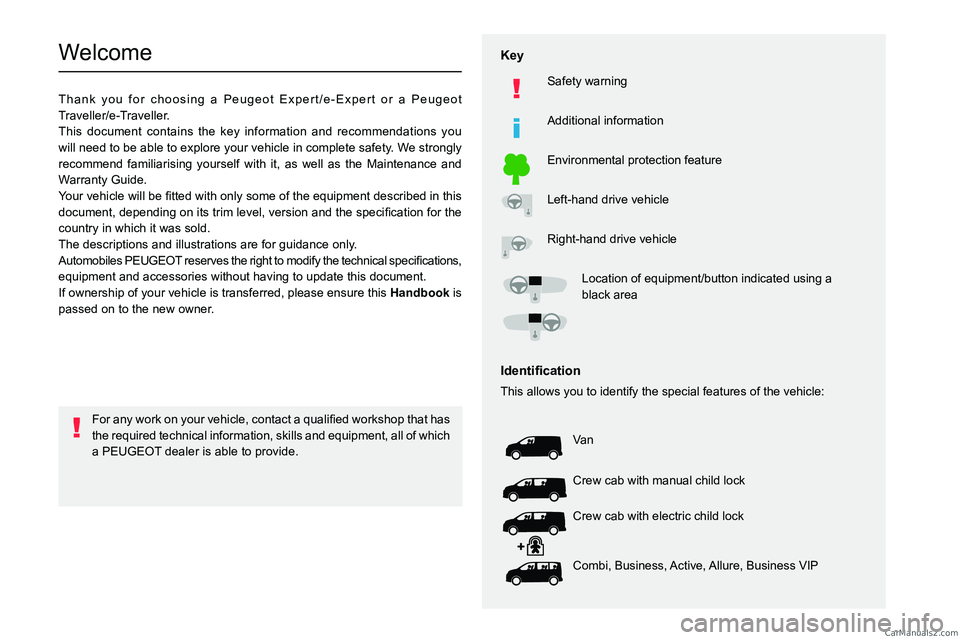
Key
Safety warning
Additional information
Environmental protection feature
Left-hand drive vehicle
Right-hand drive vehicle002F0052004600440057004C005200510003005200490003004800540058004C0053005000480051005700120045005800570057005200510003004C00510047004C00460044005700480047000300580056004C0051004A000300440003
black area
002C0047004800510057004C00BF004600440057004C00520051
This allows you to identify the special features of the vehicle:
Va n
Crew cab with manual child lock
Crew cab with electric child lock
Combi, Business, Active, Allure, Business VIP
0029
0057004B00480003
a PEUGEOT dealer is able to provide. CarM an uals 2 .c o m
Page 5 of 348

3
Contents
6-speed manual gearbox 141
Gear shift indicator 142
Automatic gearbox 142
Drive selector (Electric) 145
Driving modes (Electric) 146
Stop & Start 147
Tyre under-inflation detection 148
Driving and manoeuvring aids - General
recommendations
150
Memorising speeds 151
Road signs recognition 152
Speed limiter 154
Cruise control - Specific recommendations 156
Cruise control 156
Adaptive cruise control 158
Active Safety Brake with Collision Risk Alert and
Intelligent emergency braking assistance
162
Lane departure warning 165
Distraction detection 166
Blind spot monitoring 167
Parking sensors 168
Visiopark 1 170
7Practical informationCompatibility of fuels 174
Refuelling 174
Diesel misfuel prevention 175
Charging system (Electric) 176
Charging the traction battery (Electric) 183
Energy economy mode 187
Snow chains 188
Towing device 188
Roof bars/Roof rack 189
Bonnet 190
Engine compartment 191
Checking levels 191
Checks 194
AdBlue® (BlueHDi) 196
Free-wheeling 198
Advice on care and maintenance 199
8In the event of a breakdownWarning triangle 202
Running out of fuel (Diesel) 202
Tool box 203
Temporary puncture repair kit 204
Spare wheel 207
Changing a bulb 2 11
Fuses 216
12
V battery
/ Accessory battery 216
Towing the vehicle 220
9Technical dataEngine technical data and towed loads 223
Diesel engines 224
Electric motor 227
Dimensions 229
Identification markings 231
10Bluetooth® audio systemFirst steps 232
Steering mounted controls 233
Menus 233
Radio 234
DAB (Digital Audio Broadcasting) radio 235
Media 236
Telephone 238
Frequently asked questions 241
11Audio System with Touch ScreenFirst steps 244
Steering mounted controls 245
Menus 246
Applications 247
Radio 247
DAB (Digital Audio Broadcasting) radio 249
Media 249
Telephone 251
Settings 254
Frequently asked questions 255
123D Connected NavigationFirst steps 257
Steering mounted controls 258
Menus 258
Voice commands 260
Navigation 263
Connected navigation 266
Applications 268
Radio 271
DAB (Digital Audio Broadcasting) radio 272
Media 272
Telephone 274
Settings 276
Frequently asked questions 278
13Vehicle data recording and privacy
■
Alphabetical index
■
Appendix
■
Hydrogen electric motor supplement CarM an uals 2 .c o m
Page 87 of 348

85
Ease of use and comfort
3The additional heating must always be
switched off while refuelling to avoid any risk
of fire or explosion.
To avoid the risk of poisoning or asphyxia, the programmable heating
must not be used, even for short periods, in a
closed environment such as a garage or
workshop which is not equipped with an
exhaust gas extraction system.
Do not park the vehicle on a flammable
surface (dry grass, dead leaves, paper, etc.)
- Risk of fire!
Glazed surfaces such as the rear screen
or windscreen can become very hot in
places.
Never put objects on these surfaces; never
touch these surfaces - Risk of burns!
Independent additional
heating
Depending on the country of sale, this is an
additional and independent system which heats
the hot water circuit of the Diesel engine to
improve comfort and to raise the temperature
of the cold engine. It improves demisting and
defrosting performance. With the engine idling
or the vehicle stationary, it is normal to notice a
high-pitched whistling and some emissions of
smoke or odour.
The temperature near the heating system must
not exceed 120°C. A higher temperature (e.g. in
a paint oven) could damage the components of
electronic circuits.
The additional heating is supplied by the
vehicle's fuel tank. Make sure that the low fuel
warning lamp is not on.
To avoid the risks of poisoning or suffocation, the additional heating must
not be used, even for short periods, in a
closed environment such as a garage or
workshop which is not equipped with an
exhaust gas extraction system.
Do not park the vehicle on a flammable
surface (for example: dry grass, fallen
leaves, paper, etc.) - risk of fire!
Have the additional heating checked at
least once a year, at the beginning of
winter.
For maintenance and repairs, you must only
contact a PEUGEOT dealer or a qualified
workshop.
Temperature pre- conditioning (Electric)
This function allows you to programme the
temperature in the passenger compartment to
reach a pre-defined, non-modifiable temperature
(approx. 21°C) before you enter the vehicle, on
the days and at the times of your choice.
This function is available when the vehicle is
connected or not connected.
Programming
With Bluetooth® audio system
Temperature pre-conditioning is not available
with the Bluetooth® audio system.
With the Audio System with T ouch Screen
or 3D Connected Navigation system
Programming can be carried out from a
smartphone using the MYPEUGEOT APP
application.
For more information on Remote functions,
refer to the corresponding section.
With 3D Connected Navigation system
In the Applications menu:
Press " Car Apps" to display the applications
home page.
Select Temperature conditioning .
►
Press
+ to add a programme. CarM an uals 2 .c o m
Page 93 of 348
91
Lighting and visibility
4Automatic lighting systems - General
recommendations
The automatic lighting systems use a detection
camera, located at the top of the windscreen.
Operating limits
The system may be disrupted or not work
correctly:
–
When visibility conditions are poor
(e.g.
snowfall, heavy rain).
–
If the windscreen is dirty
, misted-up or
masked (e.g.
sticker) in front of the camera.
–
If the vehicle is facing highly reflective signs
or safety barrier reflectors.
The system is not able to detect:
–
Road users that do not have their own
lighting, such as pedestrians.
–
V
ehicles with hidden lighting (e.g. travelling
behind a safety barrier on the motorway).
–
V
ehicles at the top or bottom of a steep
slope, on winding roads, on crossroads.
Maintenance
Clean the windscreen regularly,
particularly the area in front of the camera.
The internal surface of the windscreen can
also become misted around the camera.
In humid and cold weather, demist the
windscreen regularly.
Do not allow snow to accumulate on the
bonnet or roof of the vehicle as this could
obstruct the camera.
Automatic headlamp dipping
For more information, refer to the
General recommendations for
automatic lighting systems.
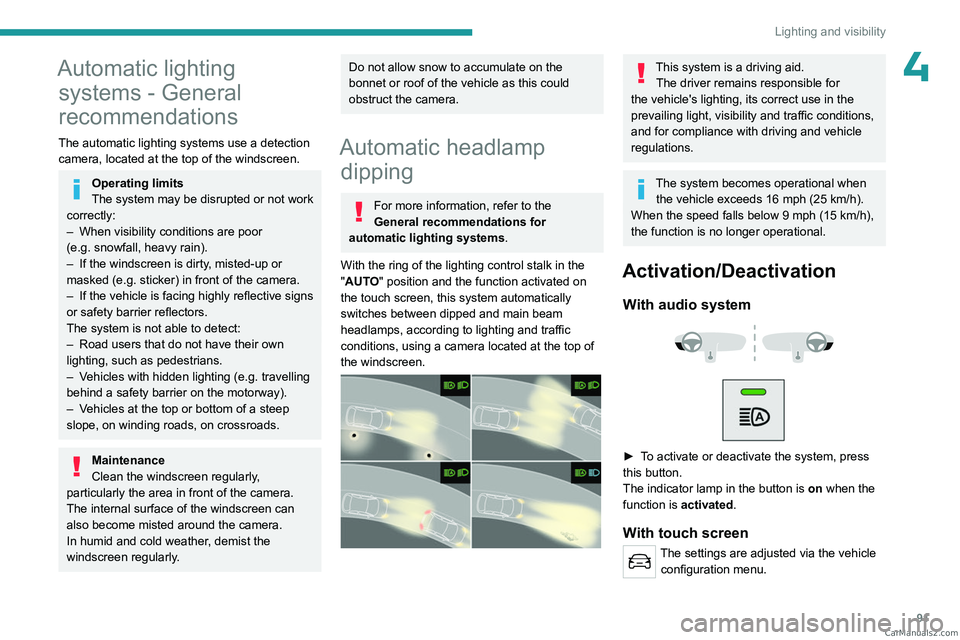
With the ring of the lighting control stalk in the
"AUTO" position and the function activated on
the touch screen, this system automatically
switches between dipped and main beam
headlamps, according to lighting and traffic
conditions, using a camera located at the top of
the windscreen.
This system is a driving aid. The driver remains responsible for
the vehicle's lighting, its correct use in the
prevailing light, visibility and traffic conditions,
and for compliance with driving and vehicle
regulations.
The system becomes operational when the vehicle exceeds 16 mph (25 km/h).
When the speed falls below 9 mph (15
km/h),
the function is no longer operational.
Activation/Deactivation
With audio system
► To activate or deactivate the system, press
this button.
The indicator lamp in the button is
on
when the
function is activated.
With touch screen
The settings are adjusted via the vehicle configuration menu. CarM an uals 2 .c o m
Page 97 of 348
95
Lighting and visibility
4Reverse gear
When reverse gear is engaged, if the windscreen
wipers are operating, the rear wiper will come
into operation automatically (activated by
default).
Activation/Deactivation
With audio system or touch screen
The system's settings are adjusted via the vehicle configuration menu.
This function is activated by default.
In the event of accumulation of snow or
hard frost or if a bicycle carrier is fitted to
the tailgate, deactivate the automatic rear
wiper via the vehicle configuration menu.
Rear screenwash
► Turn the ring as far as it will go and hold it in
position.
The screenwash and the wiper operate for as
long as the ring remains turned.
A final wiping cycle is performed when screen
washing ends.
Special position of the
windscreen wipers
This maintenance position is used while cleaning
or replacing the wiper blades. It can also be
useful, in wintry weather (ice, snow), to release
the wiper blades from the windscreen.
To maintain the effectiveness of the flat wiper blades, it is advisable to:
–
handle them with care.
–
clean them regularly using soapy water
.
–
avoid using them to hold cardboard on the
windscreen.
–
replace them at the first signs of wear
.
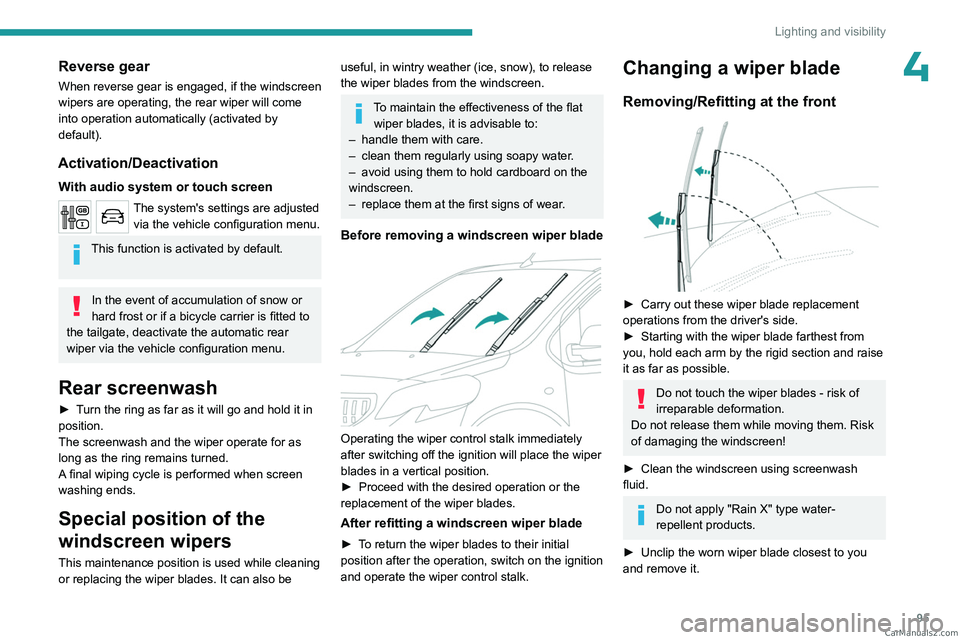
Before removing a windscreen wiper blade
Operating the wiper control stalk immediately
after switching off the ignition will place the wiper
blades in a vertical position.
►
Proceed with the desired operation or the
replacement of the wiper blades.
After refitting a windscreen wiper blade
► To return the wiper blades to their initial
position after the operation, switch on the ignition
and operate the wiper control stalk.
Changing a wiper blade
Removing/Refitting at the front
► Carry out these wiper blade replacement
operations from the driver's side.
►
Starting with the wiper blade farthest from
you, hold each arm by the rigid section and raise
it as far as possible.
Do not touch the wiper blades - risk of
irreparable deformation.
Do not release them while moving them. Risk
of damaging the windscreen!
►
Clean the windscreen using screenwash
fluid.
Do not apply "Rain X" type water-
repellent products.
►
Unclip the worn wiper blade closest to you
and remove it. CarM an uals 2 .c o m
Page 108 of 348
106
Safety
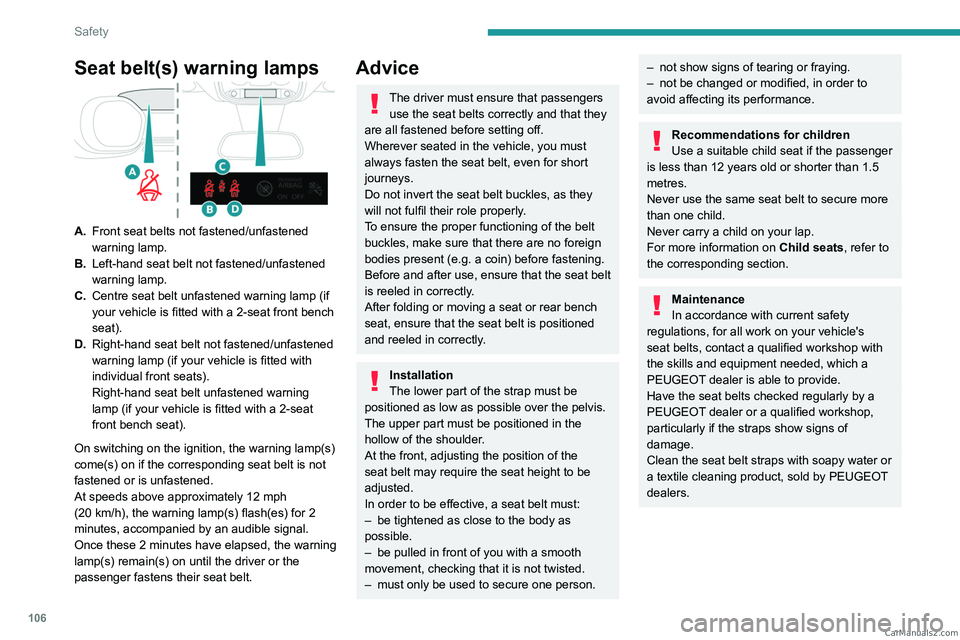
Seat belt(s) warning lamps
A.Front seat belts not fastened/unfastened
warning lamp.
B. Left-hand seat belt not fastened/unfastened
warning lamp.
C. Centre seat belt unfastened warning lamp (if
your vehicle is fitted with a 2-seat front bench
seat).
D. Right-hand seat belt not fastened/unfastened
warning lamp (if your vehicle is fitted with
individual front seats).
Right-hand seat belt unfastened warning
lamp (if your vehicle is fitted with a 2-seat
front bench seat).
On switching on the ignition, the warning lamp(s)
come(s) on if the corresponding seat belt is not
fastened or is unfastened.
At speeds above approximately 12 mph
(20
km/h), the warning lamp(s) flash(es) for 2
minutes, accompanied by an audible signal.
Once these 2 minutes have elapsed, the warning
lamp(s) remain(s) on until the driver or the
passenger fastens their seat belt.
Advice
The driver must ensure that passengers use the seat belts correctly and that they
are all fastened before setting off.
Wherever seated in the vehicle, you must
always fasten the seat belt, even for short
journeys.
Do not invert the seat belt buckles, as they
will not fulfil their role properly.
To ensure the proper functioning of the belt
buckles, make sure that there are no foreign
bodies present (e.g.
a coin) before fastening.
Before and after use, ensure that the seat belt
is reeled in correctly.
After folding or moving a seat or rear bench
seat, ensure that the seat belt is positioned
and reeled in correctly.
Installation
The lower part of the strap must be
positioned as low as possible over the pelvis.
The upper part must be positioned in the
hollow of the shoulder.
At the front, adjusting the position of the
seat belt may require the seat height to be
adjusted.
In order to be effective, a seat belt must:
–
be tightened as close to the body as
possible.
–
be pulled in front of you with a smooth
movement, checking that it is not twisted.
–
must only be used to secure one person.
– not show signs of tearing or fraying.
– not be changed or modified, in order to
avoid affecting its performance.
Recommendations for children
Use a suitable child seat if the passenger
is less than 12 years old or shorter than 1.5
metres.
Never use the same seat belt to secure more
than one child.
Never carry a child on your lap.
For more information on Child seats, refer to
the corresponding section.
Maintenance
In accordance with current safety
regulations, for all work on your vehicle's
seat belts, contact a qualified workshop with
the skills and equipment needed, which a
PEUGEOT
dealer is able to provide.
Have the seat belts checked regularly by a
PEUGEOT dealer or a qualified workshop,
particularly if the straps show signs of
damage.
Clean the seat belt straps with soapy water or
a textile cleaning product, sold by PEUGEOT
dealers. CarM an uals 2 .c o m
Page 134 of 348

132
Driving
Driving recommendations
► Observe the driving regulations and remain
vigilant whatever the traffic conditions.
►
Monitor your environment and keep your
hands on the wheel to be able to react to
anything that may happen any time.
►
Drive smoothly
, anticipate the need for
braking and maintain a longer safety distance,
especially in bad weather.
►
Stop the vehicle before performing operations
that require sustained attention (e.g.
settings).
►
During long trips, take a break every 2 hours.
T
o ensure the durability of the vehicle and
for safety reasons, remember that certain
precautionary measures must be taken when
driving the vehicle:
Manoeuvre cautiously, at low speed
Manoeuvre slowly.
Before turning, check that there are no obstacles
at mid-height along the sides.
Before reversing, check that there are no
obstacles, particularly at high level behind the
vehicle.
Be aware of the external dimensions, if ladders
are fitted.
Drive the vehicle carefully
Take corners gently.
Anticipate the need to brake as the stopping
distance is increased, particularly on wet or icy
roads.
Be aware of the effect of side winds on the
vehicle.
Maintenance
Inflate to the minimum pressure indicated on the
label, or even over-inflate by 0.2 to 0.3 bar for
long journeys.
Important!
Never leave the engine running in a
closed space without sufficient
ventilation. Internal combustion engines emit
toxic exhaust gases such as carbon
monoxide. Danger of poisoning and death!
In very severe wintry conditions
(temperature below -23°C), let the engine
run for 4 minutes before moving off, to ensure
the correct operation and durability of the
mechanical components of your vehicle
(engine and gearbox).
Never drive with the parking brake
applied . Risk of overheating and
damaging the braking system!
Never park the vehicle and never
leave the engine running on a
flammable surface (e.g.
dry grass, dead
leaves).The vehicle exhaust system is very
hot, even several minutes after the engine
stops. Risk of fire!
Never drive on surfaces covered with
vegetation (e.g. tall grass,
accumulated dead leaves, crops, debris)
such as a field, a country lane overgrown
with bushes or a grassy verge.
This vegetation could come into contact with
the vehicle's exhaust system
or other systems
which are very hot. Risk of fire!
Make sure you do not leave any item in
the passenger compartment which could
act like a magnifying glass under the effect of
the sun's rays and cause a fire. Risk of fire or
damage to interior surfaces!
Never leave the vehicle unattended,
with the engine running . If you have to
leave your vehicle with the engine running,
apply the parking brake and put the gearbox
or drive selector into neutral or position N or P
(depending on version).
Never leave children inside the vehicle
unsupervised.
On flooded roads
We strongly advise against driving on flooded
roads, as this could cause serious damage to the
engine or gearbox, as well as to your vehicle's
electrical systems.
CarM an uals 2 .c o m
Page 145 of 348
143
Driving
6Steering mounted controls
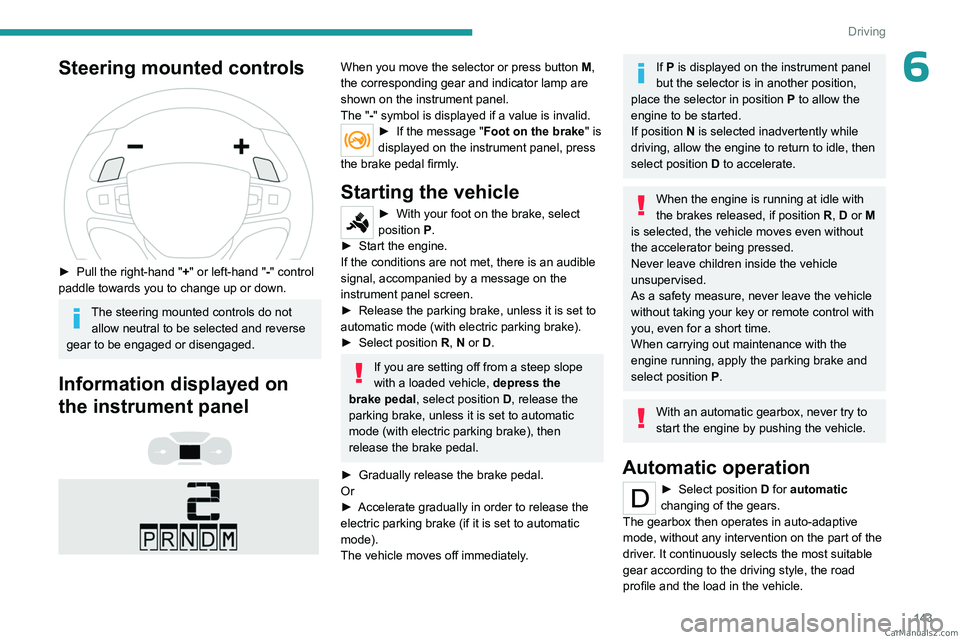
► Pull the right-hand "+ " or left-hand "-" control
paddle towards you to change up or down.
The steering mounted controls do not allow neutral to be selected and reverse
gear to be engaged or disengaged.
Information displayed on
the instrument panel
When you move the selector or press button M ,
the corresponding gear and indicator lamp are
shown on the instrument panel.
The "-" symbol is displayed if a value is invalid.
► If the message " Foot on the brake" is
displayed on the instrument panel, press
the brake pedal firmly.
Starting the vehicle
► With your foot on the brake, select
position P
.
►
Start the engine.
If the conditions are not met, there is an audible
signal, accompanied by a message on the
instrument panel screen.
►
Release the parking brake, unless it is set to
automatic mode (with electric parking brake).
►
Select position R
, N or D.
If you are setting off from a steep slope
with a loaded vehicle, depress the
brake pedal, select position D, release the
parking brake, unless it is set to automatic
mode (with electric parking brake), then
release the brake pedal.
►
Gradually release the brake pedal.
Or
►
Accelerate gradually in order to release the
electric parking brake (if it is set to automatic
mode).
The vehicle moves off immediately
.
If P is displayed on the instrument panel
but the selector is in another position,
place the selector in position P to allow the
engine to be started.
If position N is selected inadvertently while
driving, allow the engine to return to idle, then
select position D to accelerate.
When the engine is running at idle with
the brakes released, if position R, D or M
is selected, the vehicle moves even without
the accelerator being pressed.
Never leave children inside the vehicle
unsupervised.
As a safety measure, never leave the vehicle
without taking your key or remote control with
you, even for a short time.
When carrying out maintenance with the
engine running, apply the parking brake and
select position P.
With an automatic gearbox, never try to
start the engine by pushing the vehicle.
Automatic operation
► Select position D for automatic
changing of the gears.
The gearbox then operates in auto-adaptive
mode, without any intervention on the part of the
driver. It continuously selects the most suitable
gear according to the driving style, the road
profile and the load in the vehicle. CarM an uals 2 .c o m