2023 PEUGEOT 508 window
[x] Cancel search: windowPage 43 of 244

41
Access
2Do not put your head or arms through the
open windows when the vehicle is moving -
risk of serious injury!
Panoramic sunroof
The panoramic sunroof consists of a movable
glass panel that slides over the roof and a blind
that can be opened independently. Opening the
sunroof automatically opens the blind.
►
T
o operate the panoramic sunroof or the
blind, use the buttons in the roof console.
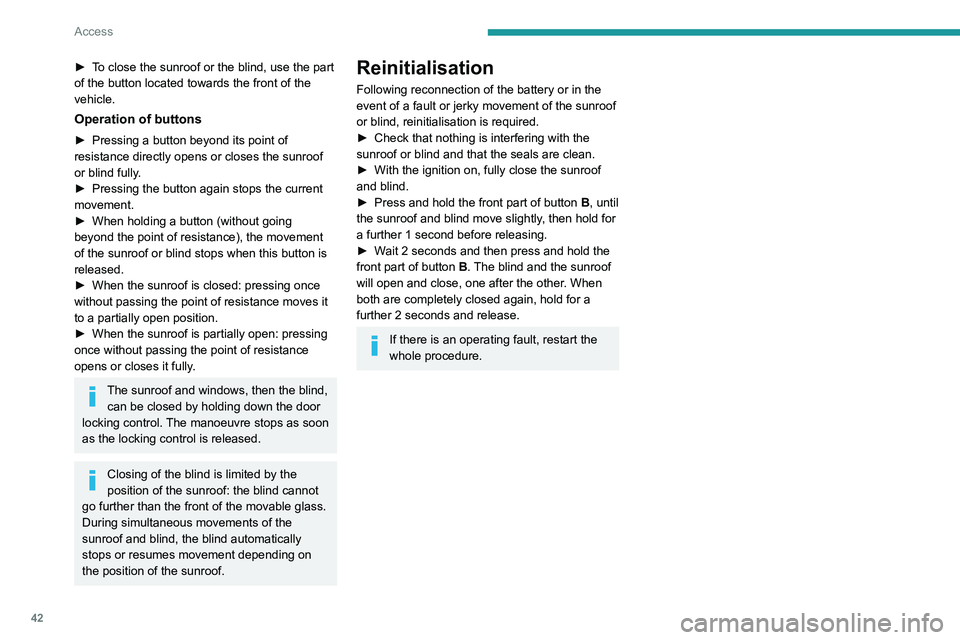
A. Sunroof blind control
B. Sunroof control
The sunroof or blind can be operated when the
ignition is turned on (if the battery is charged
enough), with the engine running, in STOP mode
of Stop & Start, and up to 45
seconds after
turning off the ignition or after locking the vehicle.
Precautions
Do not put your head or arms through the
sunroof while the vehicle is moving - risk
of serious injury!
Do not operate the sunroof if transverse
roof bars are fitted - risk of serious
damage!
Do not place heavy loads on the movable
glass panel of the sunroof.
If the sunroof is wet, following a rain
shower or washing the vehicle, wait until
it is completely dry before operating it.
Do not operate the sunroof if it is covered by
snow or ice - risk of damage!
Use only plastic scrapers to remove snow or
ice from the sunroof.
Regularly check the condition of the
sunroof seals (e.g. presence of dust,
dead leaves).
If using a car wash, check first that the roof is
correctly closed and keep the high-pressure
jet at least 30 centimetres from the seals.
Never leave the vehicle with the sunroof
open.
Operation
When opening the sunroof fully, the movable
glass moves to a partially open position, then
slides over the roof. Any intermediate position is
possible.
Depending on the speed of the vehicle,
the partially open position may vary to
improve the acoustics.
Before operating the sunroof or blind
control buttons, ensure that no object or
person might prevent the movement.
Be particularly aware of children when
operating the sunroof or blind.
If something is trapped when operating the
sunroof or blind, you should reverse the
movement of the sunroof or blind by pressing
the control in question.
The driver must ensure that passengers use
the sunroof and blind correctly.
Anti-pinch system
If the sunroof or blind encounters an obstacle
when closing, the movement is automatically
reversed.
The roof anti-pinch system is designed to be
effective at speeds of up to 75 mph (120
km/h).
Opening/Closing
► To open the sunroof or the blind, use the
part of the button located towards the rear of the
vehicle.
Page 44 of 244
42
Access
► To close the sunroof or the blind, use the part
of the button located towards the front of the
vehicle.
Operation of buttons
► Pressing a button beyond its point of
resistance directly opens or closes the sunroof
or blind fully
.
►
Pressing the button again stops the current
movement.
►
When holding a button (without going
beyond the point of resistance), the movement
of the sunroof or blind stops when this button is
released.
►
When the sunroof is closed: pressing once
without passing the point of resistance moves it
to a partially open position.
►
When the sunroof is partially open: pressing
once without passing the point of resistance
opens or closes it fully
.
The sunroof and windows, then the blind, can be closed by holding down the door
locking control. The manoeuvre stops as soon
as the locking control is released.
Closing of the blind is limited by the
position of the sunroof: the blind cannot
go further than the front of the movable glass.
During simultaneous movements of the
sunroof and blind, the blind automatically
stops or resumes movement depending on
the position of the sunroof.
Reinitialisation
Following reconnection of the battery or in the
event of a fault or jerky movement of the sunroof
or blind, reinitialisation is required.
►
Check that nothing is interfering with the
sunroof or blind and that the seals are clean.
►
With the ignition on, fully close the sunroof
and blind.
►
Press and hold the front part of button
B, until
the sunroof and blind move slightly, then hold for
a further 1 second before releasing.
►
W
ait 2 seconds and then press and hold the
front part of button B. The blind and the sunroof
will open and close, one after the other. When
both are completely closed again, hold for a
further 2 seconds and release.
If there is an operating fault, restart the
whole procedure.
Page 52 of 244
50
Ease of use and comfort
► Guide the backrest 3 down to the horizontal
position.
From the boot (SW)
► Pull the backrest release lever 2 towards you.
The backrest 3 folds fully onto the cushion.
Repositioning the backrests
First check that the outer seat belts are
lying vertically flat alongside the backrest
latching rings.
► Straighten the backrest 3 and push it firmly to
latch it into place.
►
Check that the red indicator is no longer
visible in the release grip 1
.
►
Ensure that the outer seat belts were not
trapped during the operation.
Please note: an incorrectly latched
backrest compromises the safety of
passengers in the event of sudden braking or
an accident.
The contents of the boot may be thrown
forwards - risk of serious injury!
Heating and Ventilation
Air intake
The air circulating in the passenger compartment
is filtered and originates either from the
exterior, via the grille located at the base of the windscreen, or from the inside in air recirculation
mode.
Controls
Depending on version, certain controls
are accessible in the
Climate touch
screen application and/via the control panel on
the centre console.
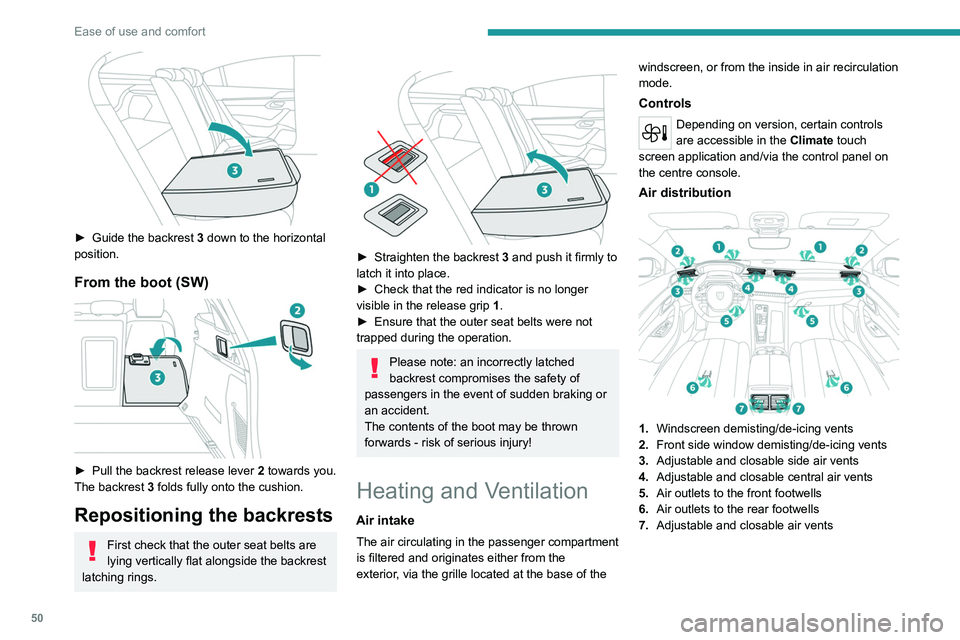
Air distribution
1. Windscreen demisting/de-icing vents
2. Front side window demisting/de-icing vents
3. Adjustable and closable side air vents
4. Adjustable and closable central air vents
5. Air outlets to the front footwells
6. Air outlets to the rear footwells
7. Adjustable and closable air vents
Page 55 of 244

53
Ease of use and comfort
3Automatic air conditioning manual settings
It is possible to manually adjust one or more
of these functions, while the system retains
automatic control of the other functions:
–
air flow
.
–
air distribution.
The indicator lamp in the " AUT
O” button goes
out if a setting is changed.
►
Press button
5-AUTO again to reactivate
automatic air conditioning.
Adjusting the air flow
► Press one of the buttons 2 (fan) or drag
horizontally to increase or decrease air flow.
It is also possible to directly press one of the
values.
Switching off the air conditioning
system
When the air flow is reduced to a minimum,
ventilation stops.
“OFF" is displayed alongside the fan.
Adjusting the air distribution
► Press the buttons 3 to adjust the air flow
distribution inside the passenger compartment.
Windscreen and side windows
Central and side air vents
Footwells
A symbol is activated to display the presence of
blown air in the direction indicated.
It is possible to activate all three buttons
simultaneously, for uniform distribution
throughout the passenger compartment.
Clean Cabin function
It includes the AQS (Air Quality System) and
Clean Air functions.
►
T
o activate/deactivate the function, press
button 7.
AQS function
Using an exterior pollution sensor, this function
automatically activates the recirculation of
interior air when a certain level of pollutants in
the exterior
air is detected.
When the air quality returns to a satisfactory
level, recirculation of interior air is automatically
deactivated.
This function is not designed to detect
unpleasant odours.
Recirculation is automatically activated when the
windscreen wash is used or when reverse gear
is engaged.
The function is inactive if the outside temperature
is below 5°C to prevent the risk of misting on the
windscreen and side windows.
Clean Air function
Using an interior pollution sensor, this function
detects fine particles (e.g. cigarette smoke,
mould, bacteria).
The management of the recirculation of
interior
air makes it possible to return to a purified
passenger compartment in just a few minutes,
thanks to the passage of air through the high-
performance passenger compartment filter.
If the air quality appears to be reduced, contact
a PEUGEOT dealer or a qualified workshop
to change the high-performance passenger
compartment filter.
Air conditioning on/off
The air conditioning system is designed to
operate effectively in all seasons, with the
windows closed:
–
It lowers the temperature in summer
.
–
It increase the effectiveness of the demisting,
in winter
, above 3°C.
►
Press button
4-A/C to switch the air
conditioning on/off.
When the function is switched on, " A/C" changes
colour.
Air conditioning does not operate when the air flow is deactivated.
To obtain cool air more quickly, enable interior
air recirculation for a brief period. Then return
to the intake of exterior air.
Switching off the air conditioning may result in
some discomfort (humidity or misting).
Page 56 of 244
54
Ease of use and comfort
Maximum air conditioning
This function automatically adjusts the
temperature setting to the lowest possible, the
air distribution towards the central and side air
vents, the air flow to maximum and, if necessary,
activates interior air recirculation.
► Press this button to activate/deactivate
the function (confirmed by the
illumination/extinction of the indicator lamp).
Once the function is deactivated, the system
returns to the previous settings.
Switching off the air
conditioning system
► Press button 12-OFF.
Its indicator lamp lights up and all the other
indicator lamps of the air conditioning system
go off.
This action deactivates all of the functions of the
air conditioning system.
The temperature is no longer regulated. A slight
flow of air can still be felt, due to the forward
movement of the vehicle.
Interior air recirculation
The intake of exterior air prevents the formation
of mist on the windscreen and side windows.
Recirculating the interior air isolates the
passenger compartment from outside odours
and fumes and allows the desired passenger
compartment temperature to be achieved more
rapidly.
► Press this button to activate/deactivate
the function (confirmed by the
illumination/extinction of the indicator lamp).
This function is activated automatically when the front screenwash is used or
reverse gear is engaged.
Front demisting/defrosting
This mode allows the windscreen and side windows to be demisted or defrosted as quickly
as possible.
► Press this button to activate/deactivate
the mode (confirmed by the illumination/
extinction of the
indicator lamp).
The mode automatically manages the air
conditioning, air flow, air intake and distributes
ventilation optimally to the windscreen and side
windows.
The air flow can be changed manually without
deactivating this mode.
With Stop & Start, when demisting has
been activated, STOP mode is not
available.
In wintry conditions, before moving off, it
is essential to remove any snow or ice
from the windscreen around the camera.
Otherwise, the operation of the equipment
using the camera may be affected.
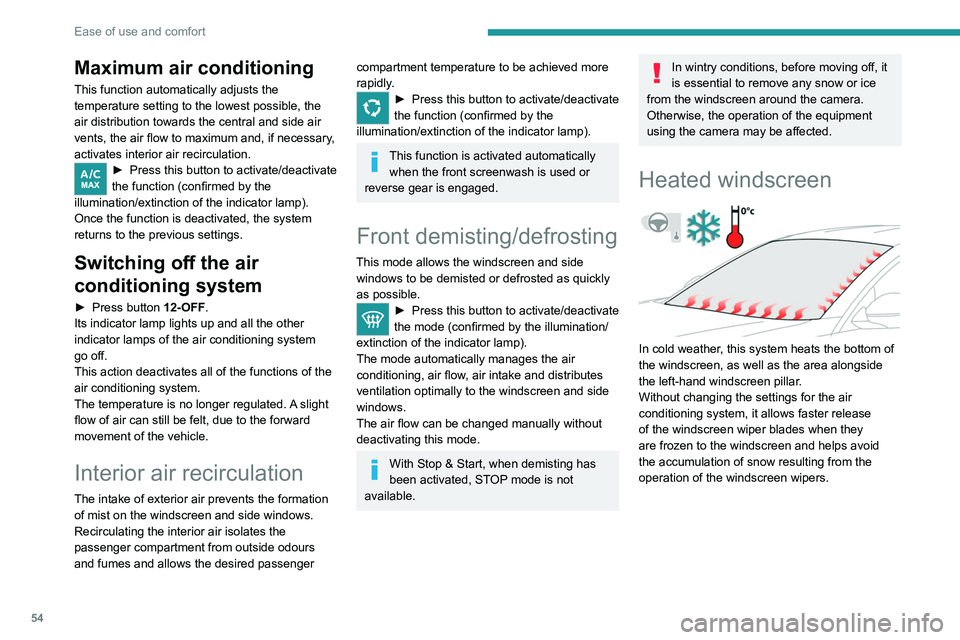
Heated windscreen
In cold weather, this system heats the bottom of
the windscreen, as well as the area alongside
the left-hand windscreen pillar.
Without changing the settings for the air
conditioning system, it allows faster release
of the windscreen wiper blades when they
are frozen to the windscreen and helps avoid
the accumulation of snow resulting from the
operation of the windscreen wipers.
Page 74 of 244
72
Lighting and visibility
Conditions for operation
– With the engine running and in Stop mode
of Stop & Start.
–
V
ery low light conditions with dipped beam
headlamps on and in good working order.
–
T
emperature between -30°C and +28°C.
–
Speed below 99 mph (160
km/h).
–
Detection of animals taller than 0.50 m.
Activation/Deactivation
It is configured in the ADAS touch screen
application.
Operation
If the function is selected but the display
on the instrument panel and the alerts are
not available (in " Night Vision"mode), the
indicator lamp comes on in grey.
If all operating conditions are met, the
indicator lamp comes on in green: the
display on the instrument panel (with " Night
Vision " mode selected) and the triggering of
alerts are available.
If certain operating conditions (speed or
temperature) are not met, the indicator
lamp comes on in orange: only the display on the
instrument panel is available (in " Night Vision"
mode).
Whilst the exterior light is too bright or the dipped
beam headlamps have not been switched on,
the alerts are not available.
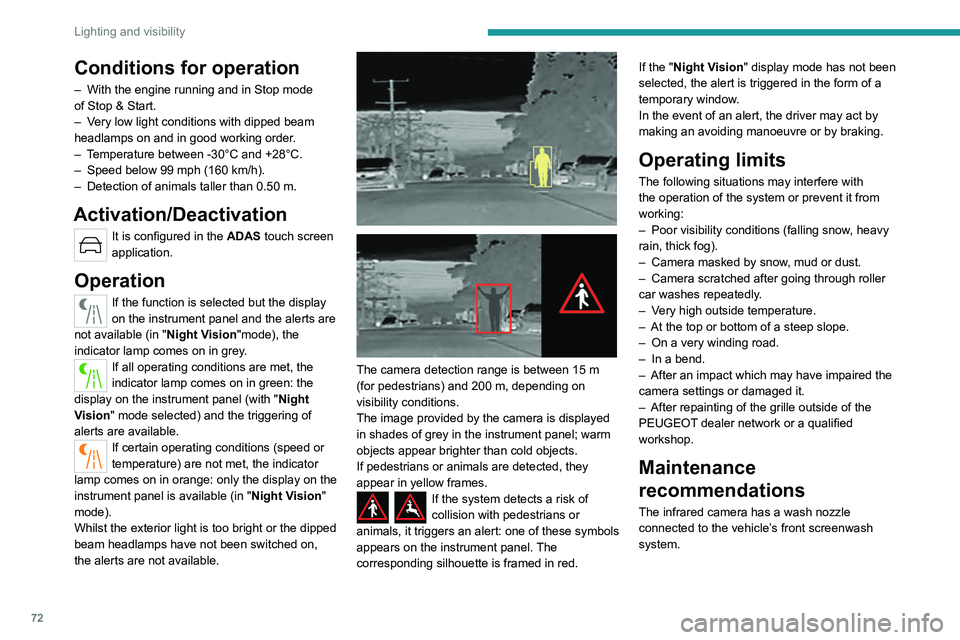
The camera detection range is between 15 m
(for pedestrians) and 200 m, depending on
visibility conditions.
The image provided by the camera is displayed
in shades of grey in the instrument panel; warm
objects appear brighter than cold objects.
If pedestrians or animals are detected, they
appear in yellow frames.
If the system detects a risk of
collision with pedestrians or
animals, it triggers an alert: one of these symbols
appears on the instrument panel. The
corresponding silhouette is framed in red. If the "
Night Vision" display mode has not been
selected, the alert is triggered in the form of a
temporary window.
In the event of an alert, the driver may act by
making an avoiding manoeuvre or by braking.
Operating limits
The following situations may interfere with
the operation of the system or prevent it from
working:
–
Poor visibility conditions (falling snow
, heavy
rain, thick fog).
–
Camera masked by snow
, mud or dust.
–
Camera scratched after going through roller
car washes repeatedly
.
–
V
ery high outside temperature.
–
At the top or bottom of a steep slope.
–
On a very winding road.
–
In a bend.
–
After an impact which may have impaired the
camera settings or damaged it.
–
After repainting of the grille outside of the
PEUGEOT
dealer network or a qualified
workshop.
Maintenance
recommendations
The infrared camera has a wash nozzle
connected to the vehicle’s front screenwash
system.
Page 88 of 244
86
Safety
steering wheel, driver's side, and the dashboard,
passenger's side, to cushion their forward
movement.
Lateral airbags
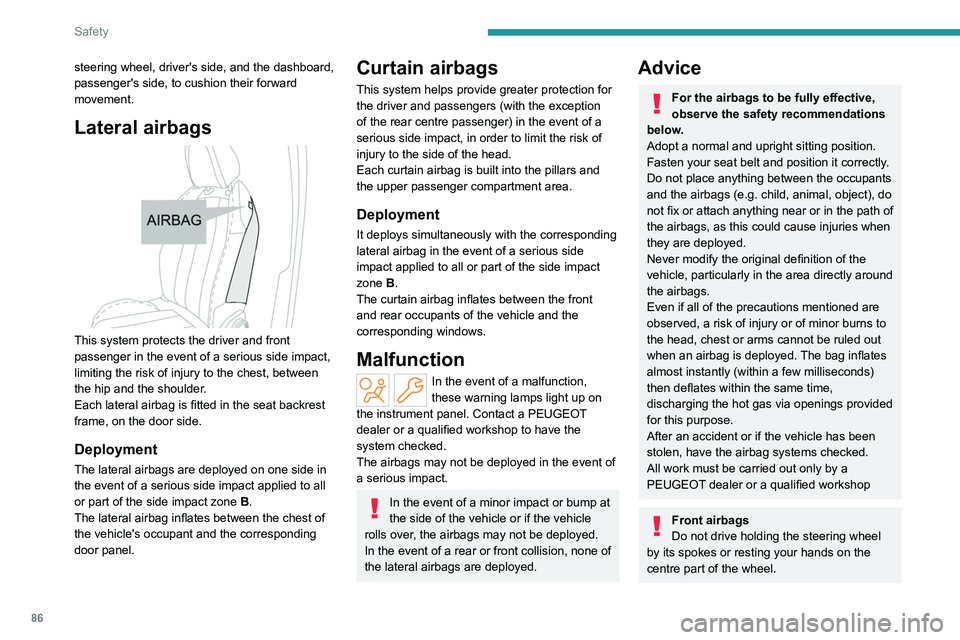
This system protects the driver and front
passenger in the event of a serious side impact,
limiting the risk of injury to the chest, between
the hip and the shoulder.
Each lateral airbag is fitted in the seat backrest
frame, on the door side.
Deployment
The lateral airbags are deployed on one side in
the event of a serious side impact applied to all
or part of the side impact zone B.
The lateral airbag inflates between the chest of
the vehicle's occupant and the corresponding
door panel.
Curtain airbags
This system helps provide greater protection for
the driver and passengers (with the exception
of the rear centre passenger) in the event of a
serious side impact, in order to limit the risk of
injury to the side of the head.
Each curtain airbag is built into the pillars and
the upper passenger compartment area.
Deployment
It deploys simultaneously with the corresponding
lateral airbag in the event of a serious side
impact applied to all or part of the side impact
zone B.
The curtain airbag inflates between the front
and rear occupants of the vehicle and the
corresponding windows.
Malfunction
In the event of a malfunction,
these warning lamps light up on
the instrument panel. Contact a PEUGEOT
dealer or a qualified workshop to have the
system checked.
The airbags may not be deployed in the event of
a serious impact.
In the event of a minor impact or bump at
the side of the vehicle or if the vehicle
rolls over, the airbags may not be deployed.
In the event of a rear or front collision, none of
the lateral airbags are deployed.
Advice
For the airbags to be fully effective,
observe the safety recommendations
below.
Adopt a normal and upright sitting position.
Fasten your seat belt and position it correctly.
Do not place anything between the occupants
and the airbags (e.g.
child, animal, object), do
not fix or attach anything near or in the path of
the airbags, as this could cause injuries when
they are deployed.
Never modify the original definition of the
vehicle, particularly in the area directly around
the airbags.
Even if all of the precautions mentioned are
observed, a risk of injury or of minor burns to
the head, chest or arms cannot be ruled out
when an airbag is deployed. The bag inflates
almost instantly (within a few milliseconds)
then deflates within the same time,
discharging the hot gas via openings provided
for this purpose.
After an accident or if the vehicle has been
stolen, have the airbag systems checked.
All work must be carried out only by a
PEUGEOT dealer or a qualified workshop
Front airbags
Do not drive holding the steering wheel
by its spokes or resting your hands on the
centre part of the wheel.
Page 90 of 244
88
Safety
Child seats
The regulations on carrying children are specific to each country. Refer to the
legislation in force in your country.
For maximum safety, please observe the
following recommendations:
–
In accordance with European regulations,
all children under the age of 12 or less than
1.5 metres tall must travel in approved child
seats suited to their size or weight , on seats
fitted with a seat belt or ISOFIX mountings.
–
Statistically
, the safest seats in your
vehicle for carrying children are the rear
seats.
–
Children ageing less than 15
months must
travel in the "rearward facing" position,
whether in the front or rear of the vehicle.
It is recommended that children travel
on the rear seats of the vehicle:
–
"rearward facing" up to the age of 3.
–
"forward facing" over the age of 3.
Make sure that the seat belt is correctly
positioned and tightened.
For child seats with a support leg, ensure that
the support leg is in firm and steady contact
with the floor.
An incorrectly installed child seat in a vehicle compromises the child's safety in
the event of an accident.
Ensure that there is no seat belt or seat belt
buckle under the child seat, as this could
destabilise it.
Remember to fasten the seat belts or the
child seat harness keeping the slack relative
to the child's body to a minimum, even for
short journeys.
When installing a child seat using the seat
belt, ensure that the seat belt is tightened
correctly on the child seat and that it secures
the child seat firmly on the vehicle seat. If
the passenger seat is adjustable, move it
forwards if necessary.
Remove the head restraint before
installing a child seat with a backrest on a
passenger seat.
Ensure that the head restraint is stored or
attached securely to prevent it from being
thrown around the vehicle in the event of
sharp braking. Refit the head restraint once
the child seat has been removed.
Installing a booster seat
The chest part of the seat belt must be
positioned on the child's shoulder without
touching the neck.
Ensure that the lap part of the seat belt
passes correctly over the child's thighs.
Use a booster seat with a backrest, equipped
with a belt guide at shoulder level.
Additional protections
To prevent accidental opening of the
doors and rear windows, use the "Child lock".
Take care not to open the rear windows by
more than one third.
To protect young children from the sun's rays,
fit side blinds on the rear windows.
As a safety measure, do not leave:
–
A
child alone and unsupervised inside a
vehicle.
–
A
child or an animal in a vehicle which is
exposed to the sun, with the windows closed.
–
The keys within reach of children inside the
vehicle.
Child seat at the rear
Forward-facing or rearward-facing
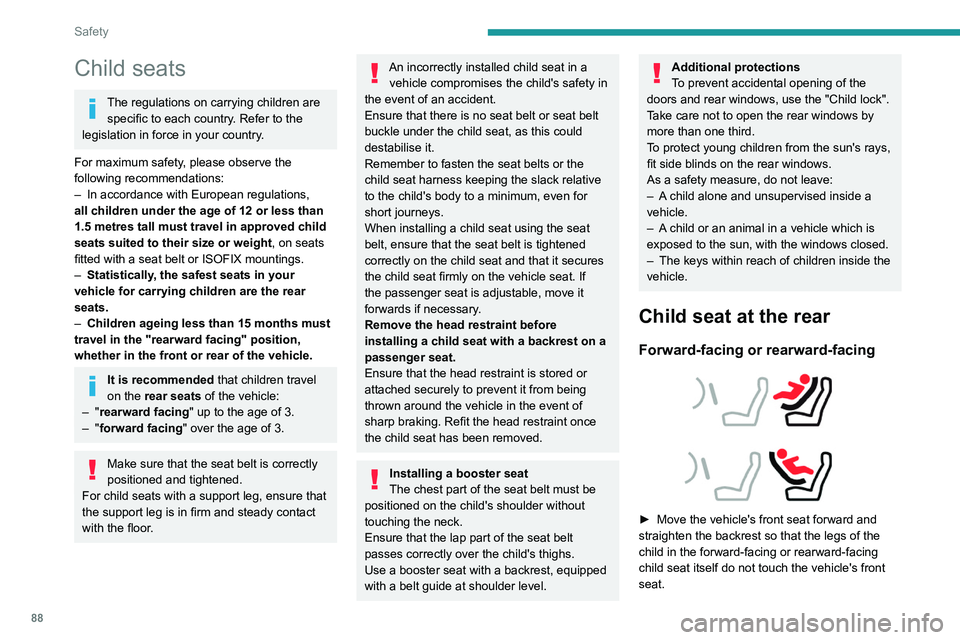
► Move the vehicle's front seat forward and
straighten the backrest so that the legs of the
child in the forward-facing or rearward-facing
child seat itself do not touch the vehicle's front
seat.