2023 PEUGEOT 508 door lock
[x] Cancel search: door lockPage 50 of 244

48
Ease of use and comfort
Adjustment
► Move control A to the right or to the left to
select the corresponding mirror.
►
Move control
B in any of the four directions
to adjust.
►
Return control A
to its central position.
Electric folding
Depending on equipment, the door mirrors can
be folded electrically.
► From the inside, with the
ignition on, place control A
in the
central position.
►
Pull control A
backwards.
►
Lock the vehicle from the outside.
If the mirrors are folded using control A,
they will not unfold when the vehicle is
unlocked.
Electric unfolding
► From outside: unlock the vehicle.
► From inside: with the ignition on, place
control
A in the central position and then pull it
rearwards.
The automatic folding/unfolding of the door mirrors is configured in the
Settings
> Vehicle touch screen application.
Before using an automatic car wash, fold the
mirrors.
Manual folding
The mirrors can be folded manually (parking
obstruction, narrow garage, etc.).
►
T
urn the mirror towards the vehicle.
Automatic tilting in reverse gear
Depending on version, this function allows you to
automatically tilt the mirrors downwards to assist
with parking manoeuvres in reverse gear.
With the engine running, on engaging reverse
gear, the mirror glasses tilt downwards.
They each return to their original positions:
–
A
few seconds after coming out of reverse
gear.
–
Once the vehicle speed exceeds 6 mph
(10
km/h).
– When the engine is switched off.It can be activated/deactivated in the
Settings > Vehicle touch screen
application.
Electrochrome interior rear
view mirror
Equipped with an anti-dazzle system, which
darkens the mirror glass and reduces the
nuisance to the driver caused by the sun,
headlamps of other vehicles, etc.
The electrochrome system uses a sensor that
detects the level of exterior brightness and that
coming from the rear of the vehicle, in order to
automatically and gradually switch between day
and night usage.
To ensure optimum visibility while manoeuvring, the mirror automatically
brightens when reverse gear is engaged.
The system is deactivated if the load in the
boot exceeds the height of the load space
cover or if the load space cover has items
placed on it.
Page 58 of 244
56
Ease of use and comfort
Operating conditions
– The function is only activated when the
ignition is switched off and the
vehicle
locked.
–
When the vehicle is not connected, the
function is only activated if the battery charge
level is greater than 20%.
–
When the vehicle is not connected and a
recurring programme is active (e.g. from Monday
to Friday), if two temperature pre-conditioning
sequences are run without the vehicle being
used, the programme will be deactivated.
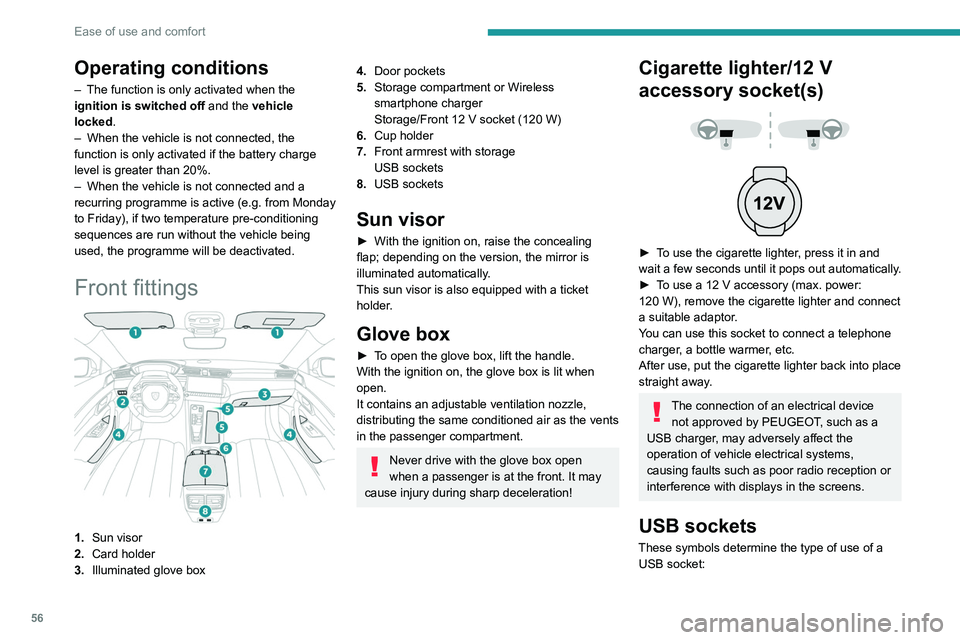
Front fittings
1. Sun visor
2. Card holder
3. Illuminated glove box
4.Door pockets
5. Storage compartment or Wireless
smartphone charger
Storage/Front 12
V socket (120 W)
6. Cup holder
7. Front armrest with storage
USB sockets
8. USB sockets
Sun visor
► With the ignition on, raise the concealing
flap; depending on the version, the mirror is
illuminated automatically
.
This sun visor is also equipped with a ticket
holder.
Glove box
► To open the glove box, lift the handle.
With the ignition on, the glove box is lit when
open.
It contains an adjustable ventilation nozzle,
distributing the same conditioned air as the vents
in the passenger compartment.
Never drive with the glove box open
when a passenger is at the front. It may
cause injury during sharp deceleration!
Cigarette lighter/12 V
accessory socket(s)
► To use the cigarette lighter, press it in and
wait a few seconds until it pops out automatically.
►
T
o use a 12 V accessory (max. power:
120
W), remove the cigarette lighter and connect
a suitable adaptor.
You can use this socket to connect a telephone
charger, a bottle warmer, etc.
After use, put the cigarette lighter back into place
straight away.
The connection of an electrical device not approved by PEUGEOT, such as a
USB charger, may adversely affect the
operation of vehicle electrical systems,
causing faults such as poor radio reception or
interference with displays in the screens.
USB sockets
These symbols determine the type of use of a USB socket:
Page 62 of 244
60
Ease of use and comfort
– when a door is opened.
– when the remote control locking button is
activated, in order to locate the vehicle.
It switches off:
–
when the vehicle is locked.
–
when the ignition is switched on.
–
30 seconds after the last door is closed.
The front and rear touch-sensitive reading lamps
come on and go off at the same time as the
courtesy lamp.
A long press on the front touch-sensitive courtesy lamp completely deactivates it
(confirmed by the "OFF" symbol).
The front and rear touch-sensitive reading
lamps still remain operational.
Touch-sensitive reading
lamps
► With the ignition on, press the corresponding
reading lamp.
Interior ambient lighting
The interior ambient lighting casts soft, coloured
lighting in the passenger compartment, when low
lighting conditions are detected.
By default, the colour of the interior ambient
lighting is linked to that of the screens,
depending on the driving mode selected.
Activation/deactivation and adjustment of the brightness are set via the Settings >
Brightness
touch screen application.
The colour is selected via the Settings >
Customization touch screen application.
Rear fittings
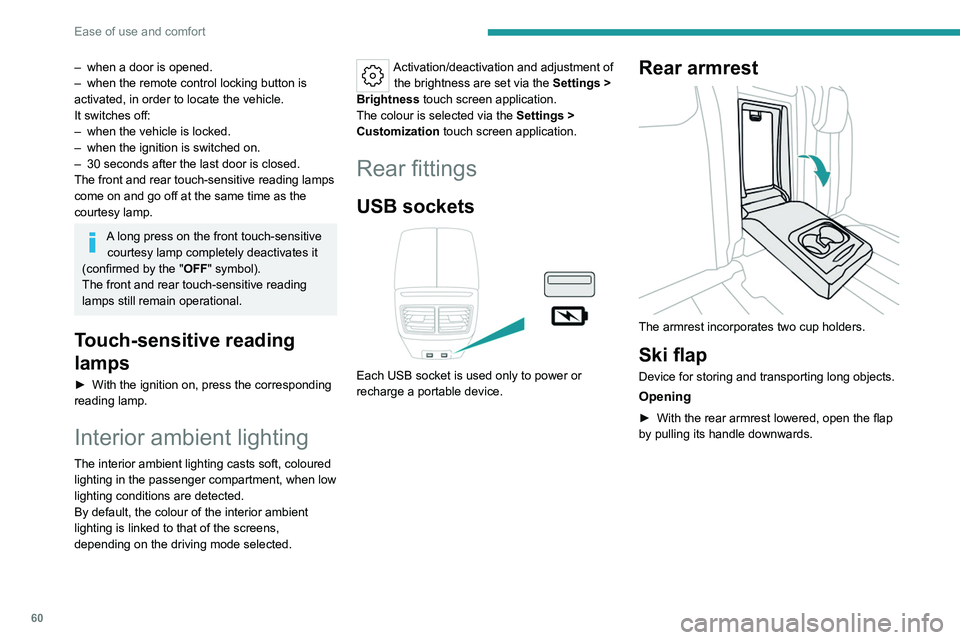
USB sockets
Each USB socket is used only to power or
recharge a portable device.
Rear armrest
The armrest incorporates two cup holders.
Ski flap
Device for storing and transporting long objects.
Opening
► With the rear armrest lowered, open the flap
by pulling its handle downwards.
Page 70 of 244

68
Lighting and visibility
Automatic illumination of lamps
With the lighting control stalk in the “ AUTO”
position and if a low level of exterior brightness
is detected by the rain/sunshine sensor, the
sidelamps and dipped beam headlamps are
switched on automatically, without any action on
the part of the driver. They may also come on if
rain is detected, at the same time as automatic
operation of the windscreen wipers.
As soon as the brightness returns to a sufficient
level or after the windscreen wipers are switched
off, the lamps are switched off automatically.
Malfunction
In the event of a malfunction of the rain/
sunshine sensor, the vehicle’s lamps
come on and this warning lamp is displayed on
the instrument panel, accompanied by an
audible signal and/or the display of a message.
Have it checked by a PEUGEOT dealer or a
qualified workshop.
Do not cover the rain/sunshine sensor
located at the top centre of the
windscreen behind the interior rear view
mirror; the associated functions would no
longer be controlled.
In fog or snow, the rain/sunshine sensor
may detect sufficient light. For this
reason, the lighting will not come on
automatically.
The inner surface of the windscreen may become misted up and affect the proper
operation of the rain/sunshine sensor.
In humid and cold weather, demist the
windscreen regularly.
Guide-me-home and
welcome lighting
Guide-me-home lighting
Automatic
With the ring of the lighting control stalk in the
"AUTO” position and when the light is poor, the
dipped beam headlamps come on automatically
when the ignition is switched off.
You can activate/deactivate and adjust the duration of the guide-me-home
lighting in the Settings
> Vehicle touch screen
application.
Manual
► With the ignition off, pull the lighting control
stalk toward you ("headlamp flash") to activate/
deactivate the function.
Manual guide-me-home lighting goes off
automatically after a period of time.
Welcome lighting
When the vehicle is unlocked in low light
conditions and the "Automatic illumination of
headlamps" function is activated, this system
automatically switches on:
–
On the outside, sidelamps, dipped beam
headlamps and door mirror spotlamps.
–
Inside, courtesy lamps and footwell lighting.
You can activate/deactivate and adjust the duration of the welcome lighting in the
Settings
> Vehicle touch screen application.
Door mirror spotlamps
These spotlamps facilitate access to the vehicle
by lighting the ground near the front doors.
The spotlamps come on automatically:
Page 71 of 244
69
Lighting and visibility
4– when the vehicle is unlocked.
– when a door is opened.
–
when a request to locate the vehicle is
received from the remote control.
They also come on with the welcome lighting
and guide-me-home lighting functions.
They go off automatically after 30 seconds.
Automatic lighting systems - General
recommendations
The automatic lighting systems use a detection
camera, located at the top of the windscreen.
Operating limits
The system may be disrupted or not work
correctly:
–
When visibility conditions are poor
(e.g.
snowfall, heavy rain).
–
If the windscreen is dirty
, misted-up or
masked (e.g.
sticker) in front of the camera.
–
If the vehicle is facing highly reflective signs
or safety barrier reflectors.
The system is not able to detect:
–
Road users that do not have their own
lighting, such as pedestrians.
–
V
ehicles with hidden lighting (e.g. travelling
behind a safety barrier on the motorway).
–
V
ehicles at the top or bottom of a steep
slope, on winding roads, on crossroads.
Maintenance
Clean the windscreen regularly,
particularly the area in front of the camera.
The internal surface of the windscreen can
also become misted around the camera.
In humid and cold weather, demist the
windscreen regularly.
Do not allow snow to accumulate on the
bonnet or roof of the vehicle as this could
obstruct the camera.
Peugeot Matrix LED
Technology 2.0
For more information, refer to the
General recommendations for
automatic lighting systems.
This system automatically adapts the main
beam according to the driving conditions, so that
optimum illumination is maintained for the driver,
without causing a nuisance to other road users.
The driver remains responsible for the vehicle's lighting, its correct use in the
prevailing light, visibility and traffic conditions,
and for compliance with driving and vehicle
regulations.
The system is active from 28 mph
(45 km/h) and deactivates below 22 mph
(35
km/h).
Activation/Deactivation
► Place the ring of the lighting control stalk in
the “ AUTO” position.
This indicator lamp comes on in the instrument panel.
It is configured in the Settings > Vehicle
touch screen application.
The state of the system is stored when the
ignition is switched off.
When deactivated, the lighting system changes
to "Automatic illumination of lamps" mode.
It is recommended that you deactivate
the function in foggy or snowy conditions
or in case of heavy mist.
The function temporarily is deactivated when
the system detects thick fog or when the
foglamps are switched on manually. This is
signalled by the indicator lamp going off on
the instrument panel.
Operation
Using a camera, the system detects the driving
conditions (brightness, lights from oncoming or
followed vehicles, road turns) and adapts the
beams of the main headlamps accordingly.
The modules that make up the main beams
switch on and off gradually, segment by
segment, depending on the driving conditions
detected.
Page 90 of 244
88
Safety
Child seats
The regulations on carrying children are specific to each country. Refer to the
legislation in force in your country.
For maximum safety, please observe the
following recommendations:
–
In accordance with European regulations,
all children under the age of 12 or less than
1.5 metres tall must travel in approved child
seats suited to their size or weight , on seats
fitted with a seat belt or ISOFIX mountings.
–
Statistically
, the safest seats in your
vehicle for carrying children are the rear
seats.
–
Children ageing less than 15
months must
travel in the "rearward facing" position,
whether in the front or rear of the vehicle.
It is recommended that children travel
on the rear seats of the vehicle:
–
"rearward facing" up to the age of 3.
–
"forward facing" over the age of 3.
Make sure that the seat belt is correctly
positioned and tightened.
For child seats with a support leg, ensure that
the support leg is in firm and steady contact
with the floor.
An incorrectly installed child seat in a vehicle compromises the child's safety in
the event of an accident.
Ensure that there is no seat belt or seat belt
buckle under the child seat, as this could
destabilise it.
Remember to fasten the seat belts or the
child seat harness keeping the slack relative
to the child's body to a minimum, even for
short journeys.
When installing a child seat using the seat
belt, ensure that the seat belt is tightened
correctly on the child seat and that it secures
the child seat firmly on the vehicle seat. If
the passenger seat is adjustable, move it
forwards if necessary.
Remove the head restraint before
installing a child seat with a backrest on a
passenger seat.
Ensure that the head restraint is stored or
attached securely to prevent it from being
thrown around the vehicle in the event of
sharp braking. Refit the head restraint once
the child seat has been removed.
Installing a booster seat
The chest part of the seat belt must be
positioned on the child's shoulder without
touching the neck.
Ensure that the lap part of the seat belt
passes correctly over the child's thighs.
Use a booster seat with a backrest, equipped
with a belt guide at shoulder level.
Additional protections
To prevent accidental opening of the
doors and rear windows, use the "Child lock".
Take care not to open the rear windows by
more than one third.
To protect young children from the sun's rays,
fit side blinds on the rear windows.
As a safety measure, do not leave:
–
A
child alone and unsupervised inside a
vehicle.
–
A
child or an animal in a vehicle which is
exposed to the sun, with the windows closed.
–
The keys within reach of children inside the
vehicle.
Child seat at the rear
Forward-facing or rearward-facing
► Move the vehicle's front seat forward and
straighten the backrest so that the legs of the
child in the forward-facing or rearward-facing
child seat itself do not touch the vehicle's front
seat.
Page 98 of 244
96
Safety
"Rearward facing" ISOFIX child seat:
–
R1
: ISOFIX child seat for a baby.
–
R2
: ISOFIX reduced size child seat.
–
R3
: ISOFIX large size child seat.
"Forward facing" ISOFIX child seat:
–
F2X
: ISOFIX child seat for toddlers.
–
F2
: ISOFIX reduced height child seat.
–
F3
: ISOFIX full height child seat.
Booster child seat:
–
B2
: reduced width booster seat.
–
B3
: full width booster seat.
Seat position authorised for the
installation of an ISOFIX child seat.
Seat position where the installation of an
ISOFIX child seat is forbidden.
For seat adjustments, refer to the summary table
"Installing universal, ISOFIX and i-Size child
seats ".
Manual child lock
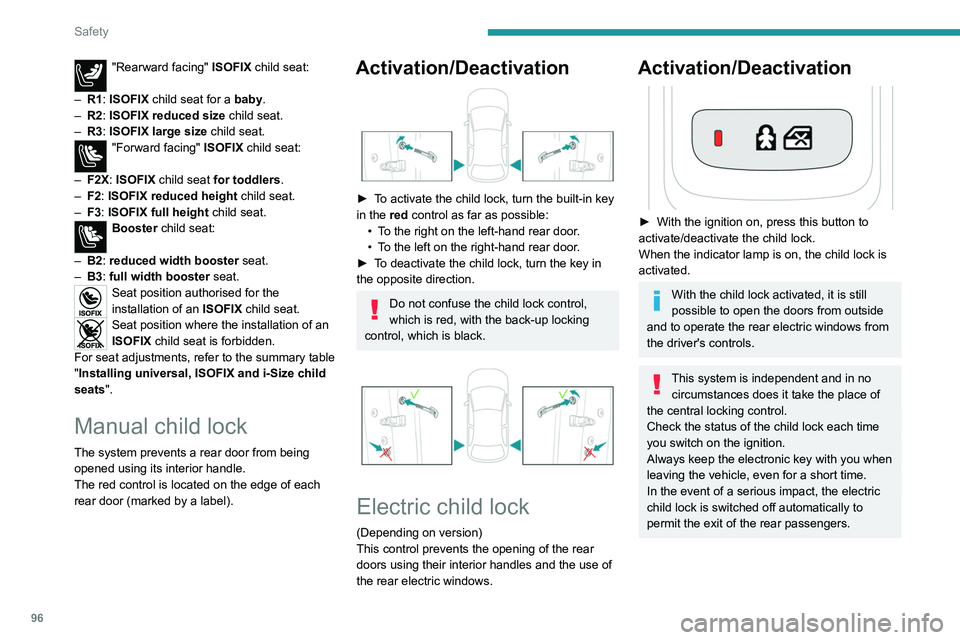
The system prevents a rear door from being
opened using its interior handle.
The red control is located on the edge of each
rear door (marked by a label).
Activation/Deactivation
► To activate the child lock, turn the built-in key
in the red control as far as possible:
•
T
o the right on the left-hand rear door.
•
T
o the left on the right-hand rear door.
►
T
o deactivate the child lock, turn the key in
the opposite direction.
Do not confuse the child lock control,
which is red, with the back-up locking
control, which is black.
Electric child lock
(Depending on version)
This control prevents the opening of the rear
doors using their interior handles and the use of
the rear electric windows.
Activation/Deactivation
► With the ignition on, press this button to
activate/deactivate the child lock.
When the indicator lamp is on, the child lock is
activated.
With the child lock activated, it is still
possible to open the doors from outside
and to operate the rear electric windows from
the driver's controls.
This system is independent and in no circumstances does it take the place of
the central locking control.
Check the status of the child lock each time
you switch on the ignition.
Always keep the electronic key with you when
leaving the vehicle, even for a short time.
In the event of a serious impact, the electric
child lock is switched off automatically to
permit the exit of the rear passengers.
Page 102 of 244
100
Driving
With the engine off, the braking and
steering assistance systems are also cut
off - risk of loss of control of the vehicle!
Never leave your vehicle with the
electronic key still inside.
Switching on the ignition
without starting the engine
With the electronic key in the passenger
compartment, pressing the " START/STOP"
button, without depressing any of the pedals ,
allows the ignition to be switched on without
starting the engine.
►
Press this button again to switch off the
ignition and allow the vehicle to be locked.
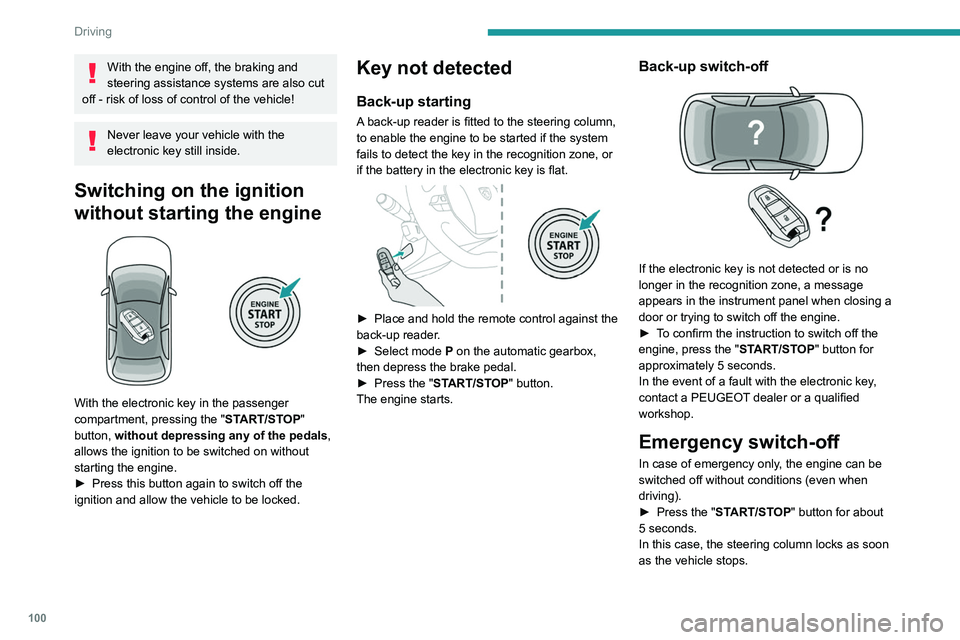
Key not detected
Back-up starting
A back-up reader is fitted to the steering column,
to enable the engine to be started if the system
fails to detect the key in the recognition zone, or
if the battery in the electronic key is flat.
► Place and hold the remote control against the
back-up reader .
►
Select mode
P on the automatic gearbox,
then depress the brake pedal.
►
Press the "
START/STOP" button.
The engine starts.
Back-up switch-off
If the electronic key is not detected or is no
longer in the recognition zone, a message
appears in the instrument panel when closing a
door or trying to switch off the engine.
►
T
o confirm the instruction to switch off the
engine, press the " START/STOP" button for
approximately 5
seconds.
In the event of a fault with the electronic key,
contact a PEUGEOT dealer or a qualified
workshop.
Emergency switch-off
In case of emergency only, the engine can be
switched off without conditions (even when
driving).
►
Press the "
START/STOP" button for about
5
seconds.
In this case, the steering column locks as soon
as the vehicle stops.