Page 23 of 644
CAUTION
When adjusting the seat positions, be
sure not to contact any moving parts to
avoid possible injuries and/or damage.
FRONT MANUAL SEAT
ADJUSTMENT (if so equipped)
Your vehicle seats can be adjusted manu-
ally. For additional information about ad-
justing the seats, refer to the steps outlined
in this section.
WARNING
Before driving the vehicle, return the
seatback to an upright seating position
af ter manually releasing it. Also, make
sure the seat is locked in place. Failure
to do so may cause the seat to move in
a collision or sudden stop. This may re-
sult in damage to the seat or personal
injury.
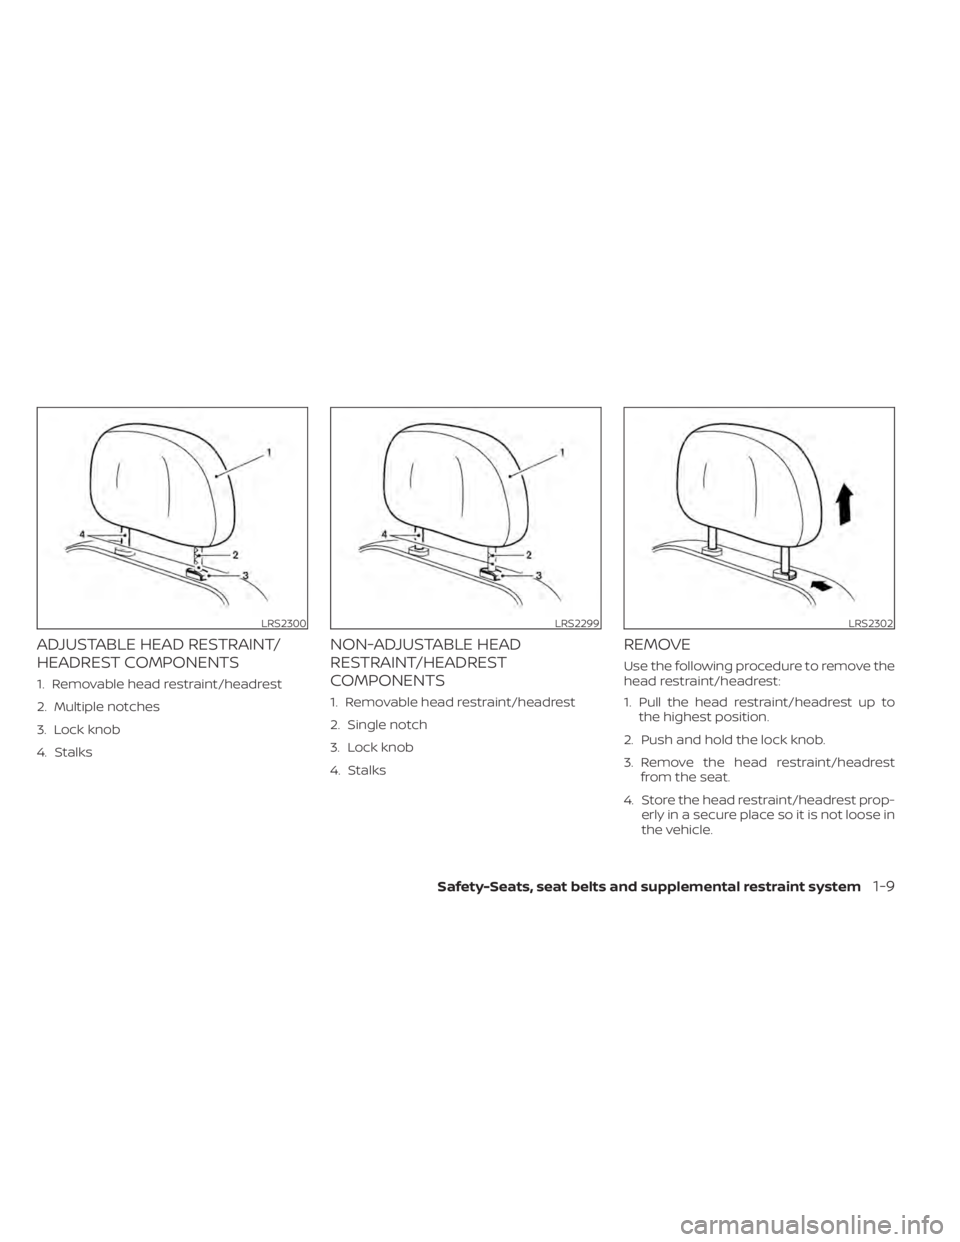
Forward and backward
Pull the center of the bar up and hold it
while you slide the seat forward or back-
ward to the desired position. Release the
bar to lock the seat in position.
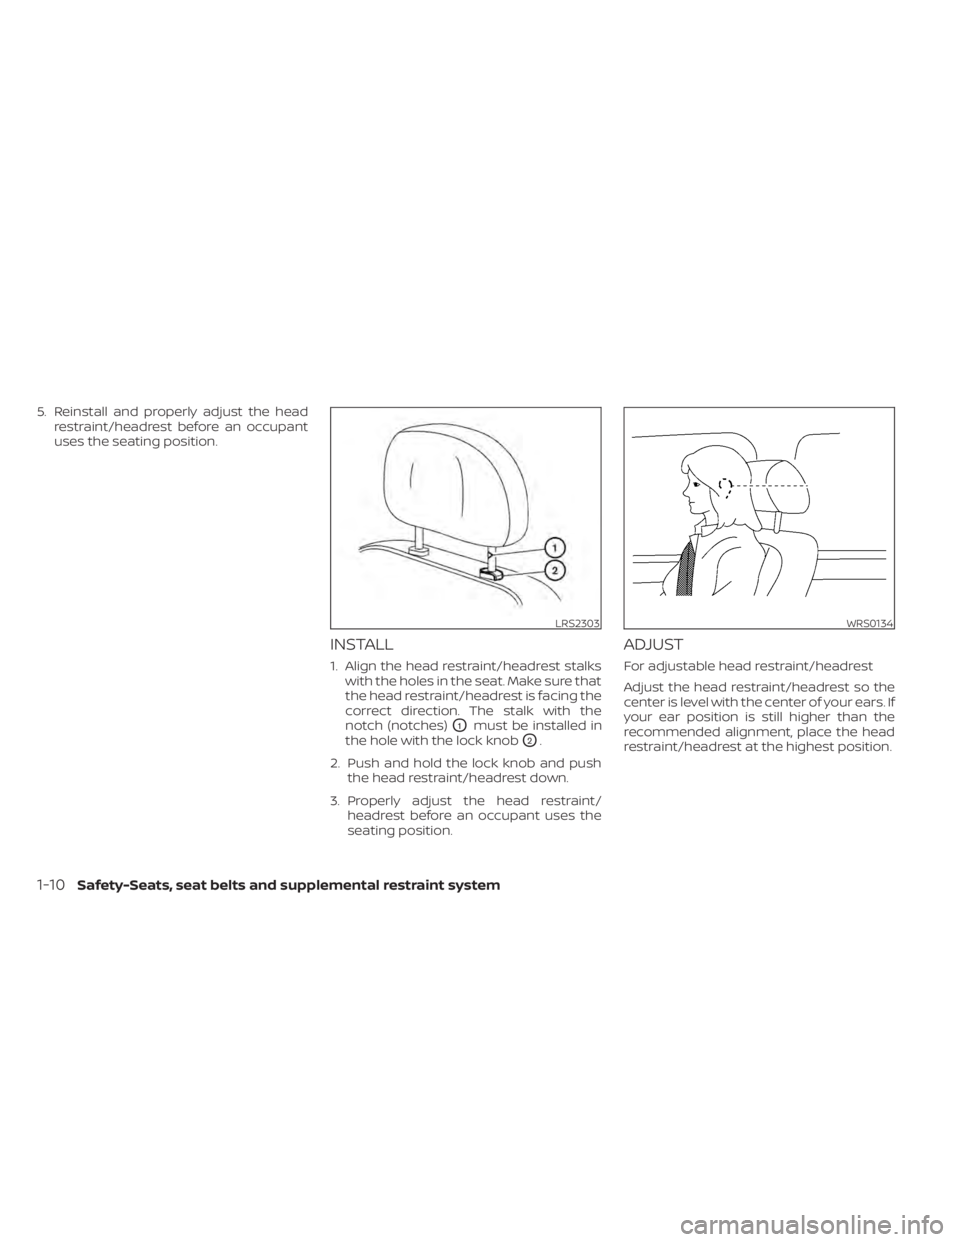
Reclining
To recline the seatback, pull the lever up
and lean back. To bring the seatback for-
ward, pull the lever up and lean your body
forward. Release the lever to lock the seat-
back in position.
The reclining feature allows adjustment of
the seatback for occupants of different
sizes for added comfort and to help obtain
proper seat belt fit. For additional informa-
tion, see “Precautions on seat belt usage”
(P. 1-12). Also, the seatback can be reclined
to allow occupants to rest when the vehicle
is stopped and the shif t lever is in the P
(Park) position.
LRS3029LRS3030
Safety-Seats, seat belts and supplemental restraint system1-3
Page 24 of 644
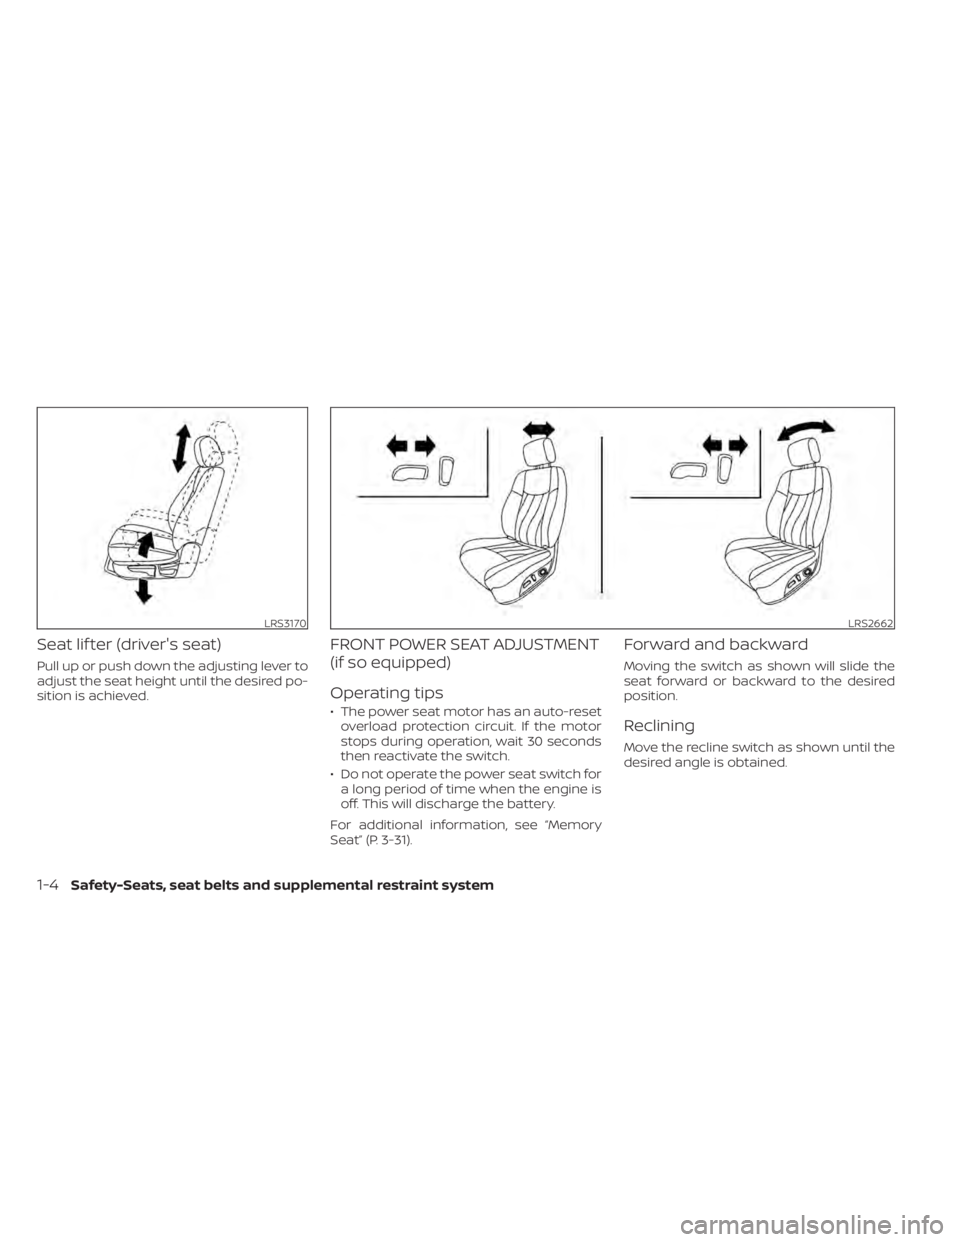
Seat lif ter (driver's seat)
Pull up or push down the adjusting lever to
adjust the seat height until the desired po-
sition is achieved.
FRONT POWER SEAT ADJUSTMENT
(if so equipped)
Operating tips
• The power seat motor has an auto-resetoverload protection circuit. If the motor
stops during operation, wait 30 seconds
then reactivate the switch.
• Do not operate the power seat switch for a long period of time when the engine is
off. This will discharge the battery.
For additional information, see “Memory
Seat” (P. 3-31).
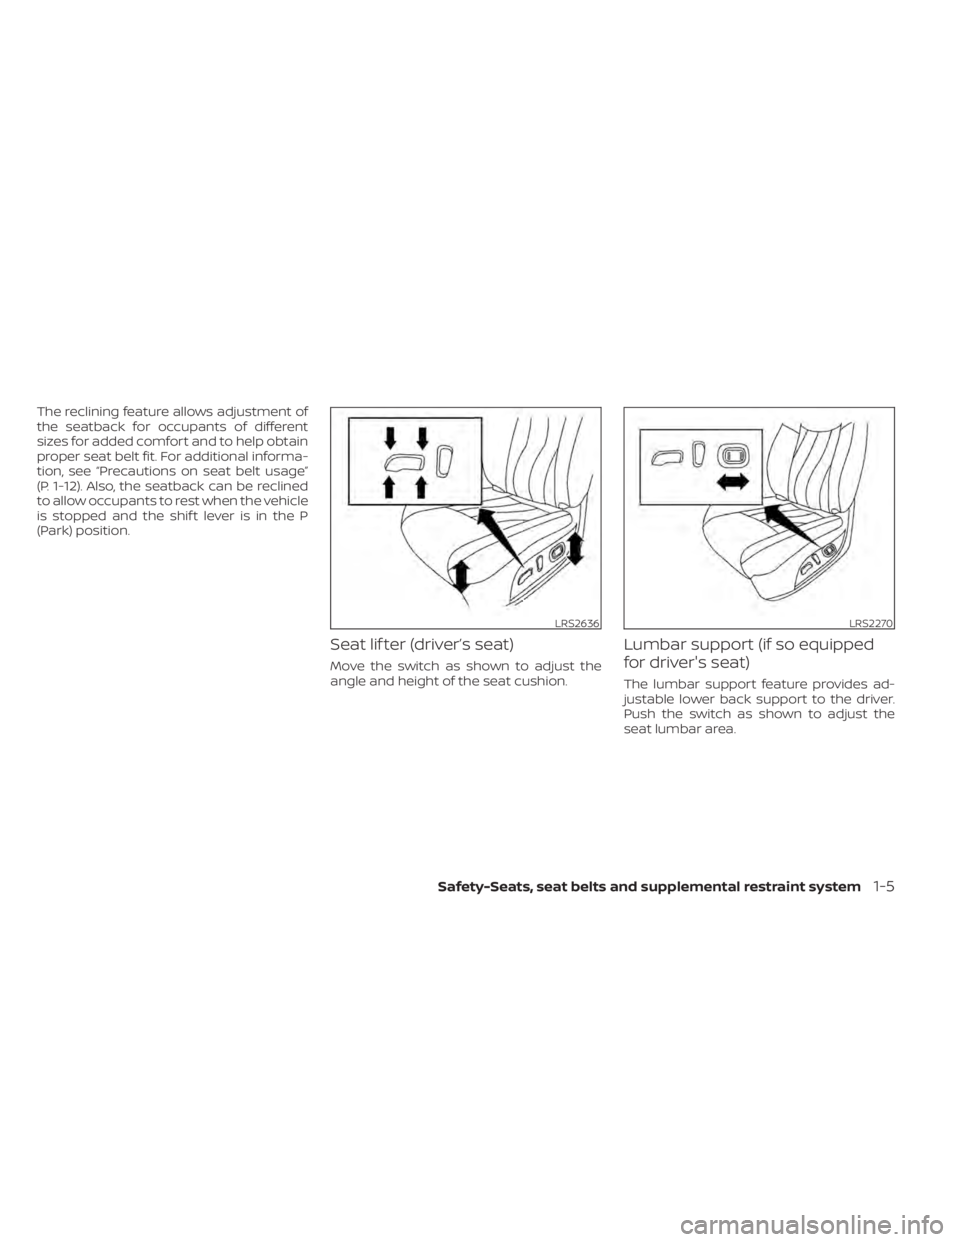
Forward and backward
Moving the switch as shown will slide the
seat forward or backward to the desired
position.
Reclining
Move the recline switch as shown until the
desired angle is obtained.
LRS3170LRS2662
1-4Safety-Seats, seat belts and supplemental restraint system
Page 25 of 644
The reclining feature allows adjustment of
the seatback for occupants of different
sizes for added comfort and to help obtain
proper seat belt fit. For additional informa-
tion, see “Precautions on seat belt usage”
(P. 1-12). Also, the seatback can be reclined
to allow occupants to rest when the vehicle
is stopped and the shif t lever is in the P
(Park) position.
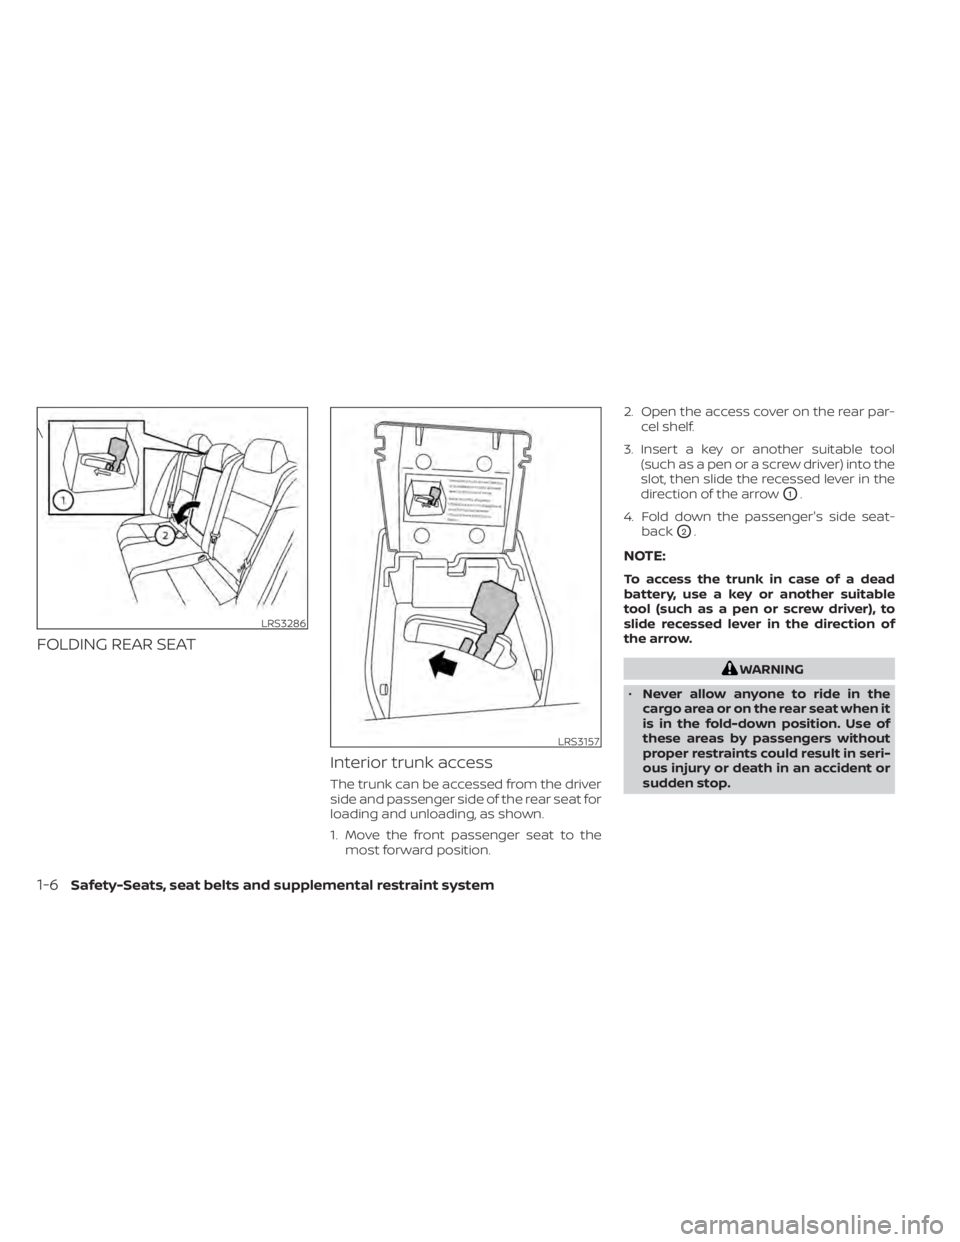
Seat lif ter (driver’s seat)
Move the switch as shown to adjust the
angle and height of the seat cushion.
Lumbar support (if so equipped
for driver's seat)
The lumbar support feature provides ad-
justable lower back support to the driver.
Push the switch as shown to adjust the
seat lumbar area.
LRS2636LRS2270
Safety-Seats, seat belts and supplemental restraint system1-5
Page 26 of 644
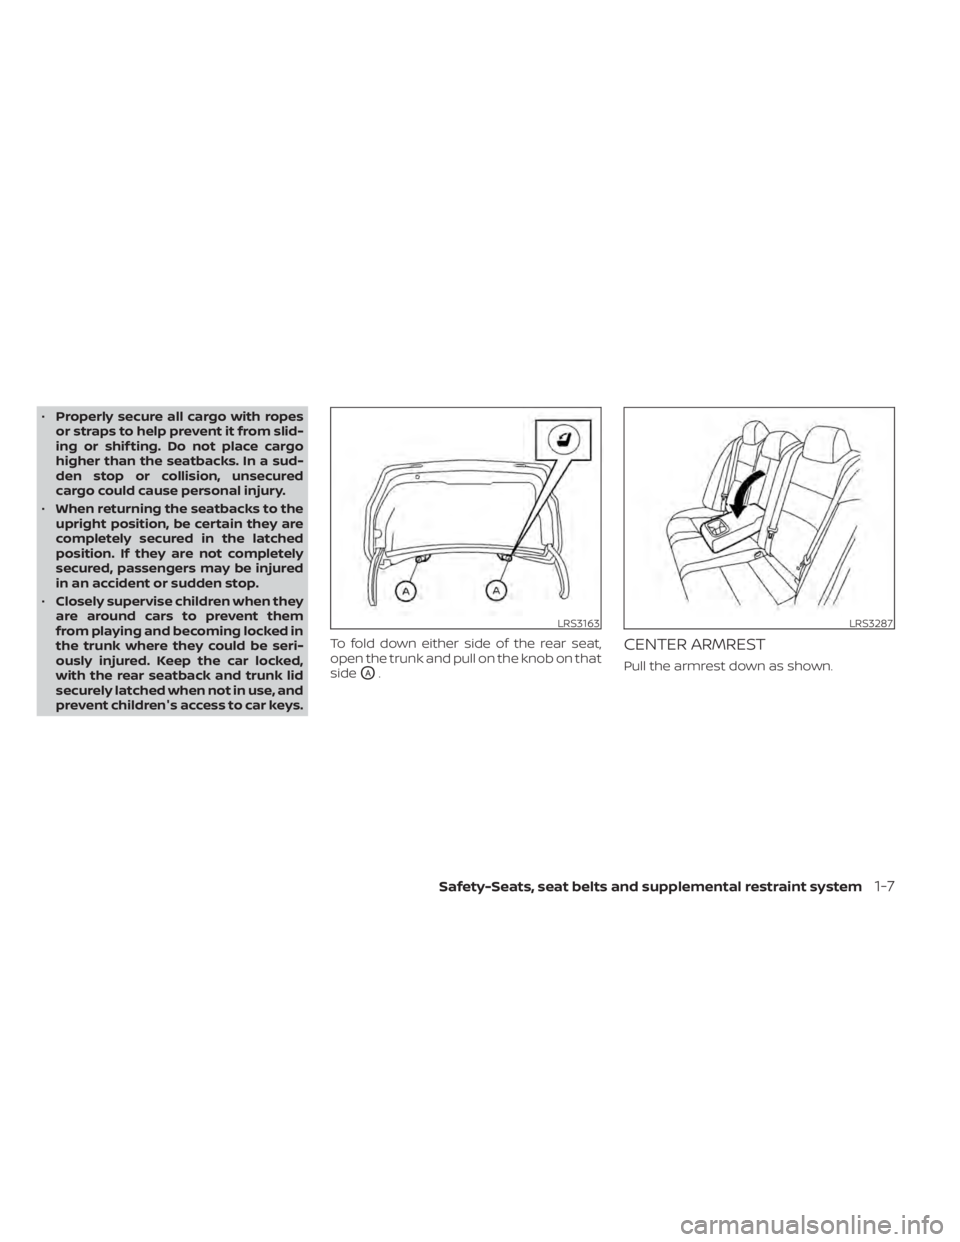
FOLDING REAR SEATInterior trunk access
The trunk can be accessed from the driver
side and passenger side of the rear seat for
loading and unloading, as shown.
1. Move the front passenger seat to themost forward position. 2. Open the access cover on the rear par-
cel shelf.
3. Insert a key or another suitable tool (such as a pen or a screw driver) into the
slot, then slide the recessed lever in the
direction of the arrow
O1.
4. Fold down the passenger's side seat- back
O2.
NOTE:
To access the trunk in case of a dead
battery, use a key or another suitable
tool (such as a pen or screw driver), to
slide recessed lever in the direction of
the arrow.
WARNING
• Never allow anyone to ride in the
cargo area or on the rear seat when it
is in the fold-down position. Use of
these areas by passengers without
proper restraints could result in seri-
ous injury or death in an accident or
sudden stop.
LRS3286
\
LRS3157
1-6Safety-Seats, seat belts and supplemental restraint system
Page 27 of 644
•Properly secure all cargo with ropes
or straps to help prevent it from slid-
ing or shif ting. Do not place cargo
higher than the seatbacks. In a sud-
den stop or collision, unsecured
cargo could cause personal injury.
• When returning the seatbacks to the
upright position, be certain they are
completely secured in the latched
position. If they are not completely
secured, passengers may be injured
in an accident or sudden stop.
• Closely supervise children when they
are around cars to prevent them
from playing and becoming locked in
the trunk where they could be seri-
ously injured. Keep the car locked,
with the rear seatback and trunk lid
securely latched when not in use, and
prevent children's access to car keys. To fold down either side of the rear seat,
open the trunk and pull on the knob on that
side
OA.
CENTER ARMREST
Pull the armrest down as shown.
LRS3163LRS3287
Safety-Seats, seat belts and supplemental restraint system1-7
Page 28 of 644
WARNING
Head restraints/headrests supplement
the other vehicle safety systems. They
may provide additional protection
against injury in certain rear end colli-
sions. Adjustable head restraints/
headrests must be adjusted properly,
as specified in this section. Check the
adjustment af ter someone else uses
the seat. Do not attach anything to the
head restraint/headrest stalks or re-
move the head restraint/headrest. Do
not use the seat if the head restraint/
headrest has been removed. If the head
restraint/headrest was removed, rein-
stall and properly adjust the head
restraint/headrest before an occupant
uses the seating position. Failure to fol-
low these instructions can reduce the
effectiveness of the head restraints/
headrests. This may increase the risk of
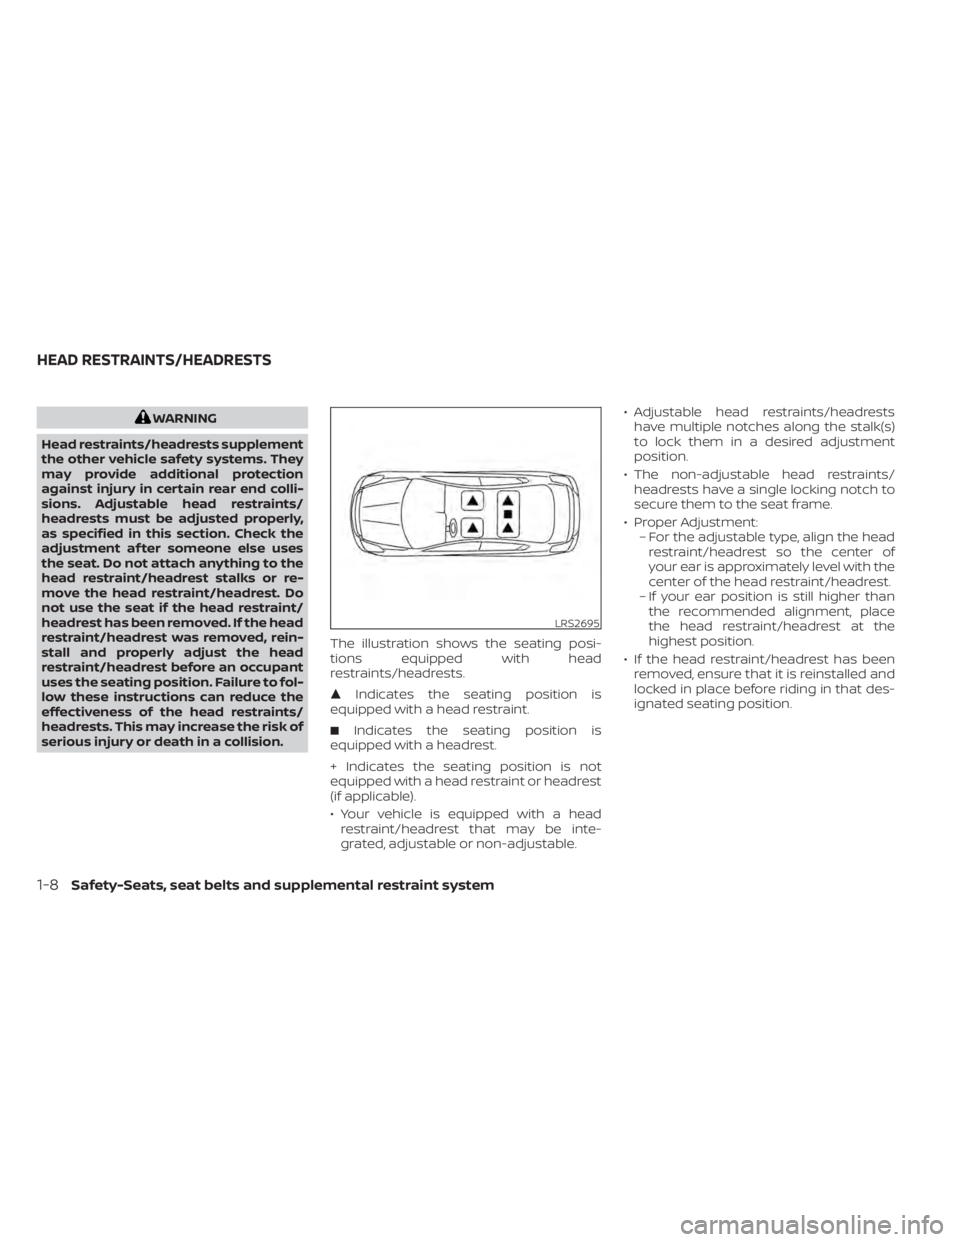
serious injury or death in a collision. The illustration shows the seating posi-
tions equipped with head
restraints/headrests.
�
Indicates the seating position is
equipped with a head restraint.
� Indicates the seating position is
equipped with a headrest.
+ Indicates the seating position is not
equipped with a head restraint or headrest
(if applicable).
• Your vehicle is equipped with a head restraint/headrest that may be inte-
grated, adjustable or non-adjustable. • Adjustable head restraints/headrests
have multiple notches along the stalk(s)
to lock them in a desired adjustment
position.
• The non-adjustable head restraints/ headrests have a single locking notch to
secure them to the seat frame.
• Proper Adjustment: – For the adjustable type, align the headrestraint/headrest so the center of
your ear is approximately level with the
center of the head restraint/headrest.
– If your ear position is still higher than the recommended alignment, place
the head restraint/headrest at the
highest position.
• If the head restraint/headrest has been removed, ensure that it is reinstalled and
locked in place before riding in that des-
ignated seating position.
LRS2695
HEAD RESTRAINTS/HEADRESTS
1-8Safety-Seats, seat belts and supplemental restraint system
Page 29 of 644
ADJUSTABLE HEAD RESTRAINT/
HEADREST COMPONENTS
1. Removable head restraint/headrest
2. Multiple notches
3. Lock knob
4. Stalks
NON-ADJUSTABLE HEAD
RESTRAINT/HEADREST
COMPONENTS
1. Removable head restraint/headrest
2. Single notch
3. Lock knob
4. Stalks
REMOVE
Use the following procedure to remove the
head restraint/headrest:
1. Pull the head restraint/headrest up tothe highest position.
2. Push and hold the lock knob.
3. Remove the head restraint/headrest from the seat.
4. Store the head restraint/headrest prop- erly in a secure place so it is not loose in
the vehicle.
LRS2300LRS2299LRS2302
Safety-Seats, seat belts and supplemental restraint system1-9
Page 30 of 644
5. Reinstall and properly adjust the headrestraint/headrest before an occupant
uses the seating position.
INSTALL
1. Align the head restraint/headrest stalkswith the holes in the seat. Make sure that
the head restraint/headrest is facing the
correct direction. The stalk with the
notch (notches)
O1must be installed in
the hole with the lock knob
O2.
2. Push and hold the lock knob and push the head restraint/headrest down.
3. Properly adjust the head restraint/ headrest before an occupant uses the
seating position.
ADJUST
For adjustable head restraint/headrest
Adjust the head restraint/headrest so the
center is level with the center of your ears. If
your ear position is still higher than the
recommended alignment, place the head
restraint/headrest at the highest position.
LRS2303WRS0134
1-10Safety-Seats, seat belts and supplemental restraint system