Page 490 of 644
Use caution not to scratch the wheel cover
or wheel surface.
Jacking up vehicle and removing
the damaged tire (2WD models)
WARNING
• Never get under the vehicle while it is
supported only by the jack. If it is nec-
essary to work under the vehicle,
support it with safety stands. •
Use only the jack provided with your
vehicle to lif t the vehicle. Do not use
the jack provided with your vehicle
on other vehicles. The jack is de-
signed for lif ting only your vehicle
during a tire change.
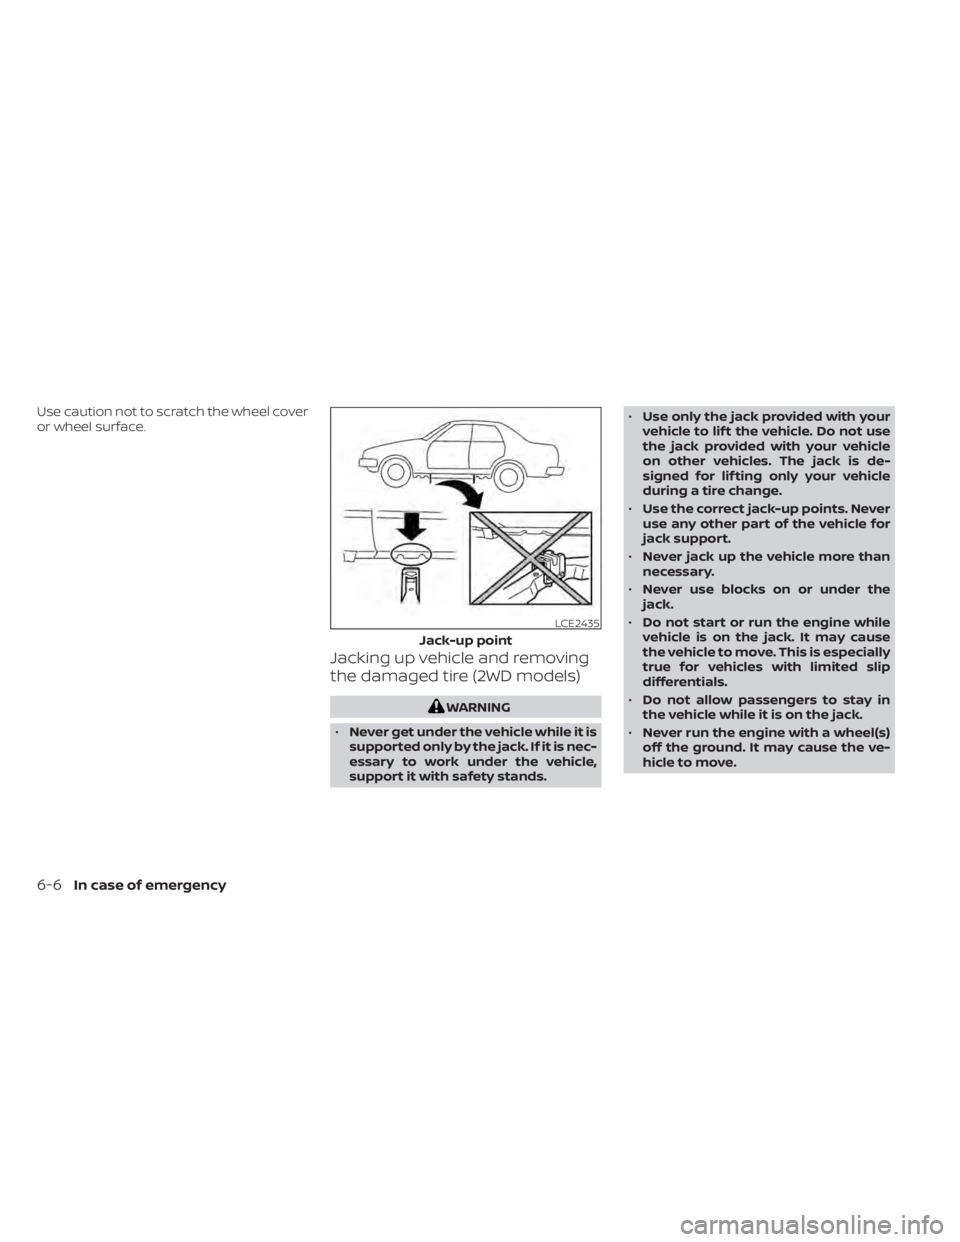
• Use the correct jack-up points. Never
use any other part of the vehicle for
jack support.
• Never jack up the vehicle more than
necessary.
• Never use blocks on or under the
jack.
• Do not start or run the engine while
vehicle is on the jack. It may cause
the vehicle to move. This is especially
true for vehicles with limited slip
differentials.
• Do not allow passengers to stay in
the vehicle while it is on the jack.
• Never run the engine with a wheel(s)
off the ground. It may cause the ve-
hicle to move.
LCE2435
Jack-up point
6-6In case of emergency
Page 491 of 644
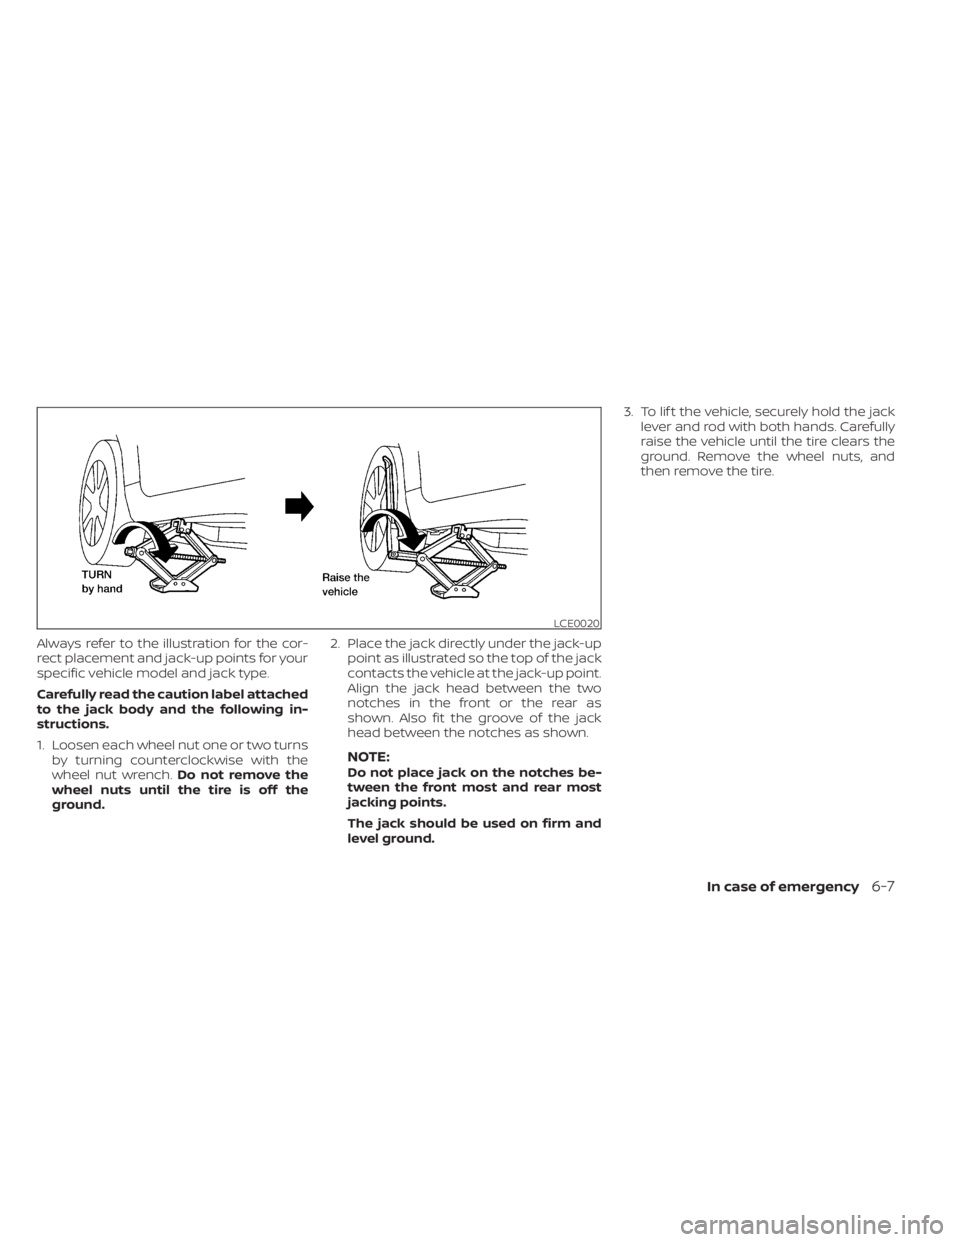
Always refer to the illustration for the cor-
rect placement and jack-up points for your
specific vehicle model and jack type.
Carefully read the caution label attached
to the jack body and the following in-
structions.
1. Loosen each wheel nut one or two turnsby turning counterclockwise with the
wheel nut wrench. Do not remove the
wheel nuts until the tire is off the
ground. 2. Place the jack directly under the jack-up
point as illustrated so the top of the jack
contacts the vehicle at the jack-up point.
Align the jack head between the two
notches in the front or the rear as
shown. Also fit the groove of the jack
head between the notches as shown.
NOTE:Do not place jack on the notches be-
tween the front most and rear most
jacking points.
The jack should be used on firm and
level ground. 3. To lif t the vehicle, securely hold the jack
lever and rod with both hands. Carefully
raise the vehicle until the tire clears the
ground. Remove the wheel nuts, and
then remove the tire.
LCE0020
In case of emergency6-7
Page 492 of 644
Jacking up vehicle and replacing
the damaged tire (AWD models)
WARNING
For AWD vehicles - the TEMPORARY USE
ONLY spare tire must be installed to the
rear wheels only. If a front tire is punc-
tured, install the original rear tire onto
the front wheel, then install the TEMPO-
RARY USE ONLY spare tire on the rear.
Failure to do so could cause overheat-
ing to the AWD system
WARNING
• Never get under the vehicle while it is
supported only by the jack. If it is nec-
essary to work under the vehicle,
support it with safety stands.
• Use only the jack provided with your
vehicle to lif t the vehicle. Do not use
the jack provided with your vehicle
on other vehicles. The jack is de-
signed for lif ting only your vehicle
during a tire change.
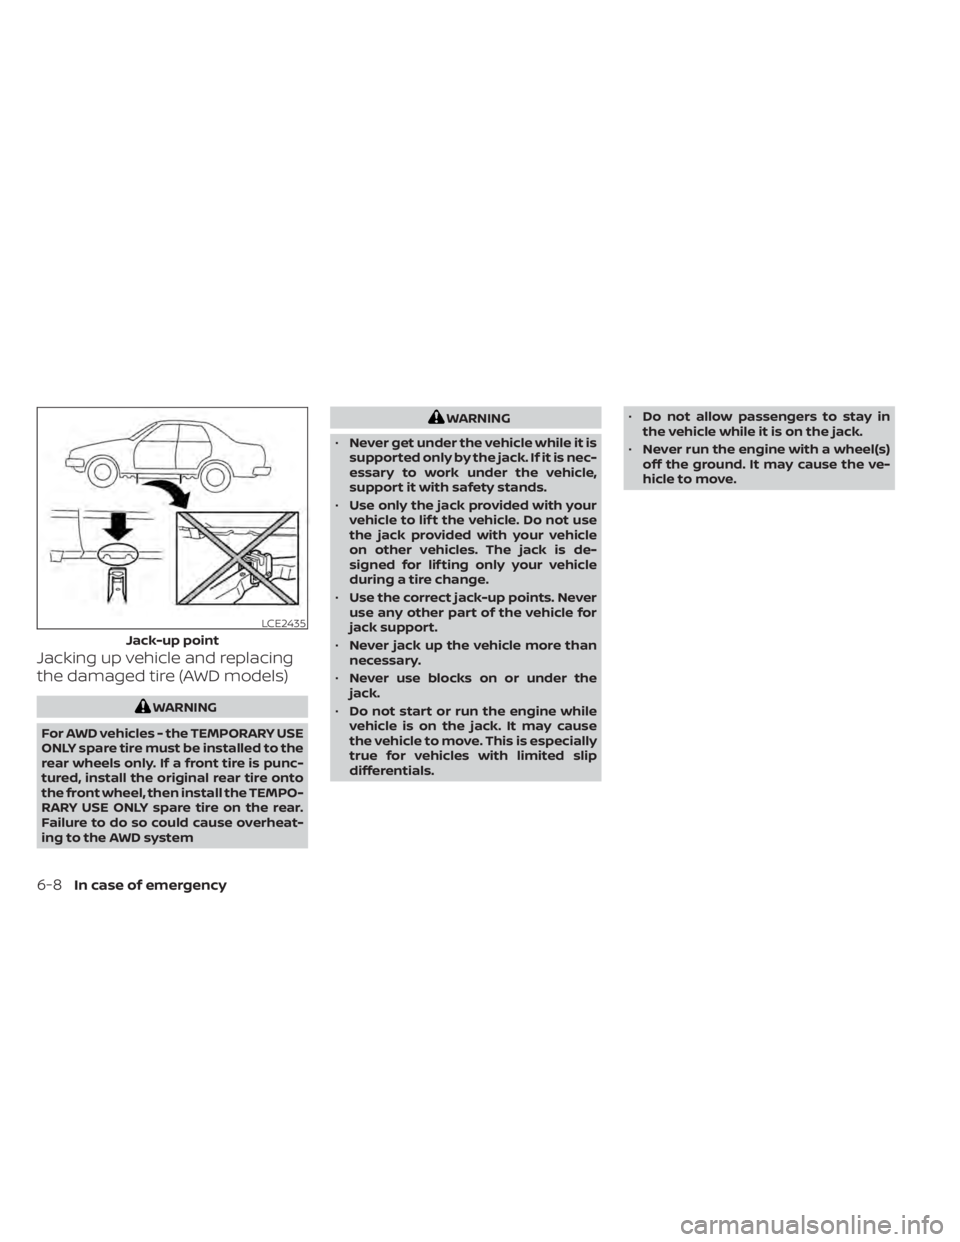
• Use the correct jack-up points. Never
use any other part of the vehicle for
jack support.
• Never jack up the vehicle more than
necessary.
• Never use blocks on or under the
jack.
• Do not start or run the engine while
vehicle is on the jack. It may cause
the vehicle to move. This is especially
true for vehicles with limited slip
differentials. •
Do not allow passengers to stay in
the vehicle while it is on the jack.
• Never run the engine with a wheel(s)
off the ground. It may cause the ve-
hicle to move.
LCE2435
Jack-up point
6-8In case of emergency
Page 493 of 644
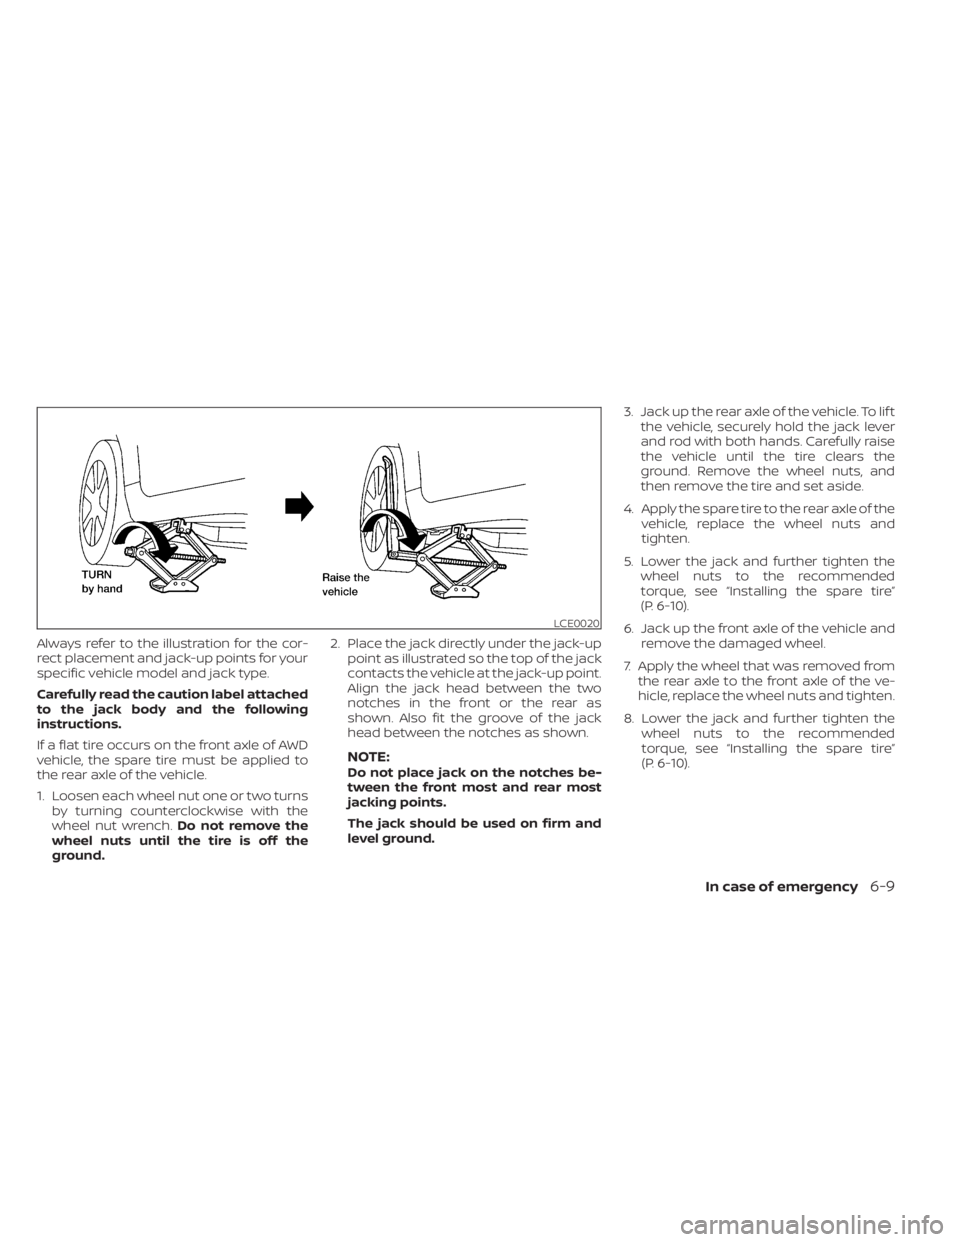
Always refer to the illustration for the cor-
rect placement and jack-up points for your
specific vehicle model and jack type.
Carefully read the caution label attached
to the jack body and the following
instructions.
If a flat tire occurs on the front axle of AWD
vehicle, the spare tire must be applied to
the rear axle of the vehicle.
1. Loosen each wheel nut one or two turnsby turning counterclockwise with the
wheel nut wrench. Do not remove the
wheel nuts until the tire is off the
ground. 2. Place the jack directly under the jack-up
point as illustrated so the top of the jack
contacts the vehicle at the jack-up point.
Align the jack head between the two
notches in the front or the rear as
shown. Also fit the groove of the jack
head between the notches as shown.
NOTE:Do not place jack on the notches be-
tween the front most and rear most
jacking points.
The jack should be used on firm and
level ground. 3. Jack up the rear axle of the vehicle. To lif t
the vehicle, securely hold the jack lever
and rod with both hands. Carefully raise
the vehicle until the tire clears the
ground. Remove the wheel nuts, and
then remove the tire and set aside.
4. Apply the spare tire to the rear axle of the vehicle, replace the wheel nuts and
tighten.
5. Lower the jack and further tighten the wheel nuts to the recommended
torque, see “Installing the spare tire”
(P. 6-10).
6. Jack up the front axle of the vehicle and remove the damaged wheel.
7. Apply the wheel that was removed from the rear axle to the front axle of the ve-
hicle, replace the wheel nuts and tighten.
8. Lower the jack and further tighten the wheel nuts to the recommended
torque, see “Installing the spare tire”
(P. 6-10).
LCE0020
In case of emergency6-9
Page 495 of 644
5. Securely store the flat tire in the tire welland jacking equipment in the vehicle.
NOTE:Remove the center wheel cap before
storing the flat tire.
6. Place the spare tire cover and the trunk floor carpeting over the damaged tire.
7. Close the trunk.
WARNING
• Always make sure that the spare tire
and jacking equipment are properly
secured af ter use. Such items can be-
come dangerous projectiles in an ac-
cident or sudden stop.
• The spare tire is designed for emer-
gency use. For additional informa-
tion, see “Wheels and tires” (P. 8-29).
REPAIRING FLAT TIRE (for models
with emergency tire puncture
repair kit)
WARNING
• Af ter using Genuine NISSAN Emer-
gency Tire Sealant to repair a minor
tire puncture, do not drive the vehicle
at speeds faster than 50 mph (80
km/h).
• Immediately af ter using the Genuine
NISSAN Emergency Tire Sealant to
repair a minor tire puncture, it is rec-
ommended that you visit a NISSAN
dealer. The Genuine NISSAN Emer-
gency Tire Sealant cannot perma-
nently seal a punctured tire. Continu-
ing operation of the vehicle without a
permanent tire repair can lead to a
crash.
• If you used the Genuine NISSAN
Emergency Tire Sealant to repair a
minor tire puncture, it is recom-
mended that you visit a NISSAN
dealer to replace the TPMS sensor in
addition to repairing or replacing the
tire. •
NISSAN recommends using only
Genuine NISSAN Emergency Tire
Sealant provided with your vehicle.
Other tire sealants may damage the
valve stem seal which can cause the
tire to lose air pressure.
This vehicle does not have a spare tire. The
emergency tire puncture repair kit
(Genuine NISSAN Emergency Tire Sealant)
is supplied with the vehicle instead of a
spare tire. It can be used to temporarily
repair minor tire punctures.
If possible, have the vehicle towed to a fa-
cility that can repair or replace the flat tire.
Using the emergency tire puncture repair
kit may cause a malfunction of the tire
pressure sensor and cause the low tire
pressure warning light to illuminate.
CAUTION
• To avoid the emergency tire puncture
kit being damaged during storage or
use:
– Only use the emergency tire punc-
ture repair kit on your vehicle. Do
not use it on other vehicles.
In case of emergency6-11