Page 253 of 690
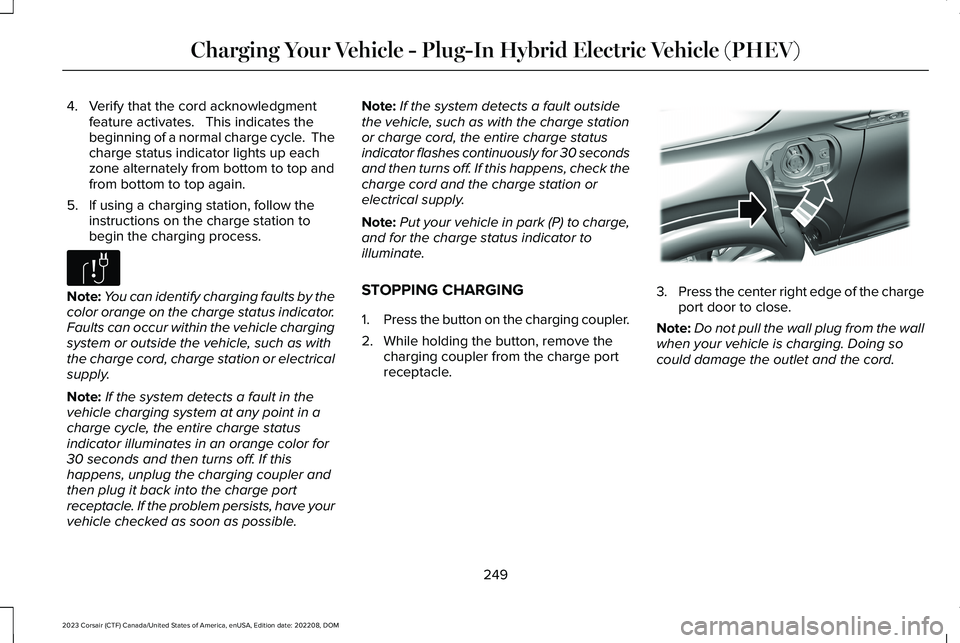
4.Verify that the cord acknowledgmentfeature activates. This indicates thebeginning of a normal charge cycle. Thecharge status indicator lights up eachzone alternately from bottom to top andfrom bottom to top again.
5.If using a charging station, follow theinstructions on the charge station tobegin the charging process.
Note:You can identify charging faults by thecolor orange on the charge status indicator.Faults can occur within the vehicle chargingsystem or outside the vehicle, such as withthe charge cord, charge station or electricalsupply.
Note:If the system detects a fault in thevehicle charging system at any point in acharge cycle, the entire charge statusindicator illuminates in an orange color for30 seconds and then turns off. If thishappens, unplug the charging coupler andthen plug it back into the charge portreceptacle. If the problem persists, have yourvehicle checked as soon as possible.
Note:If the system detects a fault outsidethe vehicle, such as with the charge stationor charge cord, the entire charge statusindicator flashes continuously for 30 secondsand then turns off. If this happens, check thecharge cord and the charge station orelectrical supply.
Note:Put your vehicle in park (P) to charge,and for the charge status indicator toilluminate.
STOPPING CHARGING
1.Press the button on the charging coupler.
2.While holding the button, remove thecharging coupler from the charge portreceptacle.
3.Press the center right edge of the chargeport door to close.
Note:Do not pull the wall plug from the wallwhen your vehicle is charging. Doing socould damage the outlet and the cord.
249
2023 Corsair (CTF) Canada/United States of America, enUSA, Edition date: 202208, DOMCharging Your Vehicle - Plug-In Hybrid Electric Vehicle (PHEV)E306677 E295444
Page 420 of 690
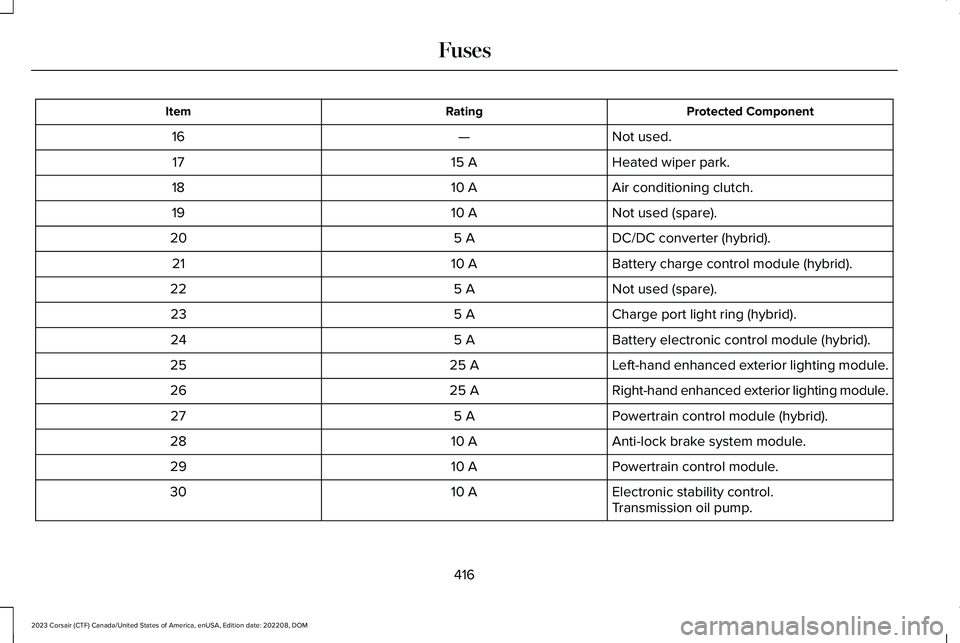
Protected ComponentRatingItem
Not used.—16
Heated wiper park.15 A17
Air conditioning clutch.10 A18
Not used (spare).10 A19
DC/DC converter (hybrid).5 A20
Battery charge control module (hybrid).10 A21
Not used (spare).5 A22
Charge port light ring (hybrid).5 A23
Battery electronic control module (hybrid).5 A24
Left-hand enhanced exterior lighting module.25 A25
Right-hand enhanced exterior lighting module.25 A26
Powertrain control module (hybrid).5 A27
Anti-lock brake system module.10 A28
Powertrain control module.10 A29
Electronic stability control.10 A30Transmission oil pump.
416
2023 Corsair (CTF) Canada/United States of America, enUSA, Edition date: 202208, DOMFuses
Page 433 of 690
Windshield washer fluid reservoir See Adding Washer Fluid (page 117).A
Engine coolant reservoir. See Changing the Coolant (page 439).B
Engine oil dipstick. See Engine Oil Dipstick Overview (page 432).C
Engine oil filler cap. See Adding Engine Oil (page 432).D
Air filter assembly. See Changing the Engine Air Filter (page 434).E
Brake fluid reservoir. See Locating the Brake Fluid Reservoir (page 269).F
Battery. See Changing the 12V Battery (page 444).G
Engine compartment fuse box. See Fuses (page 412).H
429
2023 Corsair (CTF) Canada/United States of America, enUSA, Edition date: 202208, DOMMaintenance
Page 435 of 690
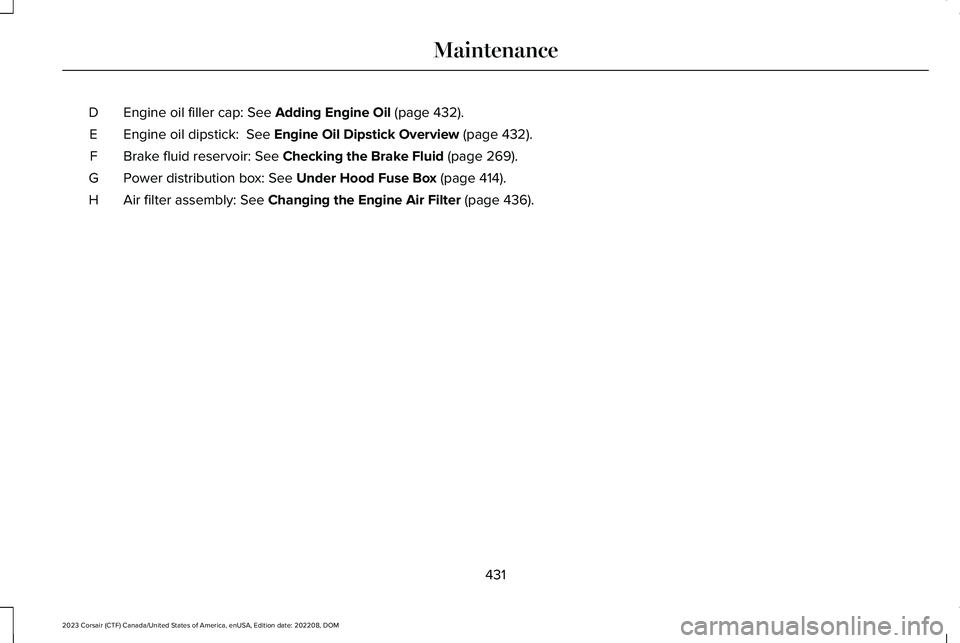
Engine oil filler cap: See Adding Engine Oil (page 432).D
Engine oil dipstick: See Engine Oil Dipstick Overview (page 432).E
Brake fluid reservoir: See Checking the Brake Fluid (page 269).F
Power distribution box: See Under Hood Fuse Box (page 414).G
Air filter assembly: See Changing the Engine Air Filter (page 436).H
431
2023 Corsair (CTF) Canada/United States of America, enUSA, Edition date: 202208, DOMMaintenance
Page 436 of 690
ENGINE OIL
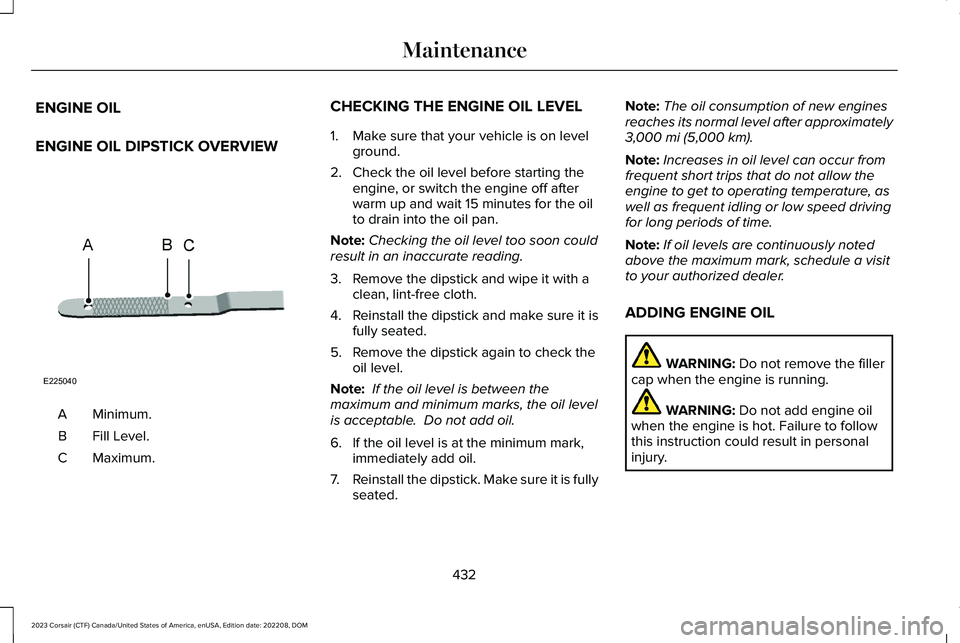
ENGINE OIL DIPSTICK OVERVIEW
Minimum.A
Fill Level.B
Maximum.C
CHECKING THE ENGINE OIL LEVEL
1.Make sure that your vehicle is on levelground.
2.Check the oil level before starting theengine, or switch the engine off afterwarm up and wait 15 minutes for the oilto drain into the oil pan.
Note:Checking the oil level too soon couldresult in an inaccurate reading.
3.Remove the dipstick and wipe it with aclean, lint-free cloth.
4.Reinstall the dipstick and make sure it isfully seated.
5.Remove the dipstick again to check theoil level.
Note: If the oil level is between themaximum and minimum marks, the oil levelis acceptable. Do not add oil.
6.If the oil level is at the minimum mark,immediately add oil.
7.Reinstall the dipstick. Make sure it is fullyseated.
Note:The oil consumption of new enginesreaches its normal level after approximately3,000 mi (5,000 km).
Note:Increases in oil level can occur fromfrequent short trips that do not allow theengine to get to operating temperature, aswell as frequent idling or low speed drivingfor long periods of time.
Note:If oil levels are continuously notedabove the maximum mark, schedule a visitto your authorized dealer.
ADDING ENGINE OIL
WARNING: Do not remove the fillercap when the engine is running.
WARNING: Do not add engine oilwhen the engine is hot. Failure to followthis instruction could result in personalinjury.
432
2023 Corsair (CTF) Canada/United States of America, enUSA, Edition date: 202208, DOMMaintenanceE225040
Page 437 of 690
Do not use supplemental engine oil additivesbecause they are unnecessary and couldlead to engine damage that the vehiclewarranty may not cover.
1.Clean the area surrounding the engineoil filler cap before you remove it.
2.Remove the engine oil filler cap.
3.Add engine oil that meets ourspecifications. See Capacities andSpecifications (page 495).
4.Reinstall the engine oil filler cap. Turn itclockwise until you feel a strongresistance.
Note: Do not add oil further than themaximum mark. Oil levels above themaximum mark may cause engine damage.
Note:Immediately soak up any oil spillagewith an absorbent cloth.
INTELLIGENT OIL LIFE MONITOR
Under certain conditions the vehicle’sintelligent oil life monitor may determine youroil requires replacement prior to your generalservice. Should this occur it is recommendedyou replace your oil within two weeks or500 mi (800 km) of being alerted.
Your authorized dealer will be able to adviseyou whether only an engine oil and filterchange is recommended or whether youshould complete your general serviceinclusive of oil and oil Filter.
RESETTING THE INTELLIGENT OIL LIFEMONITOR
Use the information display controls on thesteering wheel to reset the oil changeindicator.
From the main menu scroll to:
Action and descriptionMessage
Press the right arrow button,then from this menu scroll tothe following message.
Settings
Press the right arrow button,then from this menu scroll tothe following message.
Vehicle
Press the right arrow button,then from this menu scroll tothe following message.
Oil Life
Press and hold the OK buttonuntil the instrument clusterdisplays the followingmessage.
Hold OK toReset
Reset Successful
When the oil change indicatorresets the instrument clusterdisplays 100%.
Remaining Life
{00}%
433
2023 Corsair (CTF) Canada/United States of America, enUSA, Edition date: 202208, DOMMaintenance
Page 438 of 690
Action and descriptionMessage
If the instrument clusterdisplays one of the followingmessages, repeat theprocess.
Not Reset
Reset Cancelled
ENGINE OIL CAPACITY ANDSPECIFICATION
For filling information, please refer to theCapacities and Specifications section of yourowner's manual. See Engine Oil Capacityand Specification (page 434).
ENGINE AIR FILTER
CHANGING THE ENGINE AIR FILTER -2.0L ECOBOOST™
WARNING: To reduce the risk ofvehicle damage and personal burn injuries,do not start your engine with the aircleaner removed and do not remove itwhile the engine is running.
Change the air filter element at the properintervals.
When changing the air filter element, useonly the air filter element listed. SeeMotorcraft Parts (page 497).
Note:Failure to use the correct air filterelement could result in severe enginedamage that the vehicle warranty may notcover.
Note: When servicing the air filter, do notallow foreign material to enter the airinduction system. The engine is susceptibleto damage from even small particles.
434
2023 Corsair (CTF) Canada/United States of America, enUSA, Edition date: 202208, DOMMaintenance
Page 453 of 690
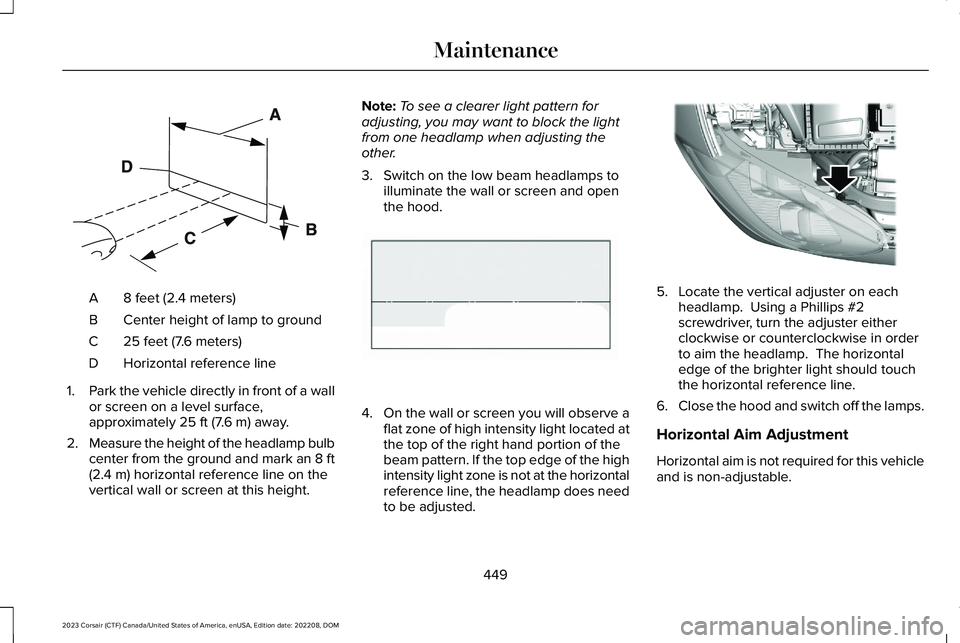
8 feet (2.4 meters)A
Center height of lamp to groundB
25 feet (7.6 meters)C
Horizontal reference lineD
1.Park the vehicle directly in front of a wallor screen on a level surface,approximately 25 ft (7.6 m) away.
2.Measure the height of the headlamp bulbcenter from the ground and mark an 8 ft(2.4 m) horizontal reference line on thevertical wall or screen at this height.
Note:To see a clearer light pattern foradjusting, you may want to block the lightfrom one headlamp when adjusting theother.
3.Switch on the low beam headlamps toilluminate the wall or screen and openthe hood.
4.On the wall or screen you will observe aflat zone of high intensity light located atthe top of the right hand portion of thebeam pattern. If the top edge of the highintensity light zone is not at the horizontalreference line, the headlamp does needto be adjusted.
5.Locate the vertical adjuster on eachheadlamp. Using a Phillips #2screwdriver, turn the adjuster eitherclockwise or counterclockwise in orderto aim the headlamp. The horizontaledge of the brighter light should touchthe horizontal reference line.
6.Close the hood and switch off the lamps.
Horizontal Aim Adjustment
Horizontal aim is not required for this vehicleand is non-adjustable.
449
2023 Corsair (CTF) Canada/United States of America, enUSA, Edition date: 202208, DOMMaintenanceE142592 E142465 E307889