2023 HYUNDAI IONIQ 5 ECU
[x] Cancel search: ECUPage 131 of 680

Seats & Safety System
3-44
Securing a Child Restraint System
with the “LATCH Anchors System”
To install a LATCH-compatible Child
Restraint System in either of the rear
outboard seating positions:
1. Move the seat belt buckle away from
the lower anchors.
2. Move any other objects away from the anchorages that could prevent
a secure connection between the
Child Restraint System and the lower
anchors.
3. Place the Child Restraint System on the vehicle seat, then attach the seat
to the lower anchors according to the
instructions provided by the Child
Restraint System manufacturer.
4. Follow the instructions of the Child
Restraint System’s manufacturer for
proper installation and connection of
the lower attachments on the Child
Restraint System to the lower anchors.
WARNING
Take the following precautions when
using the LATCH system: • Read and follow all installation
instructions provided with your Child
Restraint System.
• To prevent the child from reaching
and taking hold of unretracted
seat belts, buckle all unused rear
seat belts and retract the seat belt
webbing behind the child. Children
can be strangled if a shoulder belt
becomes wrapped around their neck
and the seat belt tightens.
• NEVER attach more than one
Child Restraint System to a single
anchorage. This could cause the
anchor or attachment to come loose
or break.
• Always have the LATCH system
inspected by your dealer after an
accident. An accident can damage
the LATCH system and may not
properly secure the Child Restraint
System.
NOTICE
The recommended weight for the
LATCH system is under 65 lb. (30 kg).
How to determine an appropriate child
restraint weight: Child weight + Child
restraint system weight < 65 lb. (30kg)
Page 132 of 680

03
3-45
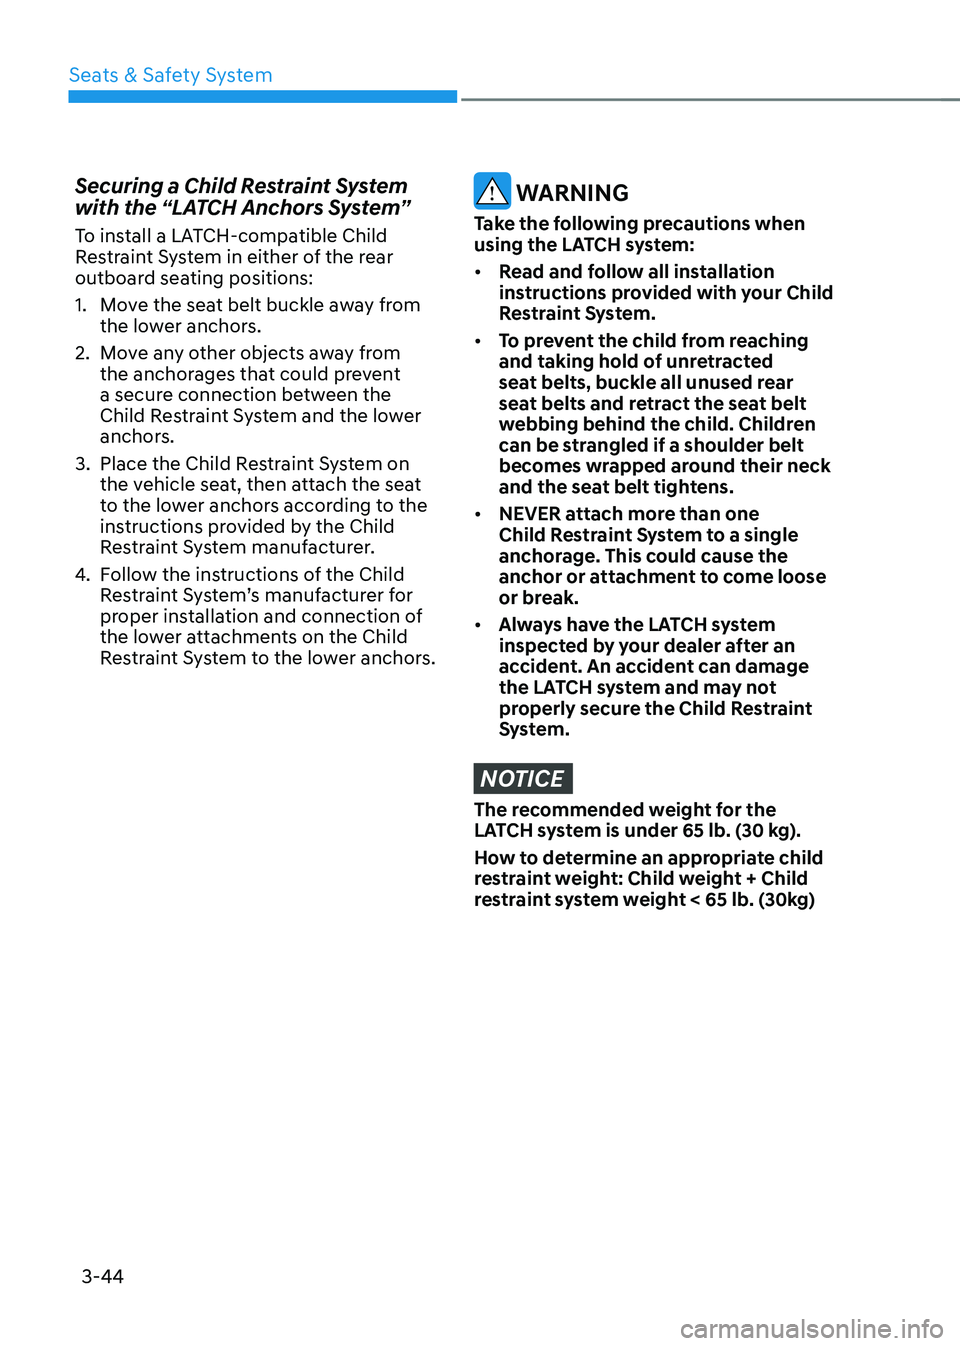
Securing a Child Restraint System
seat with “Tether Anchor” system
ONE1031096N
First secure the child restraint with
the LATCH lower anchors or the seat
belt. If the child restraint manufacturer
recommends that the top tether strap
be attached, attach and tighten the
top tether strap to the top tether strap
anchor.
Child restraint hook holders are located
on the rear of the seatbacks.
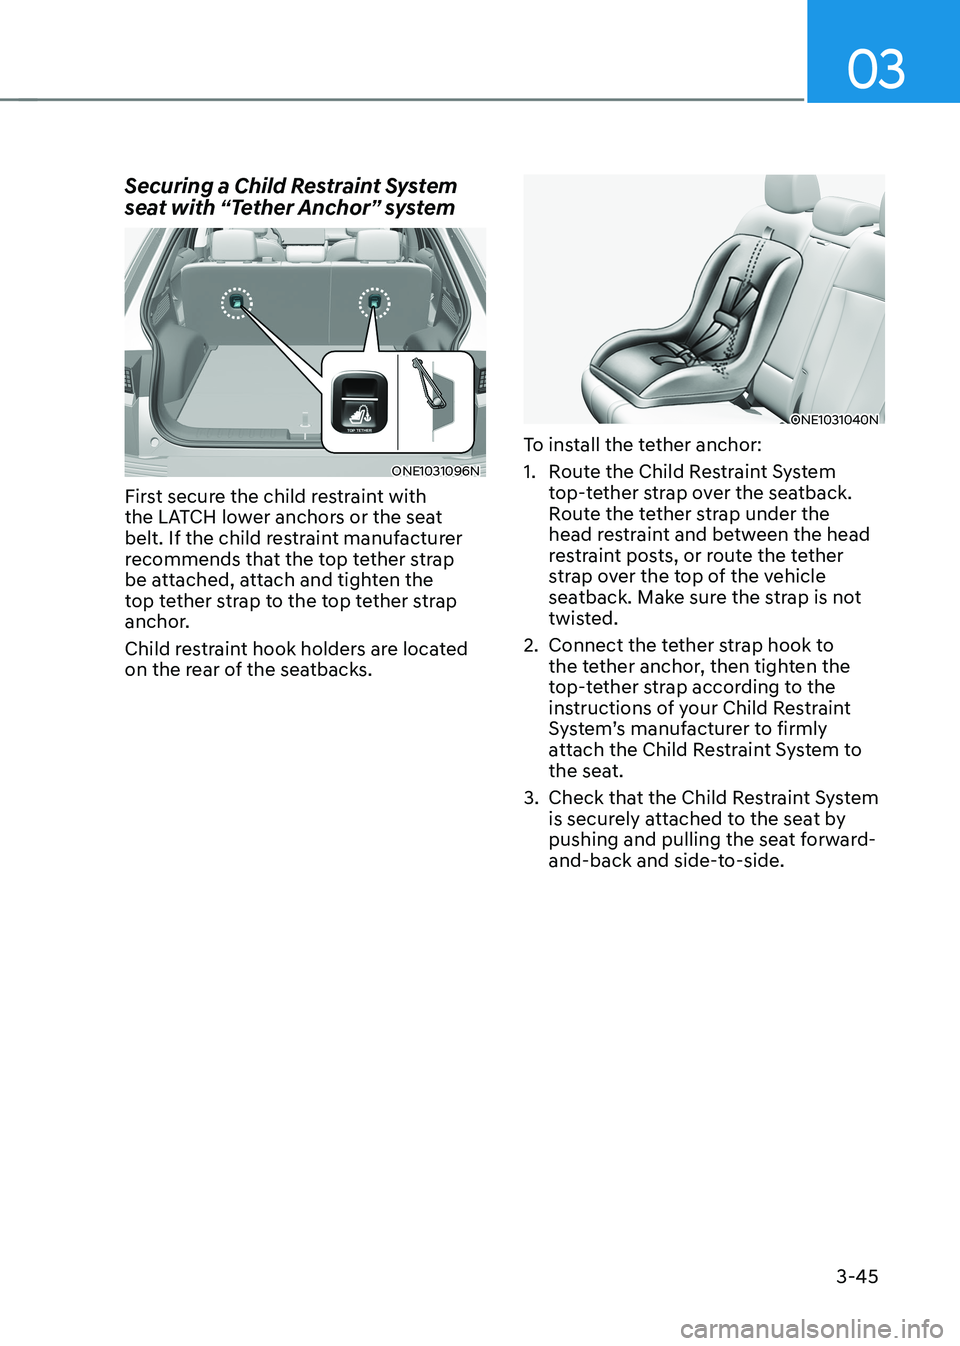
ONE1031040N
To install the tether anchor:
1. Route the Child Restraint System top-tether strap over the seatback.
Route the tether strap under the
head restraint and between the head
restraint posts, or route the tether
strap over the top of the vehicle
seatback. Make sure the strap is not
twisted.
2. Connect the tether strap hook to the tether anchor, then tighten the
top-tether strap according to the
instructions of your Child Restraint
System’s manufacturer to firmly
attach the Child Restraint System to
the seat.
3. Check that the Child Restraint System is securely attached to the seat by
pushing and pulling the seat forward-
and-back and side-to-side.
Page 133 of 680

Seats & Safety System
3-46
WARNING
Take the following precautions when
installing the top-tether: • Read and follow all installation
instructions provided with your Child
Restraint System.
• NEVER attach more than one
Child Restraint System to a single
tether anchor. This could cause the
anchorage or attachment to come
loose or break.
• Do not attach the tether strap to
anything other than the correct
top-tether anchor. It may not work
properly if attached to something else.
• Child Restraint System anchors are
designed to withstand only those
loads imposed by correctly fitted
Child Restraint System.
Under no circumstances are the
anchors to be used for adult seat
belts or harnesses or for attaching
other items or equipment to the
vehicle. Securing a Child Restraint System with a lap/shoulder belt
WARNING
ALWAYS place a rearward-facing Child
Restraint System in the rear seat of the
vehicle.
Placing a rearward-facing child restraint
in the front seat can result in serious
injury or death if the Child Restraint
System is struck by an inflating air bag.
When not using the LATCH system, all
Child Restraint Systems must be secured
to a rear seat with the lap part of a lap/shoulder belt.
Page 134 of 680

03
3-47
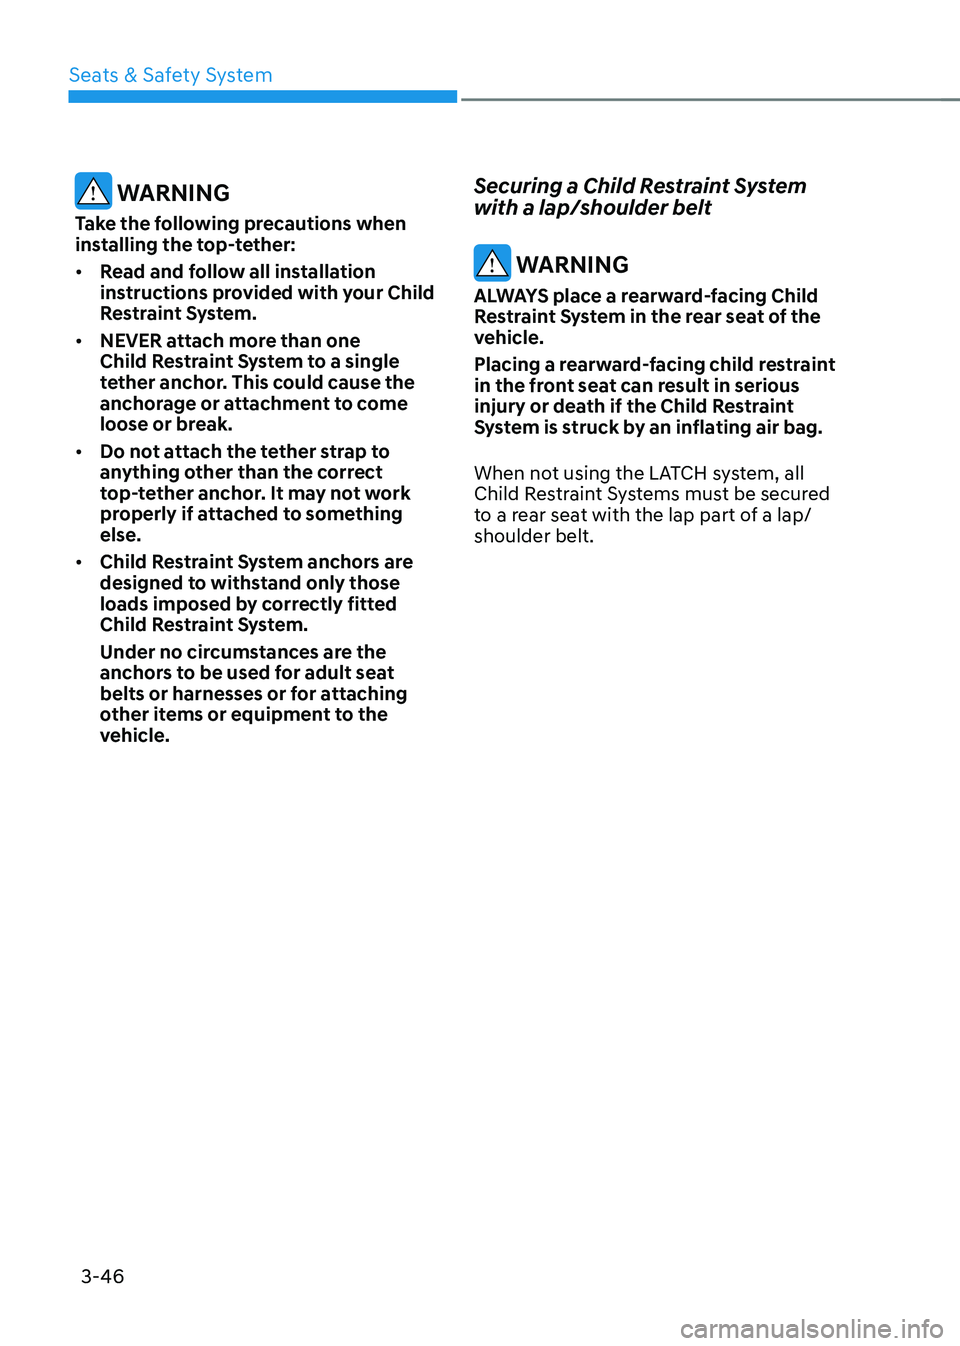
OHI038145
Automatic locking mode
Since all passenger seat belts move
freely under normal conditions and
only lock under extreme or emergency
conditions (emergency locking mode),
you must manually pull the seat belt all
the way out to shift the retractor to the
"Automatic Locking" mode to secure a
Child Restraint System.
The "Automatic Locking" mode will help
prevent the normal movement of the
child in the vehicle from causing the
seat belt to loosen and compromise
the Child Restraint System. To secure a
Child Restraint System, use the following
procedure.
To install a Child Restraint System on the
rear seats, do the following:
1. Place the Child Restraint System on a rear seat and route the lap/shoulder
belt around or through the Child
Restraint System, following the Child
Restraint System manufacturer’s
instructions. Make sure the seat belt
webbing is not twisted.
Information
When using the rear center seat belt, you
should also refer to the "Rear Seat Belt – Passenger's 3-point system" section in this
chapter.
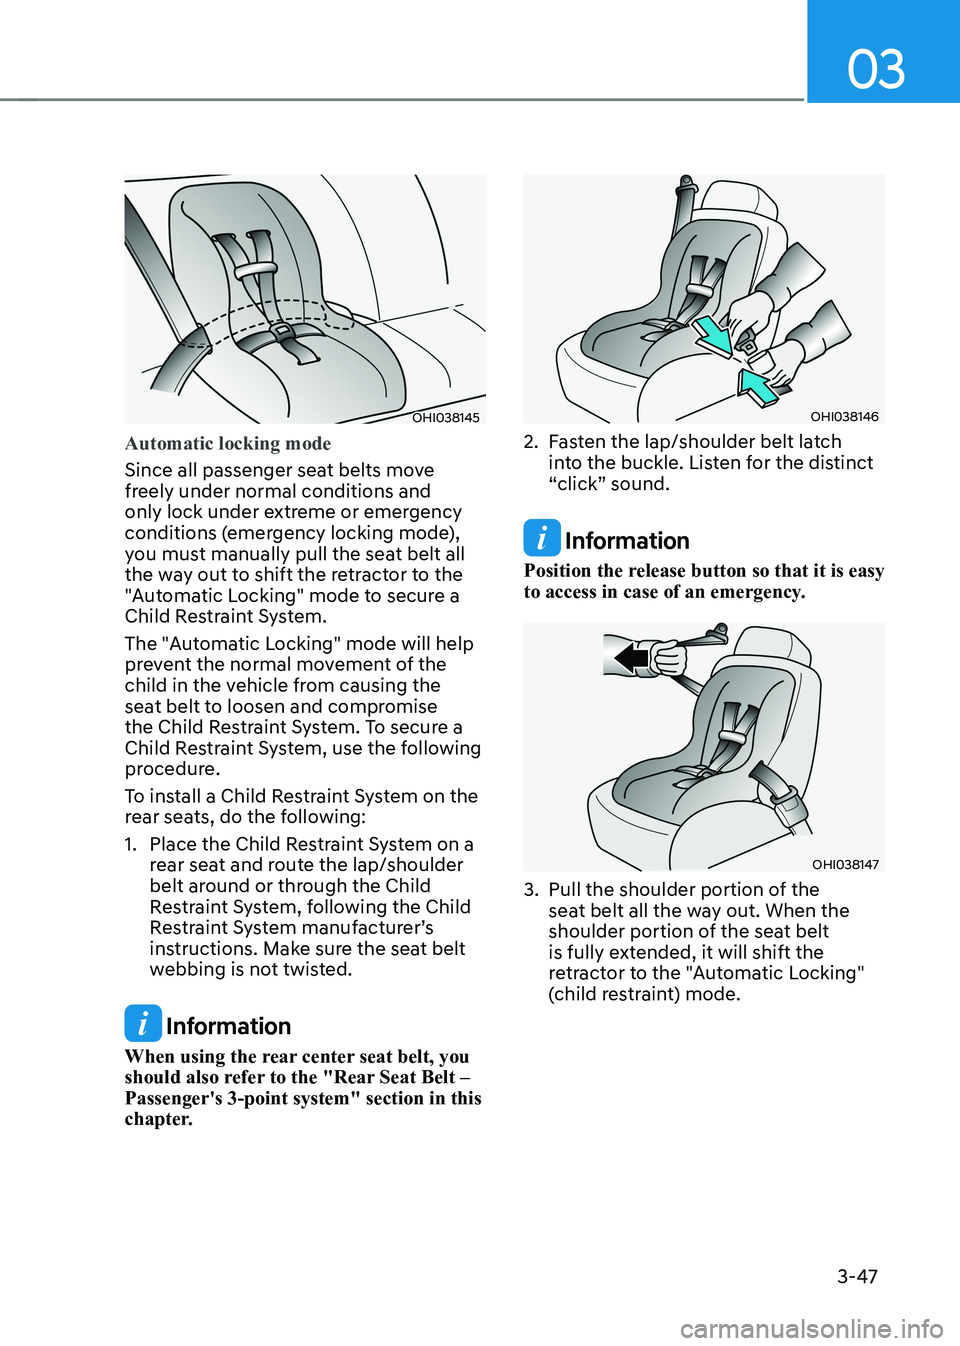
OHI038146
2. Fasten the lap/shoulder belt latch into the buckle. Listen for the distinct
“click” sound.
Information
Position the release button so that it is easy
to access in case of an emergency.
OHI038147
3. Pull the shoulder portion of the seat belt all the way out. When the
shoulder portion of the seat belt
is fully extended, it will shift the
retractor to the "Automatic Locking"
(child restraint) mode.
Page 141 of 680

Seats & Safety System
3-54
For vehicles equipped with a rollover sensor the side and/or curtain air bags
and pre-tensioners on both sides of
the vehicle may deploy if a rollover or
possible rollover is detected.
The curtain air bags are not designed
to deploy in all side impact or rollover
situations.
WARNING
To reduce the risk of serious injury or
death from an inflating curtain air bag,
take the following precautions: • All seat occupants must wear
seat belts at all times to help keep
occupants positioned properly.
• Properly secure Child Restraint
System as far away from the door as possible.
• Do not place any objects over the air
bag. Also, do not attach any objects
around the area the air bag inflates
such as the door, side door glass,
front and rear pillar, roof side rail.
• Do not hang other objects except
clothes, especially hard or breakable objects.
In an accident, it may cause vehicle
damage or personal injury.
• Do not allow passengers to lean their
heads or bodies onto doors, put their
arms on the doors, stretch their arms
out of the window, or place objects
between the doors and seats.
• Do not open or repair the side curtain air bags.
How does the Air Bags System
Operate?
ONE1031044N
The SRS consists of the following
components:
(1) Driver’s front air bag module
(2) Passenger’s front air bag module
(3) Side air bag modules
(4) Curtain air bag modules
(5) Front retractor pre-tensioner
(6) Air bag warning light
(7) SRS control module (SRSCM) / Rollover sensor
(8) Front impact sensors
(9) Side impact sensors (acceleration)
(10) Side impact sensors (pressure)
(11) Driver’s and front passenger’s seat
belt buckle sensors.
Page 195 of 680

5
Storage Compartment .................................................................................... 5-119
Center Console Storage ............................................................................................ 5-119
Glove Box .................................................................................................................. 5-120
Interior Features .............................................................................................. 5-121
Cup Holder ................................................................................................................. 5-121
Sunvisor ..................................................................................................................... 5-122
Power Outlet .............................................................................................................. 5-122
USB Charger .............................................................................................................. 5-123
Wireless Smart Phone Charging System ................................................................5-124
Cluster Fascia Side Panel .......................................................................................... 5-127
Vehicle to Load (V2L) ............................................................................................... 5-127
Clock .......................................................................................................................... 5-127
Coat Hook ................................................................................................................. 5-128
Floor Mat Anchor(s) .................................................................................................. 5-128
Rear Side Window Sunshades ................................................................................. 5-129
Luggage Net Holder ................................................................................................. 5-129
Cargo Security Screen ............................................................................................. 5-130
Infotainment System ..................................................................................... 5-132
USB Port ..................................................................................................................... 5-132
Antenna ...................................................................................................................... 5-132
Steering Wheel Remote Controls ............................................................................. 5-132
Infotainment System ................................................................................................ 5-133
Voice Recognition .................................................................................................... 5-134
Bluetooth® Wireless Technology ............................................................................. 5-134
5. Convenience Features
Page 211 of 680
![HYUNDAI IONIQ 5 2023 Owners Manual 05
5-19
ONE1051005
[A] : Wireless Charging Pad (In-vehicle Authentication Pad)
Information
After reconnecting the vehicle battery
power supply or charging the battery, it
may take time to operat HYUNDAI IONIQ 5 2023 Owners Manual 05
5-19
ONE1051005
[A] : Wireless Charging Pad (In-vehicle Authentication Pad)
Information
After reconnecting the vehicle battery
power supply or charging the battery, it
may take time to operat](/manual-img/35/56168/w960_56168-210.png)
05
5-19
ONE1051005
[A] : Wireless Charging Pad (In-vehicle Authentication Pad)
Information
After reconnecting the vehicle battery
power supply or charging the battery, it
may take time to operate due to remote
renewal of security information. When you
lock or unlock the door with NFC, please
contact and hold your smartphone on the
door handle until it works.
The solution allows for offline mode usage
when the mobile data connection of the
smartphone is weak. When you are in the
place where the mobile data connection
of your smartphone is available and
place your smartphone on the interior
authentication pad (wireless charger) and
start up your vehicle or contact the digital
key on the door handle to lock or unlock
the door, the remote renewal of security
information starts automatically. Even
though the engine is turned on, please
wait until the remote renewal process
is completed and wireless charger is converted to charging mode.
CAUTION
The engine can be turned on if the
registered smartphone or card key is
placed on the interior authentication
pad (wireless charger). Do not leave
unsupervised children or people who
are not aware of the system since it
can result in serious injury or death.
Always have the registered digital key
(smartphone) or card key with you to
prevent vehicle theft when leaving the
vehicle.
For more information, refer to the
Engine Start/Stop button in chapter 6.
Page 212 of 680

Convenience Features
5-20
Remote Control with Digital Key
To use the remote control function with
your android smartphone, Bluetooth
must be turned on.
Remote Control Connection with Digital
Key
1. Open Hyundai digital key application on the smartphone. Select the
vehicle to activate the remote control
function as a main vehicle.
2. Approach with the activated smartphone app to your vehicle
and you can check whether the
connection is available. If it enables
your smartphone to connect, connect
with your vehicle by pressing the
connect button. The remote control
function is activated after completing
the process.
Remote Control Operation with Digital
Key
You can execute the remote control
operation including door lock/unlock,
panic on/off, remote start / remote
stop and trunk opening. The icon for
each function will be highlighted and
alarm/vibration also provided when the
operation is performed.
Note that you cannot lock your vehicle
using the Hyundai digital key app if any
of the following occurs: • The Engine Start/Stop button is in
ACC or ON position.
• Any doors are open.
When the smartphone and the vehicle
are connected by the Bluetooth function
but the remote control command
cannot be received over 5 minutes, the
remote control connection is cancelled
automatically. CAUTION
• If metallic window tint was applied
to your vehicle, it may cause
bad Bluetooth connection or
performance degradation of the
digital key.
• If multiple users operate the remote
control function simultaneously, the
connection between the digital key
and the vehicle might result in failed
commands. Please connect and
operate the remote control function
only the necessary user.
• When using the remote control
operation, the driver (the remote
control user) should leave the vehicle
after confirming the door lock (the
chime sounds once and the hazard
warning lights blink).
• The remote functions of the Digital
Key app enables the vehicle to be
controlled from a set distance. If
the digital key or the vehicle goes
beyond the operable distance, the
remote control function might be
disconnected or cancelled.
• If the digital key (smartphone) is
connected with the vehicle for the
remote control, the driver with the
key goes far away from the vehicle,
the function might not work.
• If the remote control operation
is executed where the mobile
connection is weak, Bluetooth
connection is poor due to several
Bluetooth devices or there is an
object such as metal or concrete, it
might be delayed or the operable
distance might decrease. You should
not cover the smartphone with your
hand or place other devices which
can cause frequency interference. It
may result in poor performance.
• If the remote control function is not
available, please use NFC function to
lock or unlock the doors.