2023 FORD EXPEDITION ECU
[x] Cancel search: ECUPage 63 of 658
WARNING: Properly securechildren 12 years old and under in a rearseating position whenever possible. Ifyou are unable to properly secure allchildren in a rear seating position,properly secure the largest child on thefront seat. If you must use a forwardfacing child restraint on the front seat,move the seat as far back as possible.Failure to follow these instructions couldresult in personal injury or death.
WARNING: Do not place your armson the airbag cover or through thesteering wheel. Failure to follow thisinstruction could result in personal injury.
WARNING: Keep the areas in frontof the airbags free from obstruction. Donot affix anything to or over the airbagcovers. Objects could become projectilesduring airbag deployment. Failure tofollow this instruction could result inpersonal injury or death.
WARNING: To reduce risk of injury,do not obstruct or place objects in thedeployment path of the airbag.
WARNING: Do not place arearward facing child restraint in front ofan active airbag. Failure to follow thisinstruction could result in personal injuryor death.
WARNING: Do not attempt toservice, repair, or modify thesupplementary restraint system orassociated components. Failure tofollow this instruction could result inpersonal injury or death.
WARNING: Several airbag systemcomponents get hot after inflation. Toreduce the risk of injury, do not touchthem after inflation.
WARNING: If a supplementaryrestraint system component hasdeployed, it will not function again. Havethe system and associated componentsinspected as soon as possible. Failure tofollow this instruction could result inpersonal injury or death.
PROPERLY ADJUSTING THE
DRIVER AND FRONT
PASSENGER SEATS
WARNING: National HighwayTraffic Safety Administration (NHTSA)recommends a minimum distance of atleast 10 in (25 cm) between anoccupant's chest and the driver airbagmodule.
To properly position yourself away fromthe airbag:
•Move your seat to the rear as far as youcan while still reaching the pedalscomfortably.
•Recline the seat slightly one or twodegrees from the upright position.
After all occupants have adjusted theirseats and put on seatbelts, it is veryimportant that they continue to sitproperly. Properly seated occupants situpright, lean against the seat backrest, andcenter themselves on the seat cushion,with their feet comfortably extended onthe floor. Sitting improperly can increasethe chance of injury in a crash event. Forexample, if an occupant slouches, liesdown, turns sideways, sits forward, leansforward or sideways, or puts one or bothfeet up, the chance of injury during a crashgreatly increases.
59
2023 Expedition (TB8) Canada/United States of America, enUSA, Edition date: 202207, DOMAirbags
Page 69 of 658

WHAT IS 911 ASSIST
911 Assist is a SYNC system feature thatcan call for help.
For more information, visitwww.owner.ford.com.
HOW DOES 911 ASSIST WORK
If a crash deploys an airbag, excluding kneeairbags and rear inflatable seatbelts, oractivates the fuel pump shut-off, yourvehicle may be able to contact emergencyservices by dialing 911 through a paired andconnected Bluetooth® enabled phone.
Not all crashes deploy an airbag or activatethe fuel pump shut-off. If a connected cellphone sustains damage or loses itsconnection to SYNC during a crash, SYNCsearches for and tries to connect to apreviously paired cell phone. SYNC thenattempts to call the emergency services.
Before making the call:
•SYNC provides about 10 seconds tocancel the call. If you fail to cancel thecall, SYNC attempts to dial 911.
•SYNC says the following, or a similarmessage: SYNC will attempt to call 911,to cancel the call, press Cancel on yourscreen or press and hold the phonebutton on your steering wheel.
If you do not cancel the call and SYNCmakes a successful call a pre-recordedmessage plays for the 911 operator. Theoccupants in your vehicle are able to talkwith the operator. Be prepared to provideyour name, phone number and locationimmediately because not all 911 systemsare capable of receiving this informationelectronically.
During an emergency call the systemtransmits vehicle data to the emergencyservice.
EMERGENCY CALL
REQUIREMENTS
WARNING: Do not wait for 911Assist to make an emergency call if youcan do it yourself. Dial emergencyservices immediately to avoid delayedresponse time which could increase therisk of serious injury or death after acrash. If you do not hear 911 Assist withinfive seconds of the crash, the system orphone may be damaged ornon-functional.
WARNING: Always place yourphone in a secure location in your vehicleso it does not become a projectile or getdamaged in a crash. Failure to do so maycause serious injury to someone ordamage the phone which could prevent911 Assist from working properly.
WARNING: Unless the 911 Assistsetting is set on before a crash, thesystem will not dial for help which coulddelay response time, potentiallyincreasing the risk of serious injury ordeath after a crash.
•SYNC is powered and working properlyat the time of the incident andthroughout feature activation and use.
•The 911 Assist feature must be set onbefore the incident.
•You must pair and connect aBluetooth® enabled and compatiblecell phone to SYNC.
•A connected Bluetooth® enabledphone must have the ability to makeand maintain an outgoing call at thetime of the incident.
65
2023 Expedition (TB8) Canada/United States of America, enUSA, Edition date: 202207, DOM911 Assist
Page 73 of 658
CHANGING THE REMOTE
CONTROL BATTERY -
VEHICLES WITH: FLIP KEY
WARNING: Keep batteries awayfrom children to prevent ingestion.Failure to follow this instruction couldresult in personal injury or death. Ifingested, immediately seek medicalattention.
WARNING: If the batterycompartment does not securely close,stop using the remote control andreplace it as soon as possible. In themeantime, keep the remote control awayfrom children. Failure to follow thisinstruction could result in personal injuryor death.
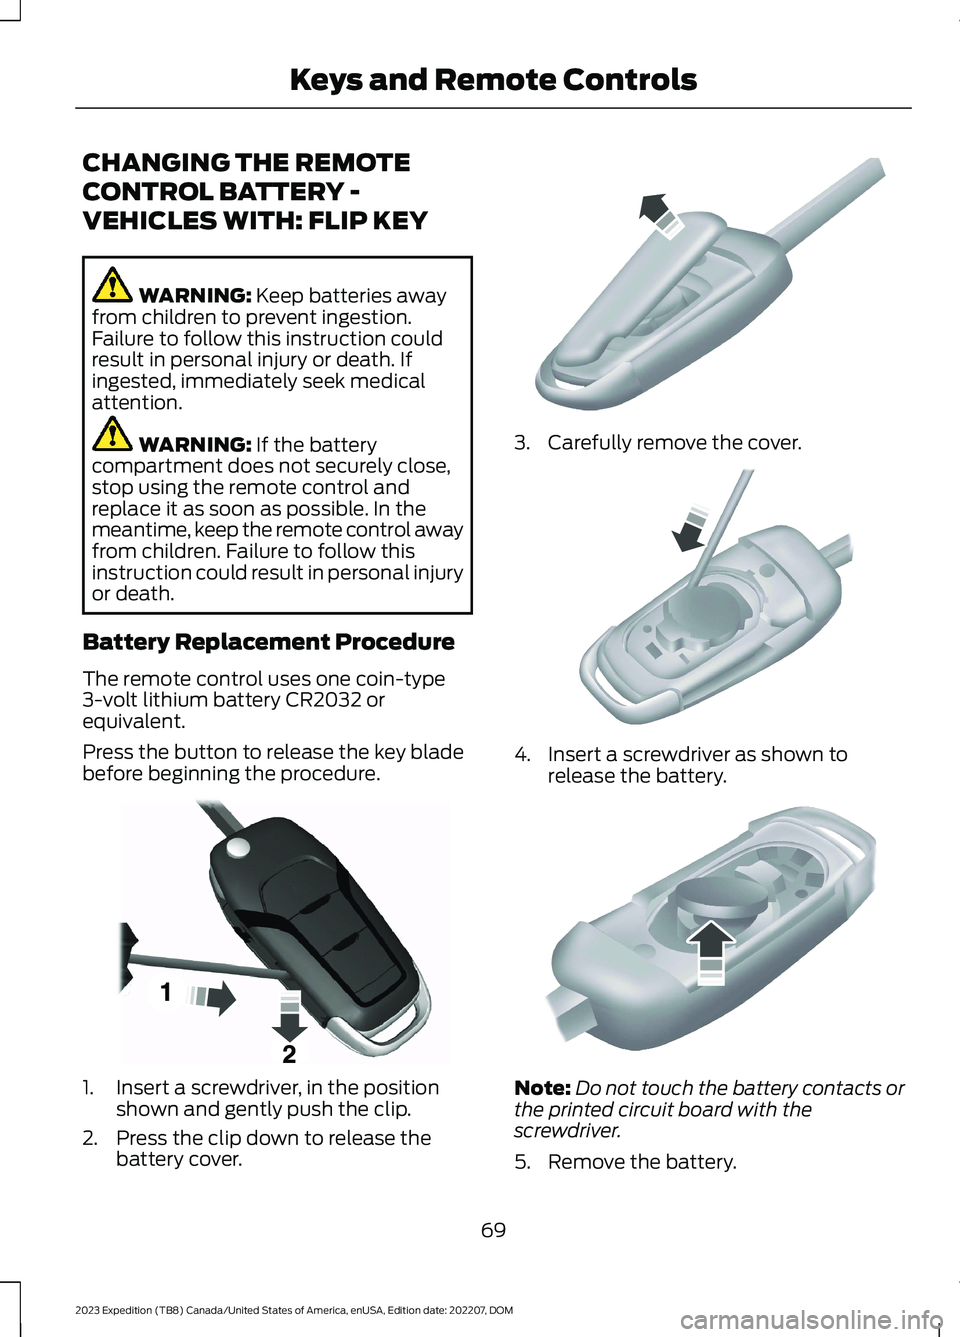
Battery Replacement Procedure
The remote control uses one coin-type3-volt lithium battery CR2032 orequivalent.
Press the button to release the key bladebefore beginning the procedure.
1.Insert a screwdriver, in the positionshown and gently push the clip.
2.Press the clip down to release thebattery cover.
3.Carefully remove the cover.
4.Insert a screwdriver as shown torelease the battery.
Note:Do not touch the battery contacts orthe printed circuit board with thescrewdriver.
5.Remove the battery.
69
2023 Expedition (TB8) Canada/United States of America, enUSA, Edition date: 202207, DOMKeys and Remote ControlsE191533 E151799 E151800 E151801
Page 74 of 658

6.Install a new battery with the + facingup.
7.Replace the battery cover.
Dispose of old batteries in anenvironmentally friendly way.Seek advice from your localauthority about recycling old batteries.
Note:Do not wipe off any grease on thebattery terminals or on the back surface ofthe circuit board.
Note: Replacing the battery does not erasethe programmed key from your vehicle. Theremote control should operate normally.
CHANGING THE REMOTE
CONTROL BATTERY -
VEHICLES WITH: PUSH
BUTTON START
WARNING: Keep batteries awayfrom children to prevent ingestion.Failure to follow this instruction couldresult in personal injury or death. Ifingested, immediately seek medicalattention.
WARNING: If the batterycompartment does not securely close,stop using the remote control andreplace it as soon as possible. In themeantime, keep the remote control awayfrom children. Failure to follow thisinstruction could result in personal injuryor death.
The remote control uses one coin-type3-volt lithium battery CR2450 orequivalent.
1.Push the release button and pull thekey blade out.
70
2023 Expedition (TB8) Canada/United States of America, enUSA, Edition date: 202207, DOMKeys and Remote ControlsE107998 E322866
Page 76 of 658
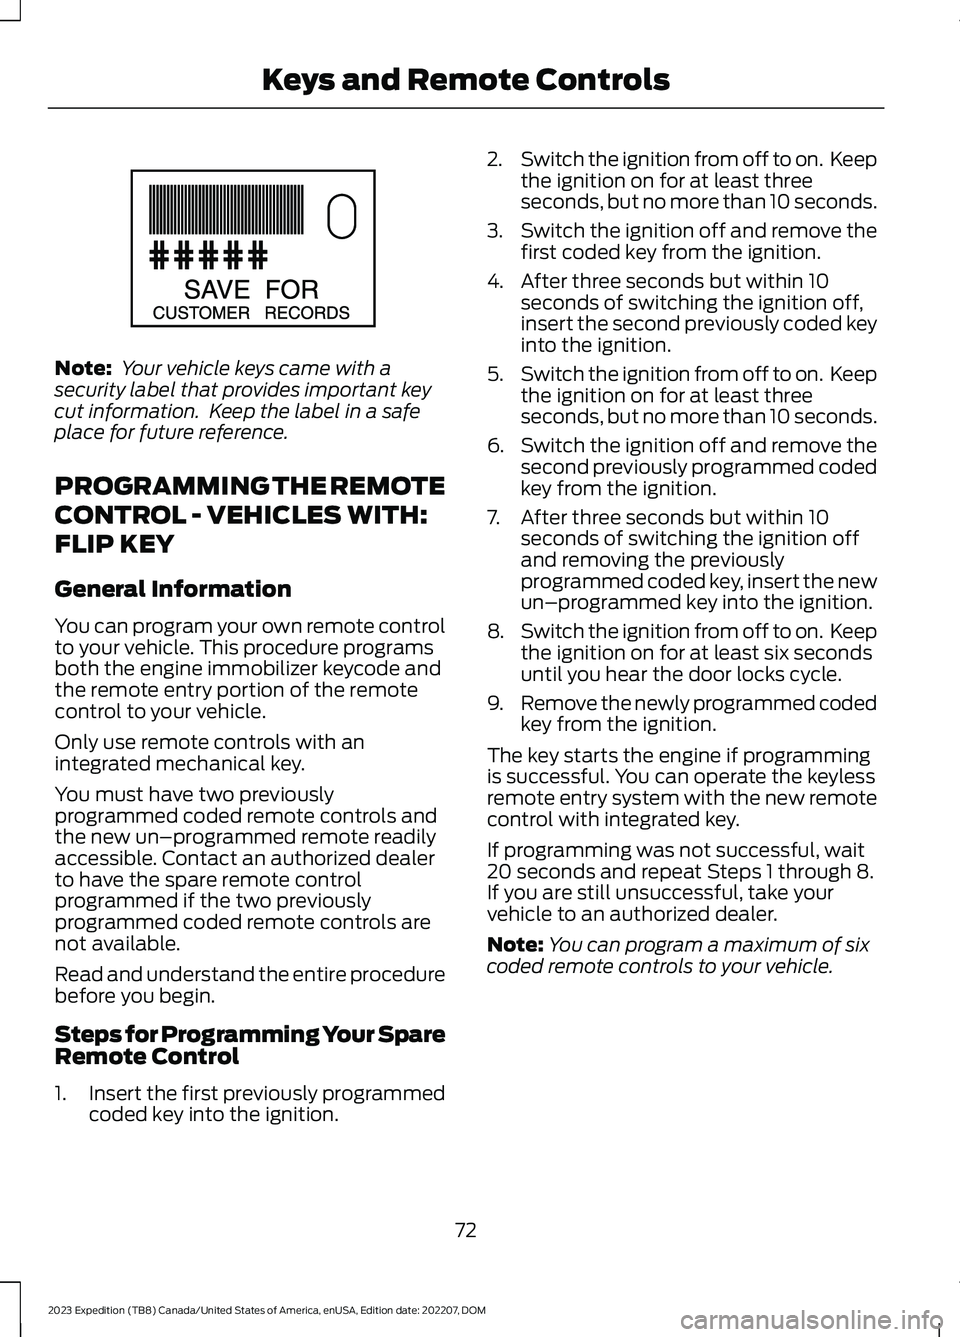
Note: Your vehicle keys came with asecurity label that provides important keycut information. Keep the label in a safeplace for future reference.
PROGRAMMING THE REMOTE
CONTROL - VEHICLES WITH:
FLIP KEY
General Information
You can program your own remote controlto your vehicle. This procedure programsboth the engine immobilizer keycode andthe remote entry portion of the remotecontrol to your vehicle.
Only use remote controls with anintegrated mechanical key.
You must have two previouslyprogrammed coded remote controls andthe new un–programmed remote readilyaccessible. Contact an authorized dealerto have the spare remote controlprogrammed if the two previouslyprogrammed coded remote controls arenot available.
Read and understand the entire procedurebefore you begin.
Steps for Programming Your SpareRemote Control
1.Insert the first previously programmedcoded key into the ignition.
2.Switch the ignition from off to on. Keepthe ignition on for at least threeseconds, but no more than 10 seconds.
3.Switch the ignition off and remove thefirst coded key from the ignition.
4.After three seconds but within 10seconds of switching the ignition off,insert the second previously coded keyinto the ignition.
5.Switch the ignition from off to on. Keepthe ignition on for at least threeseconds, but no more than 10 seconds.
6.Switch the ignition off and remove thesecond previously programmed codedkey from the ignition.
7.After three seconds but within 10seconds of switching the ignition offand removing the previouslyprogrammed coded key, insert the newun–programmed key into the ignition.
8.Switch the ignition from off to on. Keepthe ignition on for at least six secondsuntil you hear the door locks cycle.
9.Remove the newly programmed codedkey from the ignition.
The key starts the engine if programmingis successful. You can operate the keylessremote entry system with the new remotecontrol with integrated key.
If programming was not successful, wait20 seconds and repeat Steps 1 through 8.If you are still unsuccessful, take yourvehicle to an authorized dealer.
Note:You can program a maximum of sixcoded remote controls to your vehicle.
72
2023 Expedition (TB8) Canada/United States of America, enUSA, Edition date: 202207, DOMKeys and Remote ControlsE151795
Page 100 of 658
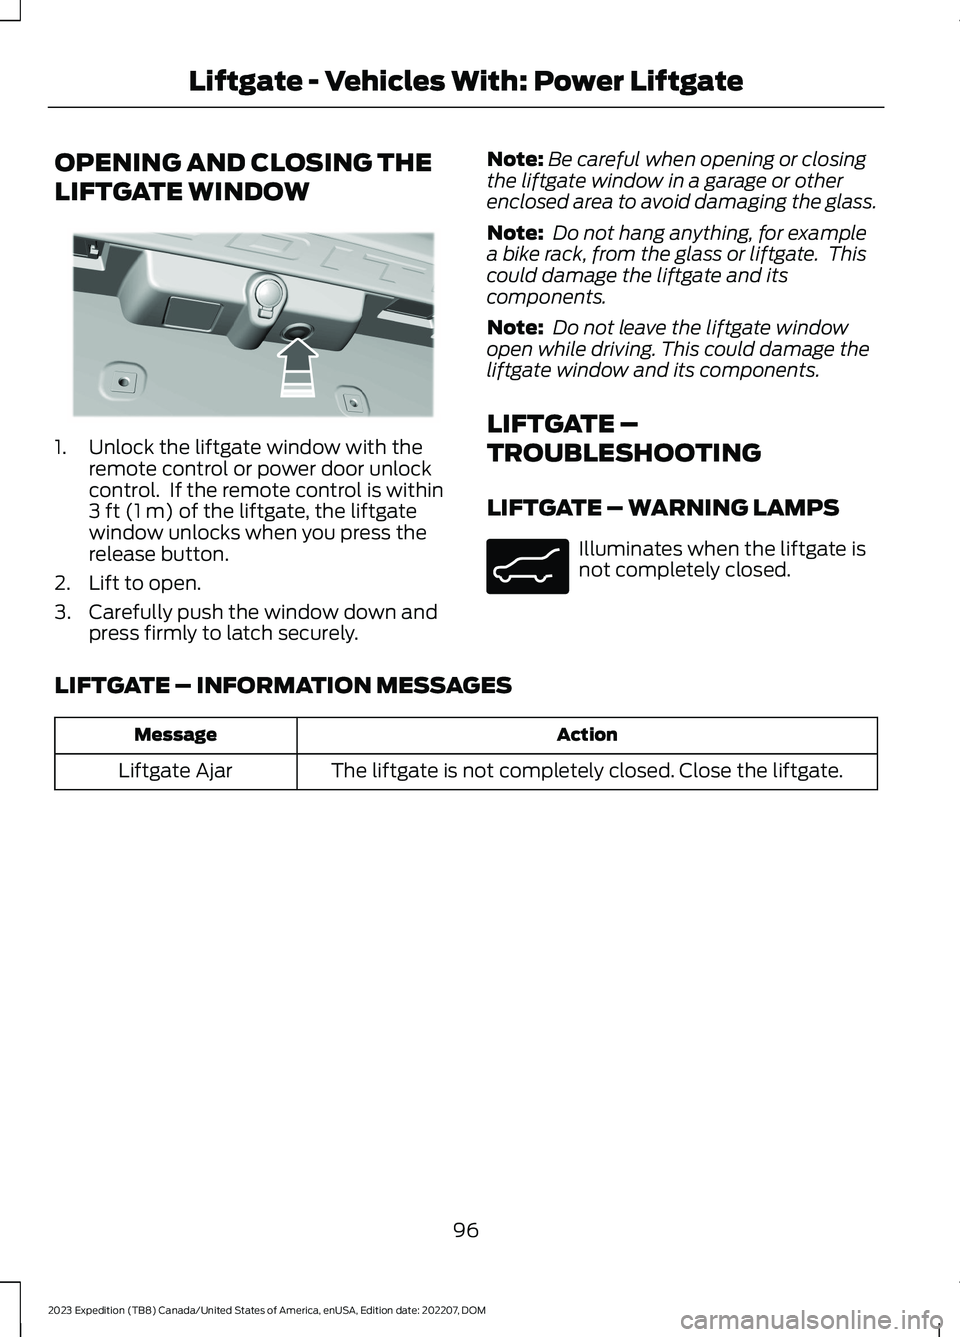
OPENING AND CLOSING THE
LIFTGATE WINDOW
1.Unlock the liftgate window with theremote control or power door unlockcontrol. If the remote control is within3 ft (1 m) of the liftgate, the liftgatewindow unlocks when you press therelease button.
2.Lift to open.
3.Carefully push the window down andpress firmly to latch securely.
Note:Be careful when opening or closingthe liftgate window in a garage or otherenclosed area to avoid damaging the glass.
Note: Do not hang anything, for examplea bike rack, from the glass or liftgate. Thiscould damage the liftgate and itscomponents.
Note: Do not leave the liftgate windowopen while driving. This could damage theliftgate window and its components.
LIFTGATE –
TROUBLESHOOTING
LIFTGATE – WARNING LAMPS
Illuminates when the liftgate isnot completely closed.
LIFTGATE – INFORMATION MESSAGES
ActionMessage
The liftgate is not completely closed. Close the liftgate.Liftgate Ajar
96
2023 Expedition (TB8) Canada/United States of America, enUSA, Edition date: 202207, DOMLiftgate - Vehicles With: Power LiftgateE354249 E162453
Page 103 of 658
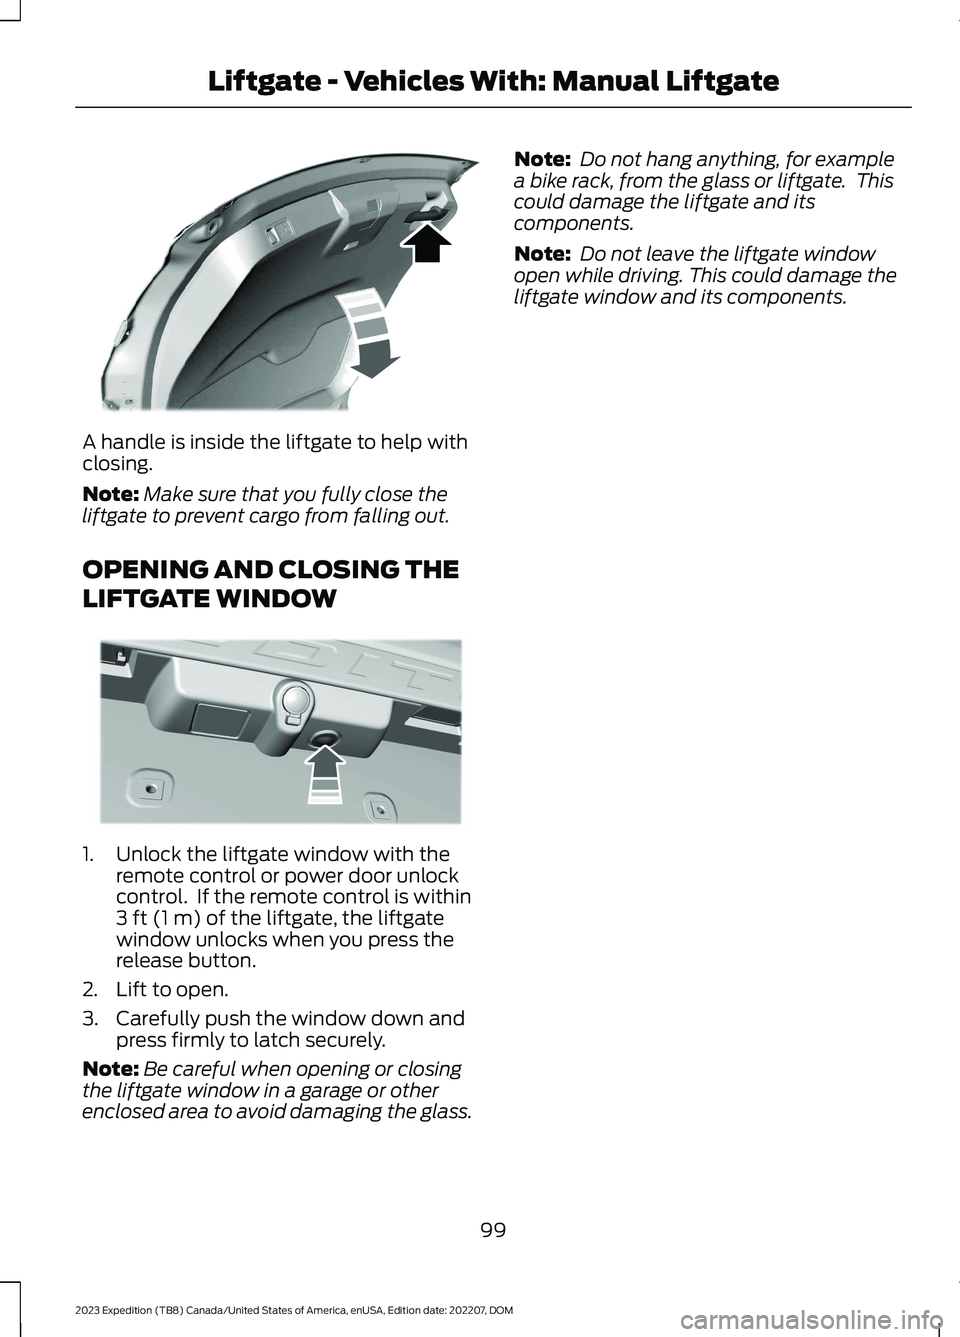
A handle is inside the liftgate to help withclosing.
Note:Make sure that you fully close theliftgate to prevent cargo from falling out.
OPENING AND CLOSING THE
LIFTGATE WINDOW
1.Unlock the liftgate window with theremote control or power door unlockcontrol. If the remote control is within3 ft (1 m) of the liftgate, the liftgatewindow unlocks when you press therelease button.
2.Lift to open.
3.Carefully push the window down andpress firmly to latch securely.
Note:Be careful when opening or closingthe liftgate window in a garage or otherenclosed area to avoid damaging the glass.
Note: Do not hang anything, for examplea bike rack, from the glass or liftgate. Thiscould damage the liftgate and itscomponents.
Note: Do not leave the liftgate windowopen while driving. This could damage theliftgate window and its components.
99
2023 Expedition (TB8) Canada/United States of America, enUSA, Edition date: 202207, DOMLiftgate - Vehicles With: Manual LiftgateE252964 E354249
Page 104 of 658

PASSIVE ANTI-THEFT
SYSTEM
WHAT IS THE PASSIVE ANTI-THEFT SYSTEM
The passive anti-theft system preventssomeone from starting the vehicle with anincorrectly coded key.
Note:Do not leave a duplicate coded keyin your vehicle. Always take the keys andlock all the doors when leaving your vehicle.
HOW DOES THE PASSIVE ANTI-THEFT SYSTEM WORK
The passive anti-theft system arms whenyou switch the ignition off.
It disarms when the ignition is switched onwith a correctly coded key.
Note:The system is not compatible withnon-Ford aftermarket remote start systems.
Note:Do not leave a duplicate coded keyin your vehicle. Always take the keys andlock all doors when leaving your vehicle.
ANTI-THEFT ALARM SYSTEM
WHAT IS THE ANTI-THEFT ALARMSYSTEM
The anti-theft alarm system warns you ofan unauthorized entry to your vehicle.
HOW DOES THE ANTI-THEFTALARM SYSTEM WORK
When armed, the anti-theft alarm istriggered in any of the following ways:
•If someone opens a door, the tailgateor the hood without a correctly codedkey or remote control.
•If you turn the power on without acorrectly coded key.
•If the interior sensors detect movementinside your vehicle.
•If the inclination sensors detect anattempt to raise your vehicle.
•If someone disconnects the vehiclebattery or the battery backup alarm.
•If someone disconnects the trailer. SeeConnecting a Trailer (page 354).
Any further attempts to carry out one ofthe above, sounds the alarm again.
If the anti-theft alarm is triggered, thealarm horn sounds for 30 seconds and theturn signals flash for five minutes.
WHAT IS THE PERIMETER ALARM
The perimeter alarm is designed to detectunauthorized access to your vehicle.
WHAT ARE THE INTERIORSENSORS
The interior sensors are designed to detectany movement inside your vehicle.
The interior sensors are in the overheadconsole.
Note:Do not cover the interior sensors.
100
2023 Expedition (TB8) Canada/United States of America, enUSA, Edition date: 202207, DOMSecurity