Page 49 of 92

Operation and important ri din g points
6-4
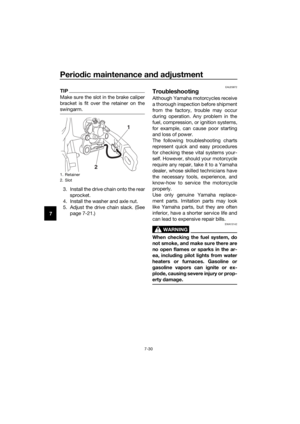
6
EAU16674
Shiftin g
Shifting gears lets you control the
amount of engine power available for
starting off, accelerating, climbing hills,
etc.
The gear positions are shown in the il-
lustration.
TIP
To shift the transmission into the neu-
tral position ( ), press the shift pedal
down repeatedly until it reaches the
end of its travel, and then slightly raise
it.
NOTICE
ECA10261
Even with the transmission in
the neutral position, d o not
coast for lon g period s of time
with the en gine off, an d d o not
tow the motorcycle for lon g d is-
tances. The transmission is
properly lu bricated only when
the en gine is runnin g. Ina de-
quate lu brication may damag e
the transmission.
Always use the clutch while
chan gin g g ears to avoi d d am-
a g in g the en gine, transmission, an
d d rive train, which are not
d esi gne d to withstan d the
shock of force d shiftin g.
EAU16691To start out an d accelerate
1. Pull the clutch lever to disengage the clutch.
2. Shift the transmission into first gear.
3. Open the throttle gradually and si- multaneously release the clutch
lever slowly.
4. Once the motorcycle has reached a speed high enough to change
gears, close the throttle, and at the
same time, quickly pull the clutch
lever in.
5. Shift the transmission into second gear. (Make sure not to shift the
transmission into the neutral posi-
tion.)
6. Open the throttle halfway and gradually release the clutch lever.
7. Follow the same procedure when
shifting to the next gear.
EAU16711To decelerate
1. Close the throttle and apply both the front and the rear brakes to
slow the motorcycle.
2. Downshift through the gears and shift the transmission into the neu-
tral position when the motorcycle
is almost completely stopped.
1. Gear positions
2. Shift pedal
2
1
1
N 2 3
4
5
6
UBR882E0.book Page 4 Wednesd
ay, February 26, 2020 11:39 AM
Page 50 of 92
Operation and important rid ing points
6-5
6
EAU17192
Parkin g
When parking, stop the engine, and
then turn the fuel cock lever to “OFF”.
WARNING
EWA10312
Since the en gine an d exhaust
system can become very hot,
park in a place where pe destri-
ans or chil dren are not likely to
touch them an d b e burne d.
Do not park on a slope or on soft
groun d, otherwise the vehicle
may overturn, increasin g the
risk of a fuel leak an d fire.
Do not park near grass or other
flamma ble materials which
mi ght catch fire.
UBR882E0.book Page 5 Wednesd ay, February 26, 2020 11:39 AM
Page 51 of 92

Periodic maintenance an d a djustment
7-1
7
EAU42074
Periodic inspection, adjustment, and
lubrication will keep your vehicle in the
safest and most efficient condition
possible. Safety is an obligation of the
vehicle owner/operator. The most im-
portant points of vehicle inspection,
adjustment, and lubrication are ex-
plained on the following pages.
The intervals given in the periodic
maintenance and lubrication chart
should be simply considered as a gen-
eral guide under normal riding condi-
tions. However, depending on the
weather, terrain, geographical location,
and individual use, the maintenance in-
tervals may need to be shortened.
WARNING
EWA10322
Failure to properly maintain the vehi-
cle or performin g maintenance ac-
tivities incorrectly may increase
your risk of injury or death during
service or while usin g the vehicle. If
you are not familiar with vehicle ser-
vice, have a Yamaha d ealer perform
service.
WARNING
EWA15123
Turn off the en gine when performin g
maintenance unless otherwise
specified .
A runnin g en gine has movin g
parts that can catch on body
parts or clothin g an d electrical
parts that can cause shocks or
fires.
Runnin g the en gine while ser-
vicin g can lead to eye injury,
b urns, fire, or car bon monoxi de
poisonin g – possi bly lea din g to d
eath. See pag e 2-2 for more in-
formation a bout car bon monox-
i d e.
WARNING
EWA15461
Brake discs, calipers, drums, an d
linin gs can b ecome very hot durin g
use. To avoi d possi ble burns, let
b rake components cool before
touching them.
UBR882E0.book Page 1 Wednesd ay, February 26, 2020 11:39 AM
Page 52 of 92

Periodic maintenance an d a djustment
7-2
7
EAU84193
Perio dic maintenance an d lu brication chart
The following chart is intended as a general guide to maintenance and lubrication.
Bear in mind that such factors as weather, terrain, geographical location, and in-
dividual usage will alter the required maintenance and lubrication intervals. If you
are in doubt as to what intervals to follow in maintaining and lubricating your mo-
torcycle, consult your Yamaha dealer.
TIP
Items marked with an asterisk should be performed by a Yamaha dealer as they
require special tools, data and technical skills.
NO. ITEM ROUTINEAfter
break-in
Everyrace
Every
third race
Every
fifth race
As
required
1 *Piston Check piston for carbon deposits and
cracks or damage.�� Clean.
Replace.
��
2 *
Piston rings Check piston ring end gap and rings
for damage.��
Replace.��
3 *
Piston pin and small
end bearing Check piston pin and small end
bearing for damage.�
Replace.�
4 *
Cylinder head Check cylinder head for carbon
deposits.
�� Clean.
Check cylinder head gasket fordamage.
�� Tighten cylinder head bolts ifnecessary.
Replace cylinder head gasket.
�
5 *
Cylinder
6*YPVS Check cylinder for score marks or
wear.
��
��
�� Clean.
Replace.
Check YPVS for carbon deposits andcracks or damage.
Clean.
�
UBR882E0.book Page 2 Wednesd ay, February 26, 2020 11:39 AM
Page 53 of 92
 Tighten.��
11 *
Kickstarter system Check idle gear for damage.� Replace if necessary.
Check exhaust pipe and muffler for")
Periodic maintenance an d a djustment
7-3
7
10 *Rotor nut
(flywheel magneto) Tighten.��
11 *
Kickstarter system Check idle gear for damage.� Replace if necessary.
Check exhaust pipe and muffler for
carbon deposits.
��
12 *Exhaust system
Clean.
� Check crankshaft for carbon depositsand damage.13 *Crankshaft
Clean.
� �
�
�
14 *
Carburetor Check carburetor settings and for
obstructions.��
Adjust and clean.�� Check condition.��
15Spark plug Clean and regap.
Replace.
� Check chain slack, alignment and
condition.
16 *Drive chain Adjust and thoroughly lubricate chain
with Yamaha chain and cable lube or
equivalent.��
Replace.�
NO. ITEM ROUTINE
After
break-in
Everyrace
Every
third race
Every
fifth race
As
required
7 *Clutch Check clutch housing, friction plates,
clutch plates and clutch springs for
wear or damage.��
Adjust.
Replace.
�
8 *
Transmission Change the transmission oil.�� Check transmission for damage.� Replace bearings.�
9 *Shift forks, guide
bars, shift cam Check all parts for wear and damage.� Replace if necessary.
UBR882E0.book Page 3 Wednesd
ay, February 26, 2020 11:39 AM
Page 54 of 92

Periodic maintenance an d a djustment
7-4
7
23 *Front fork Check operation and for oil leakage.
Adjust if necessary.
�� Clean dust seal and lubricate with
lithium-soap-based grease.
Replace fork oil.
�� Replace oil seals.� Replace protector seal.�
NO. ITEM ROUTINE
After
break-in
Everyrace
Every
third race
Every
fifth race
As
required
Check coolant level and for leakage.��
17 *
Cooling system Check hoses for cracks or damage.� Check radiator cap spring operation.� Change coolant.
Every 2 years
Every year� Check all chassis fitting and fasteners.��
18
*Chassis fasteners
Correct or tighten if necessary.
19Air filter element Clean.�� Replace.�
20 *Frame Clean and check for damage.��
��
21
*Fuel line Clean and check for leakage.��
22 *
Brakes Adjust lever position and pedal height.
Lubricate pivot points.
Check brake disk surface.
Check fluid level and for leakage.
Tighten brake disk bolts, caliper bolts,
master cylinder bolts and union bolts.
Replace brake pads.
� Replace brake fluid.�
UBR882E0.book Page 4 Wednesd ay, February 26, 2020 11:39 AM
Page 55 of 92

Periodic maintenance an d a djustment
7-5
7
EAU42012
TIP
Hydraulic brake service
• Regularly check and, if necessary, correct the brake fluid levels.
• Every two years replace the internal components of the brake master cyl- inders and calipers, and change the brake fluid.
• Replace the brake hoses every four years and if cracked or damaged.
NO. ITEM ROUTINEAfter
break-in
Everyrace
Every
third race
Every
fifth race
As
required
*Shock absorber
assembly Check operation and adjust.�� Tighten if necessary.
Lubricate with lithium-soap-based
grease.
����
*Drive chain roller
and support guide Check for wear or damage.� Replace if necessary.
*Rear suspension Check operation and tighten if
necessary.��
Lubricate with molybdenum disulfide grease.��
Check operation, free play, andtighten if necessary.��
*
Steering head Clean and lubricate with
lithium-soap-based grease.�
Replace bearings.� Check tire air pressure, wheel runout,spokes for looseness, and tires for
wear.
��
Tighten sprocket bolts if necessary.��
*Tires and wheels
Check wheel bearings for looseness.� Lubricate wheel bearings with
lithium-soap-based grease.�
Replace wheel bearings.�
*Moving parts and ca-
bles Lubricate.��
*
Throttle grip Check operation.�� Check throttle grip free play, and
adjust if necessary.
Lubricate cable and grip housing.
After washing the motorcycle or riding in the rain.�
27 *Swingarm pivot
bearings ��
Lubricate with molybdenum
disulfide grease. Check bearing assemblies for
looseness.
24
25
26
28
29
30
31
UBR882E0.book Page 5 Wednesd ay, February 26, 2020 11:39 AM
Page 56 of 92

Periodic maintenance an d a djustment
7-6
7
EAU84450
Checkin g the spark plu g
The spark plug is an important engine
component, which is easy to check.
Since heat and deposits will cause any
spark plug to slowly erode, the spark
plug should be removed and checked
in accordance with the periodic main-
tenance and lubrication chart. In addi-
tion, the condition of the spark plug
can reveal the condition of the engine.
To remove the spark plu g
1. Remove the spark plug cap.
2. Remove the spark plug as shown, with a spark plug wrench available
at a Yamaha dealer. To check the spark plu
g
1. Check that the porcelain insulator around the center electrode of the
spark plug is a medium-to-light
tan (the ideal color when the vehi-
cle is ridden normally).
TIP
If the spark plug shows a distinctly dif-
ferent color, the engine could be oper-
ating improperly. Do not attempt to
diagnose such problems yourself. In-
stead, have a Yamaha dealer check
the vehicle.
2. Check the spark plug for electrodeerosion and excessive carbon or
other deposits, and replace it if
necessary.
3. Measure the spark plug gap with a wire thickness gauge and, if nec-
essary, adjust the gap to specifi-
cation.
1. Spark plug cap
1. Spark plug wrench
1
1
Specified spark plu g:
NGK/BR9ECM
1. Spark plug gap
Spark plu g g ap:
0.7–0.8 mm (0.028–0.031 in)
UBR882E0.book Page 6 Wednesd ay, February 26, 2020 11:39 AM