2022 TOYOTA YARIS CROSS lights
[x] Cancel search: lightsPage 310 of 618

308
CV Owner's Manual_Europe_M52N20_en
4-6. Driving tips
Perform the following according to
the driving conditions:
Do not try to forcibly open a win-
dow or move a wiper that is fro-
zen. Pour warm water over the
frozen area to melt the ice. Wipe
away the water immediately to
prevent it from freezing.
To ensure proper operation of
the climate control system fan,
remove any snow that has accu-
mulated on the air inlet vents in
front of the windshield.
Check for and remove any
excess ice or snow that may
have accumulated on the exte-
rior lights, vehicle’s roof, chassis,
around the tires or on the brakes.
Remove any snow or mud from
the bottom of your shoes before
getting in the vehicle.
Accelerate the vehicle slowly, keep
a safe distance between you and
the vehicle ahead, and drive at a
reduced speed suitable to road
conditions.
Park the vehicle and shift the
shift lever to P (Multidrive), or 1
or R (manual transmission) with-
out setting the parking brake.
The parking brake may freeze
up, preventing it from being
released. If the vehicle is parked
without setting the parking brake,
make sure to block the wheels.
Failure to do so may be danger-
ous because it may cause the
vehicle to move unexpectedly,
possibly leading to an accident.
Vehicles with a Multidrive: If the
vehicle is parked without setting
the parking brake, confirm that
the shift lever cannot be moved
out of P*.
*: The shift lever will be locked if it is
attempted to be shifted from P to any
other position without depressing the
brake pedal. If the shift lever can be
shifted from P, there may be a prob-
lem with the shift lock system. Have
the vehicle inspected by any autho-
rized Toyota retailer or Toyota autho-
rized repairer, or any reliable repairer
or legitimate tire retailers immedi-
ately.
Use the correct tire chain size when
mounting the tire chains.
Chain size is regulated for each tire
size.
Before driving the vehicle
When driving the vehicle
When parking the vehicle
Selecting tire chains
Page 313 of 618
5
311
CV Owner's Manual_Europe_M52N20_en
5
Interior features
Interior features
5-1. Using the air conditioning
system and defogger
Manual air conditioning system
....................................... 312
Automatic air conditioning sys-
tem ................................. 316
Heated steering wheel/seat
heaters ........................... 322
5-2. Using the interior lights
Interior lights list................ 324
5-3. Using the storage features
List of storage features ..... 326
Luggage compartment features
....................................... 329
5-4. Other interior features
Other interior features....... 333
Page 326 of 618
324
CV Owner's Manual_Europe_M52N20_en
5-2. Using the interior lights
5-2.Using the interior lights
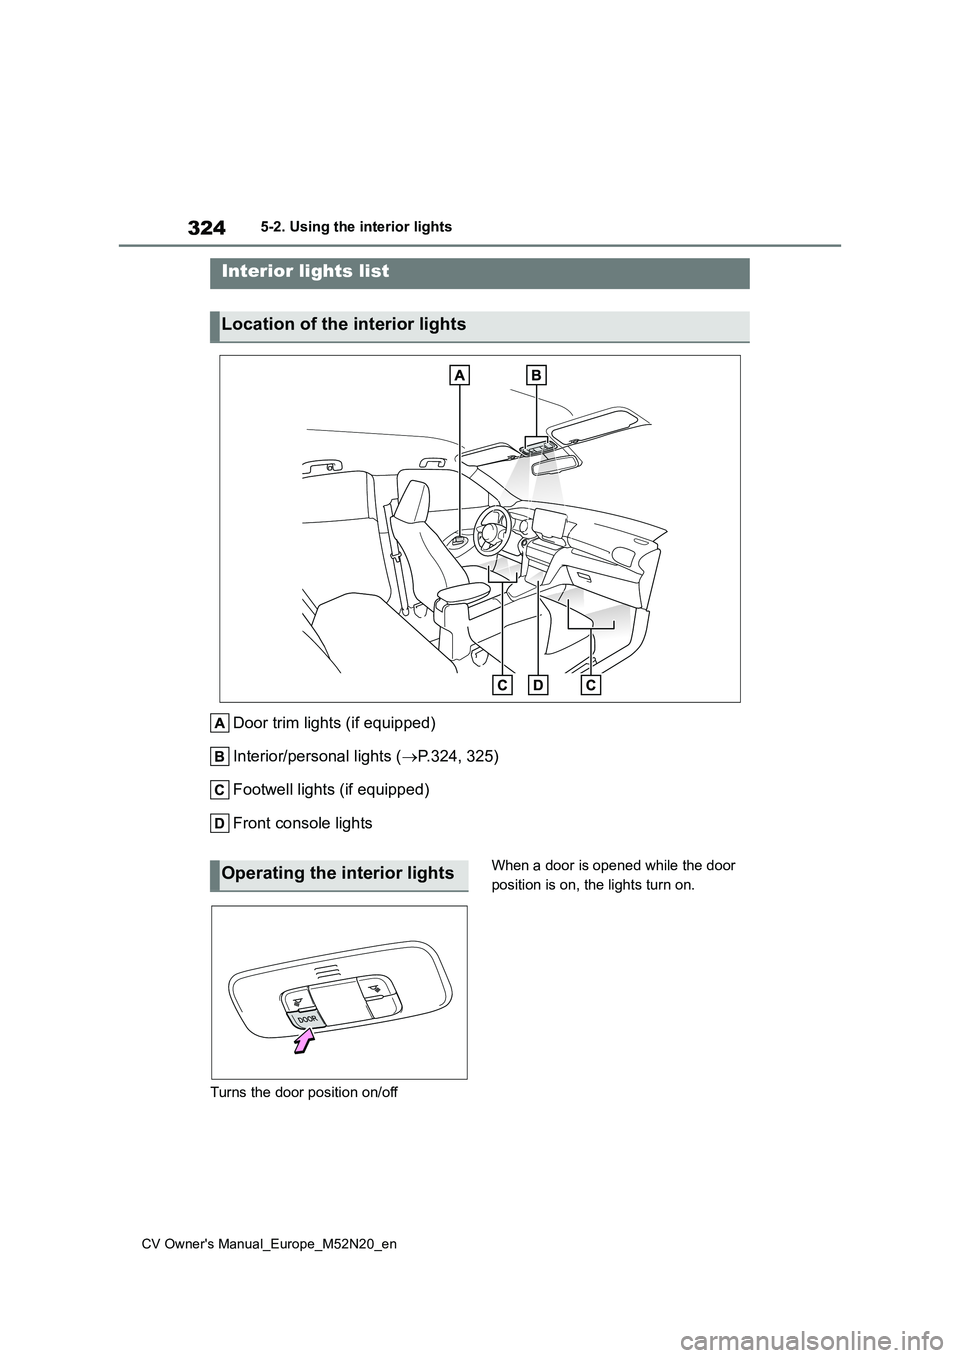
Door trim lights (if equipped)
Interior/personal lights ( P.324, 325)
Footwell lights (if equipped)
Front console lights
Turns the door position on/off
When a door is opened while the door
position is on, the lights turn on.
Interior lights list
Location of the interior lights
Operating the interior lights
Page 327 of 618
325
5
CV Owner's Manual_Europe_M52N20_en
5-2. Using the interior lights
Interior features
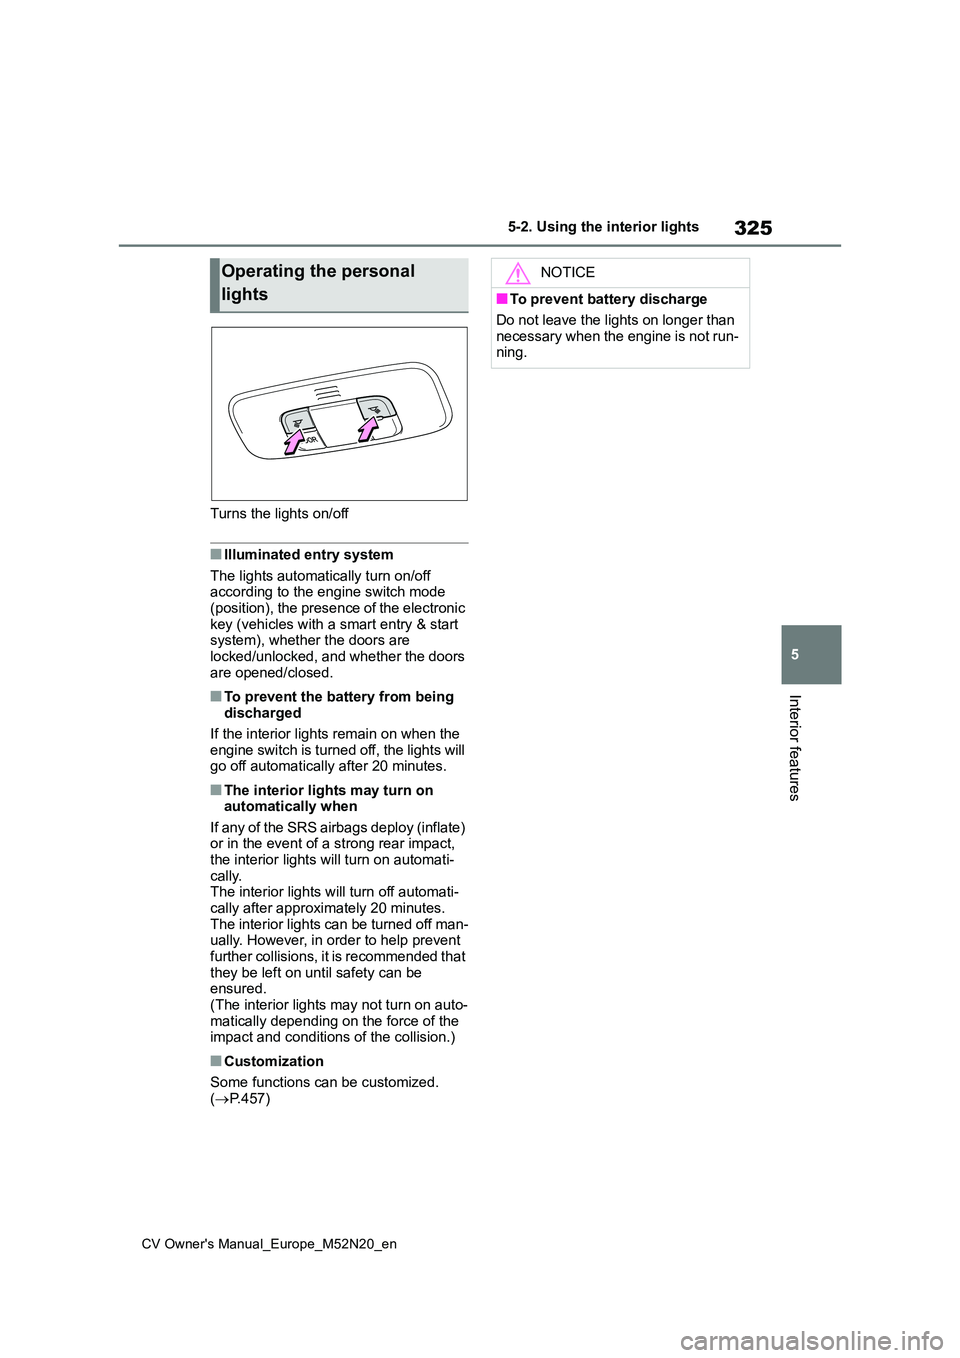
Turns the lights on/off
■Illuminated entry system
The lights automatically turn on/off according to the engine switch mode (position), the presence of the electronic
key (vehicles with a smart entry & start system), whether the doors are locked/unlocked, and whether the doors
are opened/closed.
■To prevent the battery from being discharged
If the interior lights remain on when the
engine switch is turned off, the lights will go off automatically after 20 minutes.
■The interior lights may turn on automatically when
If any of the SRS airbags deploy (inflate) or in the event of a strong rear impact, the interior lights will turn on automati-
cally. The interior lights will turn off automati-cally after approximately 20 minutes.
The interior lights can be turned off man- ually. However, in order to help prevent further collisions, it is recommended that
they be left on until safety can be ensured.(The interior lights may not turn on auto-
matically depending on the force of the impact and conditions of the collision.)
■Customization
Some functions can be customized.
( P.457)
Operating the personal
lights
NOTICE
■To prevent battery discharge
Do not leave the lights on longer than
necessary when the engine is not run- ning.
Page 337 of 618
335
5
CV Owner's Manual_Europe_M52N20_en
5-4. Other interior features
Interior features
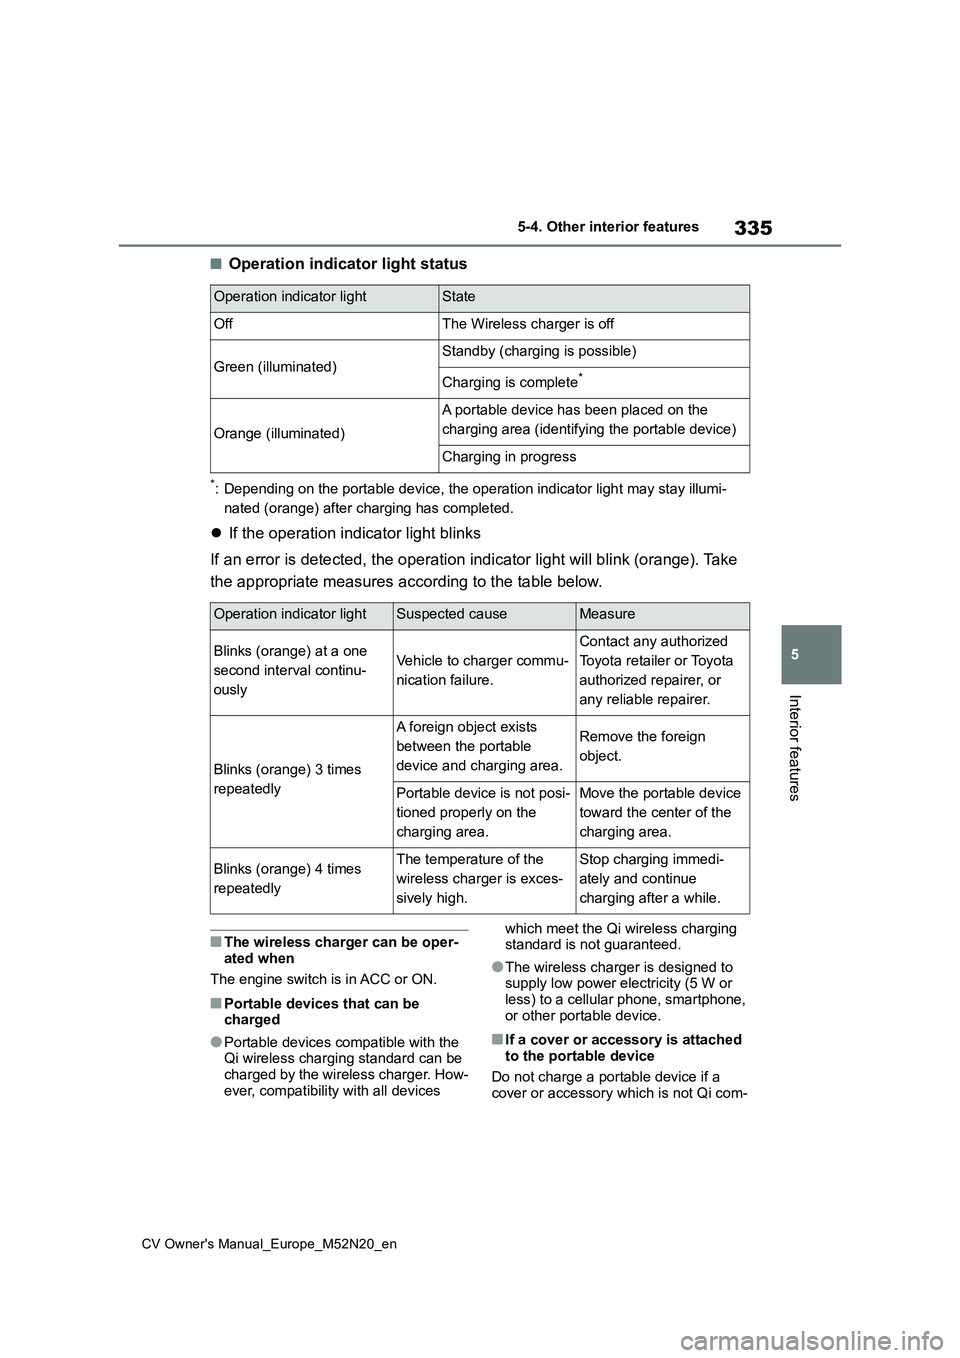
■Operation indicator light status
*: Depending on the portable device, the operation indicator light may stay illumi-
nated (orange) after charging has completed.
If the operation indicator light blinks
If an error is detected, the operation indicator light will bli nk (orange). Take
the appropriate measures according to the table below.
■The wireless charger can be oper- ated when
The engine switch is in ACC or ON.
■Portable devices that can be charged
●Portable devices compatible with the Qi wireless charging standard can be charged by the wireless charger. How-
ever, compatibility with all devices
which meet the Qi wireless charging standard is not guaranteed.
●The wireless charger is designed to supply low power electricity (5 W or
less) to a cellular phone, smartphone, or other portable device.
■If a cover or accessory is attached to the portable device
Do not charge a portable device if a cover or accessory which is not Qi com-
Operation indicator lightState
OffThe Wireless charger is off
Green (illuminated)Standby (charging is possible)
Charging is complete*
Orange (illuminated)
A portable device has been placed on the
charging area (identifying the portable device)
Charging in progress
Operation indicator lightSuspected causeMeasure
Blinks (orange) at a one
second interval continu-
ously
Vehicle to charger commu-
nication failure.
Contact any authorized
Toyota retailer or Toyota
authorized repairer, or
any reliable repairer.
Blinks (orange) 3 times
repeatedly
A foreign object exists
between the portable
device and charging area.
Remove the foreign
object.
Portable device is not posi-
tioned properly on the
charging area.
Move the portable device
toward the center of the
charging area.
Blinks (orange) 4 times
repeatedly
The temperature of the
wireless charger is exces-
sively high.
Stop charging immedi-
ately and continue
charging after a while.
Page 340 of 618
338
CV Owner's Manual_Europe_M52N20_en
5-4. Other interior features
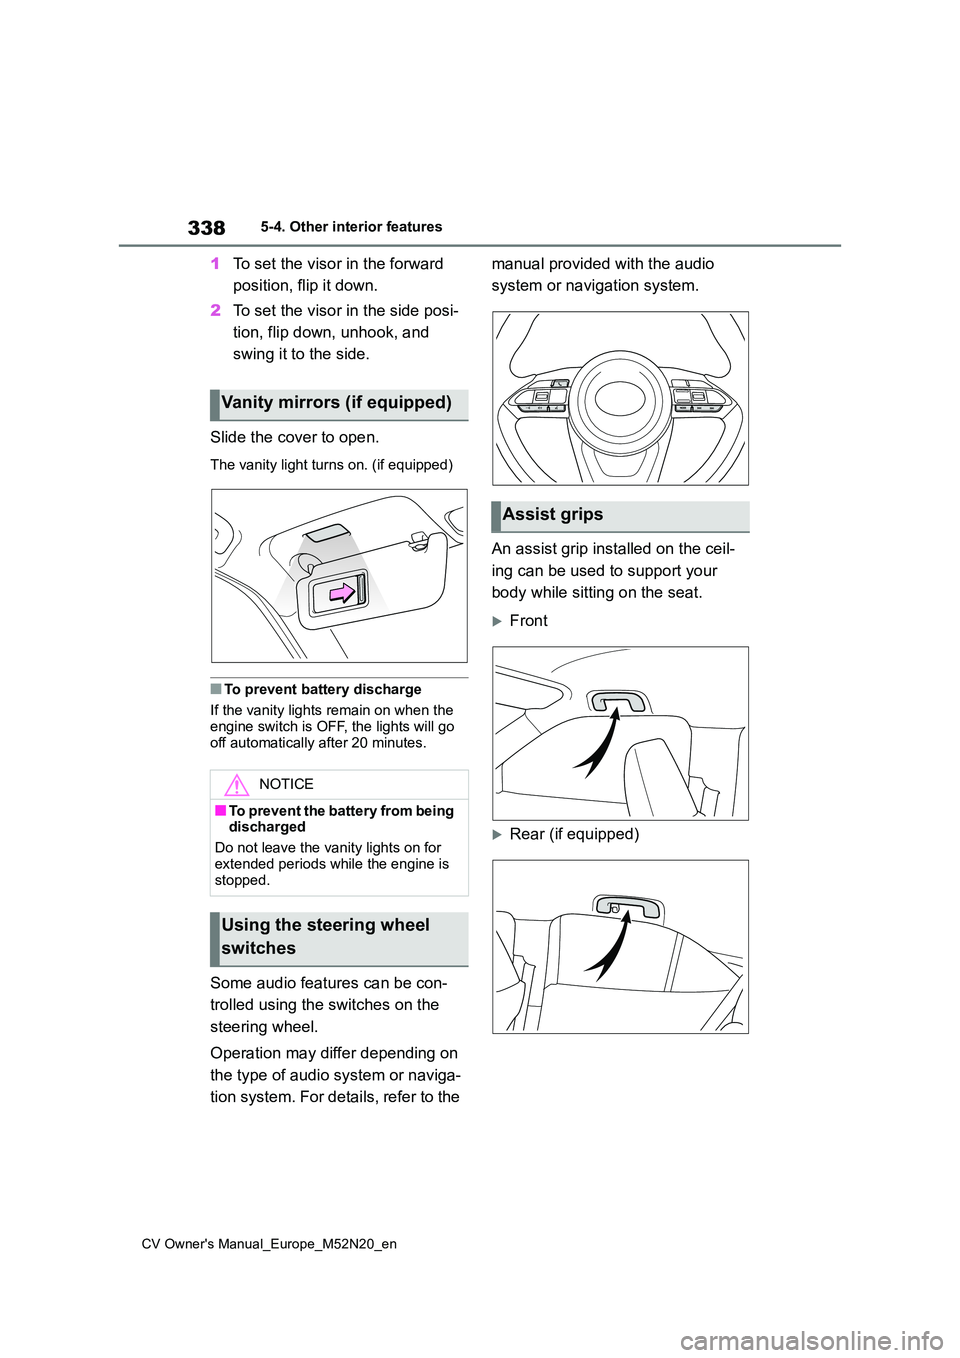
1To set the visor in the forward
position, flip it down.
2 To set the visor in the side posi-
tion, flip down, unhook, and
swing it to the side.
Slide the cover to open.
The vanity light turns on. (if equipped)
■To prevent battery discharge
If the vanity lights remain on when the
engine switch is OFF, the lights will go off automatically after 20 minutes.
Some audio features can be con-
trolled using the switches on the
steering wheel.
Operation may differ depending on
the type of audio system or naviga-
tion system. For details, refer to the
manual provided with the audio
system or navigation system.
An assist grip installed on the ceil-
ing can be used to support your
body while sitting on the seat.
Front
Rear (if equipped)
Vanity mirrors (if equipped)
NOTICE
■To prevent the battery from being discharged
Do not leave the vanity lights on for
extended periods while the engine is stopped.
Using the steering wheel
switches
Assist grips
Page 346 of 618
344
CV Owner's Manual_Europe_M52N20_en
6-1. Maintenance and care
NOTICE
• If liquids such as benzene and gas- oline are spilled on the paint sur-
face
●If the paint is chipped or scratched,
have it repaired immediately.
●To prevent the wheels from corrod-
ing, remove any dirt and store in a place with low humidity when stor-ing the wheels.
■Cleaning the exterior lights
●Wash carefully. Do not use organic
substances or scrub with a hard brush.This may damage the surfaces of
the lights.
●Do not apply wax to the surfaces of
the lights. Wax may cause damage to the lenses.
■To prevent damage to the wind-shield wiper arms
When lifting the wiper arms away from the windshield, pull the driver side wiper arm upward first, and
repeat for the passenger side. When returning the wipers to their original position, do so from the passenger
side first.
■When using an automatic car
wash (vehicles with rain-sensing windshield wipers)
Set the wiper switch to the off posi-
tion. If the wiper switch is in “AUTO”, the wipers may operate and the wiper blades may be damaged.
■When using a high pressure car wash
●Vehicles with rear view monitor sys-
tem: When washing the vehicle, do not spray the camera or its sur-rounding area directly with a high
pressure washer. Shock applied from high pressure water may cause the device to not operate
normally.
●Vehicles with Toyota Safety Sense:
Do not spray water directly on the radar which is equipped behind the emblem. Otherwise it may cause
the device to be damaged.
●Do not bring the nozzle tip close to
boots (rubber or resin manufac- tured cover), connectors or the fol-lowing parts. The parts may be
damaged if they come into contact with high-pressure water.
• Traction related parts
• Steering parts
• Suspension parts
• Brake parts
●Keep the cleaning nozzle at least
30 cm (11.9 in.) away from the vehi- cles body. Otherwise resin section, such as moldings and bumpers,
may be deformed and damaged. Also, do not continuously hold the nozzle in the same place.
●Do not spray the lower part of the windshield continuously. If water
enters the air conditioning system intake located near the lower part of the windshield, the air conditioning
system may not operate correctly.
●Do not wash the underside of the
vehicle using a high pressure car washer.
Page 372 of 618

370
CV Owner's Manual_Europe_M52N20_en
6-3. Do-it-yourself maintenance
4Press / (7-inch display)
or / (4.2-inch display) to
select “Vehicle Settings” and
then press .
5 Press / to select “TPWS
setting” and then press .
6 Press / to select “Identi-
fying Each Wheel & Position”.
Then press and hold until
the tire pressure warning light
blinks slowly 3 times.
Then a message will be displayed on the multi-information display.
When registration is being performed, the tire pressure warning light will blink for approximately 1 minute then illumi-
nate and “--” will be displayed for the inflation pressure of each tire on the multi-information display.
7 Drive straight (with occasional
left and right turns) at approxi-
mately 40 km/h (25 mph) or
more for approximately 10 to 30
minutes.
Registration is complete when the tire pressure warning light turns off and the inflation pressure of each tire is dis-
played on the multi-information display.
Registration may take longer than approximately 1 hour in certain situa-tions, such as when the vehicle is
stopped for a long time at traffic lights, etc. ( P.371)
8Initializing the tire pressure
warning system. ( P.367)
■When registering ID codes
●Before performing ID code registra- tion, make sure that no wheels with tire pressure warning valve and trans-
mitters installed are near the vehicle.
●Make sure to initialize the tire pres-
sure warning system after registering the ID codes. If the system is initial-ized before registering the ID codes,
the initialized values will be invalid.
●As the tires will be warm when regis-
tration is completed, make sure to allow the tires to cool before perform-ing initialization.
■Canceling ID code registration
●To cancel ID code registration after it has been started, operate the multi-
information display again to select “Identifying Each Wheel & Position”. ( P.369)
●If ID code registration has been can-
celed, the tire pressure warning light will blink for approximately 1 minute when the engine switch is turned to
ON mode and then illuminate. The tire pressure warning system will be oper-ational when the tire pressure warning
light turns off.
●If the warning light does not turn off
even after several minutes have elapsed, ID code registration may not have been canceled correctly. To can-
cel registration, perform the ID code registration start procedure again and then turn the engine switch off before
driving.