2022 TOYOTA VENZA HYBRID change time
[x] Cancel search: change timePage 217 of 548
2174-3. Operating the lights and wipers
4
Driving
formed, the 12-volt battery-saving
function is canceled once and then
reactivated. All the lights will turn off
automatically 20 minutes after the
12-volt battery-saving function has
been reactivated:
●When the headlight switch is oper-
ated
●When a door is opened or closed
■When unlocking the doors (wel-
come lamp)
The parking lights automatically turn
on when the surroundings are dark
and the doors are unlocked using
the entry function or wireless remote
control if the light switch is in the
position.
■Windshield wiper linked head-
light illumination
When driving during daytime with
the headlight switch is in the
position, if the windshield wipers are
used, the headlights will turn on
automatically after several seconds
to help enhance the visibility of your
vehicle.
■If “Headlight System Malfunc-
tion Visit Your Dealer” is dis-
played on the multi-information
display
The system may be malfunctioning.
Have the vehicle inspected by your
Toyota dealer.
■Customization
Settings (e.g. light sensor sensitiv-
ity) can be changed.
(Customizable features: P.507)
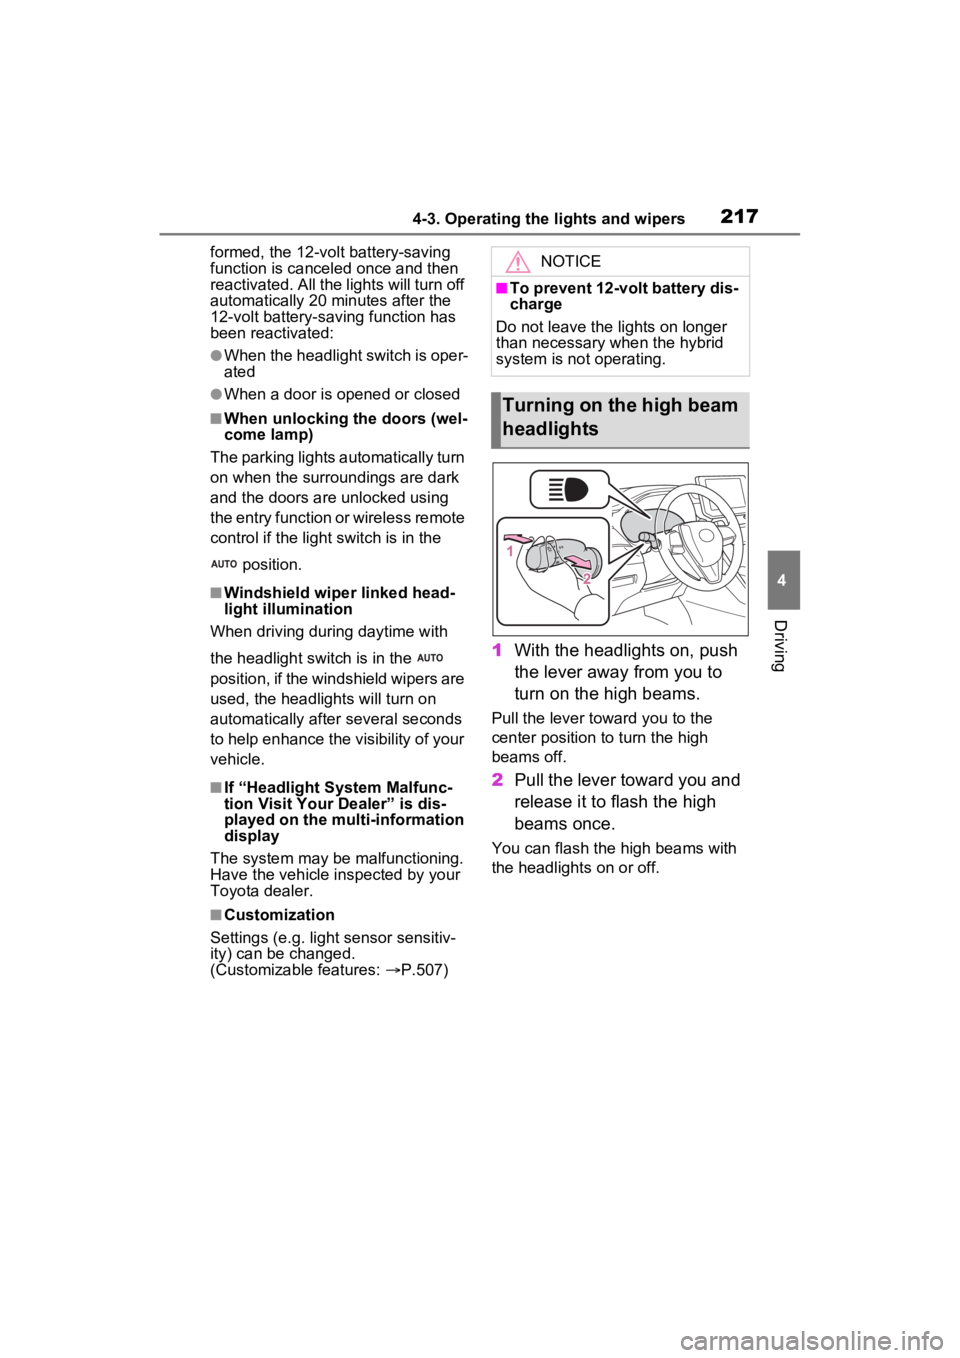
1 With the headlights on, push
the lever away from you to
turn on the high beams.
Pull the lever toward you to the
center position to turn the high
beams off.
2Pull the lever toward you and
release it to flash the high
beams once.
You can flash the high beams with
the headlights on or off.
NOTICE
■To prevent 12-volt battery dis-
charge
Do not leave the lights on longer
than necessary when the hybrid
system is not operating.
Turning on the high beam
headlights
Page 220 of 548
2204-3. Operating the lights and wipers
Have the vehicle inspected by your
Toyota dealer.
■Temporarily lowering sensor
sensitivity
The sensitivity of the sensor can be
temporarily lowered.
1 Turn the power switch to OFF
while the following conditions are
met.
●The headlight switch is in or
position.
●The headlight switch lever is in
high beam position.
●Automatic High Beam switch is
on.
2 Turn the power switch to ON.
3 Within 60 seconds after step 2,
repeat pulling the headlight
switch lever to the original posi-
tion then pushing it to the high
beam position qu ickly 10 times,
then leave the lever in the origi-
nal position.
4 If the sensitivity is changed, the
Automatic High Beam indicator
is turn on and off 3 times.
Automatic High Beam (headlights)
may turn on even w hen the vehicle
is stopped.
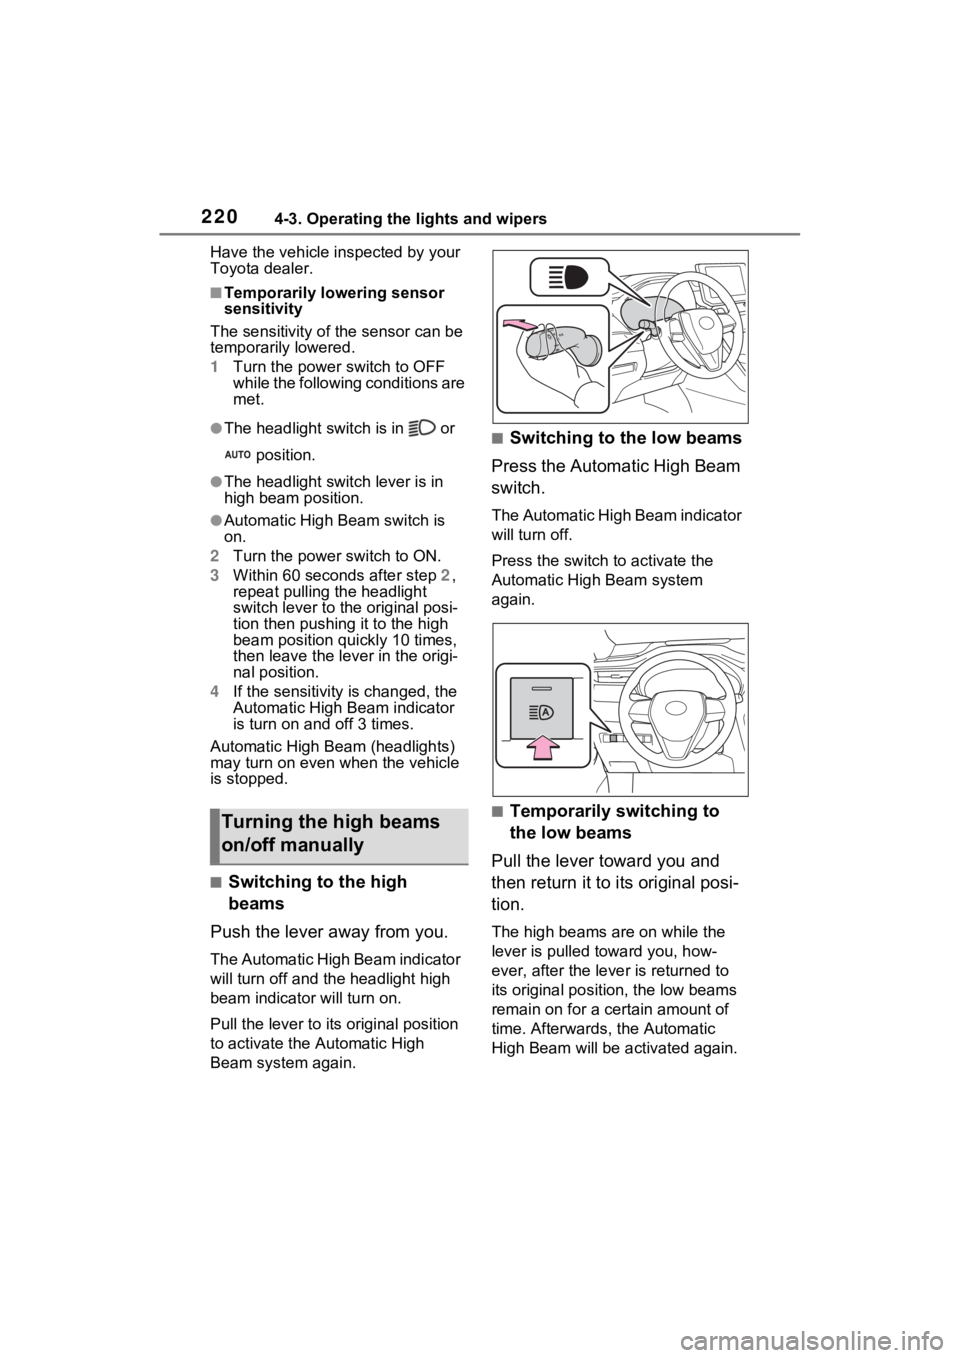
■Switching to the high
beams
Push the lever away from you.
The Automatic High Beam indicator
will turn off and the headlight high
beam indicator will turn on.
Pull the lever to its original position
to activate the Automatic High
Beam system again.
■Switching to the low beams
Press the Automatic High Beam
switch.
The Automatic High Beam indicator
will turn off.
Press the switch to activate the
Automatic High Beam system
again.
■Temporarily switching to
the low beams
Pull the lever toward you and
then return it to its original posi-
tion.
The high beams are on while the
lever is pulled toward you, how-
ever, after the lever is returned to
its original posit ion, the low beams
remain on for a certain amount of
time. Afterwards, the Automatic
High Beam will be a ctivated again.
Turning the high beams
on/off manually
Page 226 of 548
2264-3. Operating the lights and wipers
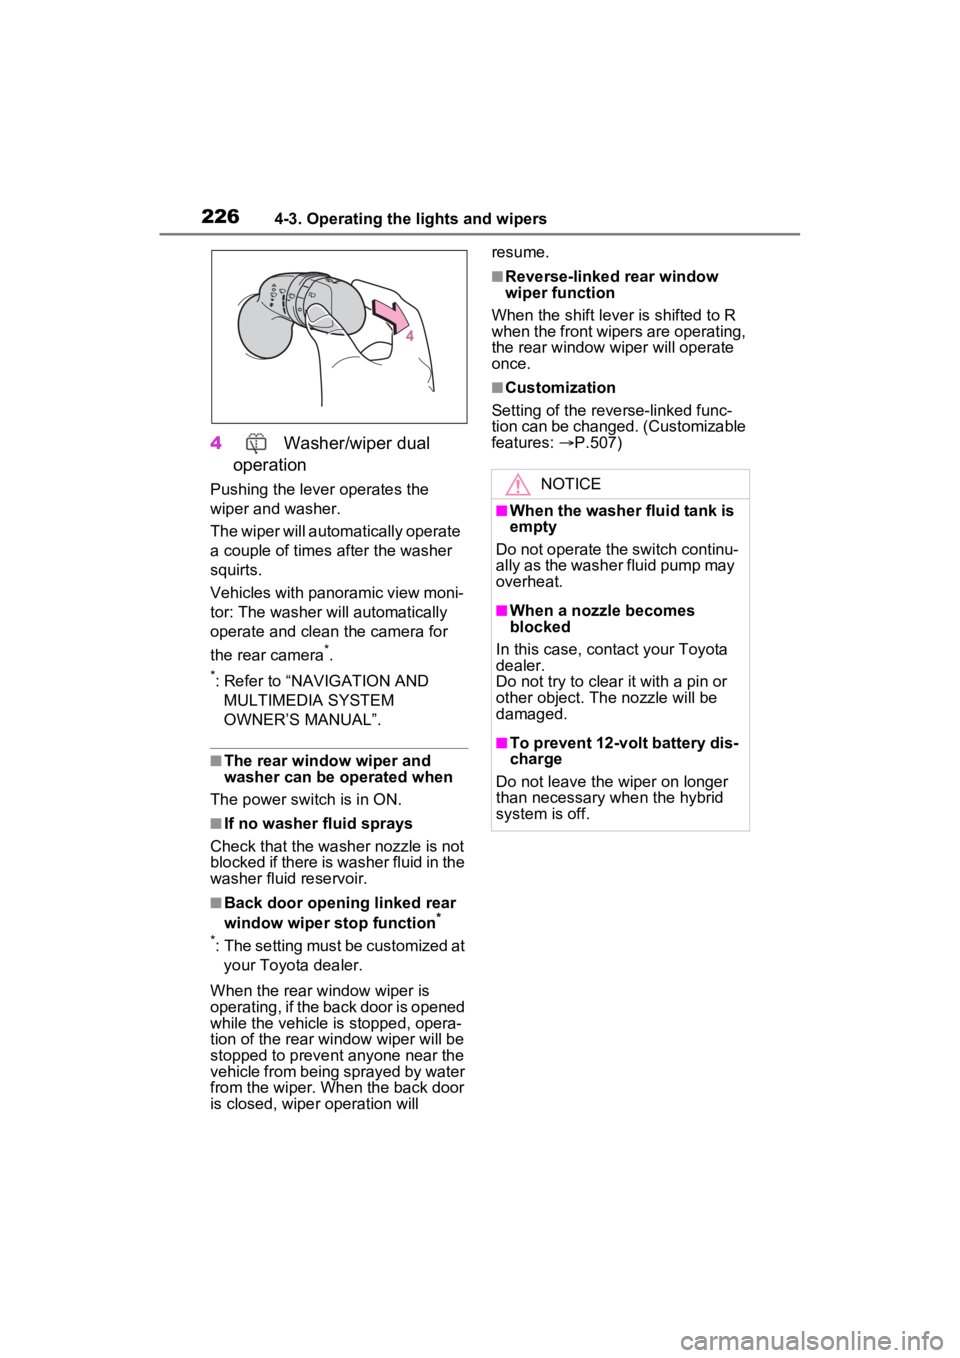
4 Washer/wiper dual
operation
Pushing the lever operates the
wiper and washer.
The wiper will automatically operate
a couple of times after the washer
squirts.
Vehicles with panoramic view moni-
tor: The washer will automatically
operate and clean the camera for
the rear camera
*.
*: Refer to “NAVIGATION AND MULTIMEDIA SYSTEM
OWNER’S MANUAL”.
■The rear window wiper and
washer can be operated when
The power swit ch is in ON.
■If no washer fluid sprays
Check that the washer nozzle is not
blocked if there is washer fluid in the
washer fluid reservoir.
■Back door opening linked rear
window wiper stop function*
*
: The setting must be customized at your Toyota dealer.
When the rear w indow wiper is
operating, if the back door is opened
while the vehicle is stopped, opera-
tion of the rear window wiper will be
stopped to prevent anyone near the
vehicle from being sprayed by water
from the wiper. When the back door
is closed, wiper operation will resume.
■Reverse-linked rear window
wiper function
When the shift lever is shifted to R
when the front wipers are operating,
the rear window wiper will operate
once.
■Customization
Setting of the reverse-linked func-
tion can be changed. (Customizable
features: P.507)
NOTICE
■When the washer fluid tank is
empty
Do not operate the switch continu-
ally as the washer fluid pump may
overheat.
■When a nozzle becomes
blocked
In this case, contact your Toyota
dealer.
Do not try to clear it with a pin or
other object. The nozzle will be
damaged.
■To prevent 12-volt battery dis-
charge
Do not leave the wiper on longer
than necessary when the hybrid
system is off.
Page 235 of 548
2354-5. Using the driving support systems
4
Driving
●In the following situations, if the situation has changed (or the vehicle has
been driven for some time) and the normal operating conditions are
detected, the message will disappear and the system will become opera-
tional.
If the message does not disapp ear, contact your Toyota dealer.
• When the temperature around the radar sensor is outside of the opera-
tional range, such as when the vehicle is in the sun or in an e xtremely cold
environment
• When the front camera cannot d etect objects in front of the vehicle, such
as when driving in the dark, sno w, or fog, or when bright lights are shining
into the front camera
• Depending on the conditions in the vicinity of the vehicle, th e radar may
judge the surrounding environment can not be properly recognize d. In that
case, “Pre-Collision System Unavailable” is displayed.
When the temperature around the
front camera is outside of the opera-
tional range, such as when the vehi-
cle is in the sun or in an extremely
cold environment
If the front camera is hot, such as
after the vehicle had been parked in
the sun, use the air conditioning sys-
tem to decrease the temperature
around the front camera.
If a sunshade was used when the
vehicle was parked, depending on its
type, the sunlight reflected from the
surface of the sunshade may cause
the temperature of the front camera
to become excessively high.
If the front camera is cold, such as
after the vehicle is parked in an
extremely cold environment, use the
air conditioning system to increase
the temperature around the front
camera.
The area in front o f the front camera
is obstructed, such as when the
hood is open or a sticker is attached
to the part of the win dshield in front
of the front camera.
Close the hood, rem ove the sticker,
etc. to clear the obstruction.
When “Pre-Collision System
Unavailable” is displayed.
Check whether there is attached
materials on the radar sensor and
radar sensor cover , and if there is,
remove it.
SituationActions
Page 238 of 548
2384-5. Using the driving support systems
■Enabling/disabling the pre-
collision system
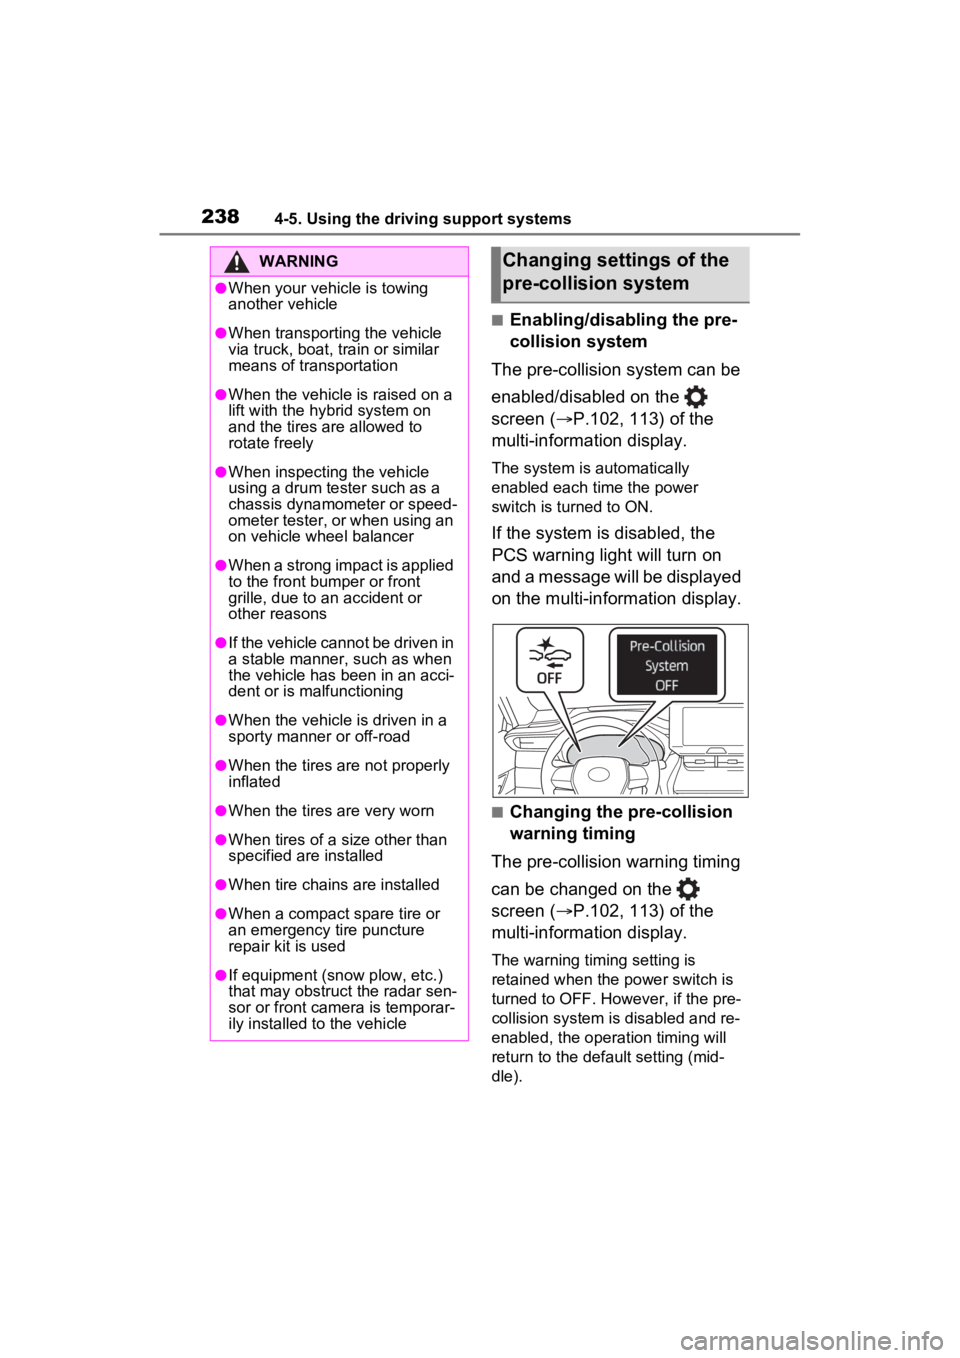
The pre-collision system can be
enabled/disabled on the
screen ( P.102, 113) of the
multi-information display.
The system is automatically
enabled each time the power
switch is turned to ON.
If the system is disabled, the
PCS warning light will turn on
and a message will be displayed
on the multi-information display.
■Changing the pre-collision
warning timing
The pre-collision warning timing
can be changed on the
screen ( P.102, 113) of the
multi-information display.
The warning timing setting is
retained when the power switch is
turned to OFF. However, if the pre-
collision system is disabled and re-
enabled, the operation timing will
return to the default setting (mid-
dle).
WARNING
●When your vehicle is towing
another vehicle
●When transporting the vehicle
via truck, boat, train or similar
means of transportation
●When the vehicle is raised on a
lift with the hybrid system on
and the tires are allowed to
rotate freely
●When inspecting the vehicle
using a drum tester such as a
chassis dynamometer or speed-
ometer tester, or when using an
on vehicle wheel balancer
●When a strong impact is applied
to the front bumper or front
grille, due to a n accident or
other reasons
●If the vehicle cannot be driven in
a stable manner, such as when
the vehicle has been in an acci-
dent or is malfunctioning
●When the vehicle is driven in a
sporty manner or off-road
●When the tires are not properly
inflated
●When the tires are very worn
●When tires of a size other than
specified are installed
●When tire chains are installed
●When a compact spare tire or
an emergency tire puncture
repair kit is used
●If equipment (snow plow, etc.)
that may obstruct the radar sen-
sor or front camera is temporar-
ily installed to the vehicle
Changing settings of the
pre-collision system
Page 243 of 548
2434-5. Using the driving support systems
4
Driving
such as heavy rain, fog, snow or a
sandstorm
• When driving through steam or
smoke
• When the surrounding area is dim, such as at dawn or dusk, or while
at night or in a t unnel, making a
detectable object appear to be
nearly the same color as its sur-
roundings
• When driving in a place where the surrounding brightness changes
suddenly, such as at the entrance
or exit of a tunnel
• After the hybrid system has
started the vehicle has not been
driven for a certain amount of time
• While making a left/right turn and
for a few seconds after making a
left/right turn
• While driving on a curve and for a
few seconds after driving on a
curve
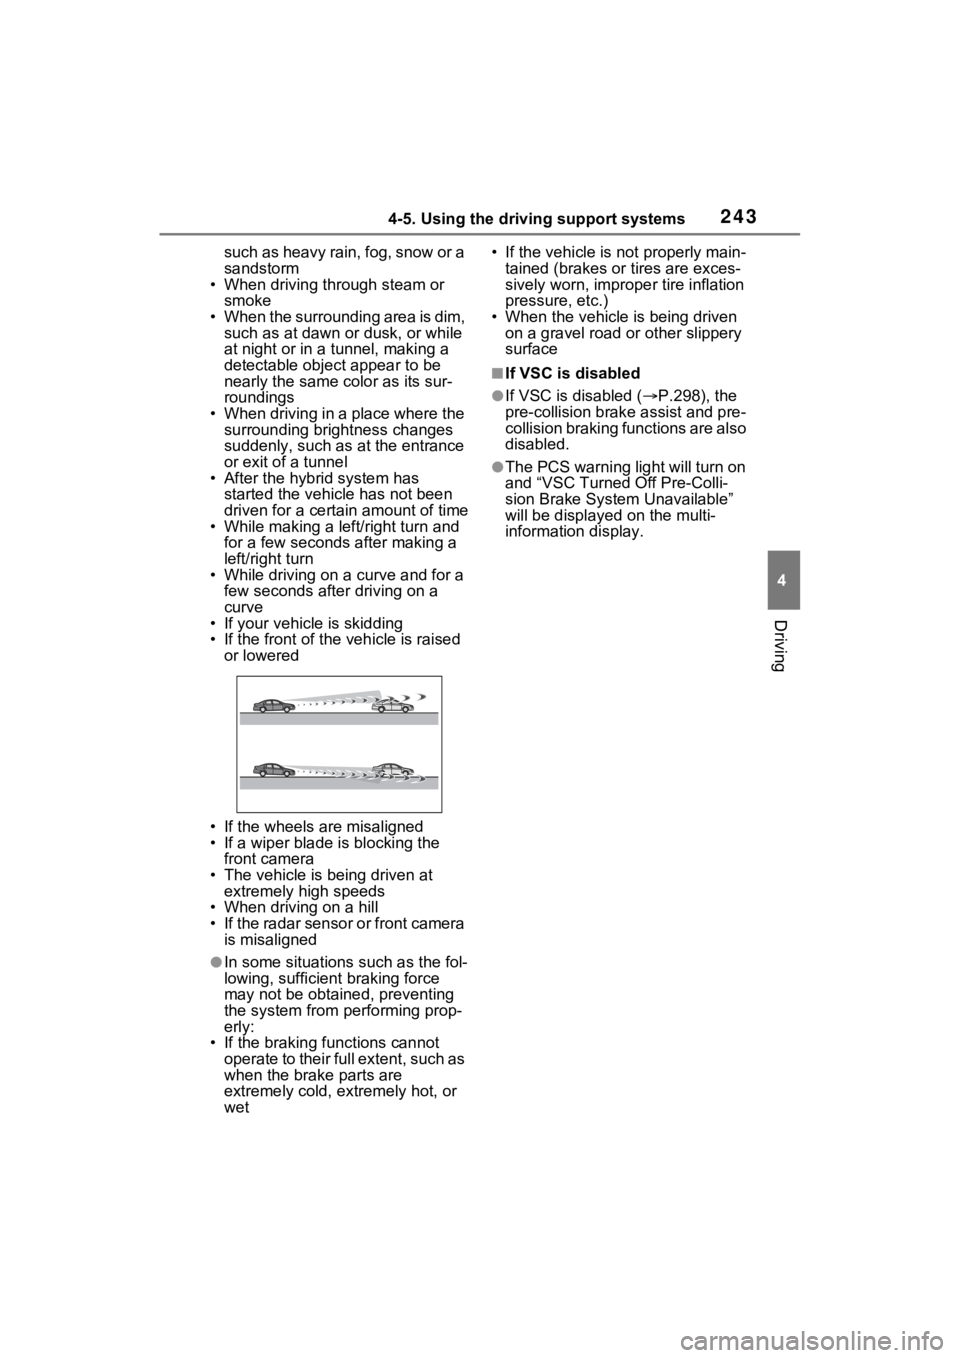
• If your vehicle is skidding
• If the front of the vehicle is raised
or lowered
• If the wheels are misaligned
• If a wiper blade is blocking the front camera
• The vehicle is being driven at extremely high speeds
• When driving on a hill
• If the radar sensor or front camera
is misaligned
●In some situations such as the fol-
lowing, sufficien t braking force
may not be obtained, preventing
the system from performing prop-
erly:
• If the braking functions cannot operate to their full extent, such as
when the brake parts are
extremely cold, extremely hot, or
wet • If the vehicle is not properly main-
tained (brakes or tires are exces-
sively worn, imprope r tire inflation
pressure, etc.)
• When the vehicle is being driven on a gravel road or other slippery
surface
■If VSC is disabled
●If VSC is disabled ( P.298), the
pre-collision brak e assist and pre-
collision braking functions are also
disabled.
●The PCS warning light will turn on
and “VSC Turned Off Pre-Colli-
sion Brake System Unavailable”
will be displayed on the multi-
information display.
Page 256 of 548
2564-5. Using the driving support systems
When the RSA system recog-
nizes a do not enter sign and
determines that your vehicle
has entered a no-entry area,
the displayed sign will flash
and a buzzer will sound.
Depending on the situation, a
notification function may not
operate properly.
■Setting procedure
P.102, 113
■Automatic turn-off of RSA sign
display
In the following si tuations, a dis-
played speed limit sign and/or do
not enter sign will stop being dis-
played automatically:
●No sign has been recognized for a
certain distance.
●The road changes due to a left or
right turn, etc.
In the following si tuations, stop and
yield signs will stop being displayed
automatically:
●The system determines that your
vehicle has passed the sign.
●The road changes due to a left or
right turn, etc.
■Conditions in which the func-
tion may not operate or detect
correctly
In the following situations, RSA
does not operate normally and may
not recognize signs, display the
incorrect sign, etc. However, this
does not indicate a malfunction.
●The front camera is misaligned
due to a strong impact being
applied to the sensor, etc.
●D i r t , s n o w , s t i c k e r s , e t c . a r e o n t h e
windshield near the front camera.
●In inclement weather such as
heavy rain, fog, snow or sand
storms
●Light from an oncoming vehicle,
the sun, etc. ente rs the front cam-
era.
●The sign is dirty, faded, tilted or
bent.
●The contrast of electronic sign is
low.
●All or part of the sign is hidden by
the leaves of a tree, a pole, etc.
●The sign is only visible to the front
camera for a short amount of time.
●The driving scene (turning, lane
change, etc.) is judged incorrectly.
●If a sign not appropriate for the
currently traveled lane, but the
sign exists directly after a freeway
branches, or in an adjacent lane
just before merging.
●Stickers are attached to the rear
of the preceding vehicle.
●A sign resembling a system com-
patible sign is recognized.
●Side road speed signs may be
detected and displayed (if posi-
tioned in sight of the front camera)
while the vehicle i s traveling on
the main road.
●Roundabout exit road speed signs
may be detected and displayed (if
positioned in si ght of the front
camera) while t raveling on a
roundabout.
●The front of the vehicle is raised or
lowered due to the carried load.
●The surrounding brightness is not
sufficient or changes suddenly.
●When a sign inte nded for trucks,
etc. is recognized.
●The speed information displayed
on the meter and on the naviga-
tion system may be different due
to the navigation system using
map data.
■Speed limit sign display
If the power switch was last turned
off while a speed limit sign was dis-
played on the multi-information dis-
Page 261 of 548

2614-5. Using the driving support systems
4
Driving
When there are no vehicles ahead
The vehicle travels at the speed set by the driver.
Example of deceleration crui sing and follow-up cruising
When a preceding vehicle driving slower than the set speed
appears
When a vehicle is detected runni ng ahead of you, the system automatically
decelerates your vehicle. When a greater reduction in vehicle s peed is nec-
essary, the system applies the brakes (the stop lights will come on at this
time). The system will respond to changes i n the speed of the vehicle
ahead in order to maintain the ve hicle-to-vehicle distance set by the driver.
Approach warning warns you when the system cannot decelerate suffi-
ciently to prevent your vehicle from closing in on the vehicle ahead.
When the vehicle ahead of you st ops, your vehicle will also stop (vehicle is
stopped by system control). Afte r the vehicle ahead starts off, pressing the
“+RES” switch or depressing the accelerator pedal (start-off operation) will
resume follow-up cruising. If the start-off operation is not performed, system
control continues to keep your vehicle stopped.
When the turn signal lever is ope rated and your vehicle moves to an over-
taking lane while driving at 50 mph (80 km/h) or more, the vehi cle will accel-
erate to help to overt ake a passing vehicle.
The system’s identifi cation of what is an overtaking lane may be deter-
mined solely based on the location of the steering wheel in the vehicle (left
side driver position versus righ t side driver position.) If the vehicle is driven
to a region where the overtaking lane is on a different side fr om where the
vehicle is normally driven, the v ehicle may accelerate when the turn signal
lever is operated in the opposite direction to the overtaking l ane (e.g., if the
driver normally operates the vehicle in a region where the over taking lane is
to the right but then drives to a region where the overtaking l ane is to the
left, the vehicle may accelerate when the right turn signal is activated).
Example of acceleration
When there are no longer any preceding vehicles driving slower
than the set speed
The system accelerates until the set speed is reached. The system then
returns to constan t speed cruising.
1Press the cruise control main
switch to activate the cruise control.
Dynamic radar cruise control indi-
cator will come on and a message
will be displayed on
the multi-infor-
mation display. Press the switch
again to deactivate the cruise con-
trol.
B
C
Setting the vehicle speed
(vehicle-to-vehicle dis-
tance control mode)