2022 TOYOTA TUNDRA HYBRID lock
[x] Cancel search: lockPage 380 of 618
3804-5. Using the driving support systems
Owners Manual_USA_M0C031_en
Select the item desired to be
setup and select as follows on
the multi-information screen
(P.100):
1 Press or on the meter
control switch and then select
.
2 Press or on the meter
control switch, select “Trailer
Settings”, and then press and
hold on the meter control
switch.
3 According to the display,
select the desired setting and
then press .
Changing trailer brake type or
trailer ID will cause the current
“gain” setting to reset to zero.
Make sure to set the “gain” as
described in the following sec-
tion.
“Gain” setting on trailer brake
controller should be set for a
specific towing condition. “Gain”
setting should be adjusted each
time the vehicle load, trailer
load, road conditions, or
weather changes. Setting the
“gain” value to 0 will disable the
trailer brake controller output. 1
Make sure the trailer brakes
are in good working condition
and functioning normally. See
trailer dealer if necessary.
2 Hook up the trailer and make
proper electrical connections.
3 Select the correct type of
trailer brakes that are
equipped on the trailer by
using the multi-information
display.
4 Drive vehicle with trailer
attached on a level road sur-
face similar to towing condi-
tion and in traffic-free
environment. Driving speed
should be approximately 20 -
25 mph [35 - 40 km/h].
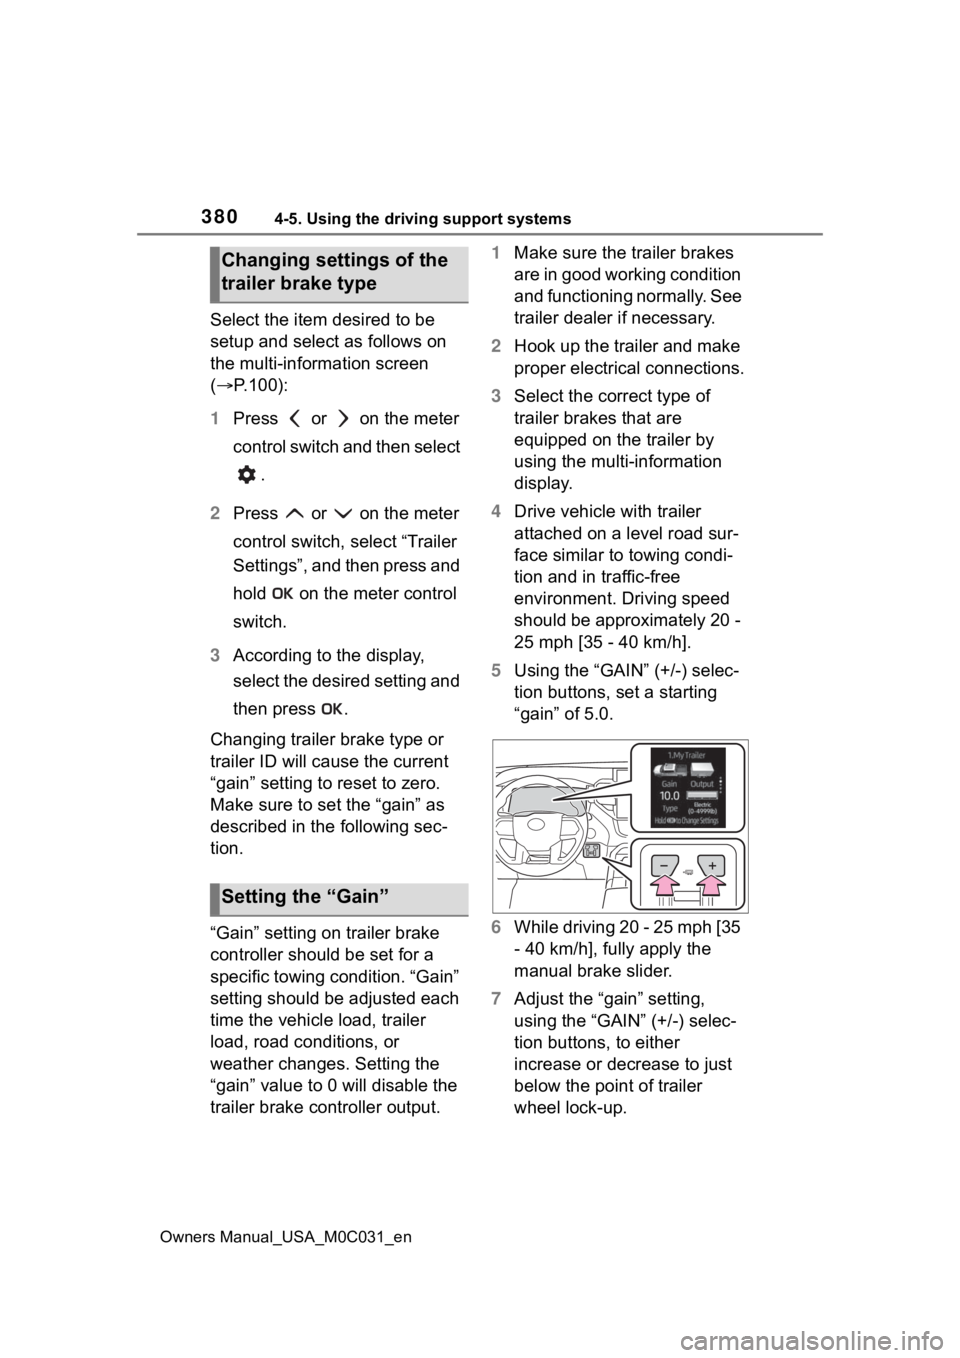
5 Using the “GAIN” (+/-) selec-
tion buttons, set a starting
“gain” of 5.0.
6 While driving 20 - 25 mph [35
- 40 km/h], fully apply the
manual brake slider.
7 Adjust the “gain” setting,
using the “GAIN” (+/-) selec-
tion buttons, to either
increase or decrease to just
below the point of trailer
wheel lock-up.
Changing settings of the
trailer brake type
Setting the “Gain”
Page 381 of 618
3814-5. Using the driving support systems
Owners Manual_USA_M0C031_en
4
Driving
8 For confirmation, repeat
steps 6 and 7 until desired
“gain” setting is reached (just
below point of trailer wheel
lock-up).
■When setting the “gain”
Wheel lock-up occurs when the
trailer wheel squeals or tire smoke
occurs. Trailer wheels may not lock-
up while driving heavily loaded
trailer. During this case, adjust the
Trailer “gain” to the highest allow-
able setting for the towing condition.
■When disconnecting and recon-
necting 12-volt battery termi-
nals
The “gain” setting data will be reset.
■Trailer Sway Control Function
Helps suppress trailer sway at an
early stage by using the trailer brake
control system to operate the trailer
brakes.
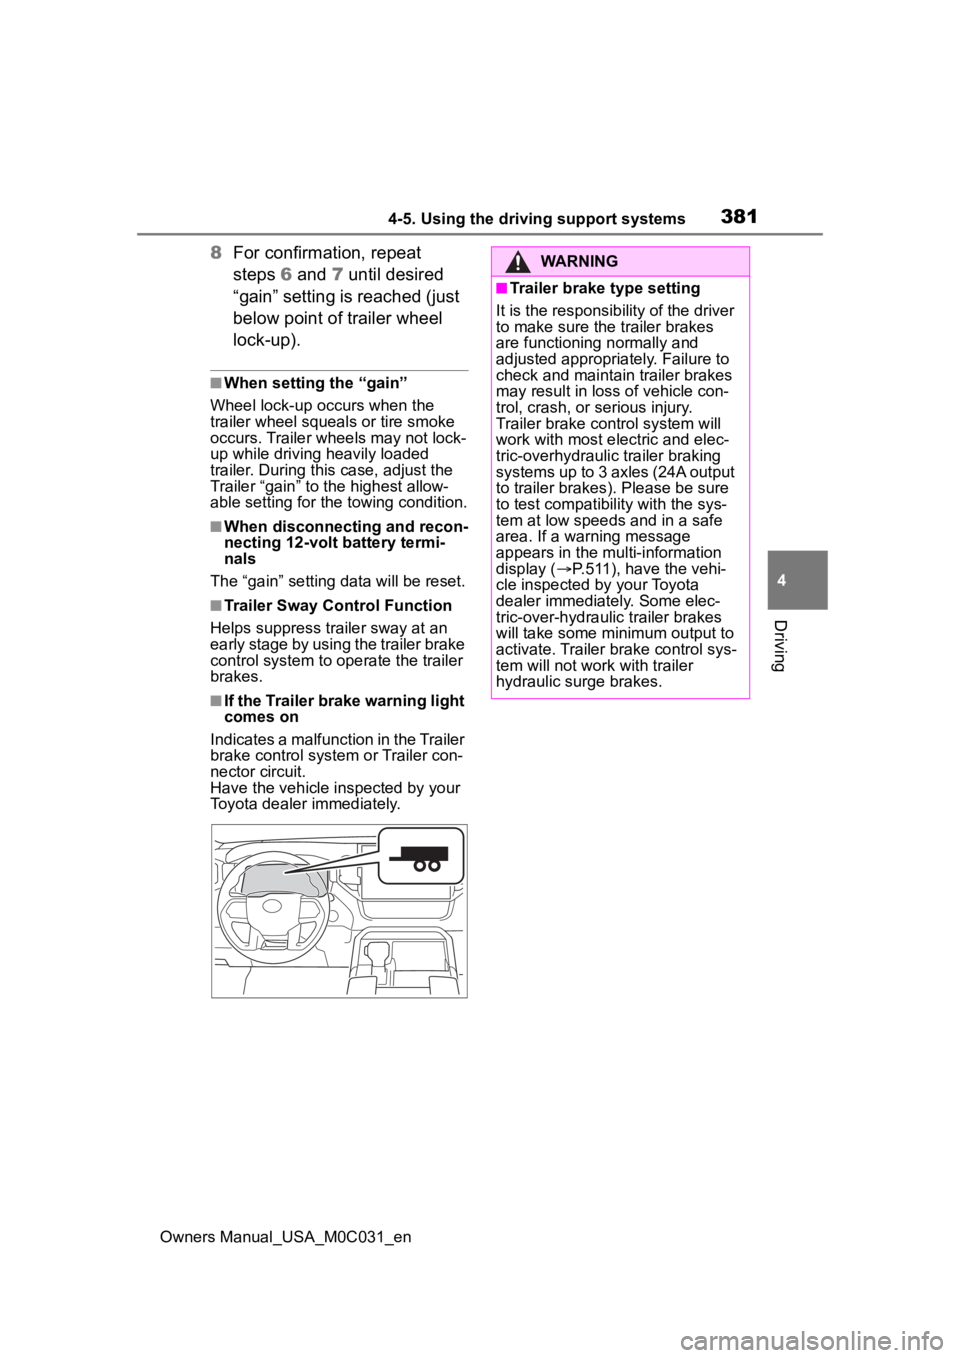
■If the Trailer brake warning light
comes on
Indicates a malfunction in the Trailer
brake control system or Trailer con-
nector circuit.
Have the vehicle inspected by your
Toyota dealer immediately.
WARNING
■Trailer brake type setting
It is the responsibility of the driver
to make sure the trailer brakes
are functioning normally and
adjusted appropriately. Failure to
check and maintain trailer brakes
may result in loss of vehicle con-
trol, crash, or serious injury.
Trailer brake control system will
work with most electric and elec-
tric-overhydraulic trailer braking
systems up to 3 axles (24A output
to trailer brakes). Please be sure
to test compatibility with the sys-
tem at low speeds and in a safe
area. If a warning message
appears in the multi-information
display ( P.511), have the vehi-
cle inspected by your Toyota
dealer immediately. Some elec-
tric-over-hydraulic trailer brakes
will take some minimum output to
activate. Trailer brake control sys-
tem will not work with trailer
hydraulic surge brakes.
Page 393 of 618
3934-6. Driving tips
Owners Manual_USA_M0C031_en
4
Driving
NOTICE
■To prevent water damage
Take all necessary safety mea-
sures to ensure that water dam-
age to the engine, hybrid system
or other components does not
occur.
●Water entering the engine air
intake will cause severe engine
damage.
●Water entering the automatic
transmission will cause deterio-
ration in shift quality, locking up
of your transmission accompa-
nied by vibration, and ultimately
damage.
●Water can wash the grease
from wheel bearings, causing
rusting and premature failure,
and may also enter the differen-
tials, transmission and transfer
case, reducing the gear oil’s
lubricating qualities.
■When you drive through
water
●If driving through water, such as
when crossing shallow streams,
first check the depth of the
water and the bottom of the riv-
erbed for firmness. Drive slowly
and avoid deep water.
●When crossing a river or a pud-
dle, be sure to cross it without
stopping midway. If you stop or
drive at extremely low speeds in
water, water may enter the vehi-
cle and damage the hybrid bat-
tery making the vehicle unable
to be driven.
■Inspection after off-road driv-
ing
●Sand and mud that has accu-
mulated around brake discs
may affect braking efficiency
and may damage brake system
components.
●Always perform a maintenance
inspection after each day of off-
road driving that has taken you
through rough terrain, sand,
mud, or water. For scheduled
maintenance information, refer
to the “Scheduled Maintenance
Guide” or “Owner’s Manual
Supplement”.
Page 395 of 618
3954-6. Driving tips
Owners Manual_USA_M0C031_en
4
Driving
Perform the following according
to the driving conditions:
Do not try to forcibly open a
window or move a wiper that
is frozen. Pour warm water
over the frozen area to melt
the ice. Wipe away the water
immediately to prevent it from
freezing.
To ensure proper operation of
the climate control system
fan, remove any snow that
has accumulated on the air
inlet vents in front of the wind-
shield.
Check for and remove any
excess ice or snow that may
have accumulated on the
exterior lights, vehicle’s roof,
chassis, around the tires or on
the brakes.
Remove any snow or mud
from the bottom of your shoes
before getting in the vehicle. Accelerate the vehicle slowly,
keep a safe distance between
you and the vehicle ahead, and
drive at a reduced speed suit-
able to road conditions.
Park the vehicle and move
the shift lever to P without set-
ting the parking brake. The
parking brake may freeze up,
preventing it from being
released. If the vehicle is
parked without setting the
parking brake, make sure to
block the wheels.
Failure to do so may be dan-
gerous because it may cause
the vehicle to move unexpect-
edly, possibly leading to an
accident.
When the parking brake is in auto-
matic mode, release the parking
brake after shifting the shift lever to
P. ( P.206)
If the vehicle is parked without
setting the parking brake,
confirm that the shift lever
cannot be moved out of P
*.
*: The shift lever will be locked if it is
attempted to be shifted from P to
any other position without
depressing the brake pedal. If the
shift lever can be shifted from P,
there may be a problem with the
shift lock system. Have the vehi-
cle inspected by your Toyota
NOTICE
■Repairing or replacing snow
tires
Request repairs or replacement of
snow tires from Toyota dealers or
legitimate tire retailers.
This is because the removal and
attachment of snow tires affects
the operation of the tire pressure
warning valves and transmitters.
Before driving the vehicle
When driving the vehicle
When parking the vehicle
Page 401 of 618
4035-1. Using the air conditioning system and defogger
Owners Manual_USA_M0C031_en
5
Interior features
■Air conditioning system refrig-
erant
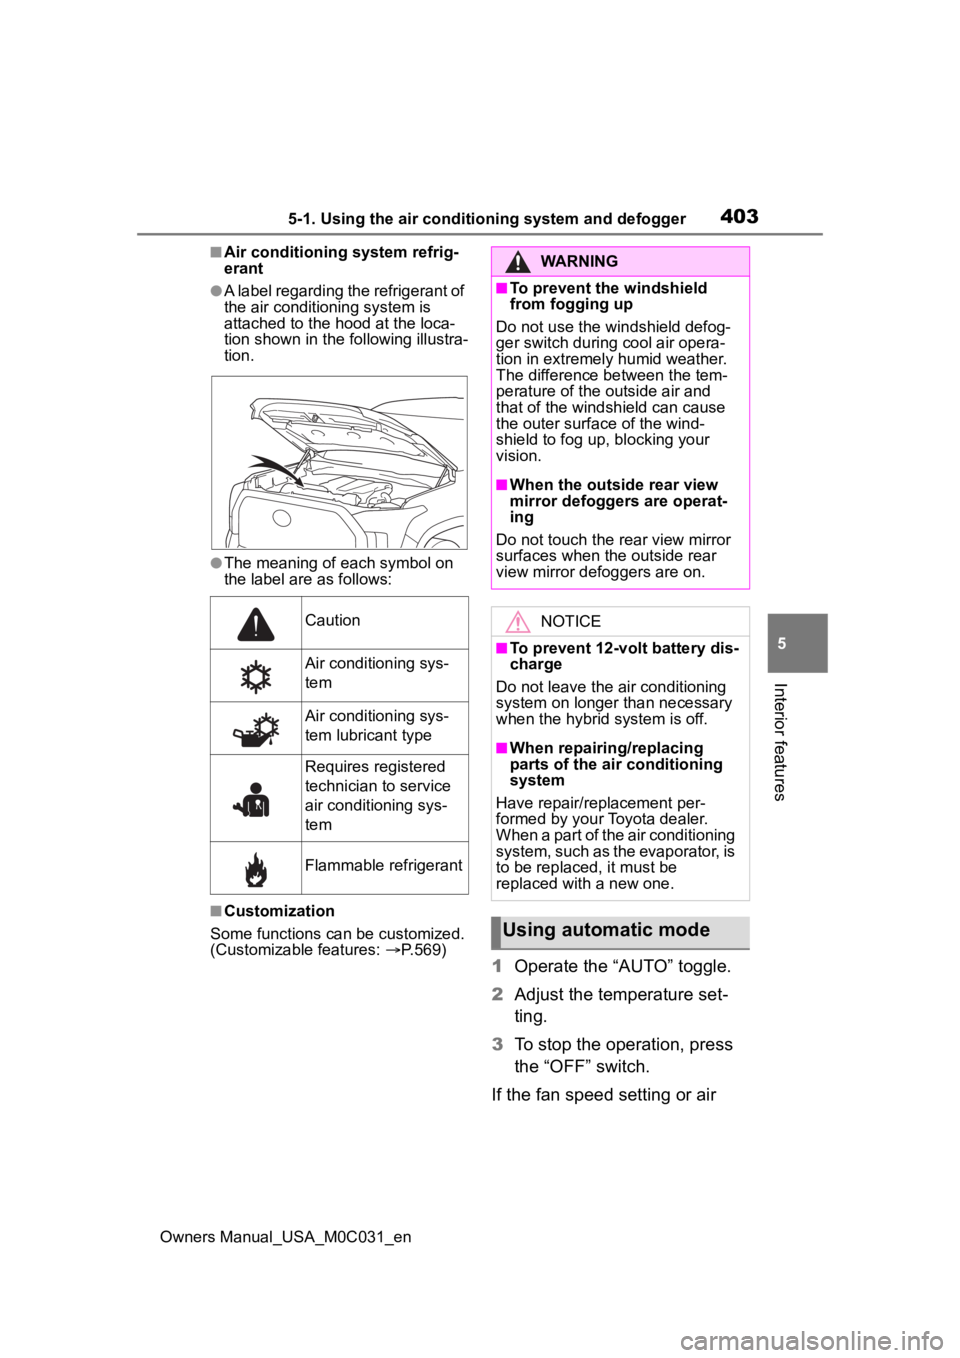
●A label regarding the refrigerant of
the air conditioning system is
attached to the ho od at the loca-
tion shown in the f ollowing illustra-
tion.
●The meaning of each symbol on
the label are as follows:
■Customization
Some functions can be customized.
(Customizable features: P.569)
1 Operate the “AUTO” toggle.
2 Adjust the temperature set-
ting.
3 To stop the operation, press
the “OFF” switch.
If the fan speed setting or air
Caution
Air conditioning sys-
tem
Air conditioning sys-
tem lubricant type
Requires registered
technician to service
air conditioning sys-
tem
Flammable refrigerant
WARNING
■To prevent the windshield
from fogging up
Do not use the windshield defog-
ger switch during cool air opera-
tion in extremely humid weather.
The difference between the tem-
perature of the outside air and
that of the windshield can cause
the outer surface of the wind-
shield to fog up, blocking your
vision.
■When the outside rear view
mirror defoggers are operat-
ing
Do not touch the rear view mirror
surfaces when the outside rear
view mirror def oggers are on.
NOTICE
■To prevent 12-volt battery dis-
charge
Do not leave the air conditioning
system on longer than necessary
when the hybrid system is off.
■When repairing/replacing
parts of the air conditioning
system
Have repair/replacement per-
formed by your Toyota dealer.
When a part of the air conditioning
system, such as the evaporator, is
to be replaced, it must be
replaced with a new one.
Using automatic mode
Page 410 of 618
4125-2. Using the interior lights
Owners Manual_USA_M0C031_enopened or closed while the shift
lever is in P, D or R.
The trailer hitch light turns on when
the door or tailgate is opened or
closed while the shift lever is in P or
R. trailer hitch light will turn off
when shift lever in D.
“ON”
The cargo lamp, bed lamp, trailer
hitch light turns o
n while the shift
lever is in P or R. Only cargo lamp
and bed lamp turns on while shift
lever is in D.
■Illuminated entry system
The lights automatically turn on/off
according to the power switch
mode, the presence of the elec-
tronic key, whether the doors are
locked/unlocked, and whether the
doors are open/closed.
■To prevent the 12-volt battery
from being discharged
If the follo wing lights remain on
when the door is not fully closed and
the main switch i s in the “DOOR”
position, the lights will go off auto-
matically after 20 minutes:
●Personal/interior lights
●Cargo lamp
●Bed lamp
●Trailer hitch light
■The personal/interior lights may
turn on automatically when
If any of the SRS airbags deploy
(inflate) or in the event of a strong
rear impact, the personal/interior
lights will turn on automatically.
The personal/interior lights will turn
off automatically after approximately
20minutes.
The personal/interior lights can be
turned off manually. However, in
order to help prev ent further colli-
sions, it is recommended that they be left on until safety can be
ensured.
(The personal/interior lights may not
turn on automatically depending on
the force of the impact and condi-
tions of the collision.)
■Customization
Some functions can be customized.
( P.561)
NOTICE
■To prevent 12-volt battery dis-
charge
Do not leave the lights on longer
than necessary when the hybrid
system is off.
■Removing light lenses
Never remove the lens for the
personal/interior lights. Otherwise,
the lights will be damaged. If a
lens needs to be removed, con-
tact your Toyota dealer.
Page 412 of 618
4145-3. Using the storage features
Owners Manual_USA_M0C031_en
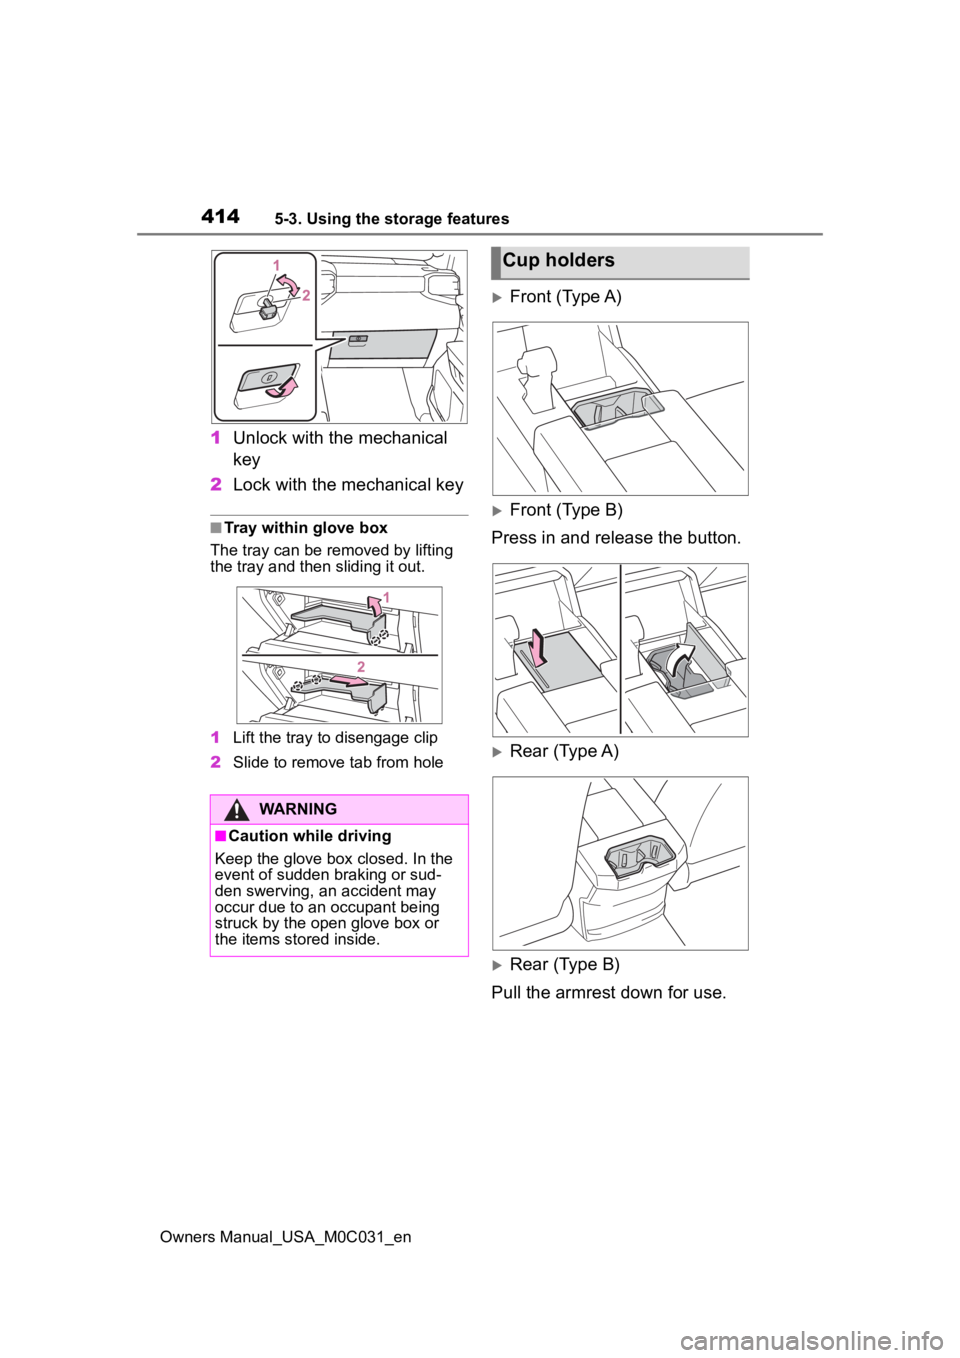
1Unlock with the mechanical
key
2 Lock with the mechanical key
■Tray within glove box
The tray can be removed by lifting
the tray and then sliding it out.
1 Lift the tray to disengage clip
2 Slide to remove tab from hole
Front (Type A)
Front (Type B)
Press in and release the button.
Rear (Type A)
Rear (Type B)
Pull the armrest down for use.
WARNING
■Caution while driving
Keep the glove box closed. In the
event of sudden braking or sud-
den swerving, an accident may
occur due to an occupant being
struck by the open glove box or
the items stored inside.
Cup holders
Page 431 of 618
4335-4. Using the other interior features
Owners Manual_USA_M0C031_en
5
Interior features
■HomeLink® programming pro-
cedure
The programming procedures can
also be found at the following URL.
Website: www.homelink.com/toyota
For support, contact customer sup-
port at the following.
Help Line: 1-800-355-3515
The HomeLink® wireless control
system in your vehicle has 3
buttons which can be pro-
grammed to operate 3 different
devices. Refer to the program-
ming methods on the following
pages to determine the method
which is appropriate for the
device.
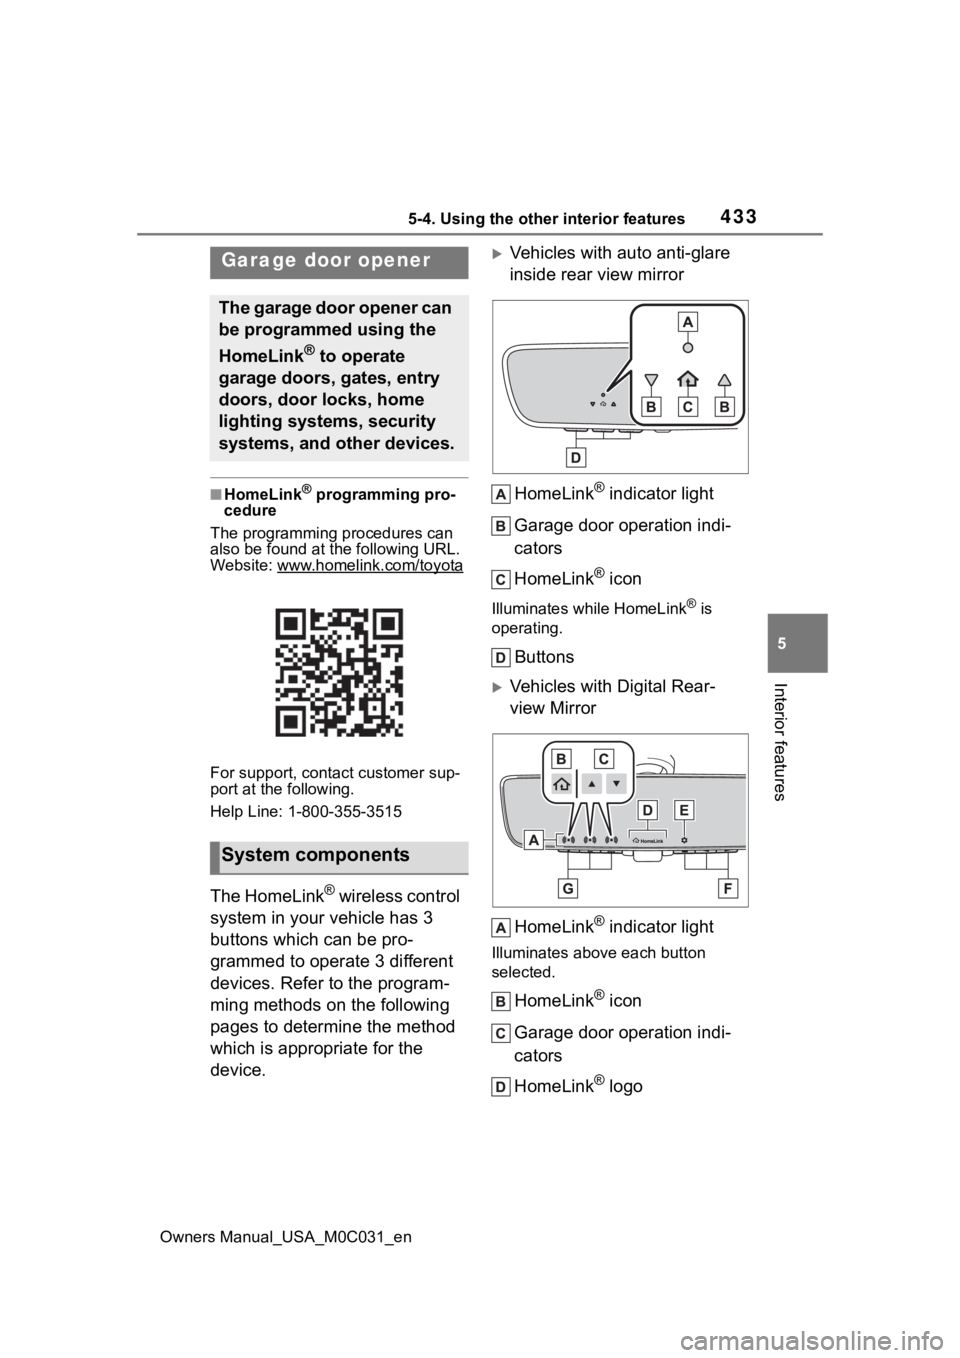
Vehicles with auto anti-glare
inside rear view mirror
HomeLink
® indicator light
Garage door operation indi-
cators
HomeLink
® icon
Illuminates while HomeLink® is
operating.
Buttons
Vehicles with Digital Rear-
view Mirror
HomeLink
® indicator light
Illuminates above each button
selected.
HomeLink® icon
Garage door operation indi-
cators
HomeLink
® logo
Garage door opener
The garage door opener can
be programmed using the
HomeLink
® to operate
garage doors, gates, entry
doors, door locks, home
lighting systems, security
systems, and other devices.
System components